> ## Documentation Index
> Fetch the complete documentation index at: https://support.getskara.ai/llms.txt
> Use this file to discover all available pages before exploring further.
# How to Setup Single Sign-On (SSO) using SAML
Single sign-on (SSO) is an authentication method that enables users to securely authenticate with multiple applications and websites by using just one set of credentials.
If you have a Skara *Enterprise* account and have SSO set up for your business, you can require users to log in to Skara using their SSO credentials.
**Note:** **Available in Pro and above Plans (For Legacy Accounts: Growth and above Plans).**
This setup process should be done by an IT administrator with experience creating applications in your identity provider account.
***
### Enable SSO inside Skara
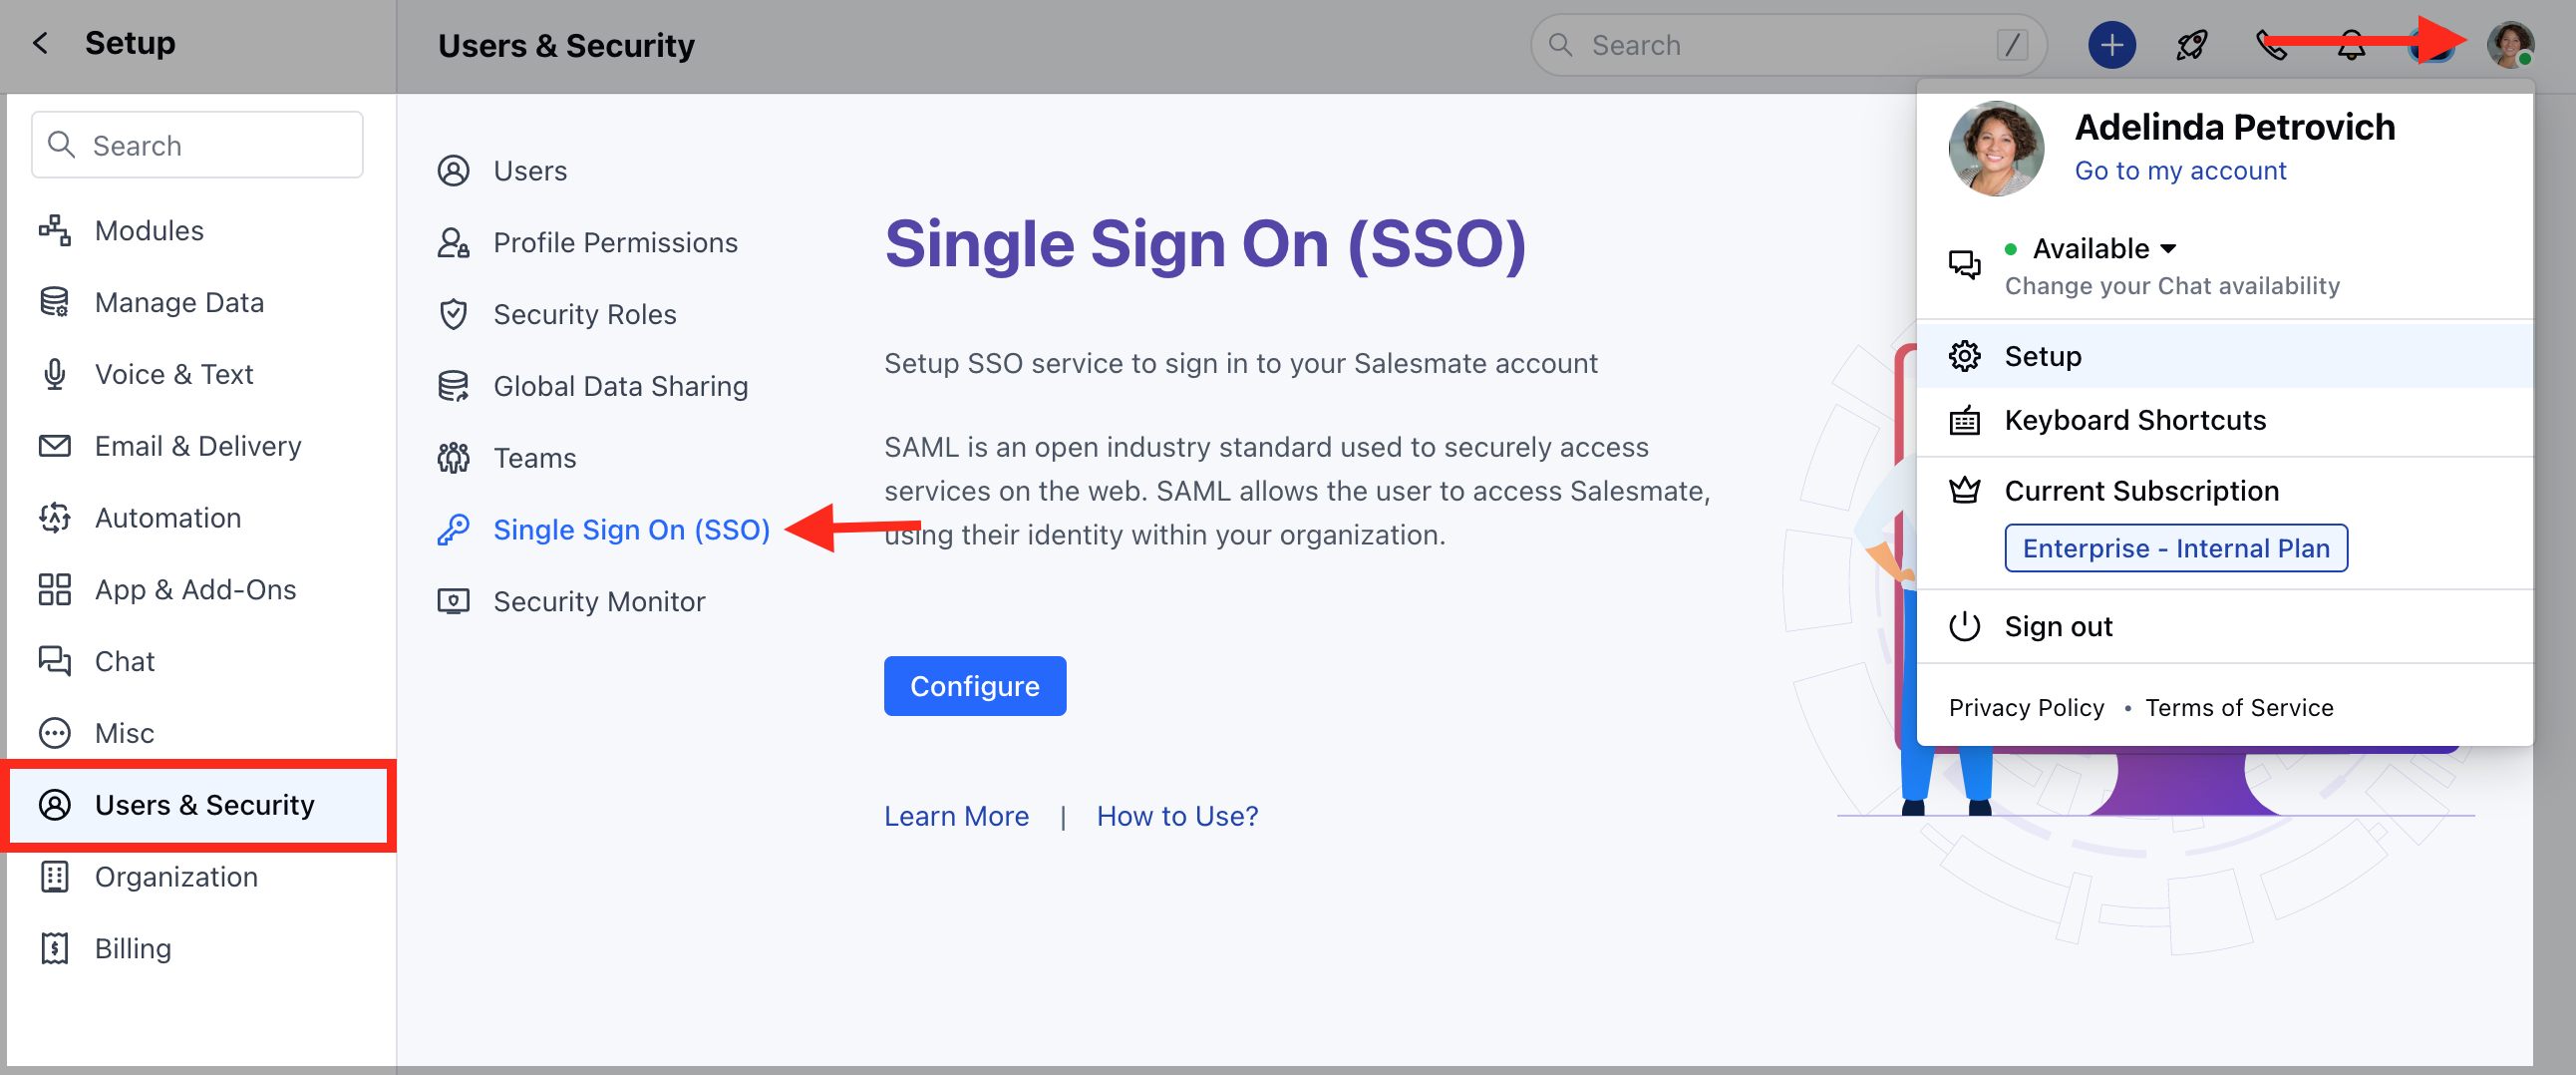
* Navigate to the **Profile Icon** on the top right corner.
* Click on **Setup**.
* Head over to **Users & Security**.
* Click on **Single Sign On (SSO)**.
 5. Click on the **Configure** option.
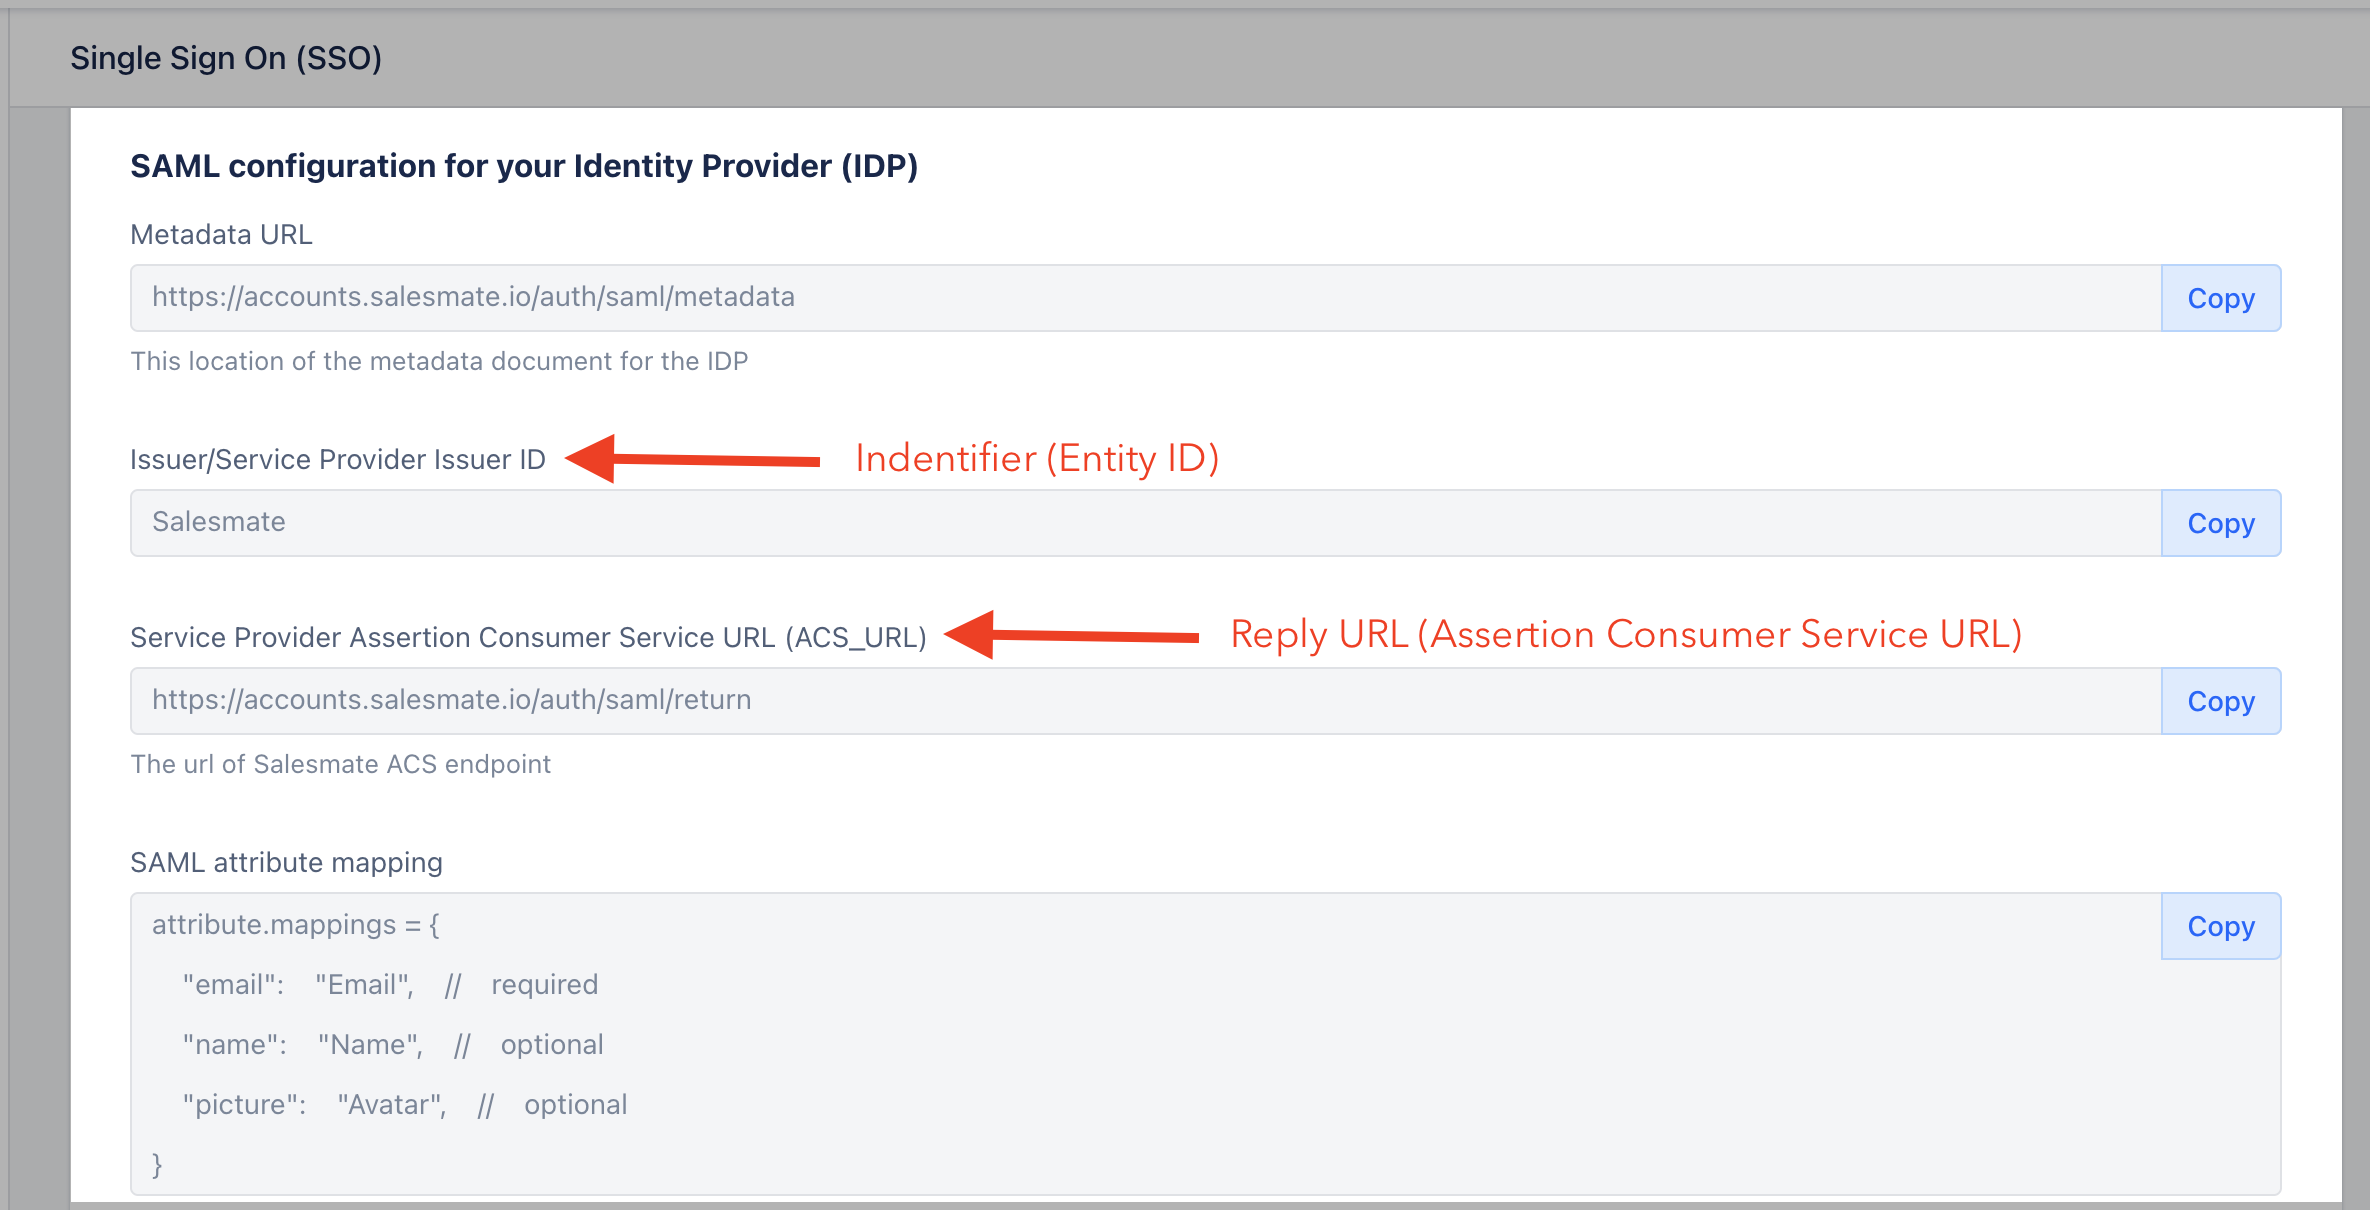
 * Find the **SAML configuration values** on the screen and paste them into your identity provider account where required.
* Copy the **Identifier or Issuer URL**, the **Single Sign-On URL**, and the **Certificate** from your identity provider and paste them into the Salesmate panel.
* Click on **Test**.
* Once the test is successful, you can come back to the SSO screen and **enable** it for your workspace.
* Find the **SAML configuration values** on the screen and paste them into your identity provider account where required.
* Copy the **Identifier or Issuer URL**, the **Single Sign-On URL**, and the **Certificate** from your identity provider and paste them into the Salesmate panel.
* Click on **Test**.
* Once the test is successful, you can come back to the SSO screen and **enable** it for your workspace.
 ***
### Force SSO Login (Optional)
If you want every user to log in via SSO only, follow these steps:
* Navigate to the **Profile Icon** on the top right corner.
* Click on **Setup**.
* Head over to **Users & Security**.
* Click on **Single Sign On (SSO)**.
* Enable the **"Force SSO login"** option.
* Click **Save**.
***
### Force SSO Login (Optional)
If you want every user to log in via SSO only, follow these steps:
* Navigate to the **Profile Icon** on the top right corner.
* Click on **Setup**.
* Head over to **Users & Security**.
* Click on **Single Sign On (SSO)**.
* Enable the **"Force SSO login"** option.
* Click **Save**.
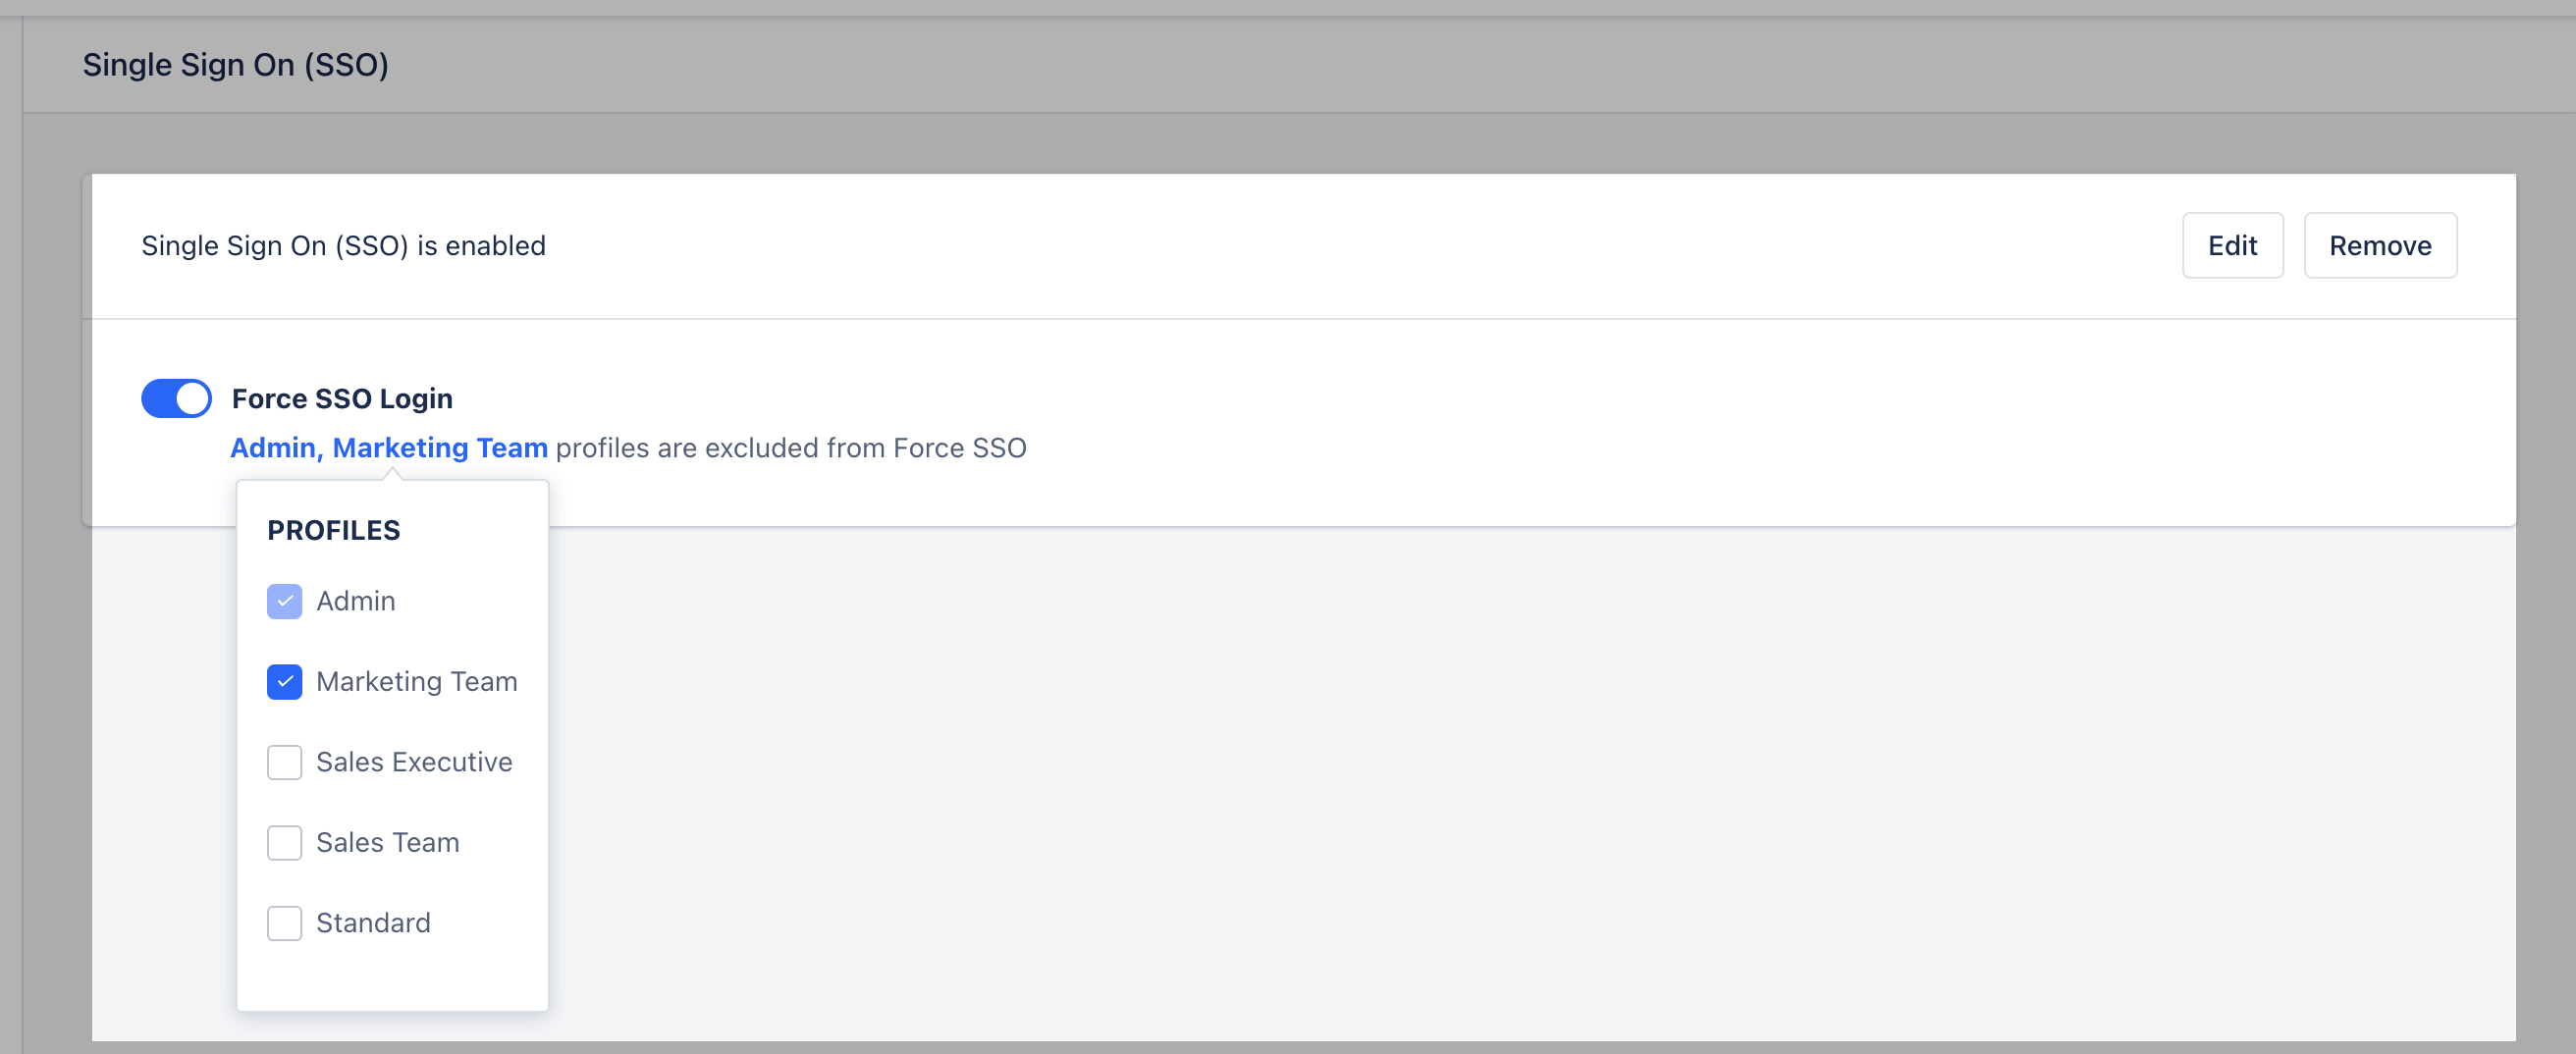
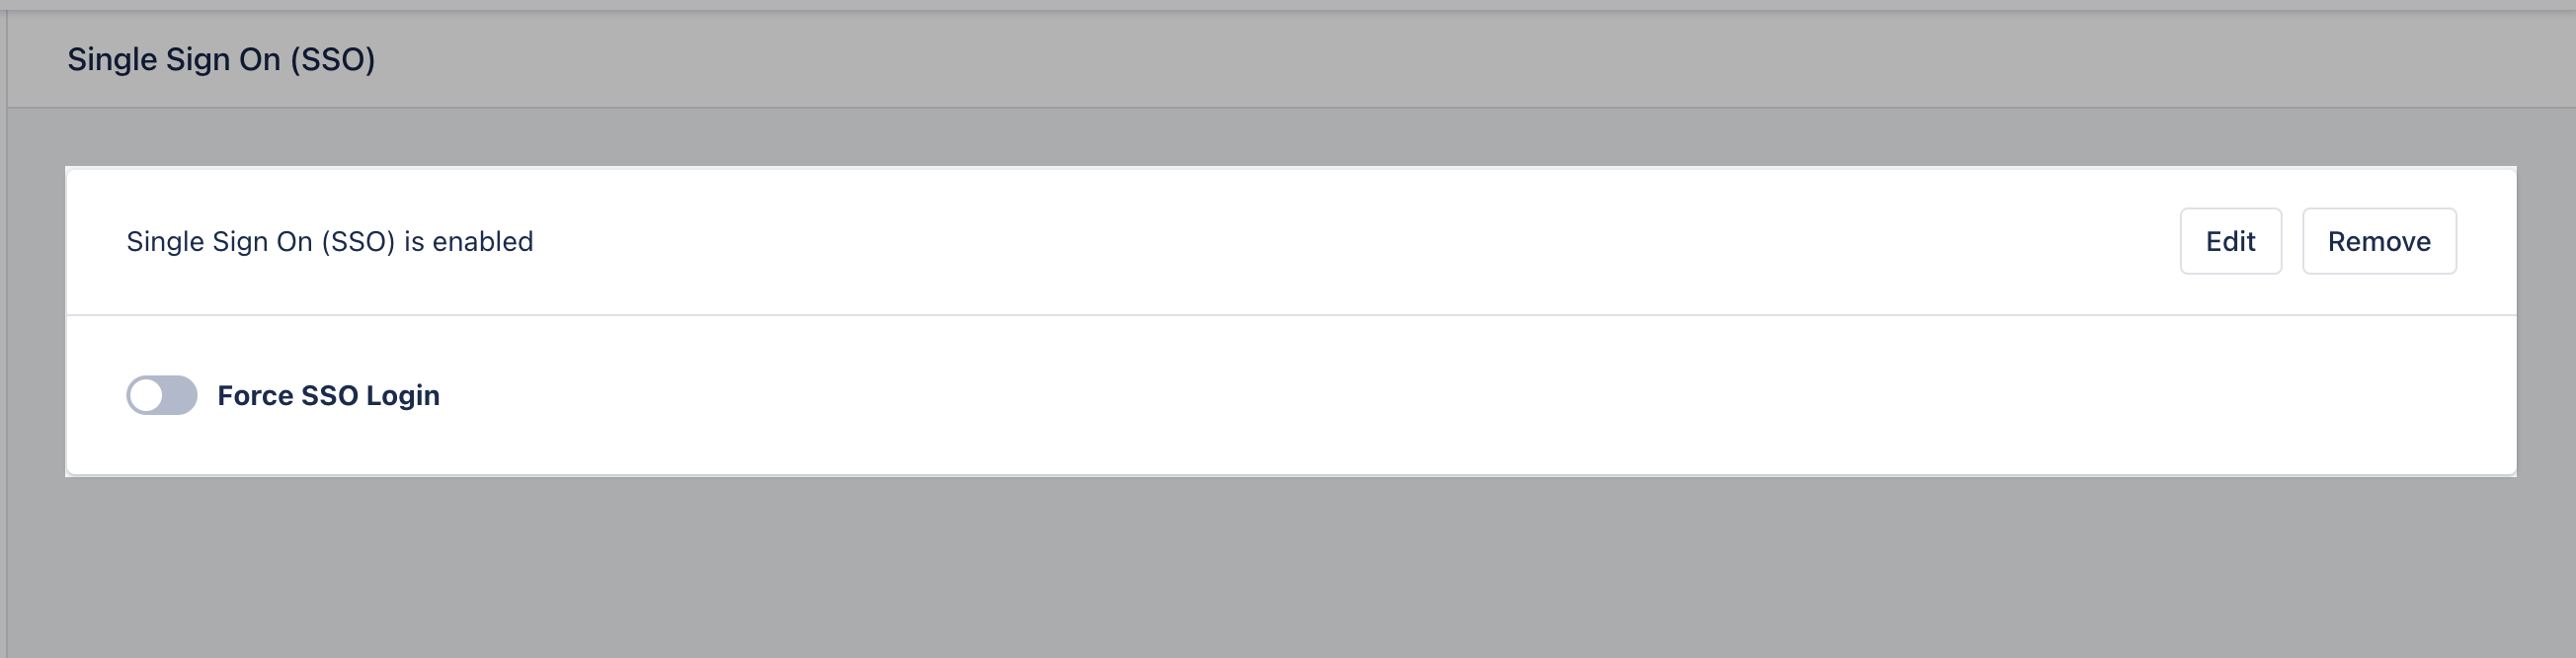 **Once the SSO is enabled, you can add the profiles that you want to exclude from SSO.**
 ***
### What happens when you enable SSO login?
* If **Forced SSO Login** is enabled, users can log in **only via your identity provider**.
* If **Forced SSO Login** is enabled, login via **password, 2FA, or Google** will **not work**.
* If **SSO is enabled but not forced**, users can still log in via **password, 2FA, and Google**.
***
### Configure SSO in Azure Active Directory
* Log in to your **Azure Active Directory**.
* Go to **Enterprise Applications** in the left sidebar.
* Click on **+ Create your application**.
* Type **Skara** in the "What’s the name of your app?" text box.
* Select the option:**Integrate any other application you don't find in the gallery (Non-gallery)**.
Once added, it will show the **Application Name**, **ID**, and **Object ID**. Additionally, it provides options to:
* Assign users and groups
* Set up single sign-on
* Provision user accounts
* Enable self-service
***
### Assign Users and Groups
Under **Assign users and groups**, you can specify which users or groups will have access to this application.
***
### Set up Single Sign-On (SAML)
* Under **Set up single sign-on**, select **SAML**.
* Under **Set up Single Sign-on with SAML**, configure the following:
### Basic SAML Configuration
* Click **Edit** and copy the information from the Skara SSO page.
* Copy the \*\*Identifier ID (Issuer / Service Provider Issuer ID)\*\*and **Reply URL (Assertion Consumer Service URL / ACS URL)**.
### User Attributes & Claims
* Click **Edit** and **Add new claim**.
* * **Name:** Email
* **Source attribute:** user.mail
**Note:** `email` is the only required claim. Other claims are optional and can be added to provide more information in case of connection failures.
***
### SAML Signing Certificate
1. Download the **Federation Metadata XML**.
2. Open it in **Notepad**.
3. Search for ``.
4. Copy the key value between the tags `` and ``.
5. Paste it into the **Security Certificate Fingerprint** field on the SSO page in Skara.
> 💡 Tip: To avoid MDX parsing issues, do not remove the backticks around tags.
***
### Set up Salesmate
1. Copy the **Login URL** to the **SAML Login URL** field on the SSO page in Skara.
2. Copy the **Logout URL** to the **Logout URL** field on the SSO page in Skara.
3. Once completed, click **Save & Verify** on the SSO page in Salesmate to verify the setup.
4. You can also test this by clicking on the **Test** button from Azure’s Single Sign-on page under **Test single sign-on with Skara**.
***
### Known Errors & Solutions
* **Error:** *Malformed request detected!!!*
* **Solution:** Check if the **Certificate key** is correctly entered.
* * -**Error:** *Cannot find a user with the same email address*
* **Solution:** Ensure that the correct claim with the name **email** is mapped to the source attribute **user.mail**.
***
If you are still facing any issues, feel free to reach out to our support team via chat or email us at [support@salesmate.io](#enable-sso-inside-salesmate).
***
### What happens when you enable SSO login?
* If **Forced SSO Login** is enabled, users can log in **only via your identity provider**.
* If **Forced SSO Login** is enabled, login via **password, 2FA, or Google** will **not work**.
* If **SSO is enabled but not forced**, users can still log in via **password, 2FA, and Google**.
***
### Configure SSO in Azure Active Directory
* Log in to your **Azure Active Directory**.
* Go to **Enterprise Applications** in the left sidebar.
* Click on **+ Create your application**.
* Type **Skara** in the "What’s the name of your app?" text box.
* Select the option:**Integrate any other application you don't find in the gallery (Non-gallery)**.
Once added, it will show the **Application Name**, **ID**, and **Object ID**. Additionally, it provides options to:
* Assign users and groups
* Set up single sign-on
* Provision user accounts
* Enable self-service
***
### Assign Users and Groups
Under **Assign users and groups**, you can specify which users or groups will have access to this application.
***
### Set up Single Sign-On (SAML)
* Under **Set up single sign-on**, select **SAML**.
* Under **Set up Single Sign-on with SAML**, configure the following:
### Basic SAML Configuration
* Click **Edit** and copy the information from the Skara SSO page.
* Copy the \*\*Identifier ID (Issuer / Service Provider Issuer ID)\*\*and **Reply URL (Assertion Consumer Service URL / ACS URL)**.
### User Attributes & Claims
* Click **Edit** and **Add new claim**.
* * **Name:** Email
* **Source attribute:** user.mail
**Note:** `email` is the only required claim. Other claims are optional and can be added to provide more information in case of connection failures.
***
### SAML Signing Certificate
1. Download the **Federation Metadata XML**.
2. Open it in **Notepad**.
3. Search for ``.
4. Copy the key value between the tags `` and ``.
5. Paste it into the **Security Certificate Fingerprint** field on the SSO page in Skara.
> 💡 Tip: To avoid MDX parsing issues, do not remove the backticks around tags.
***
### Set up Salesmate
1. Copy the **Login URL** to the **SAML Login URL** field on the SSO page in Skara.
2. Copy the **Logout URL** to the **Logout URL** field on the SSO page in Skara.
3. Once completed, click **Save & Verify** on the SSO page in Salesmate to verify the setup.
4. You can also test this by clicking on the **Test** button from Azure’s Single Sign-on page under **Test single sign-on with Skara**.
***
### Known Errors & Solutions
* **Error:** *Malformed request detected!!!*
* **Solution:** Check if the **Certificate key** is correctly entered.
* * -**Error:** *Cannot find a user with the same email address*
* **Solution:** Ensure that the correct claim with the name **email** is mapped to the source attribute **user.mail**.
***
If you are still facing any issues, feel free to reach out to our support team via chat or email us at [support@salesmate.io](#enable-sso-inside-salesmate).