> ## Documentation Index
> Fetch the complete documentation index at: https://support.getskara.ai/llms.txt
> Use this file to discover all available pages before exploring further.
# Customize the Ticket Layout
Page layout builder helps you to create custom layouts using a visual drag-drop editor. It also enables you to build different Ticket layouts based on user roles, teams, or personal preferences.
**Note:** A User with **Manage Permission** Rights can perform this action
To Customize the Ticket Layout,
* Navigate to the **Profile Icon** in the top right corner.
* Click on **Set Up**
* Head over to the **Modules** category
* Select **Tickets**
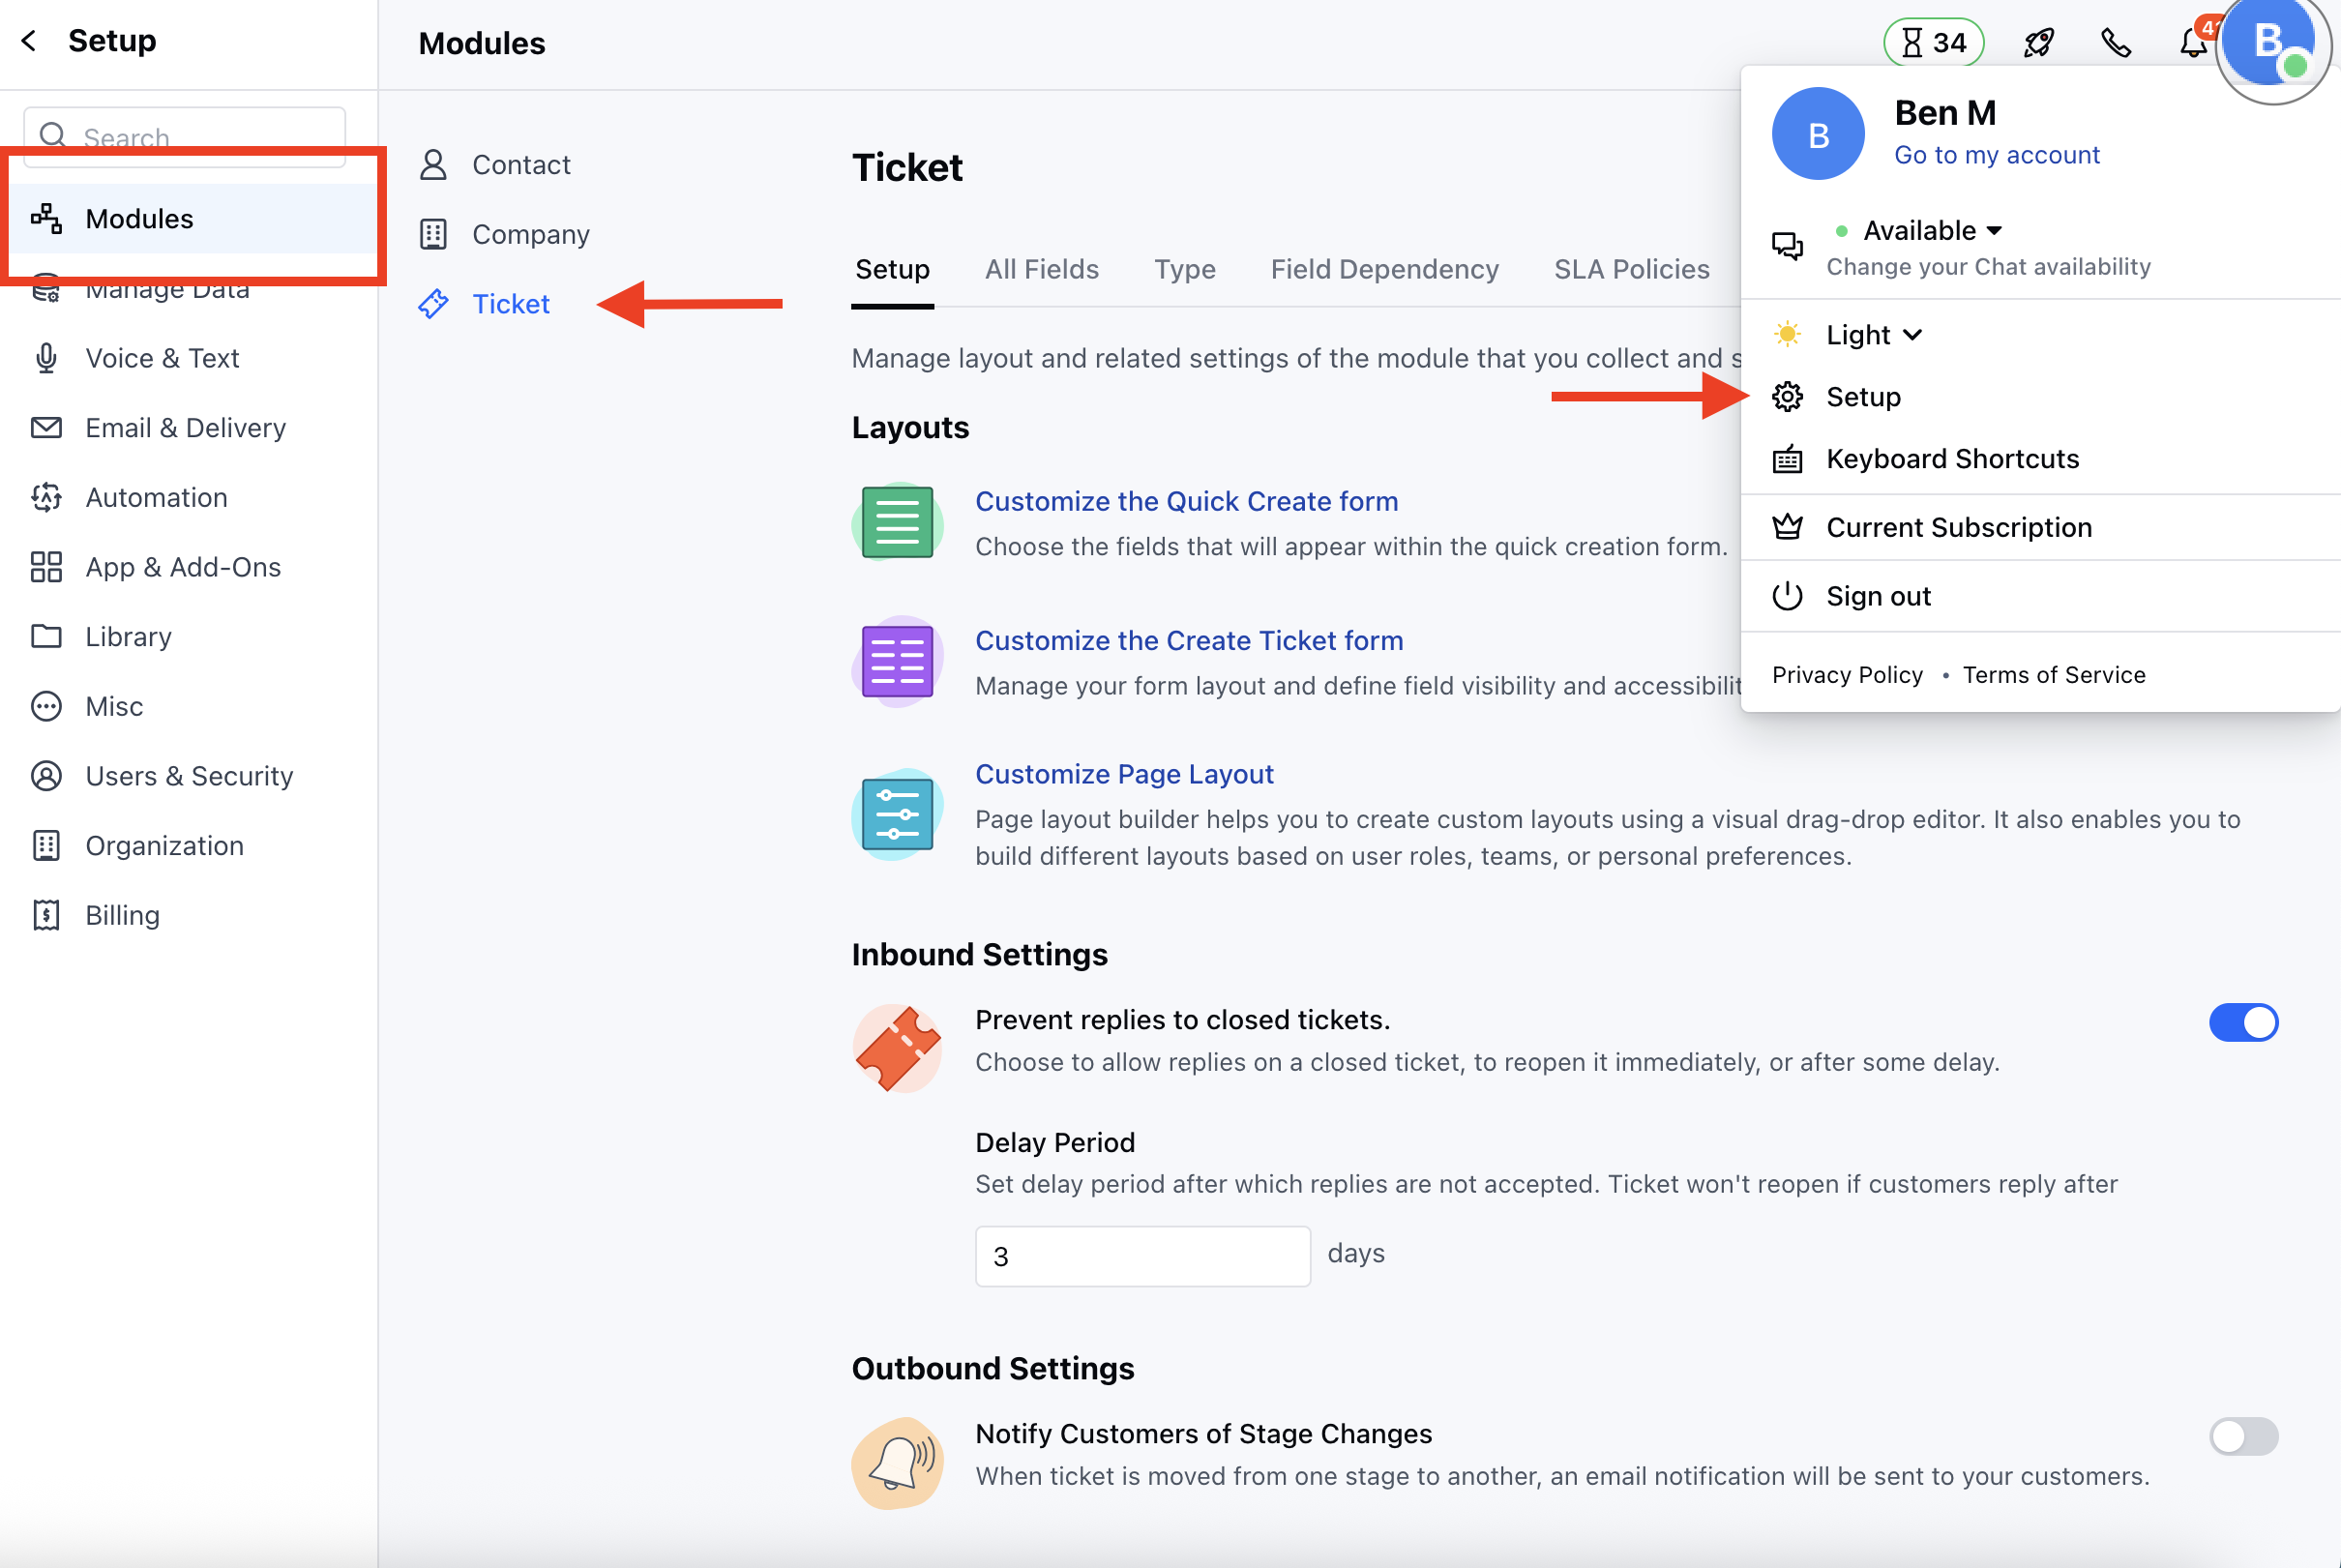 * Click on the **Customize the Page Layout option**
* Here, you can **Create a New Layout** Customize the Default Page Layouts
### Create a New Layout
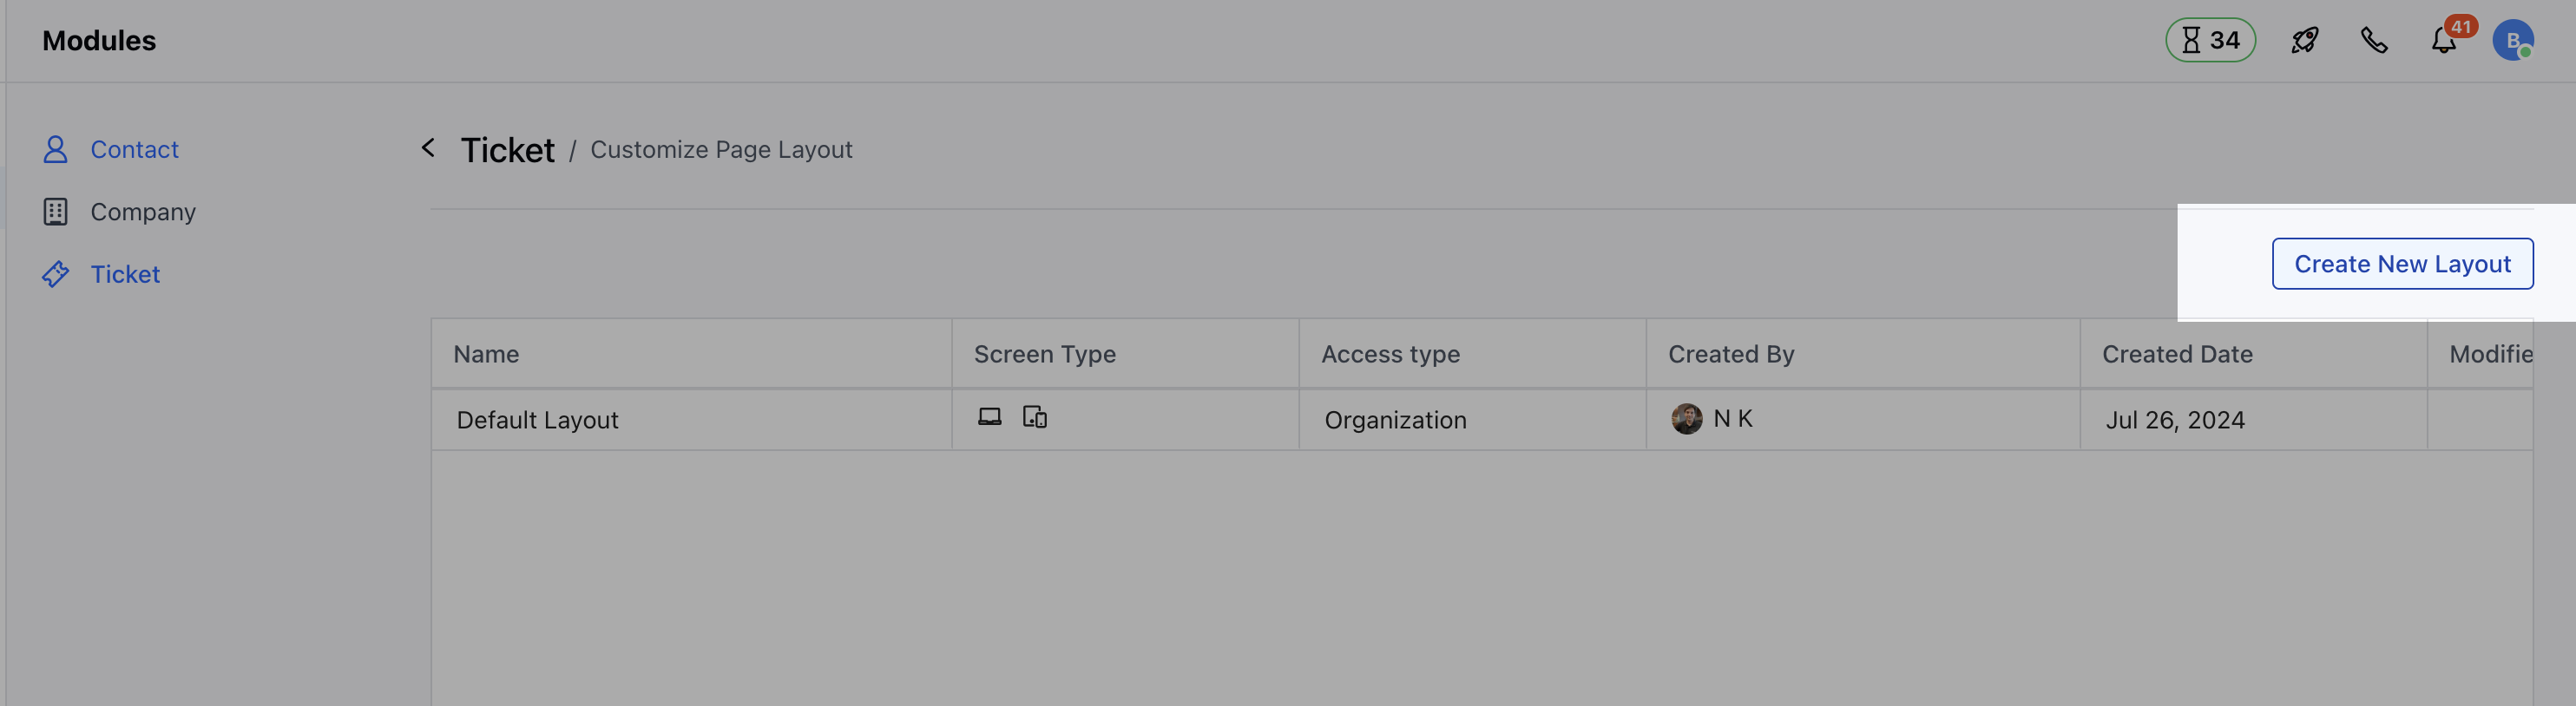
To create a New Page Layout,
* Click on the **Create New Layout** option on the right
* Click on the **Customize the Page Layout option**
* Here, you can **Create a New Layout** Customize the Default Page Layouts
### Create a New Layout
To create a New Page Layout,
* Click on the **Create New Layout** option on the right
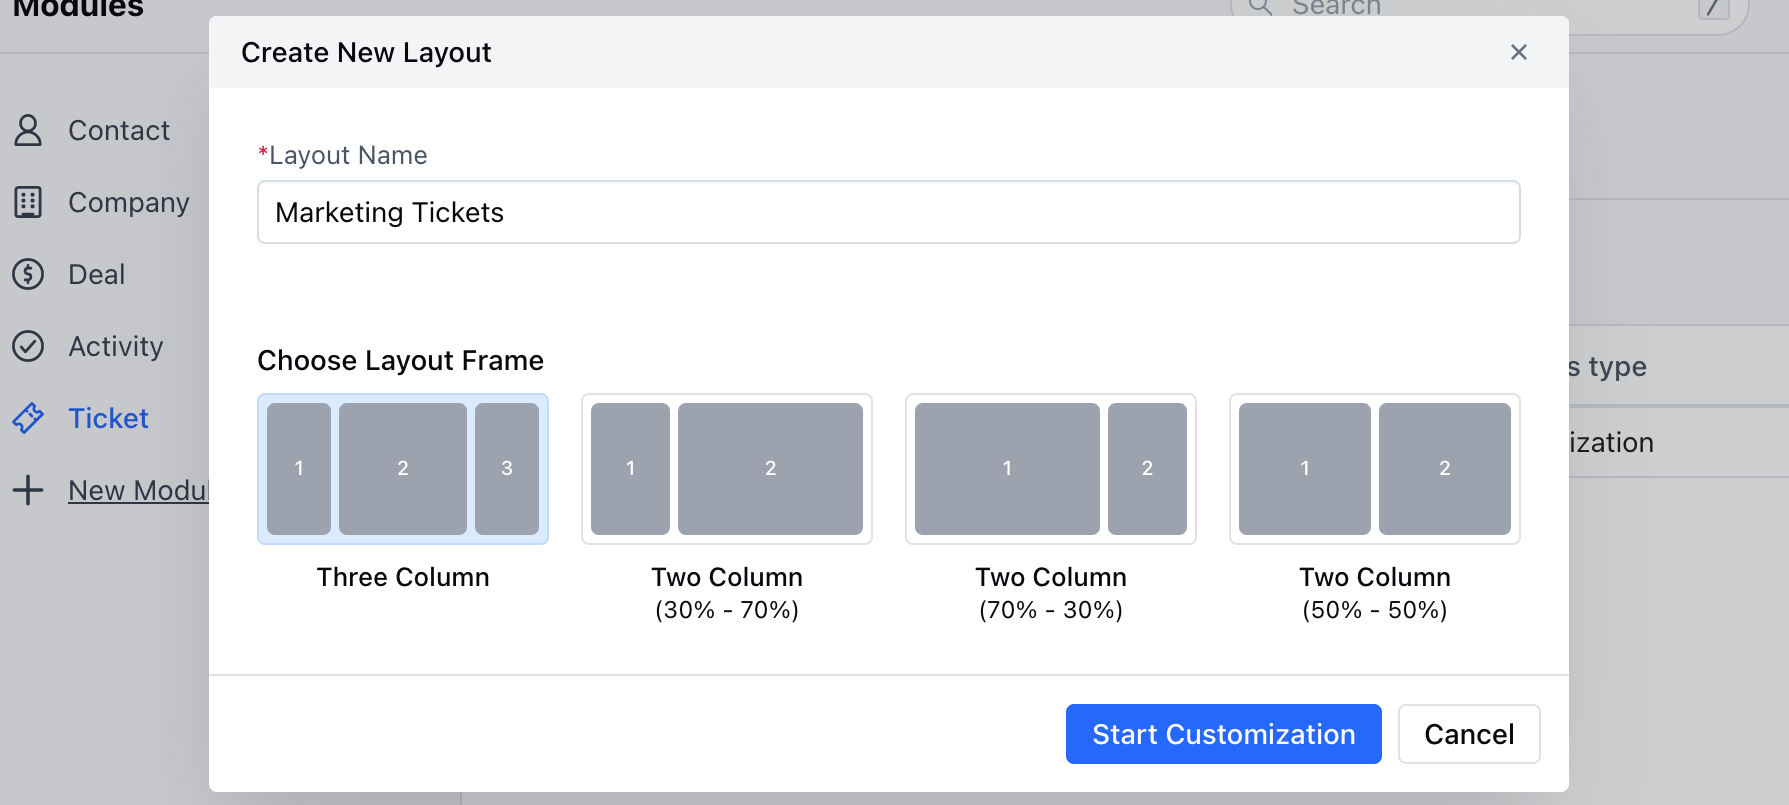
 * A pop will open asking for the following details
* **Layout Name**: Enter the layout Name
* **Choose Layout Frame**: Select the appropriate Layout Frame from
* 3 Column Layout - Default Layout
* 2 Column Layout - Left Sidebar
* 2 Column Layout - Right Sidebar
* 2 Column Layout - Equal width
* Once you have provided the information, click the **Start Customization** button
* A pop will open asking for the following details
* **Layout Name**: Enter the layout Name
* **Choose Layout Frame**: Select the appropriate Layout Frame from
* 3 Column Layout - Default Layout
* 2 Column Layout - Left Sidebar
* 2 Column Layout - Right Sidebar
* 2 Column Layout - Equal width
* Once you have provided the information, click the **Start Customization** button
 * You will be redirected to the **Visual Layout Builder** Page
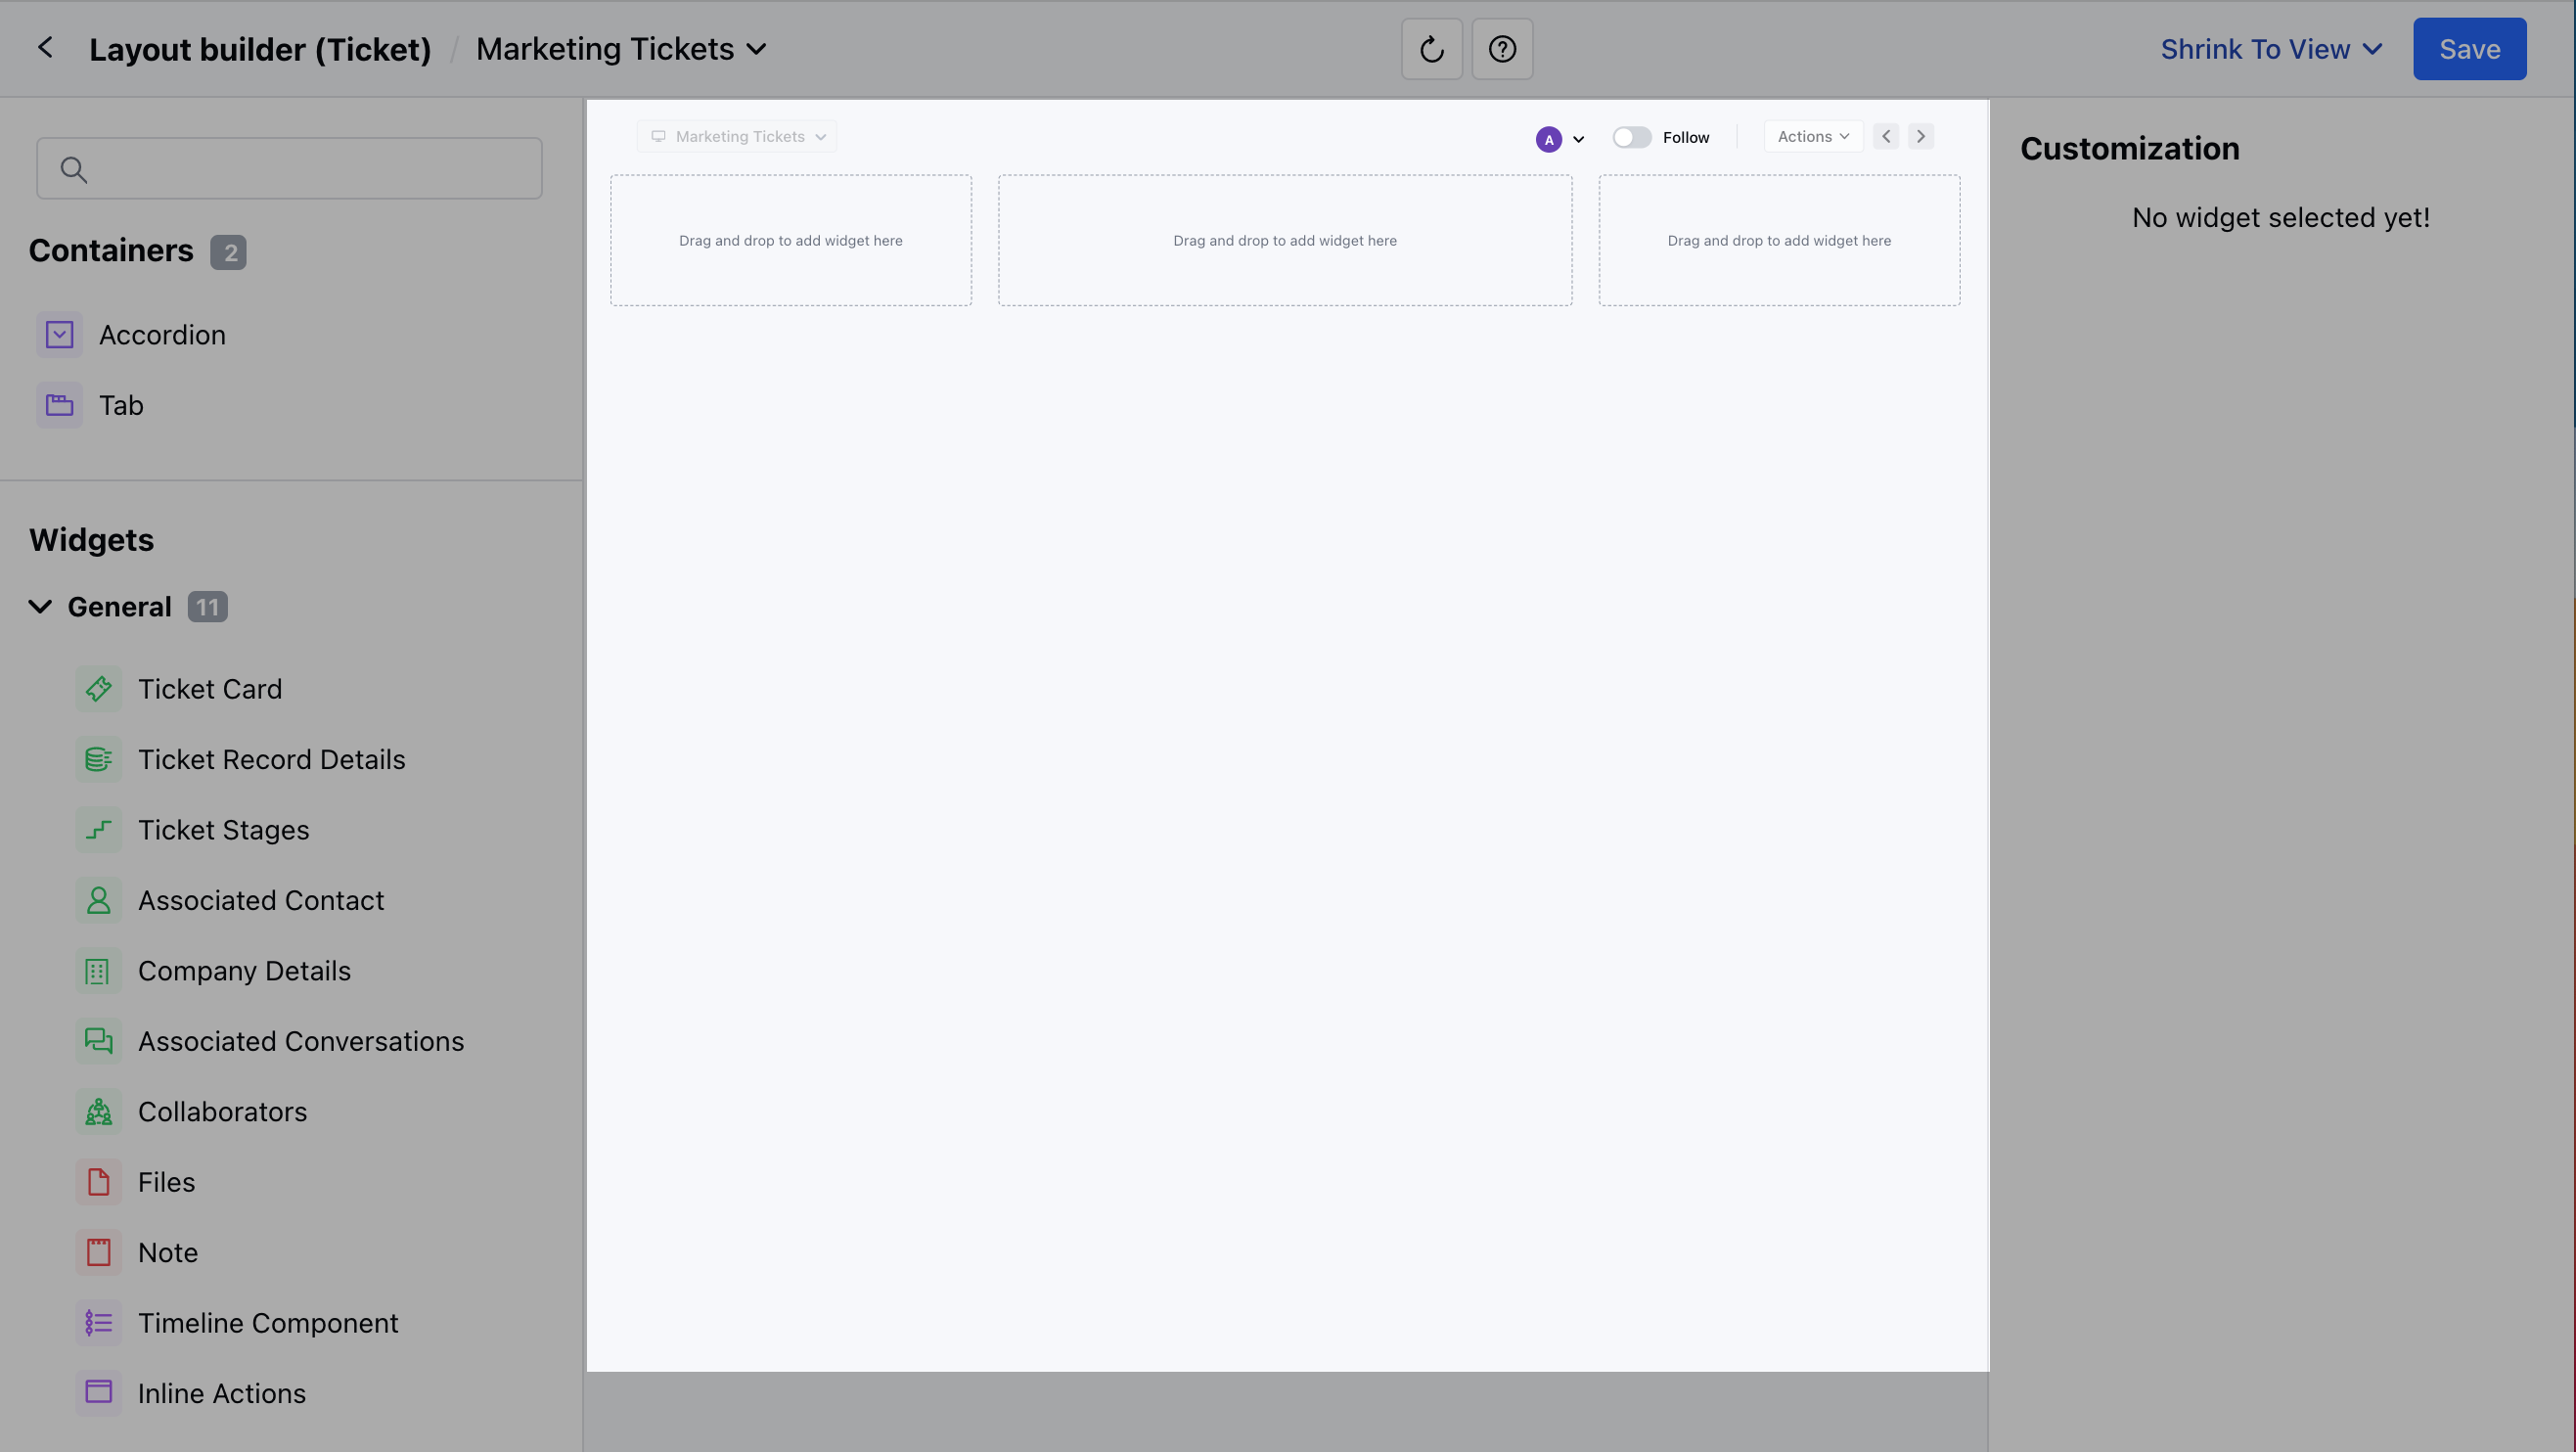
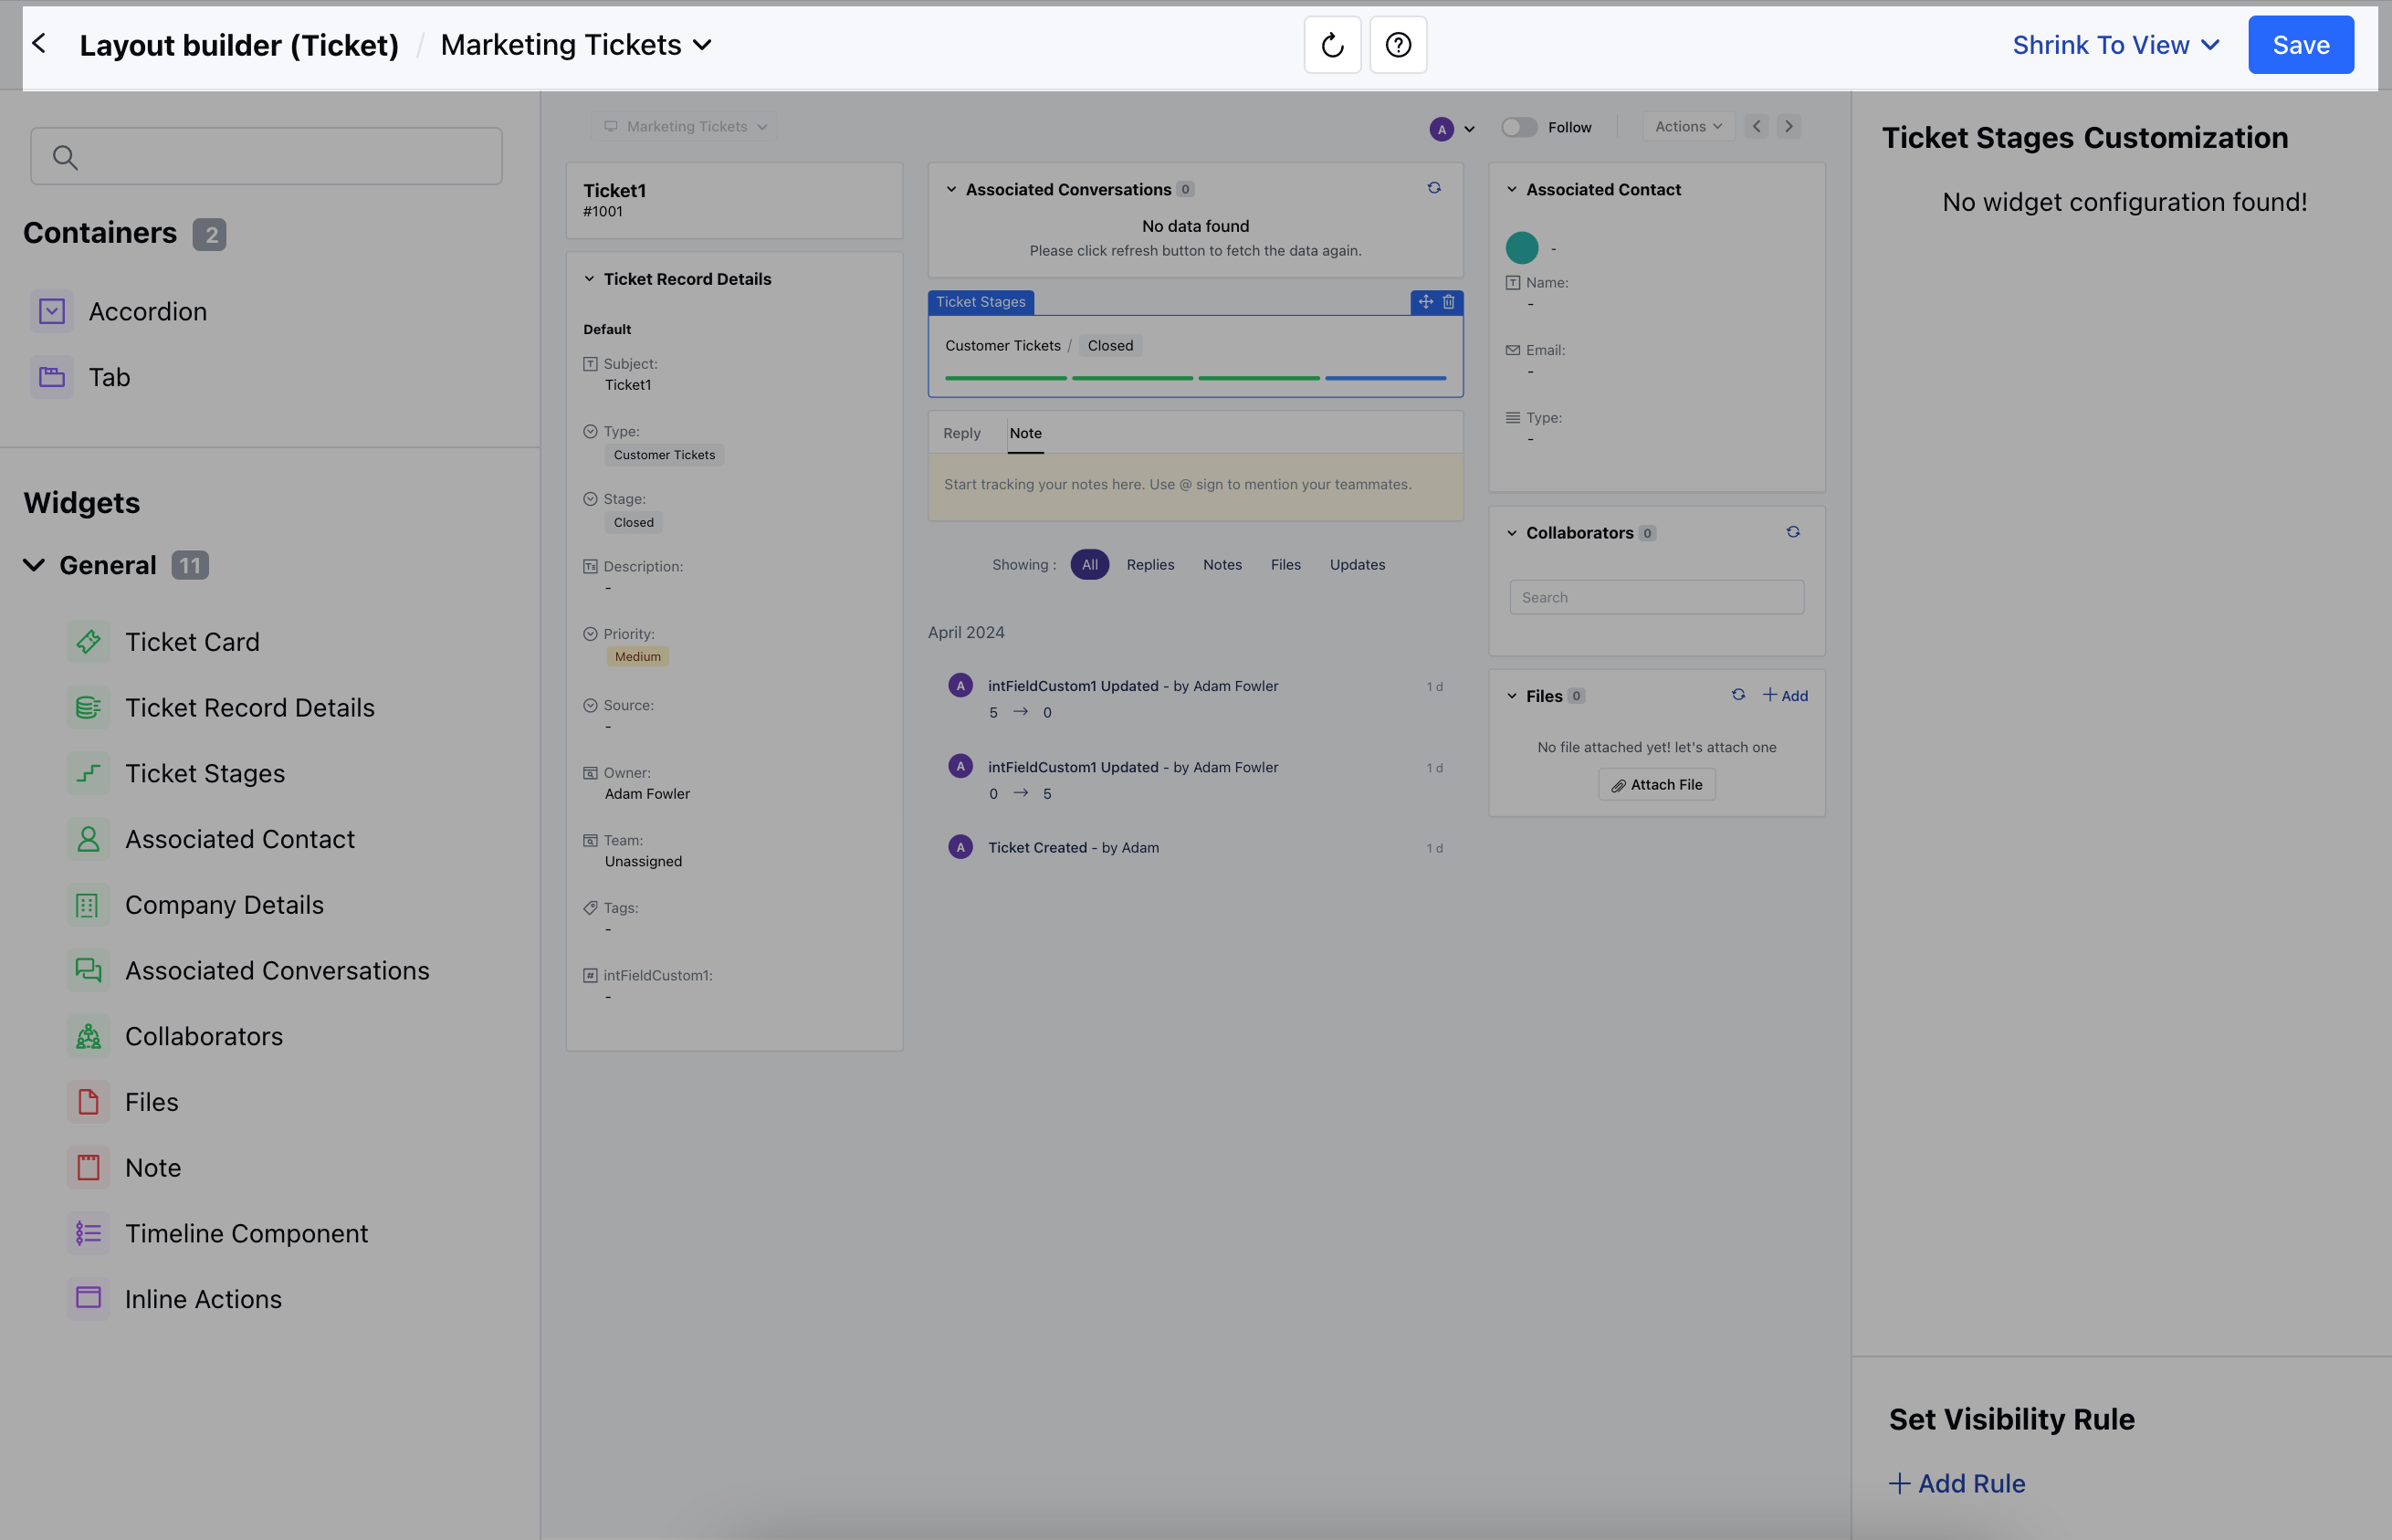
* Here, a blank canvas will open with the selected layout frame and one action bar at the top. You can drag-drop the required widget on the screen to create a preferred layout.
* You will be redirected to the **Visual Layout Builder** Page
* Here, a blank canvas will open with the selected layout frame and one action bar at the top. You can drag-drop the required widget on the screen to create a preferred layout.
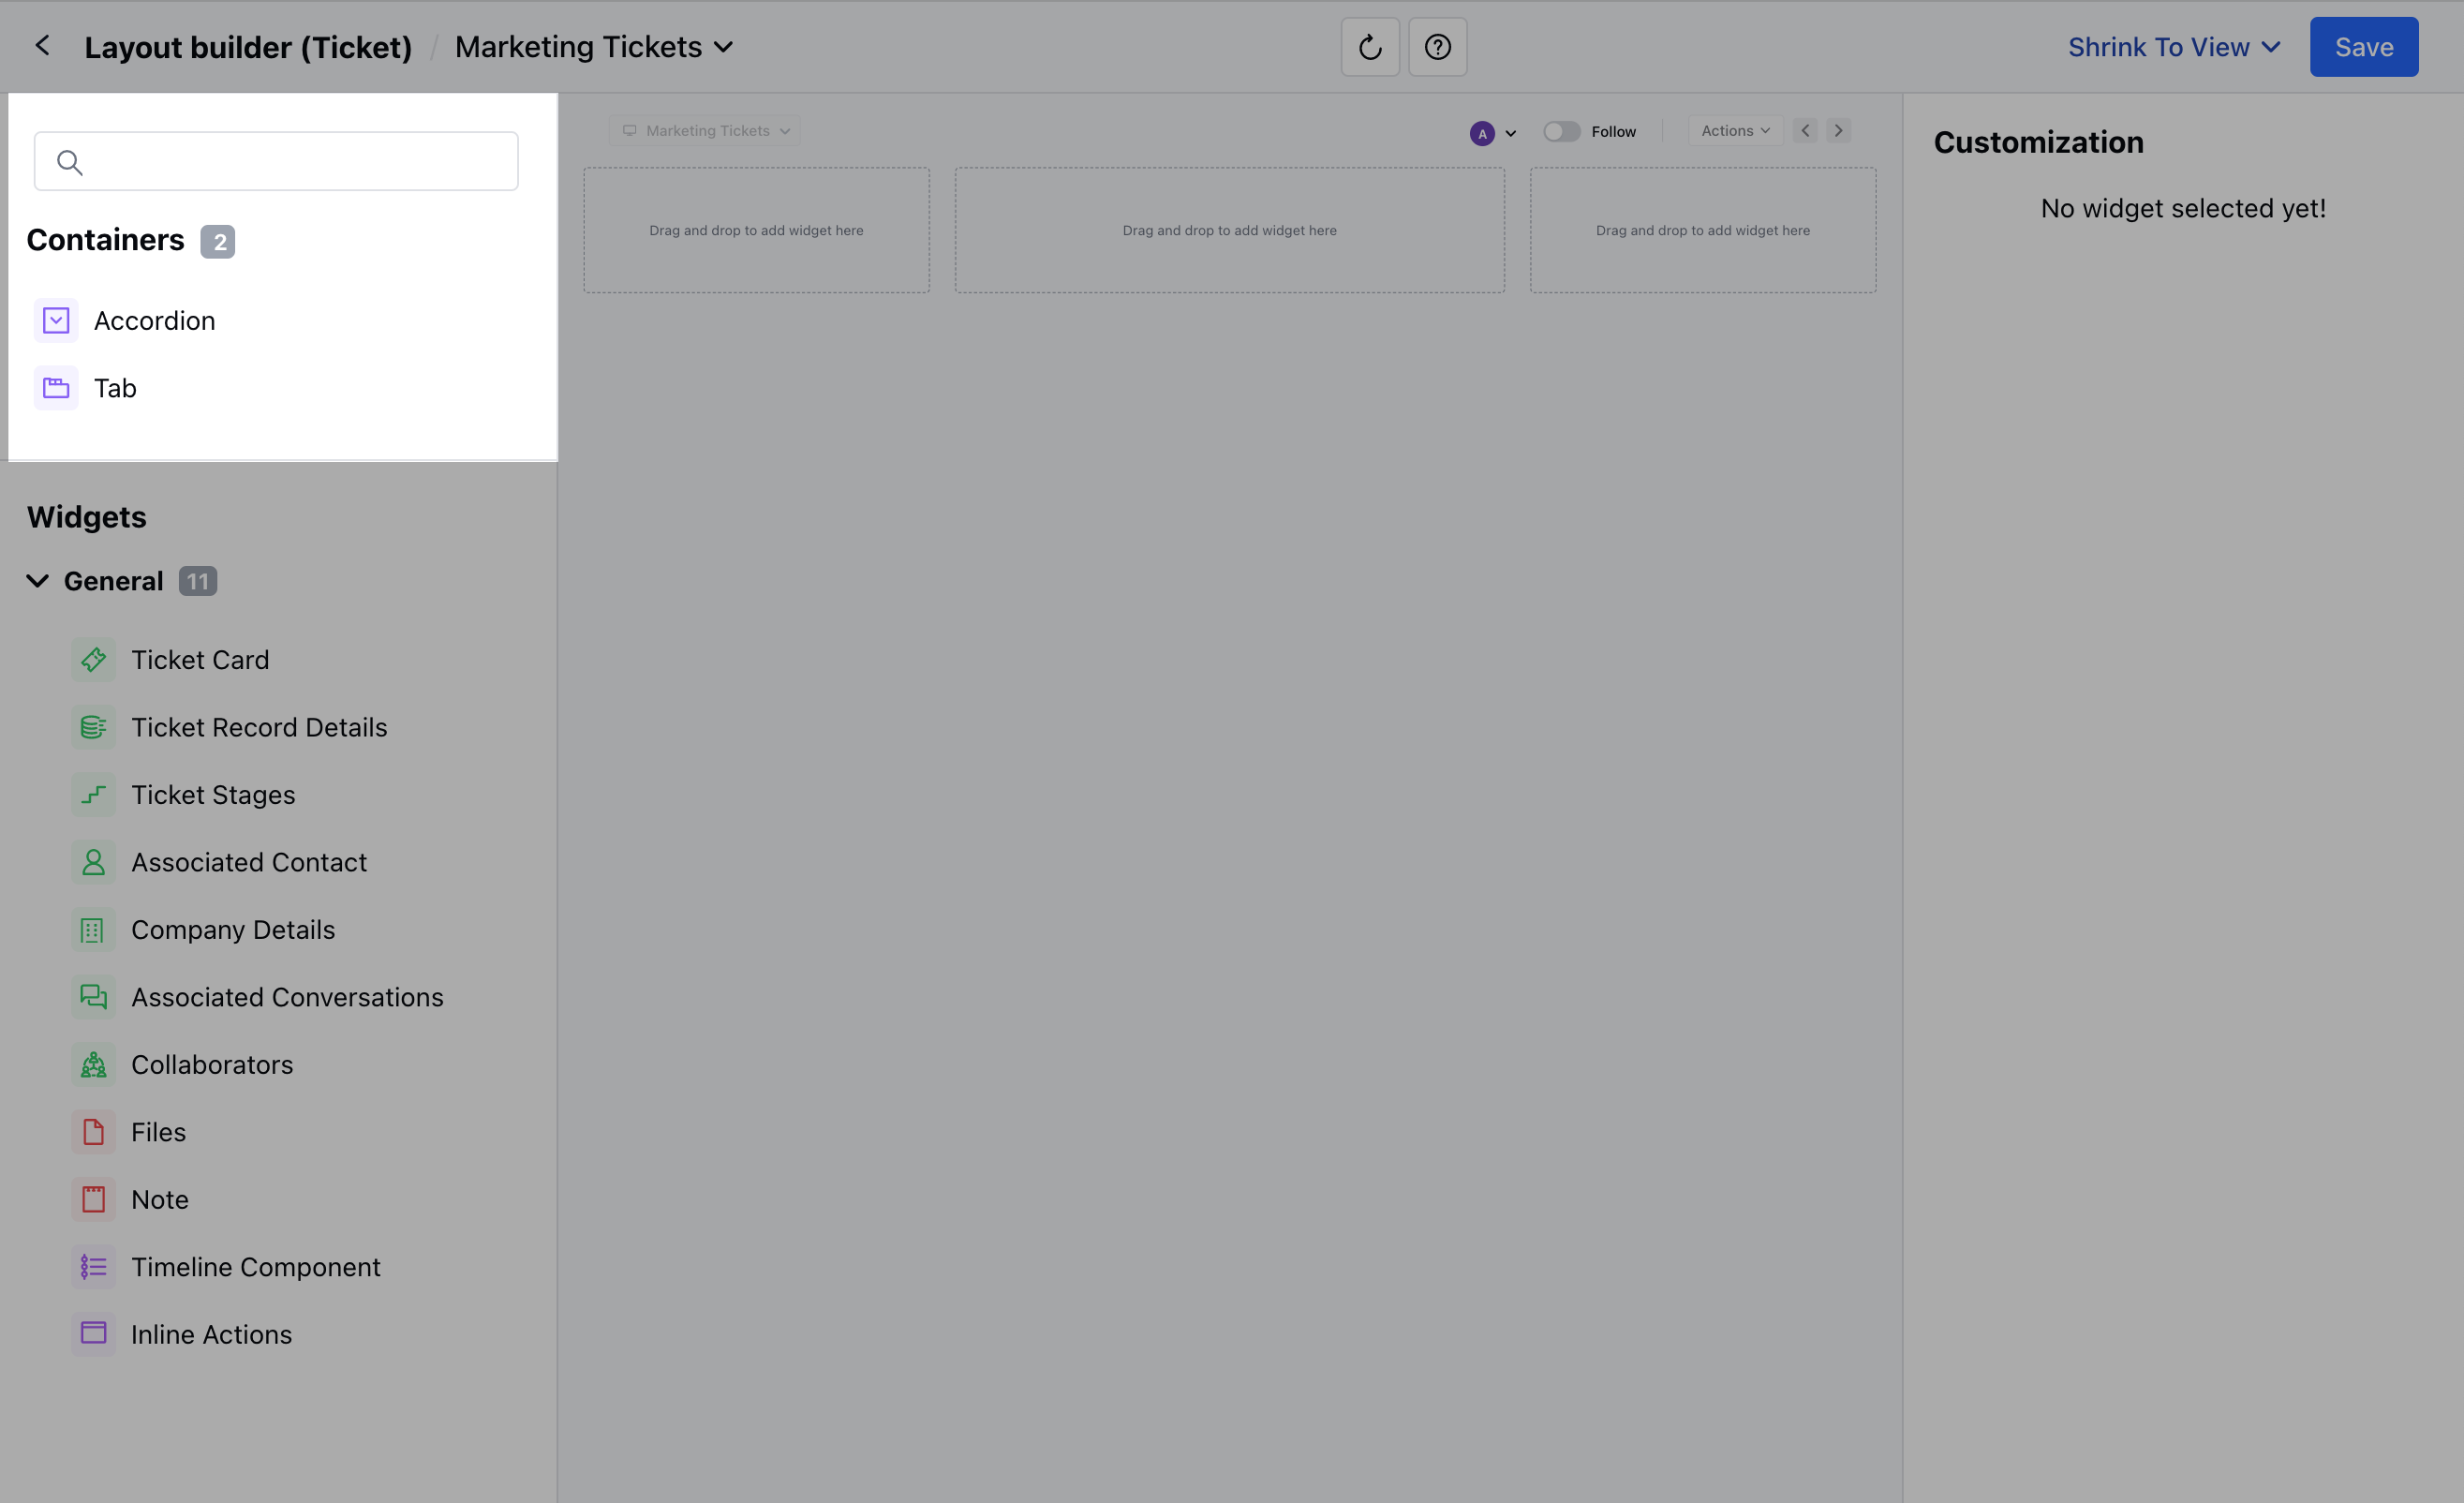
 * Build different **Accordion** and **Tabs** to organize the content in a specific structure.
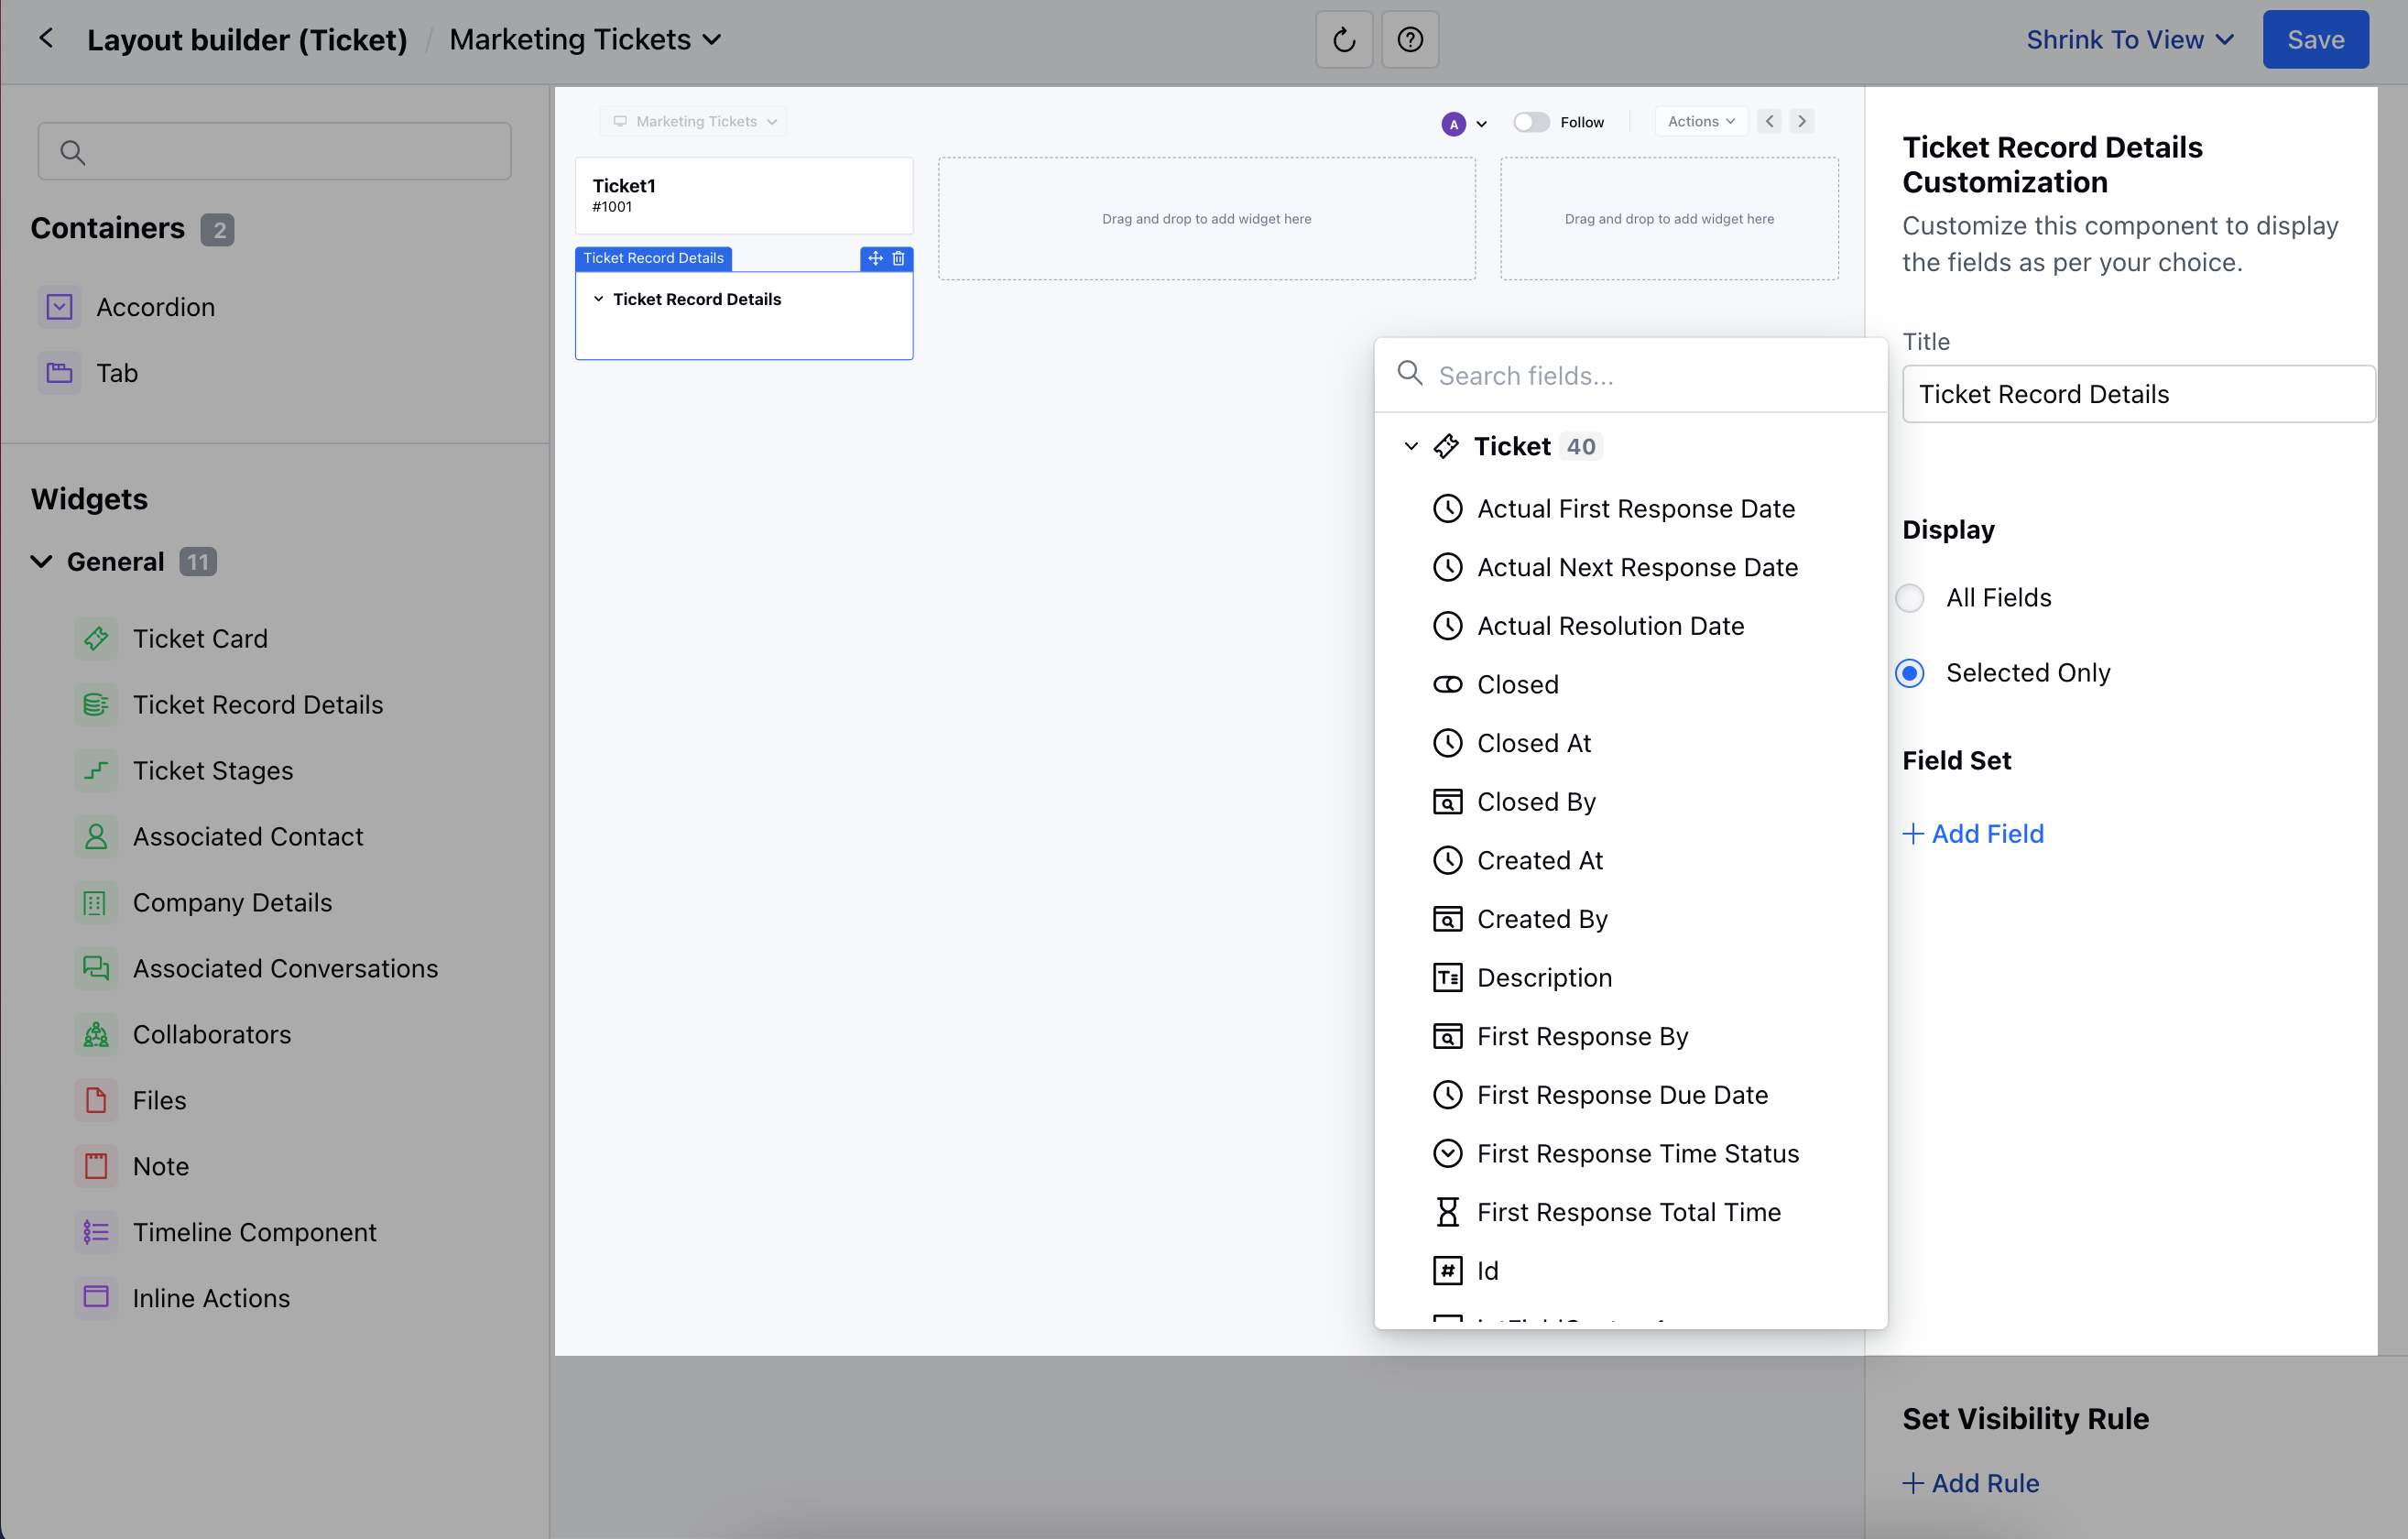
 * When accessing the Ticket Record Details, you have the flexibility to customize your view. You can choose to display either All Available Fields or only specific ones by selecting the **"Add Field"** option
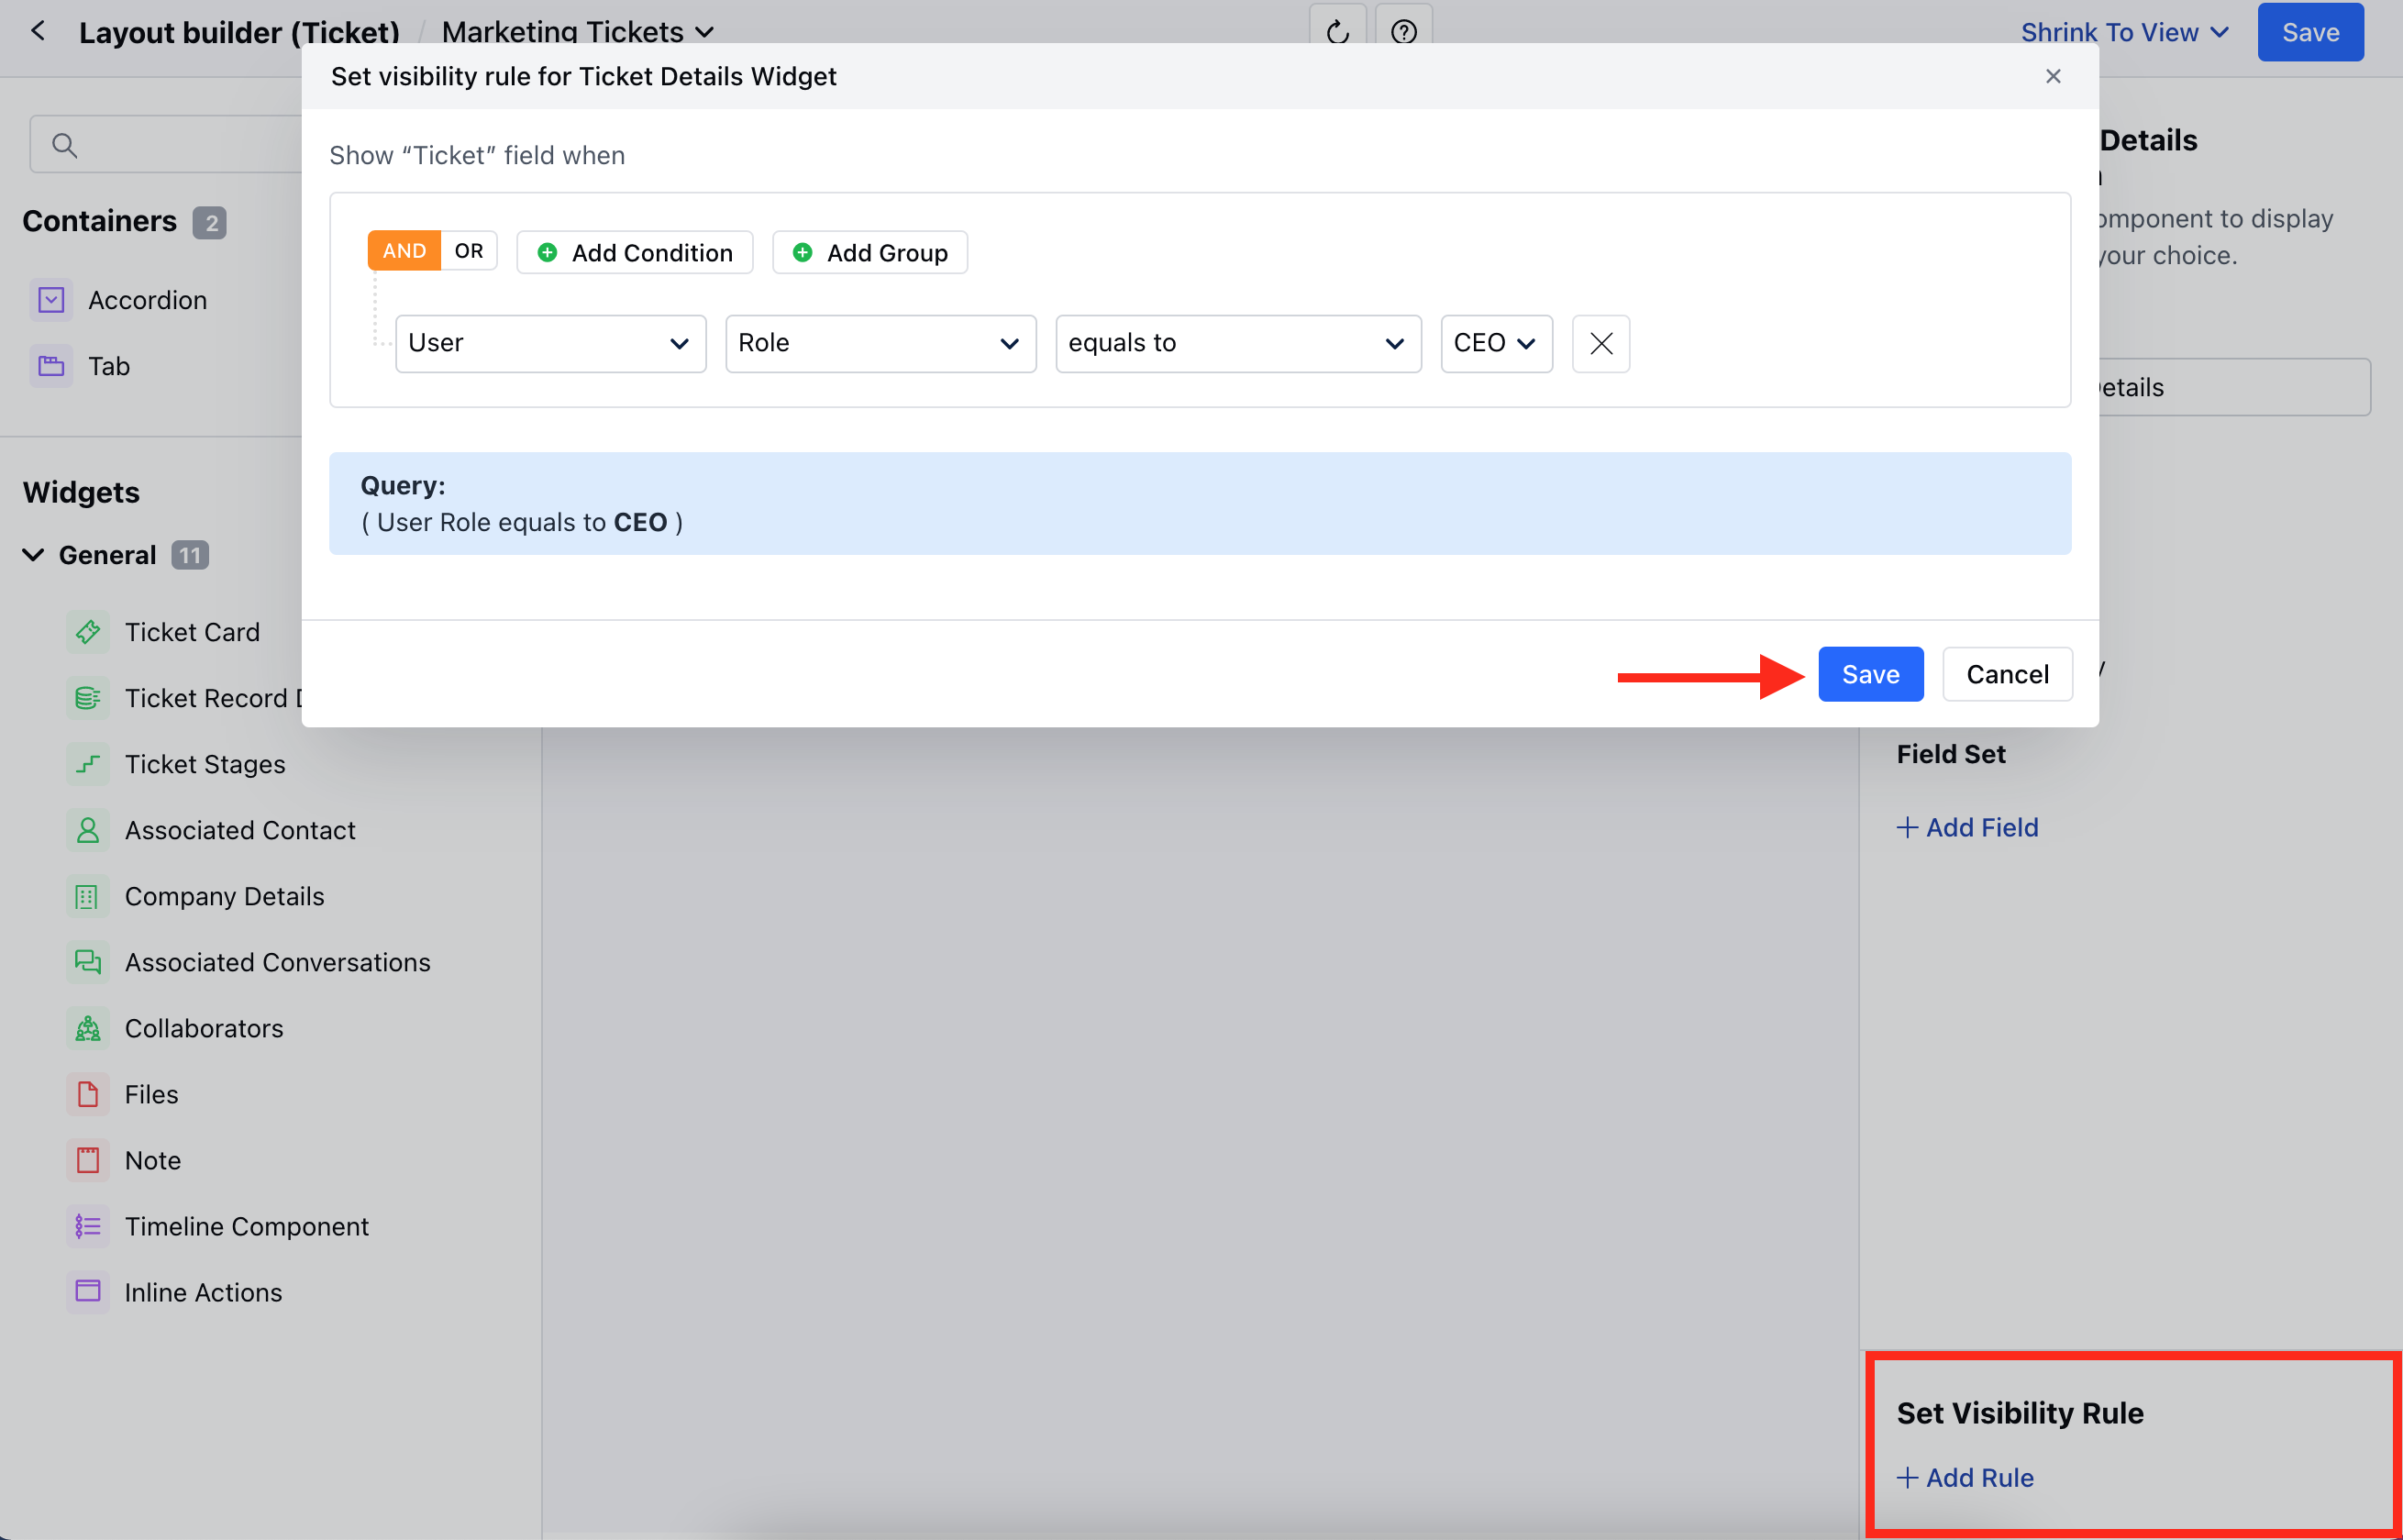
 * You can also **Set the Visibility Rule** from the **+ Add Rule** option
* Set the **Condition Criteria **and**Save**
* You can also **Set the Visibility Rule** from the **+ Add Rule** option
* Set the **Condition Criteria **and**Save**
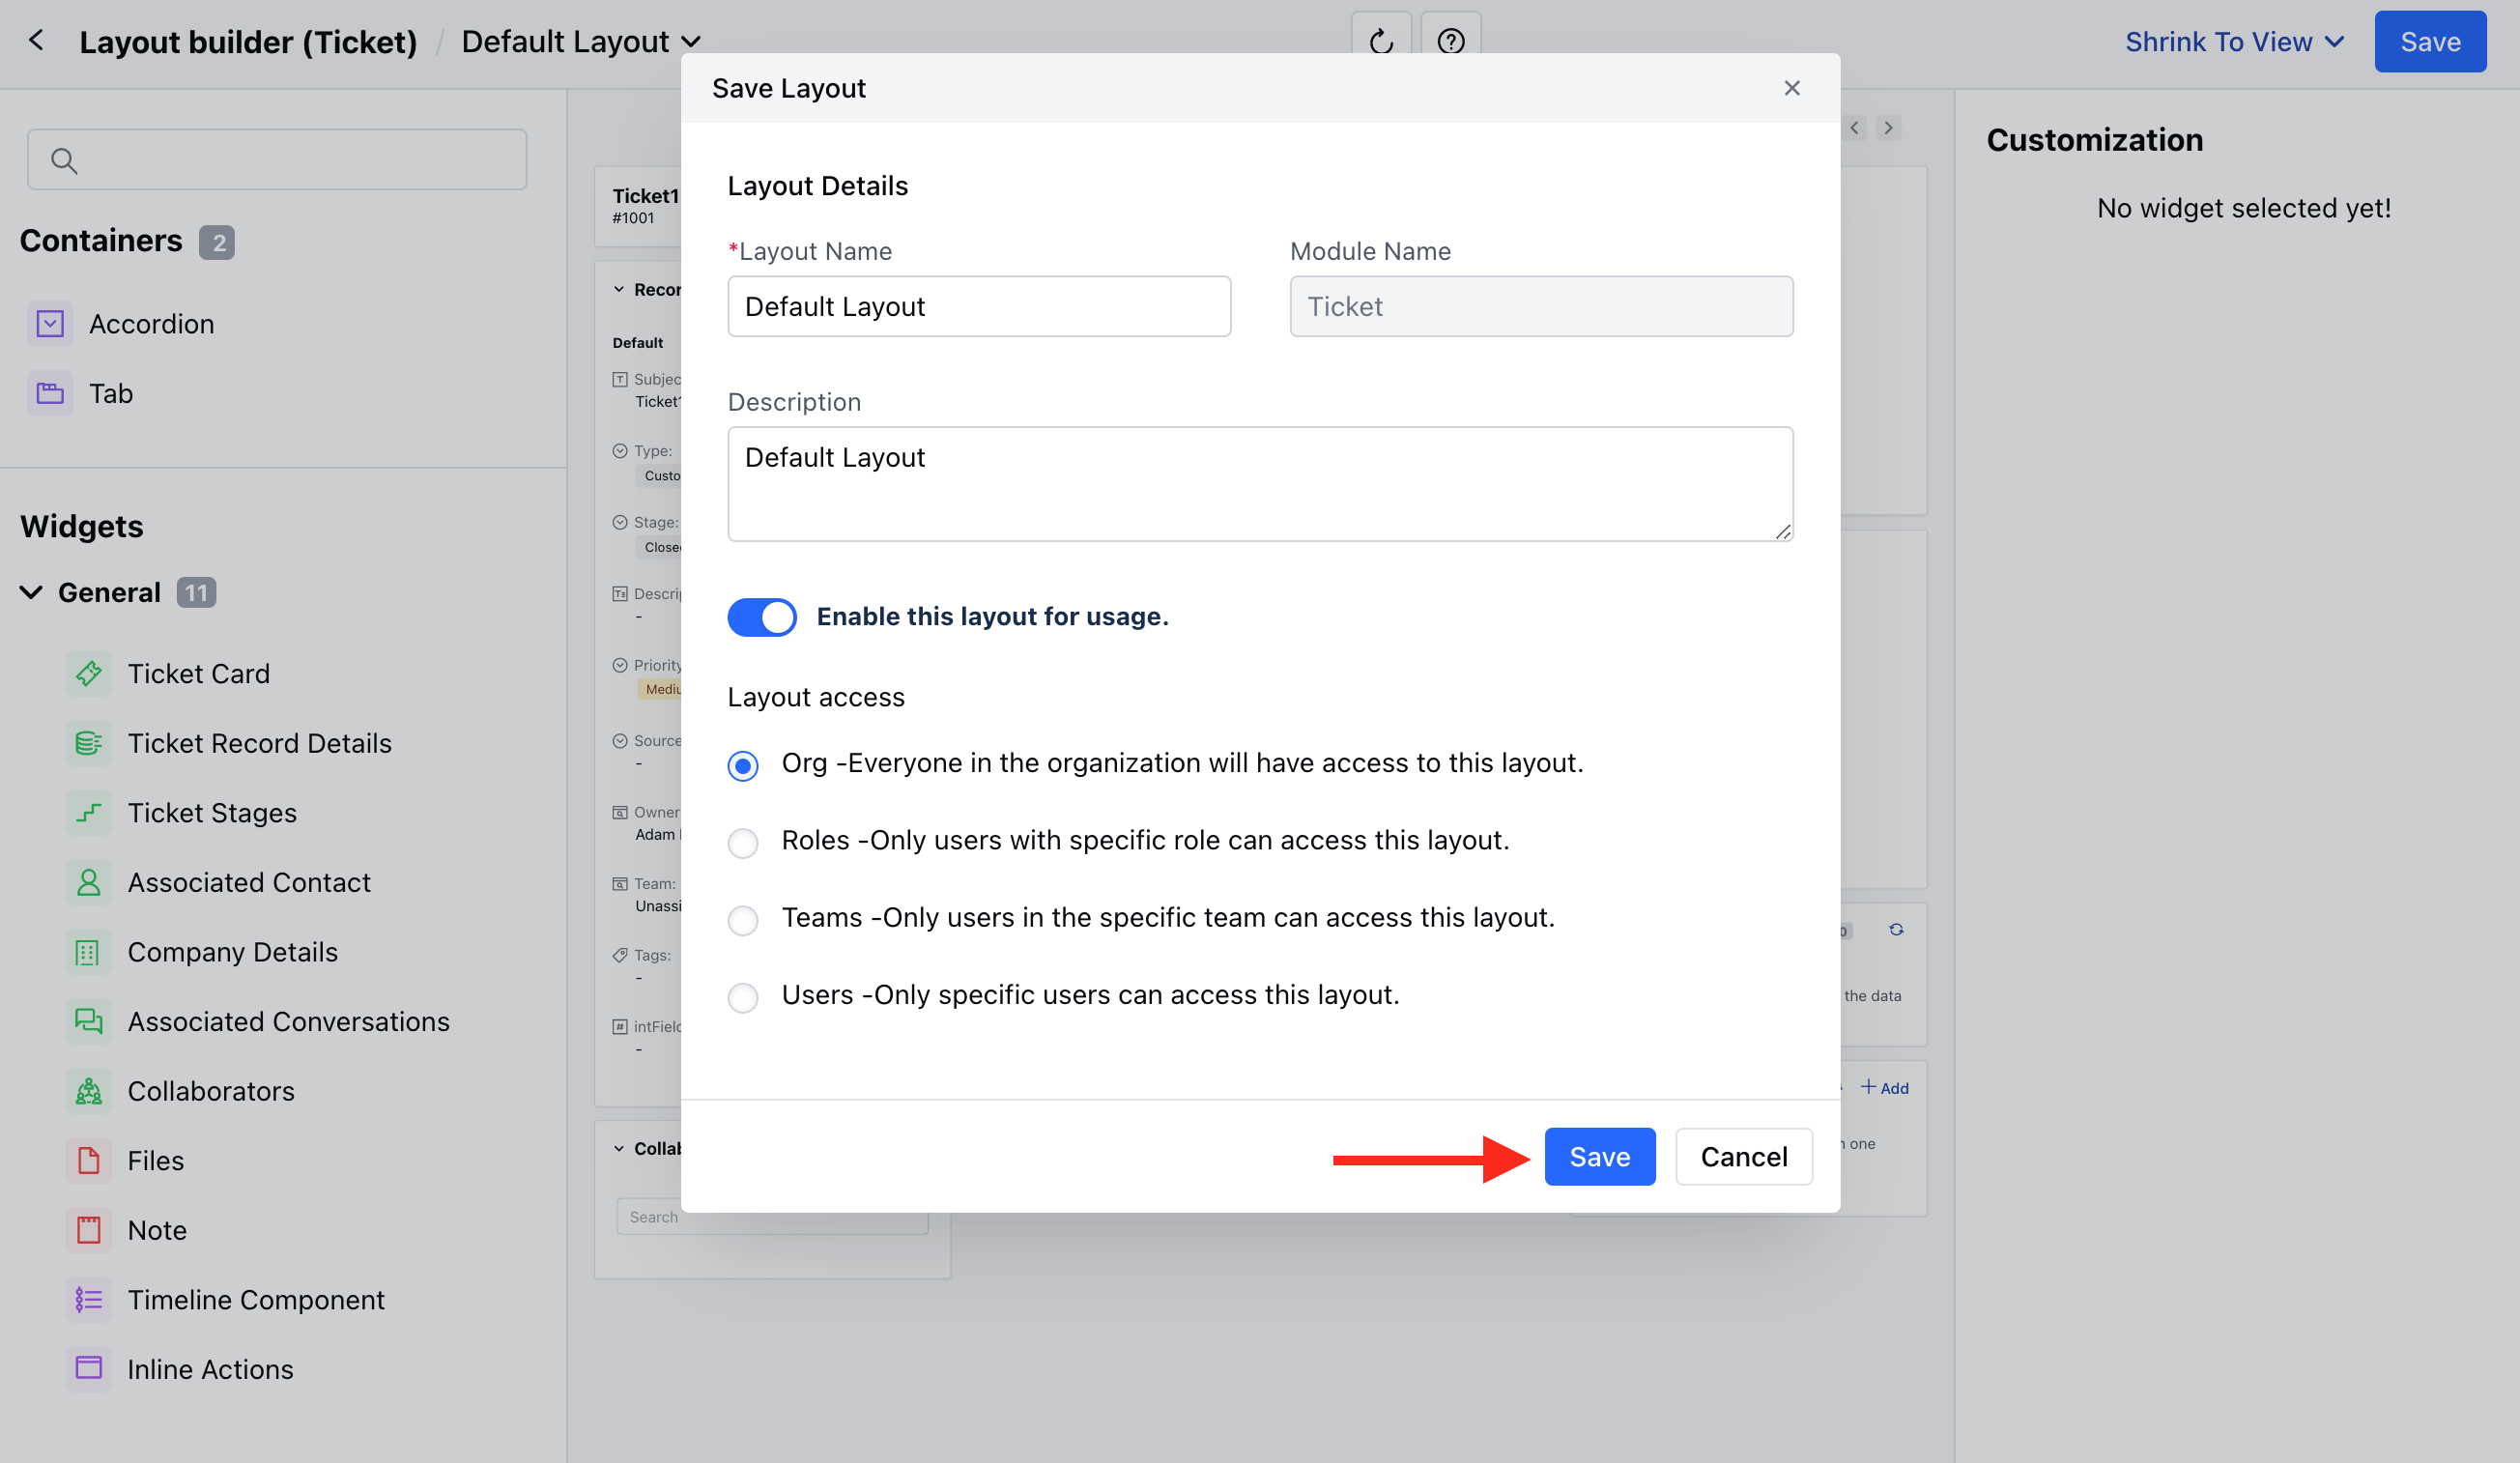
 * Once you are done making the changes, you can hit on **Save**.
 * A pop will open asking for the following information,
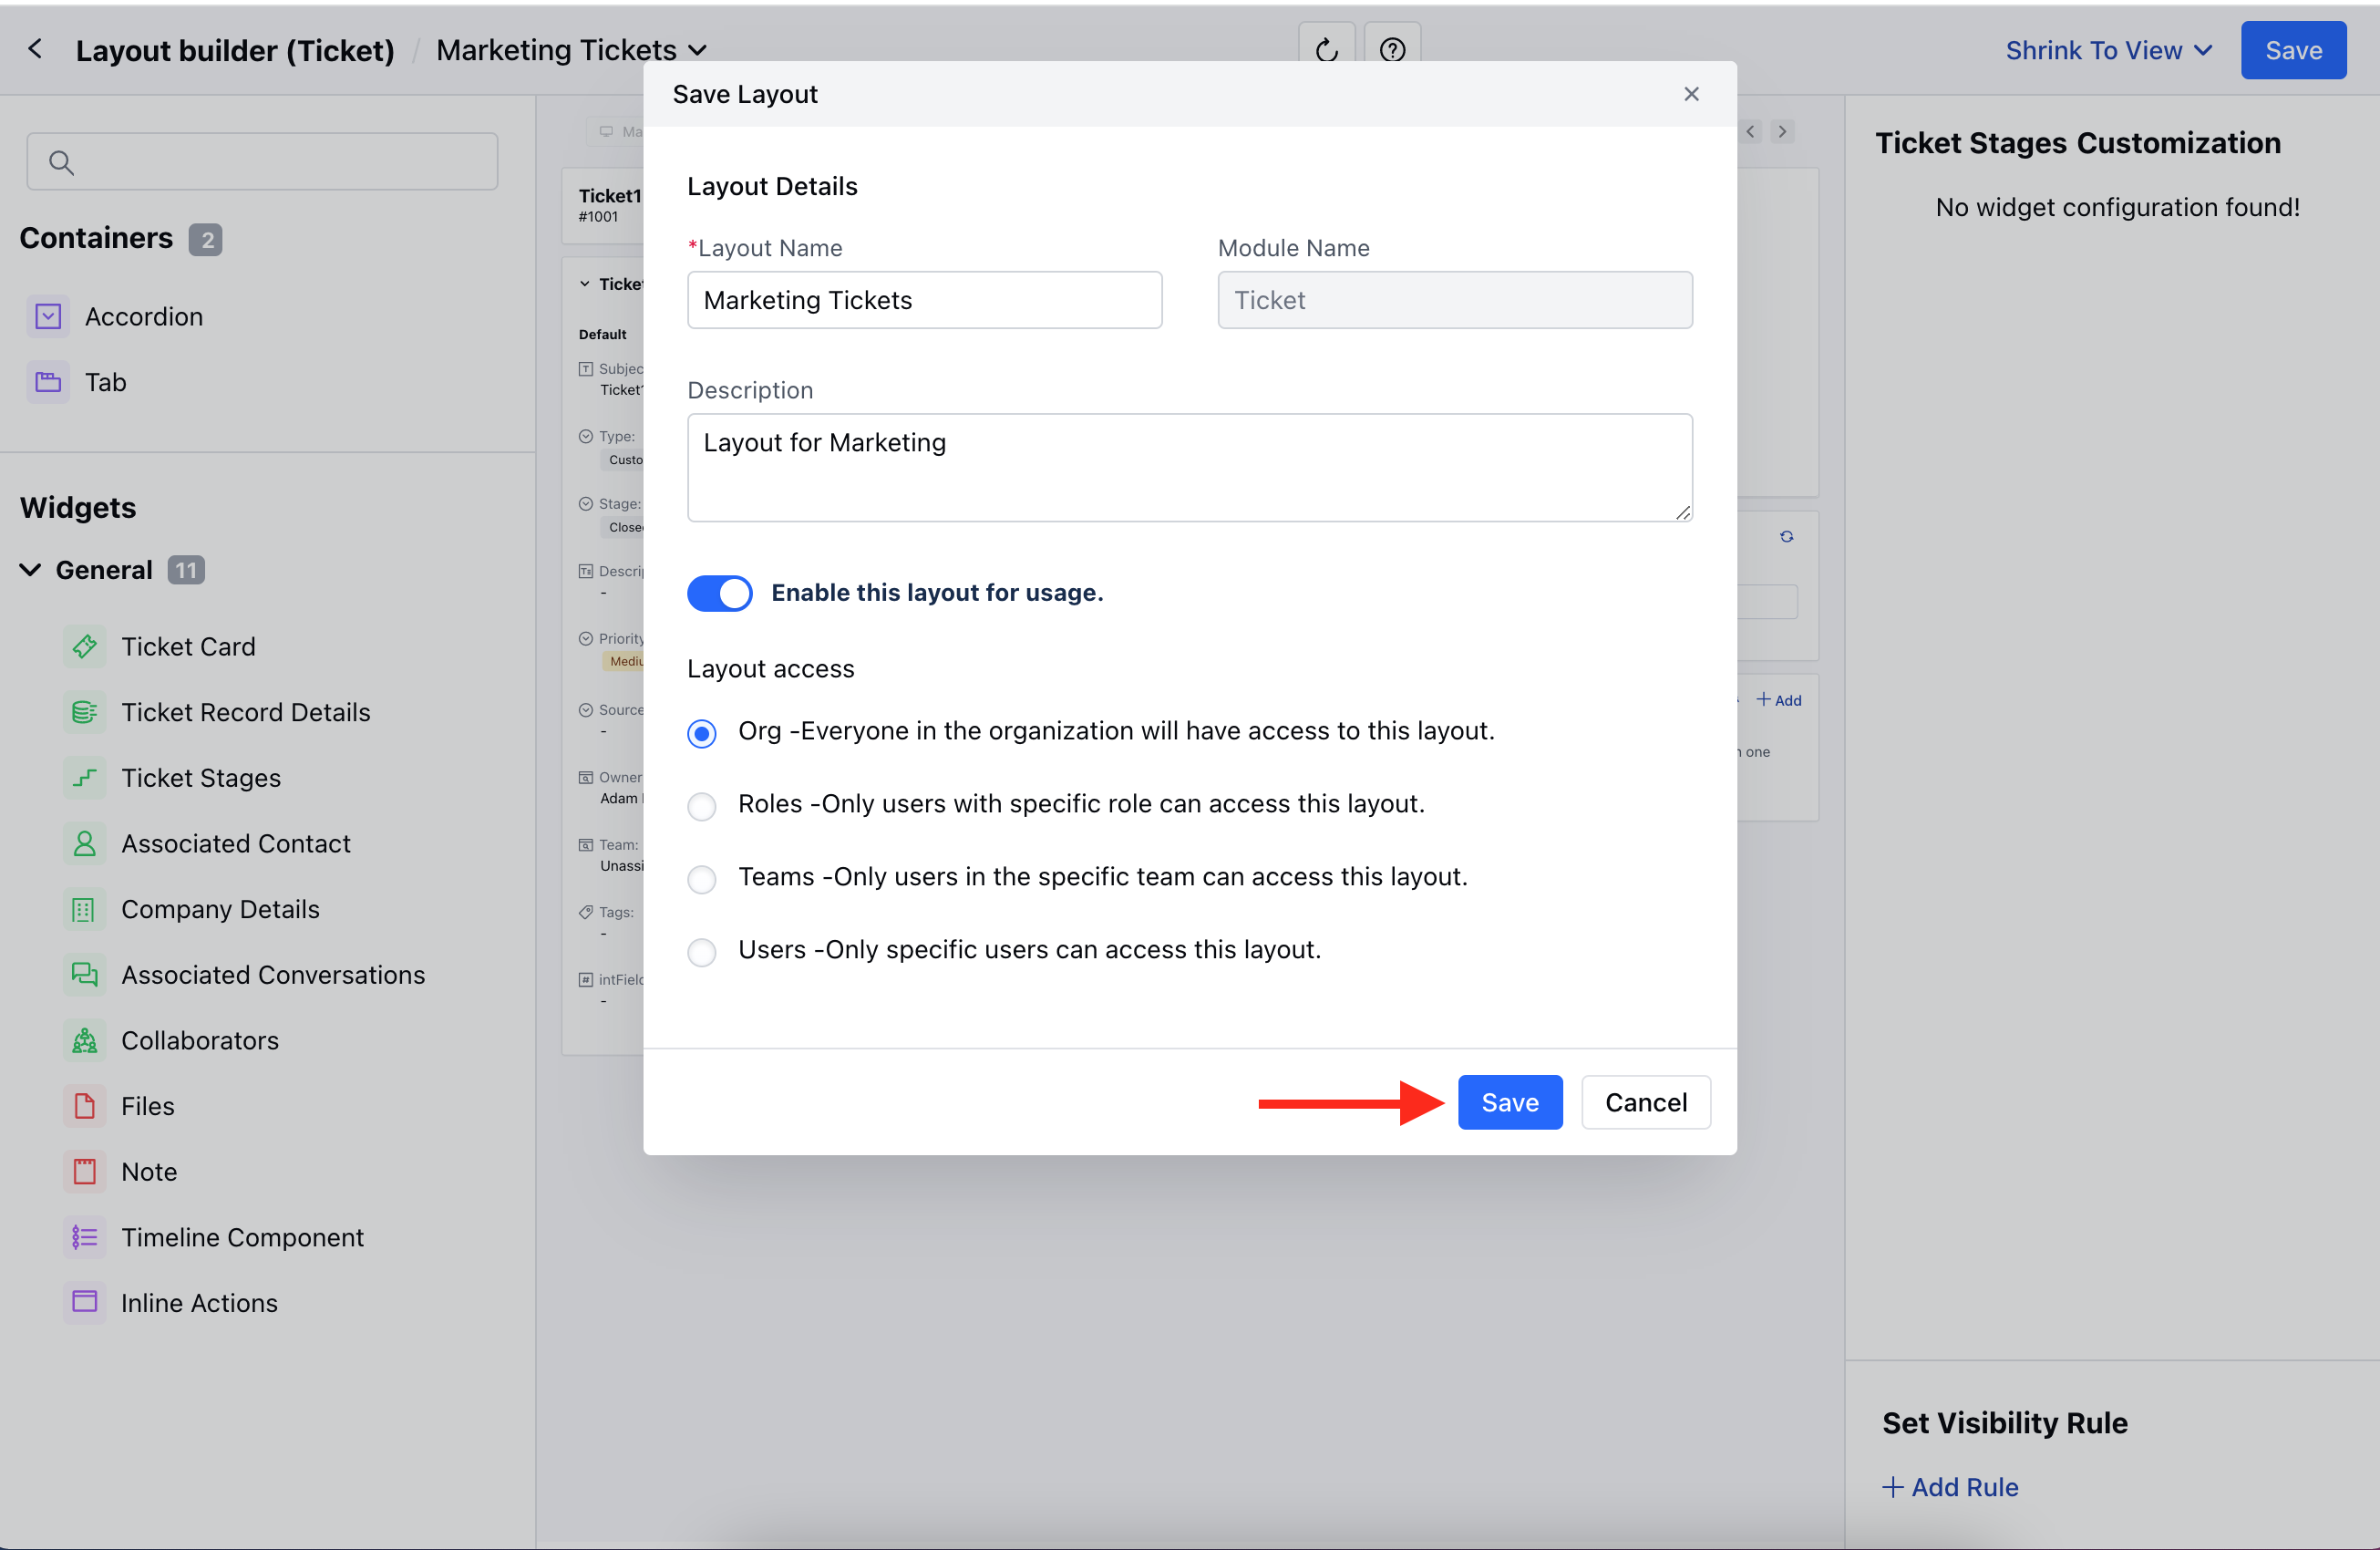
* **Layout Name**: It will display the name that you provided earlier, but you can change it before saving.
* **Description**: Add a description of the newly created layout. \* Choose if you want to Enable this layout for usage. If you enable the option it will open an option to allow access,
* **Organization Level**: Everyone in the organization will have access to this layout.
* **Role**: Only users with specific roles can access this layout.
* **Teams**: Only users in the specific team can access this layout.
* **User**: Only specific users can access this layout.
* Then, **Save** the information
* A pop will open asking for the following information,
* **Layout Name**: It will display the name that you provided earlier, but you can change it before saving.
* **Description**: Add a description of the newly created layout. \* Choose if you want to Enable this layout for usage. If you enable the option it will open an option to allow access,
* **Organization Level**: Everyone in the organization will have access to this layout.
* **Role**: Only users with specific roles can access this layout.
* **Teams**: Only users in the specific team can access this layout.
* **User**: Only specific users can access this layout.
* Then, **Save** the information
 **Note:** If you have one layout set as organization level and then you save another then the previous one loses its org level setting and becomes inactive from usage at user level.
### Customize the Default Layouts
To customize the Default Layout
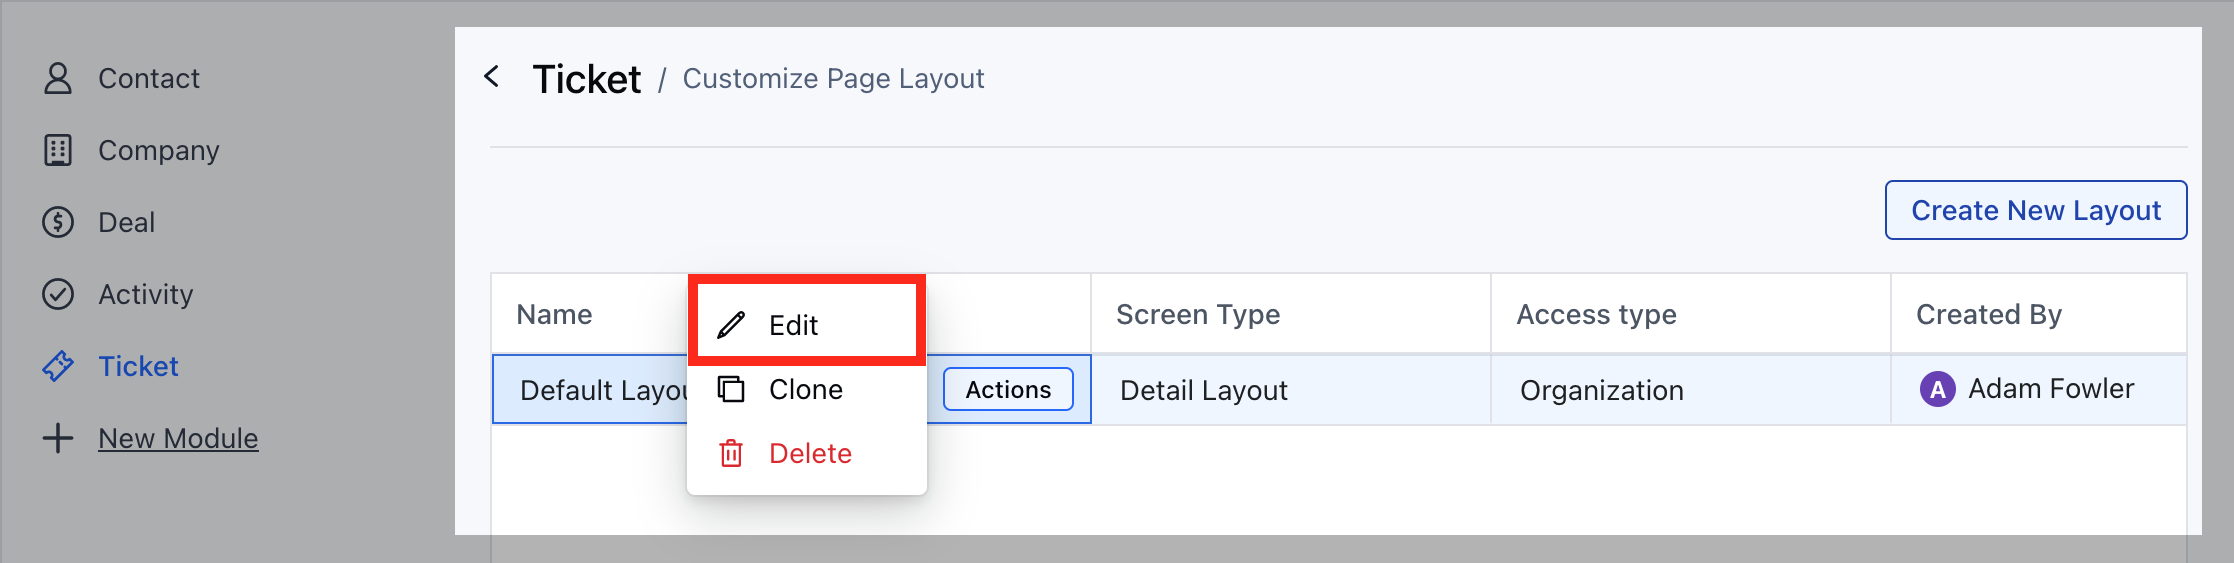
* Hover on the **Default Layout** option,**Actions** button will appear
* Click on the **Actions** button and select the **Edit** option.
**Note:** If you have one layout set as organization level and then you save another then the previous one loses its org level setting and becomes inactive from usage at user level.
### Customize the Default Layouts
To customize the Default Layout
* Hover on the **Default Layout** option,**Actions** button will appear
* Click on the **Actions** button and select the **Edit** option.
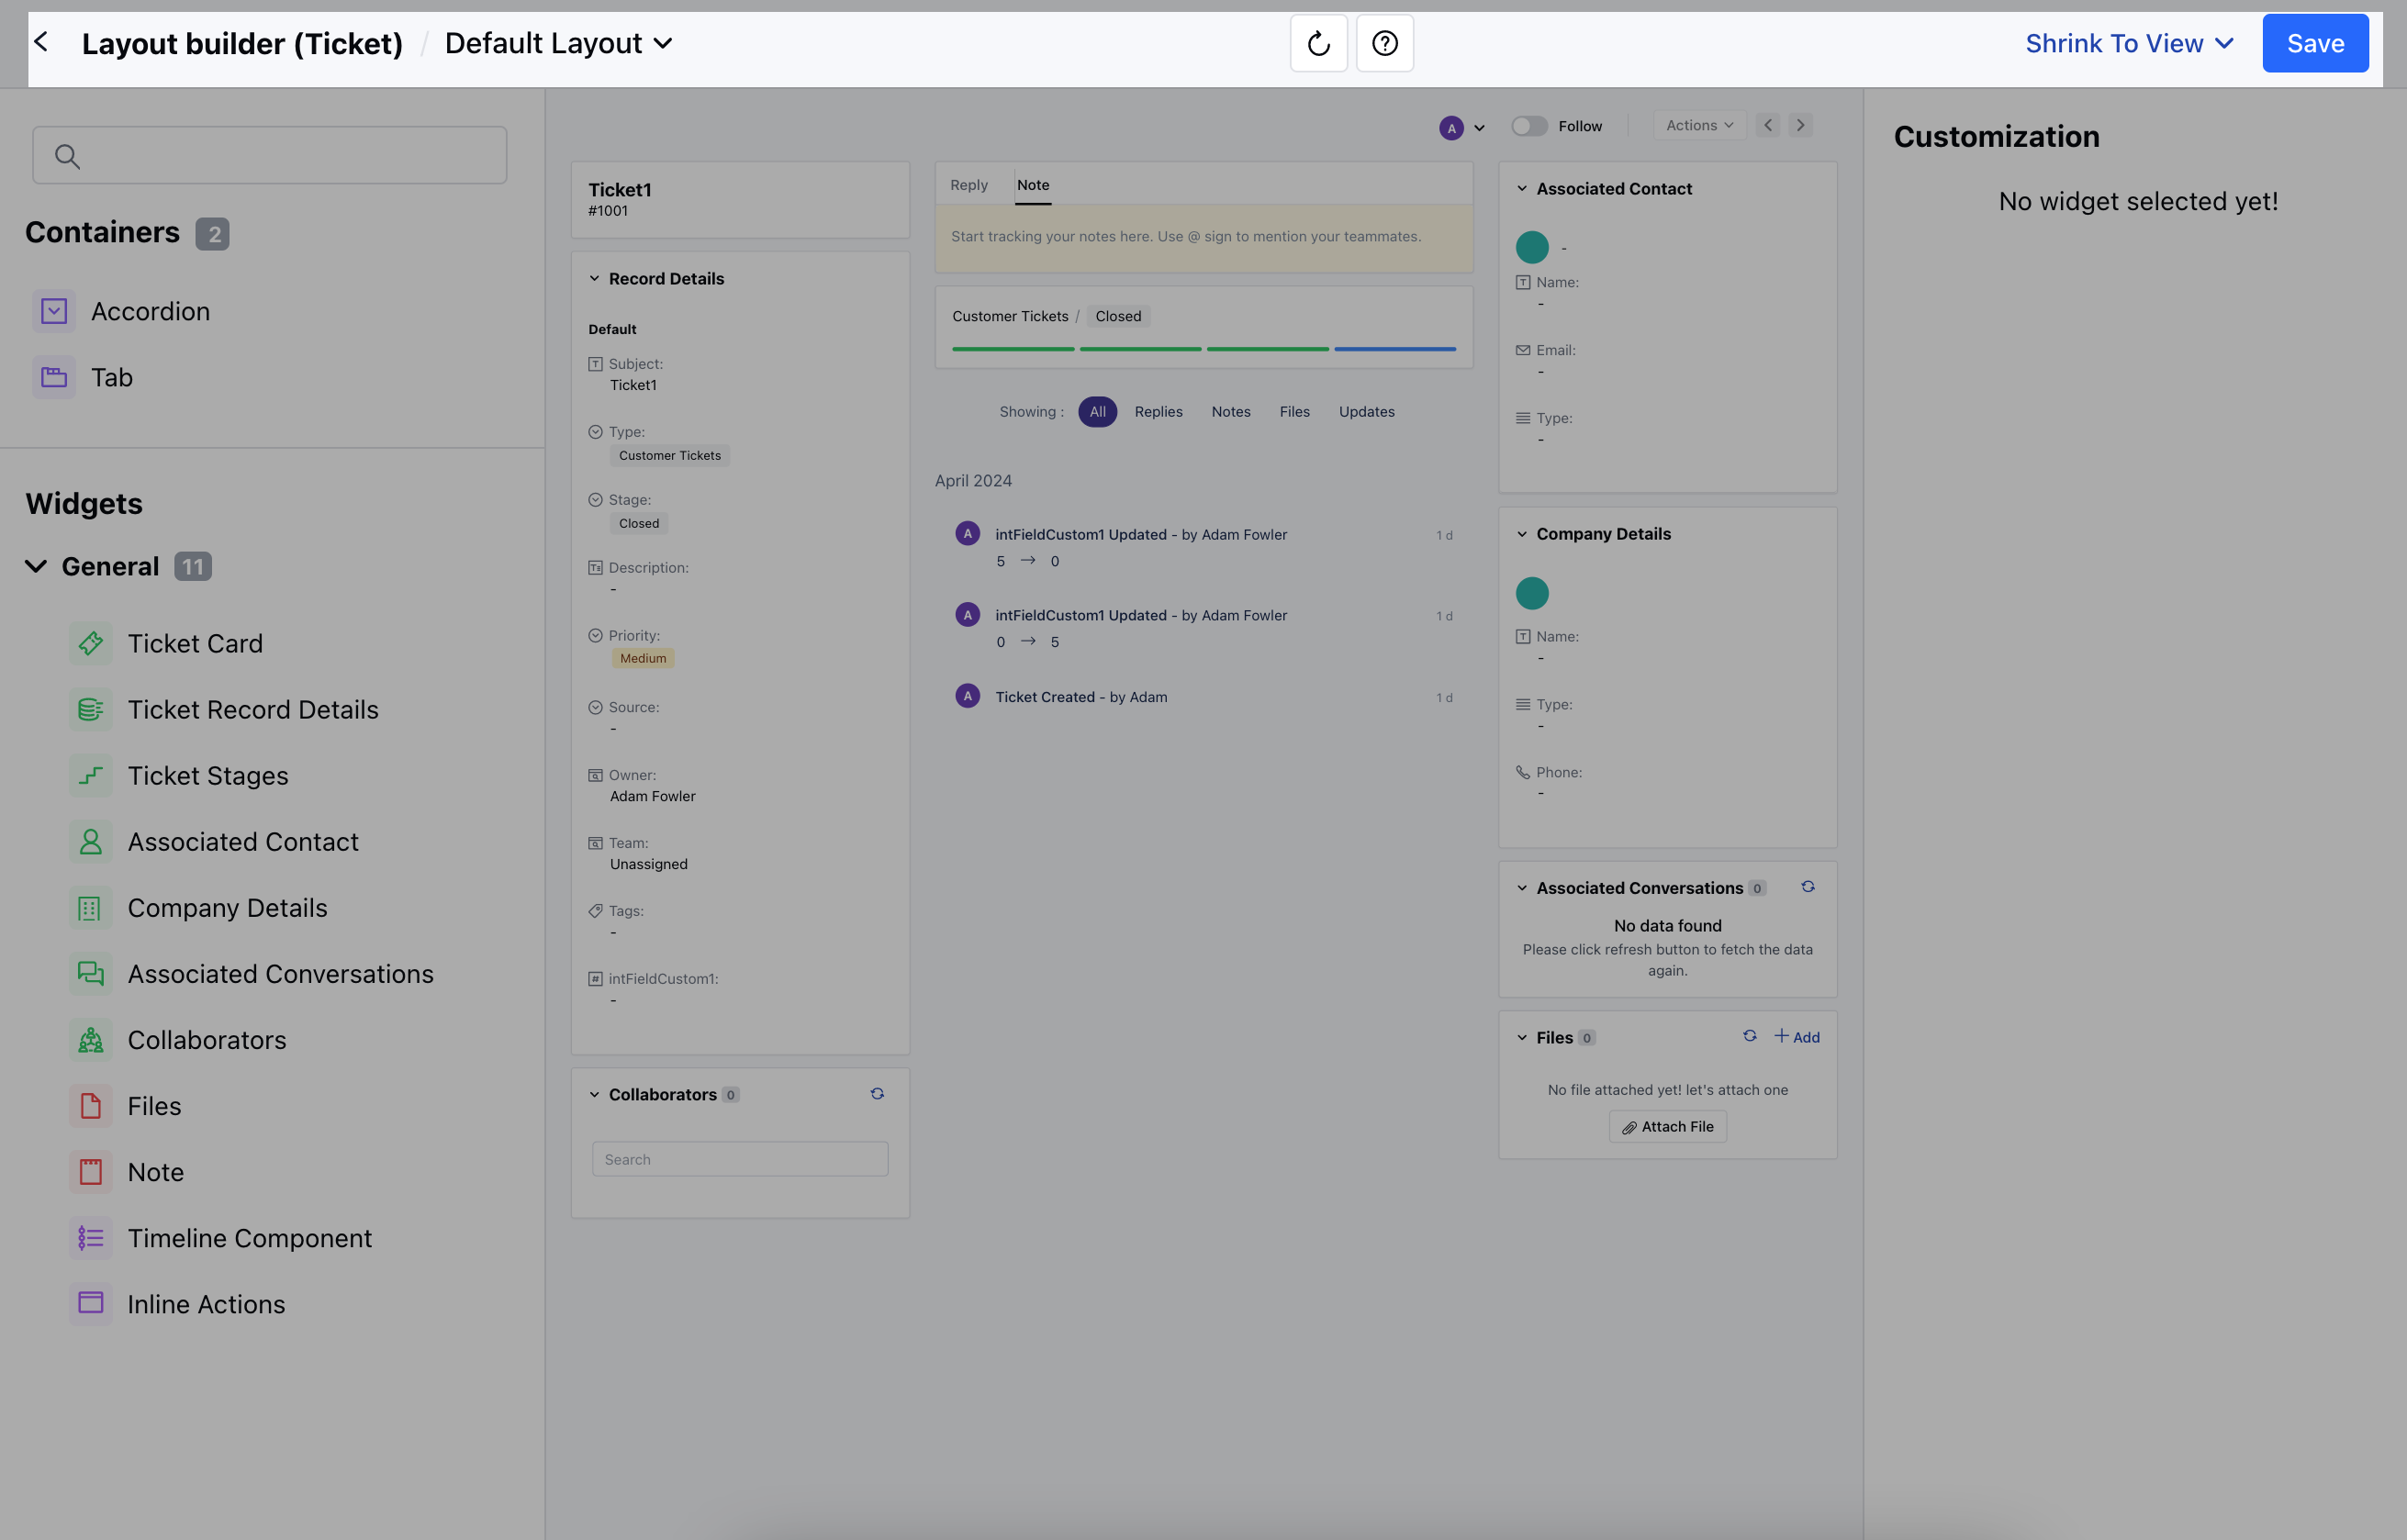
 * You will be redirected to the **Layout Builder Page**. Here, you can drag and drop the Widgets to align with your specific business processes
* Make the desire changes, once done click on **Save**
* You will be redirected to the **Layout Builder Page**. Here, you can drag and drop the Widgets to align with your specific business processes
* Make the desire changes, once done click on **Save**
 * Once you click on the Save option a pop will open asking for the following information
* Here, you can **Change the Layout Name**
* Add the **Description**
* Enable/Disable the Layout for Usage
* Change the Layout **Access**
* Once done, **Save** the information.
* Once you click on the Save option a pop will open asking for the following information
* Here, you can **Change the Layout Name**
* Add the **Description**
* Enable/Disable the Layout for Usage
* Change the Layout **Access**
* Once done, **Save** the information.