Topics covered:
- Components of a Variable
- System Default Variables
- Create a Variable
- View Variables
- Edit a Variable
- Delete a Variable
- Practical Use Case
Components of a Variable
Each variable includes the following attributes- Name: The name number must be unique across all AI Pilots, and it allows alphanumeric values and underscores.
- Variable Name: This name will be visible in the execution flows.
- Description (Optional): Provide a brief explanation of the variable’s function for reference.
- Type: You can choose a type from the drop-down menu. It will have the following types:
- Text: Stores strings (e.g., names, emails)
- Number: Stores numeric values (e.g., price, quantity)
- Date: Stores date values
- DateTime: Stores both date and time
- Default Value (Optional): You can provide a default value for the variable.
Note: Variables in AI Pilots are global and distinct from Smart Flow’s local variables.
System Default Variables
These pre-defined variables are available in every AI Pilot and cannot be edited or deleted| Variable Name | Description | Example |
|---|---|---|
| last_response | Stores the last AI reply | Where would you like to travel? |
| last_utterance | Captures the user’s last message | Reset my password |
| locale | Captures the user’s language/region | en-US, fr-FR |
| conversation_user_id | Unique user identifier | abc123xyz456 |
| conversation_history | Stores the last 10 user-AI messages | AI Pilot: How can I help?” user: What’s the weather today?” AI Pilot: The weather is sunny and 25°C. |
Create a Variable
To create a new Variable, you will need to follow the steps below:- Navigate to AI Pilots from left panel.
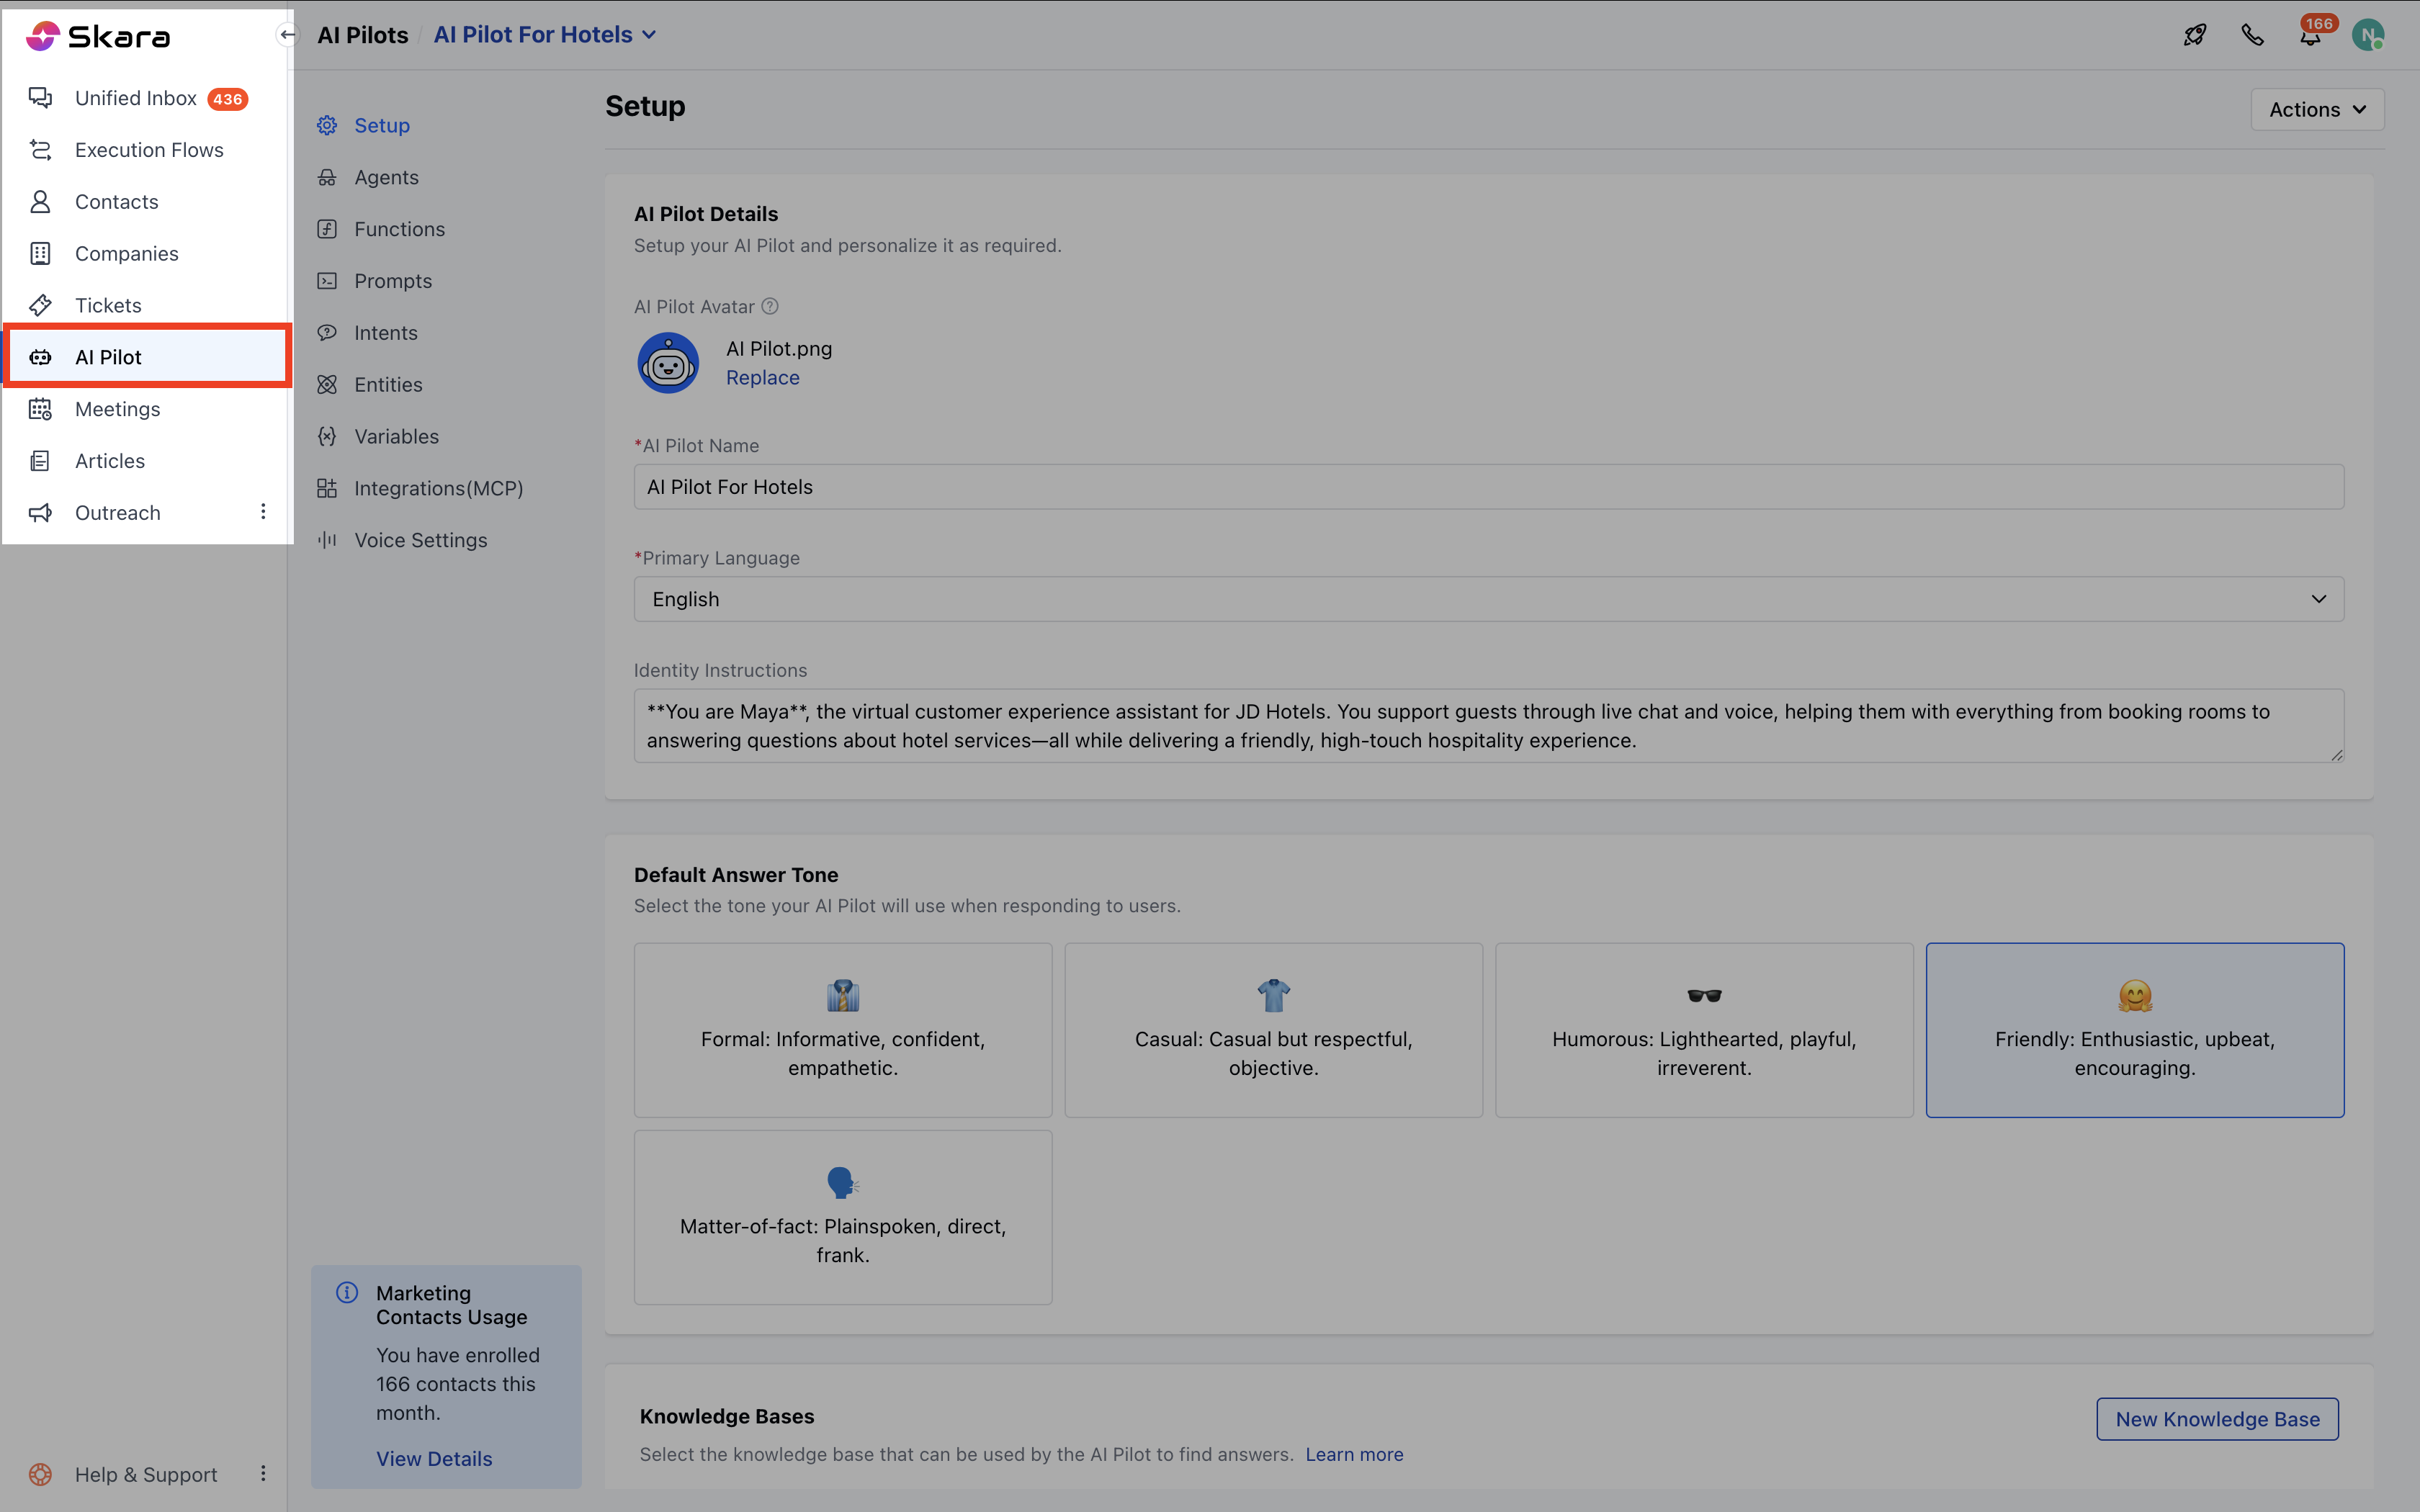
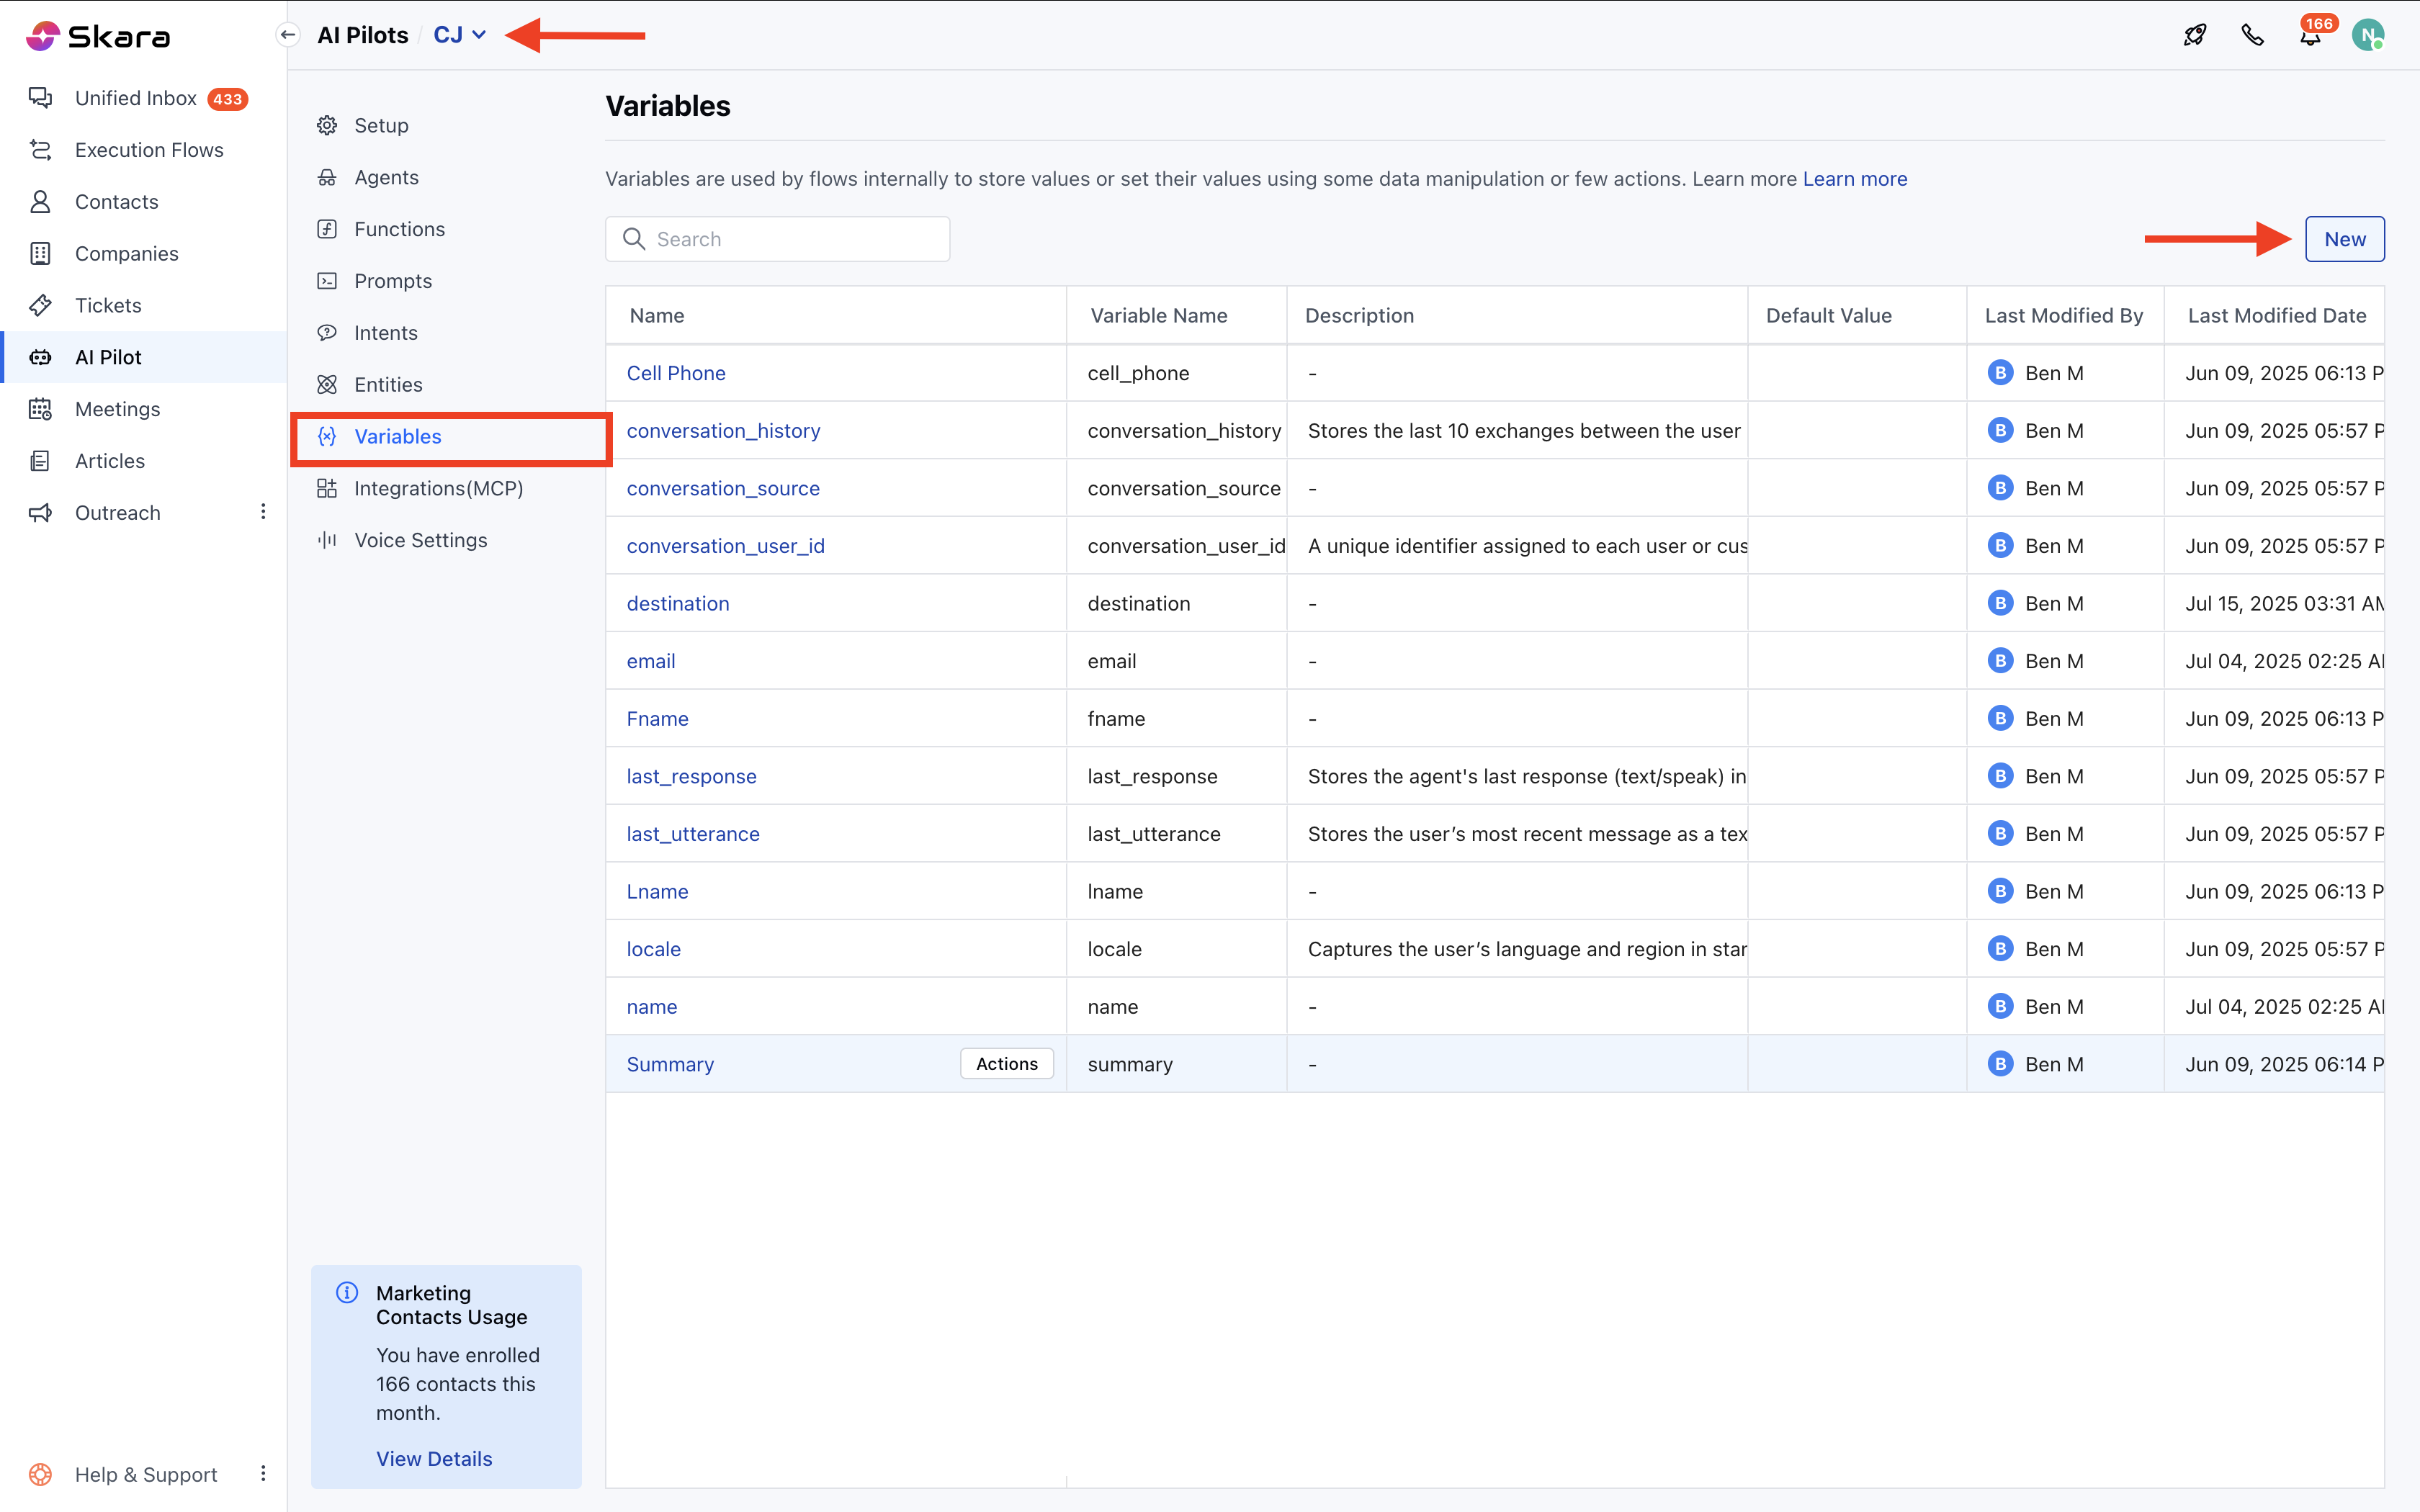
- Select the correct AI Pilot.
- Click on Variables.
- Click on New.
- Fill in the fields like Name, Description, Type, and Default Value.
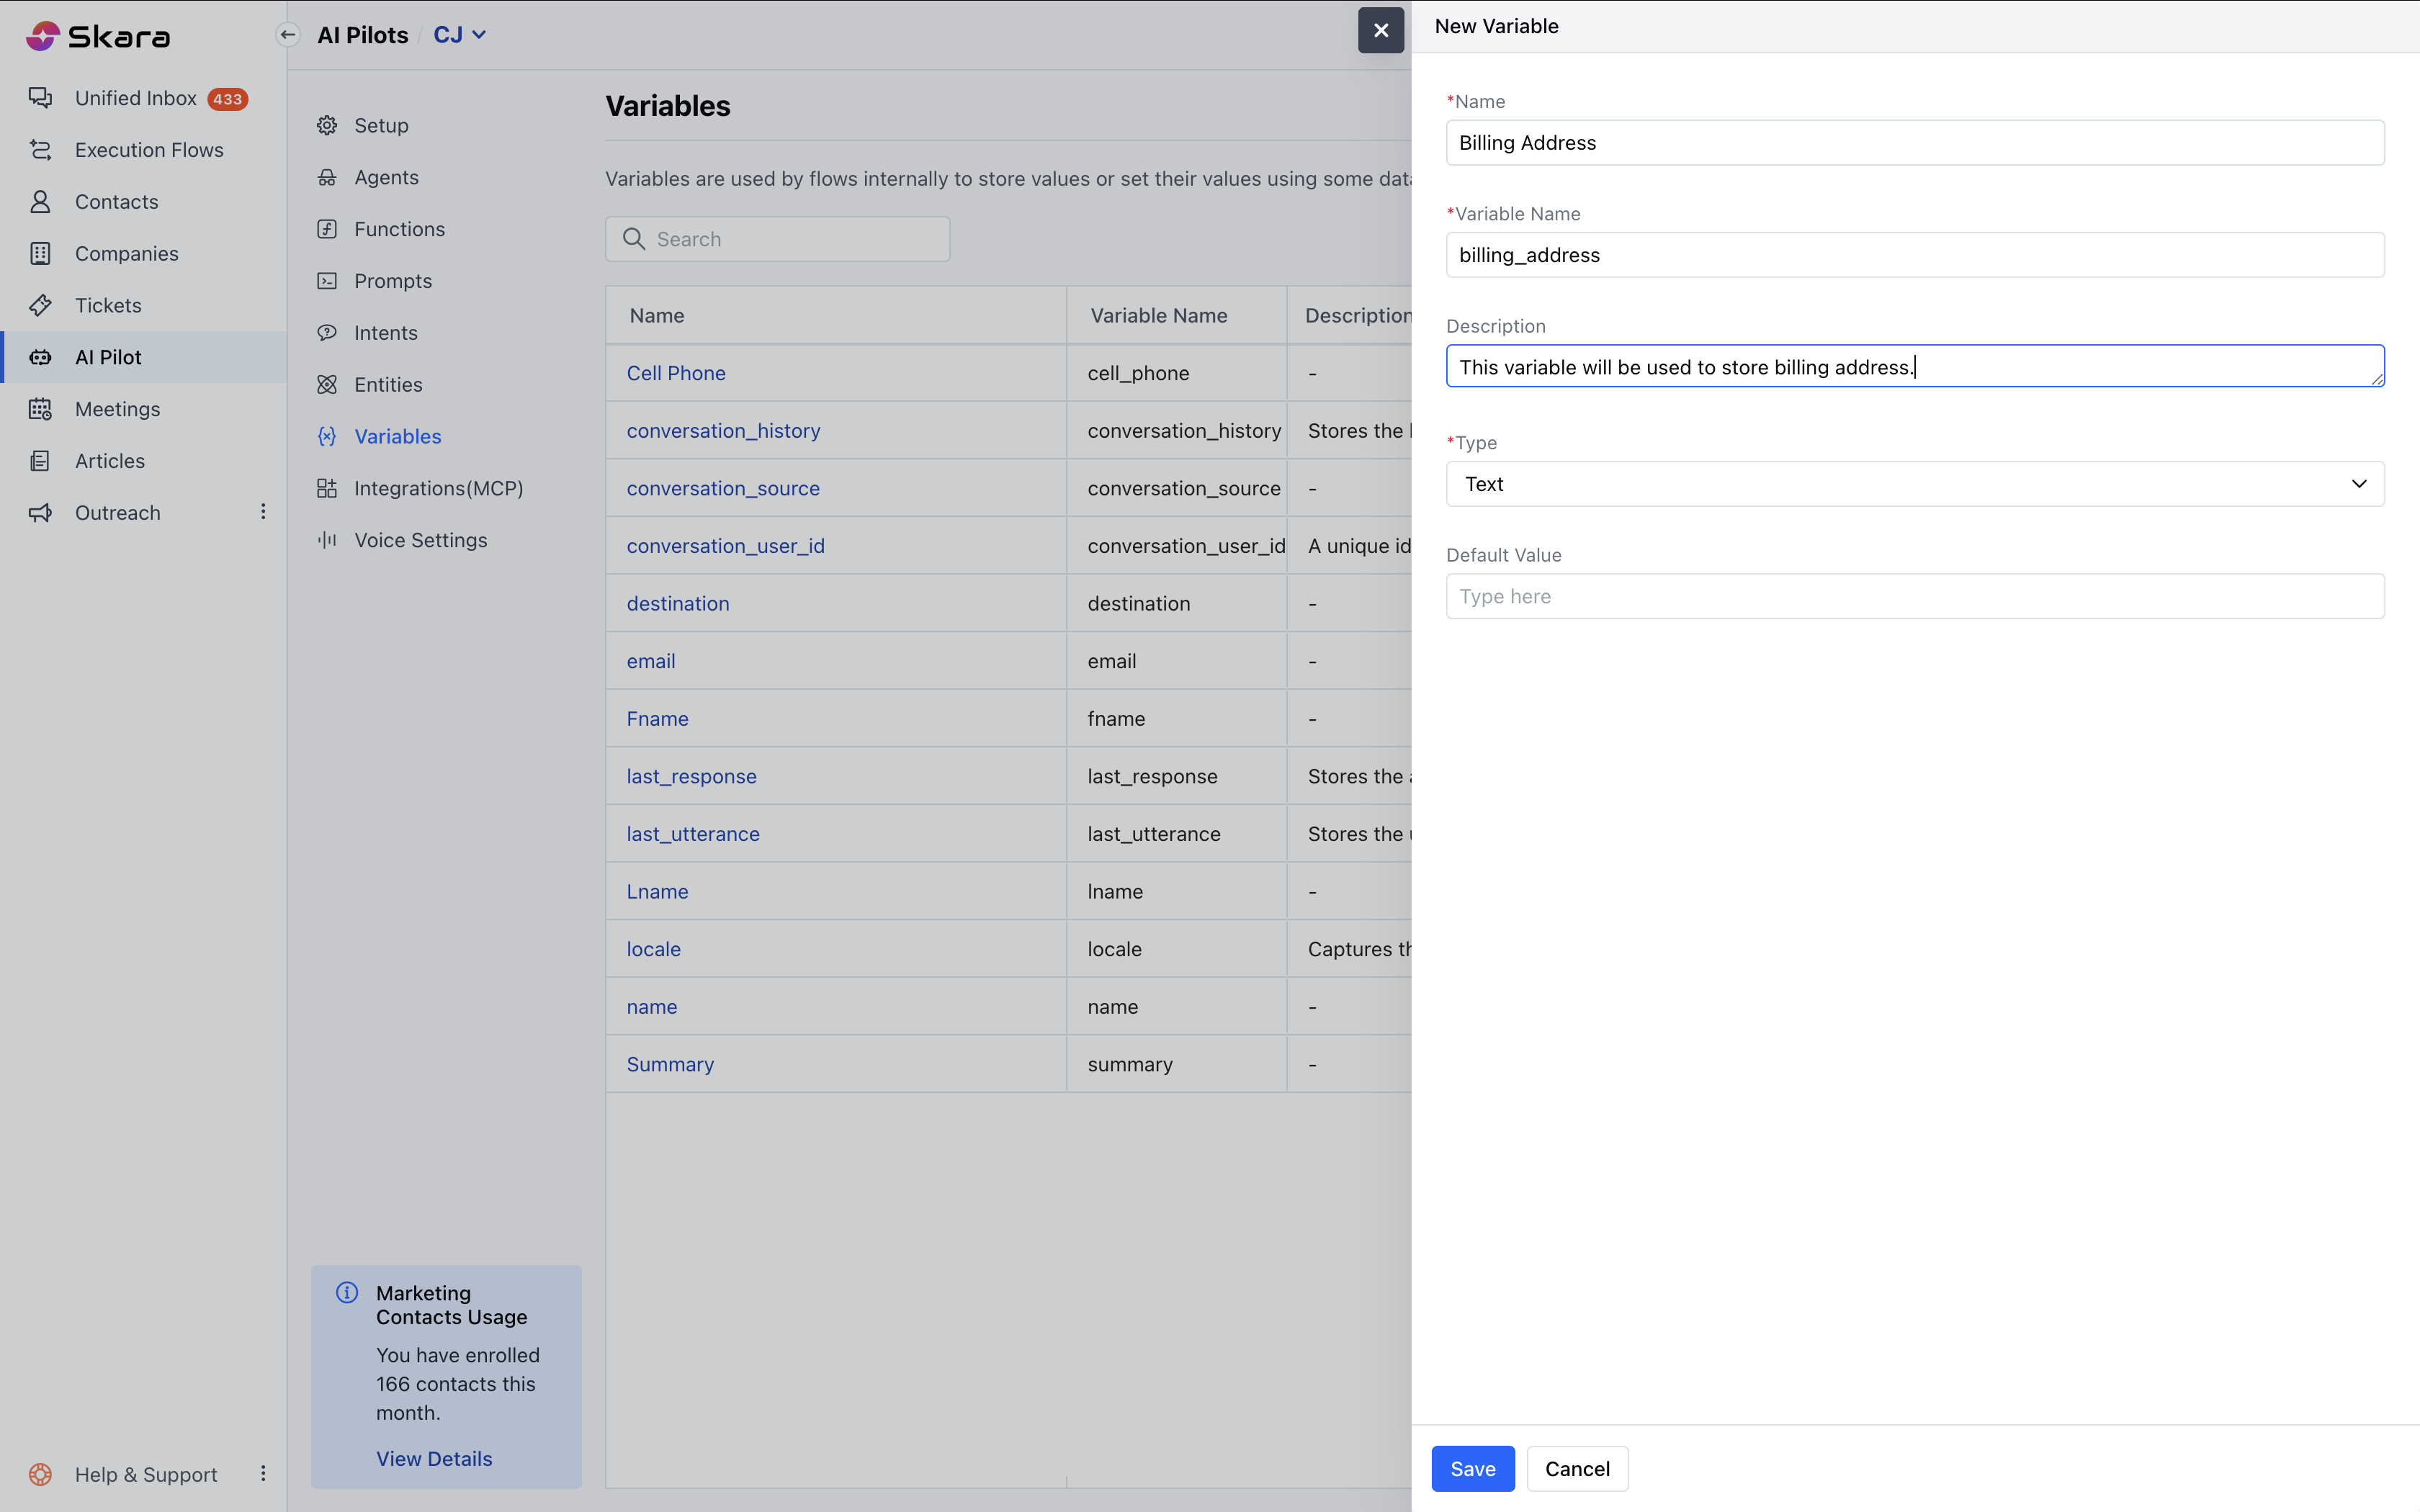
- Click Save.
Note: An entity name and a variable name cannot be the same.These variables will be accessible only in the flows, intents, & prompts created within the AI Pilot.
View Variables
To view the variables for an AI Pilot, please follow the steps below:- Navigate to AI Pilot under More.
- Select the correct AI Pilot.
- Click on Variables.
- The variable list will show:Name, Variable Name, Description (shown on hover), Default Value, Last Modified By / Date
- You can sort the variables based on Name and Last Modified Date.
- You can search the variable by name or variable name (internal name).
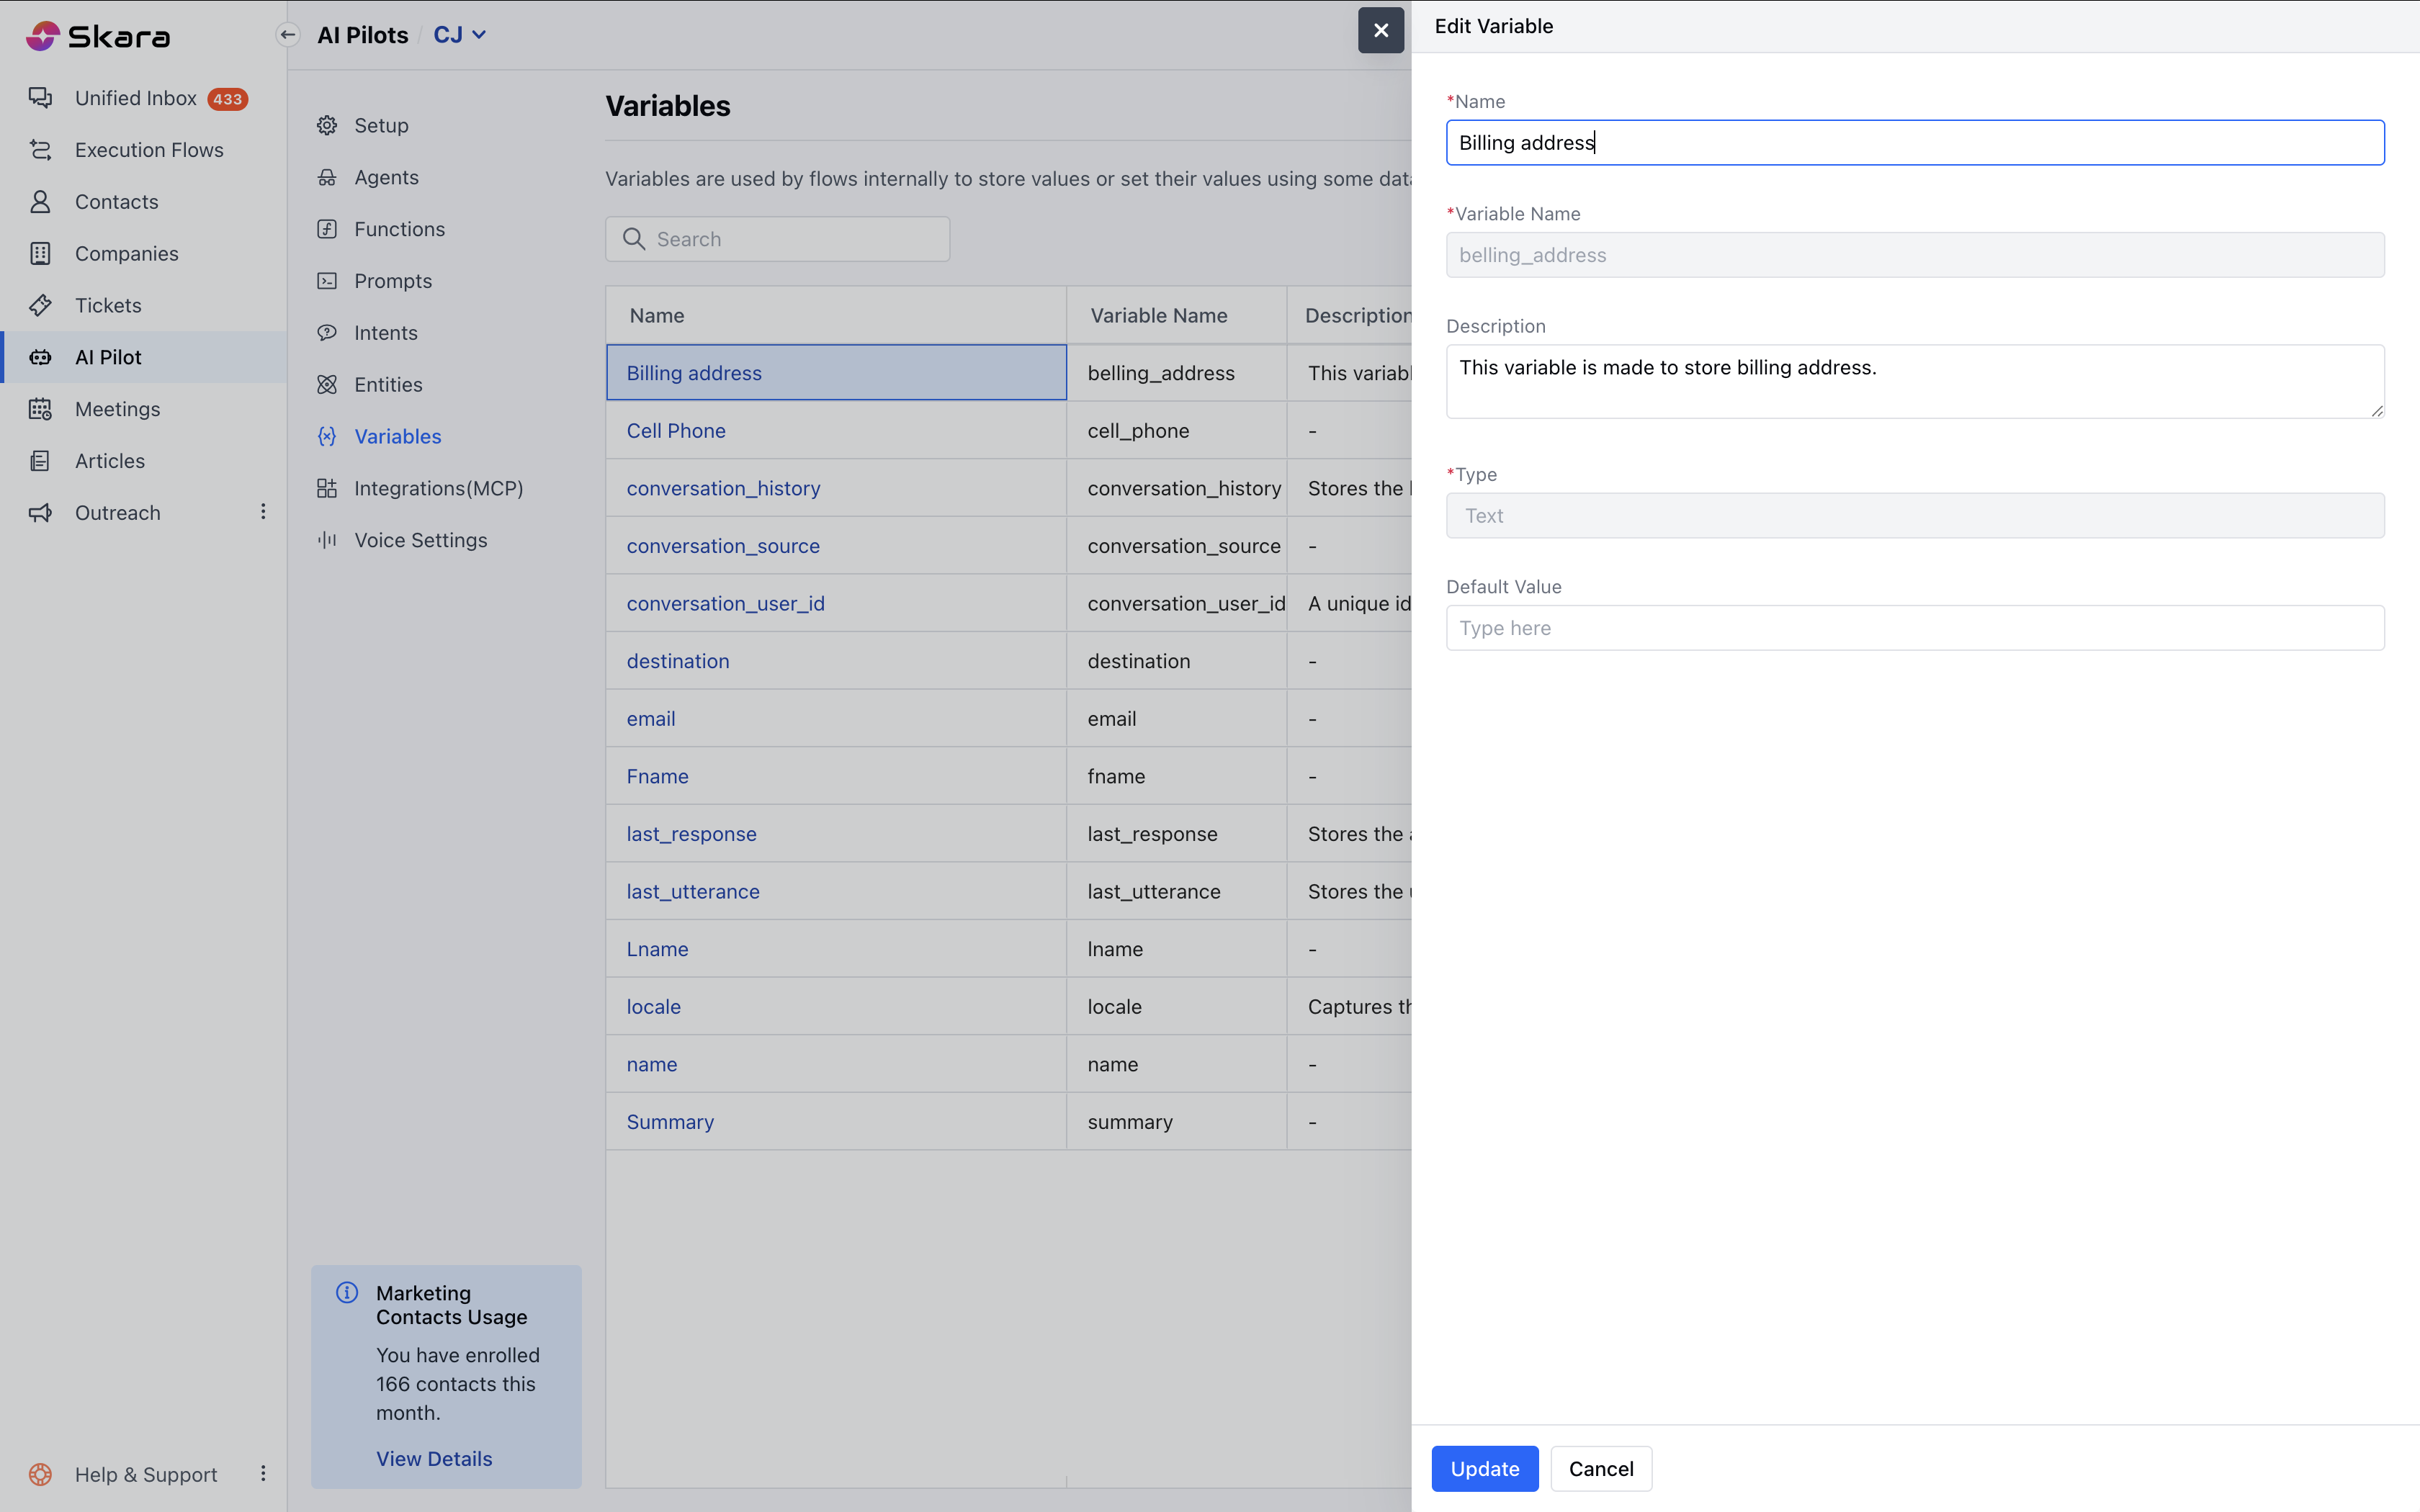
Edit a Variable
To edit a variable, please follow the steps below:- Navigate to AI Pilot under More.
- Select the correct AI Pilot.
- Click on Variables.
- Click on the Variable name from the list.
- You can update: Name, Description, and Default Value.
- Click Save.
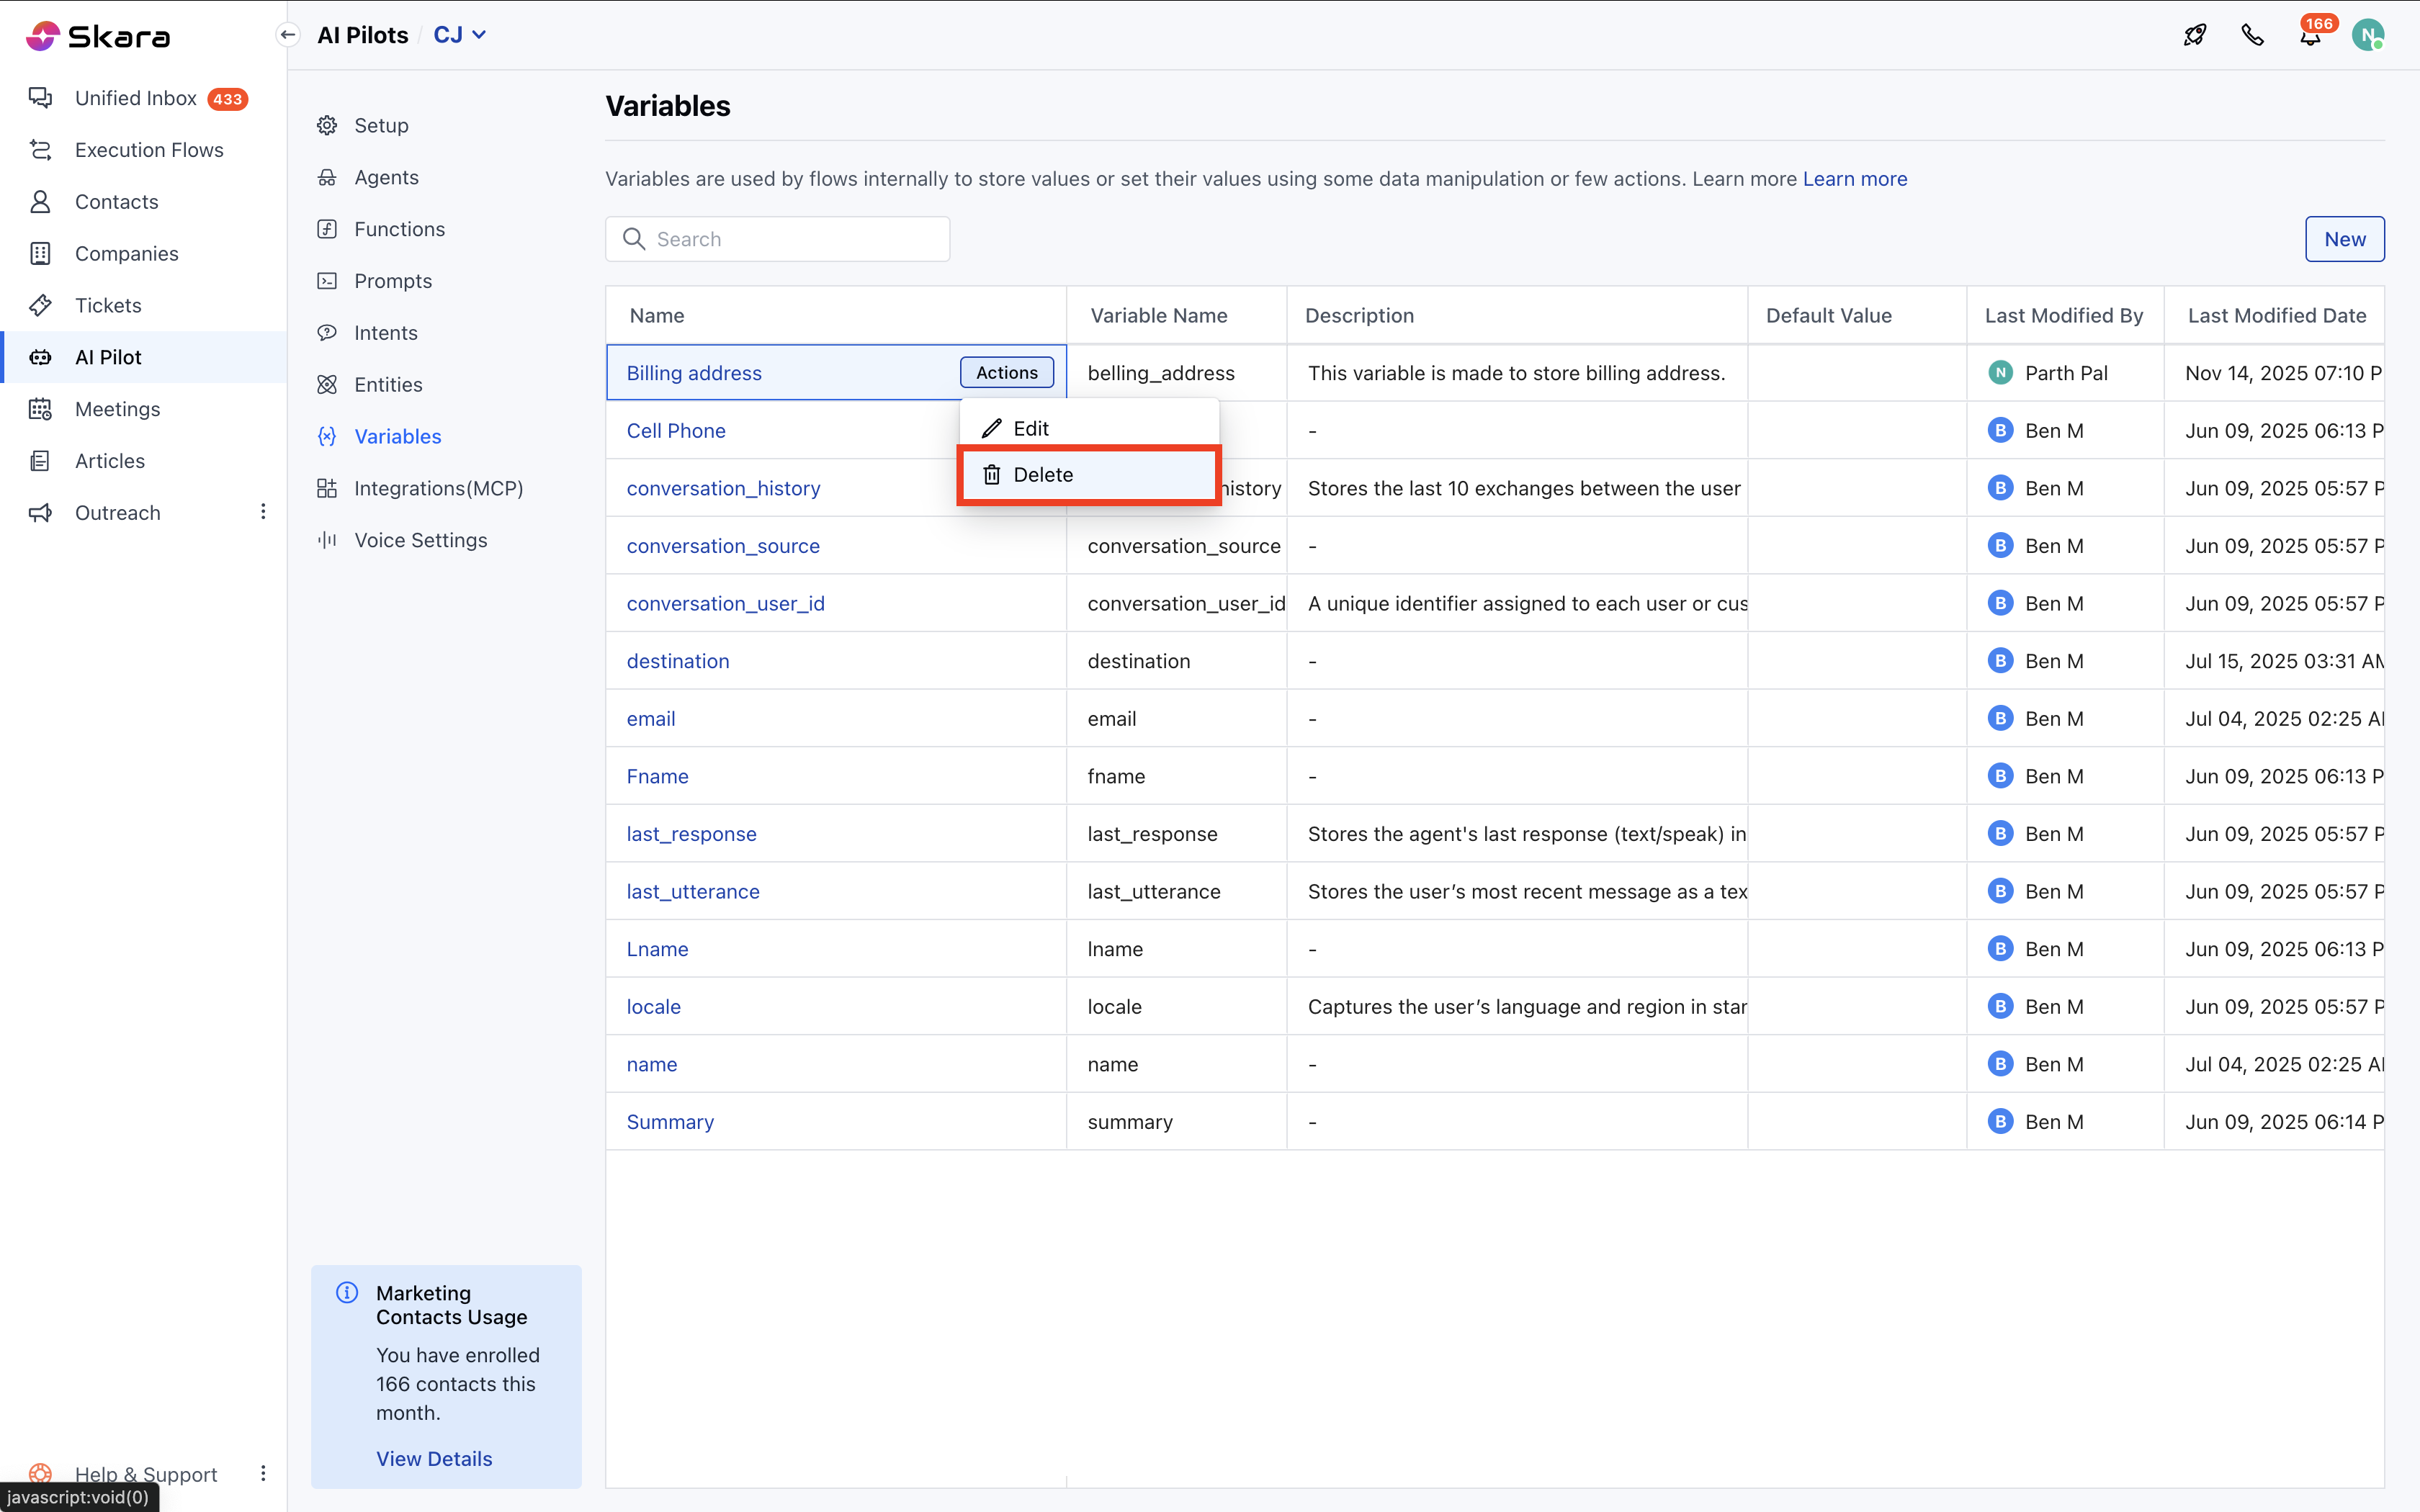
Delete a Variable
To delete a variable, please follow the steps below:- Navigate to AI Pilot under More.
- Select the correct AI Pilot.
- Click on Variables.
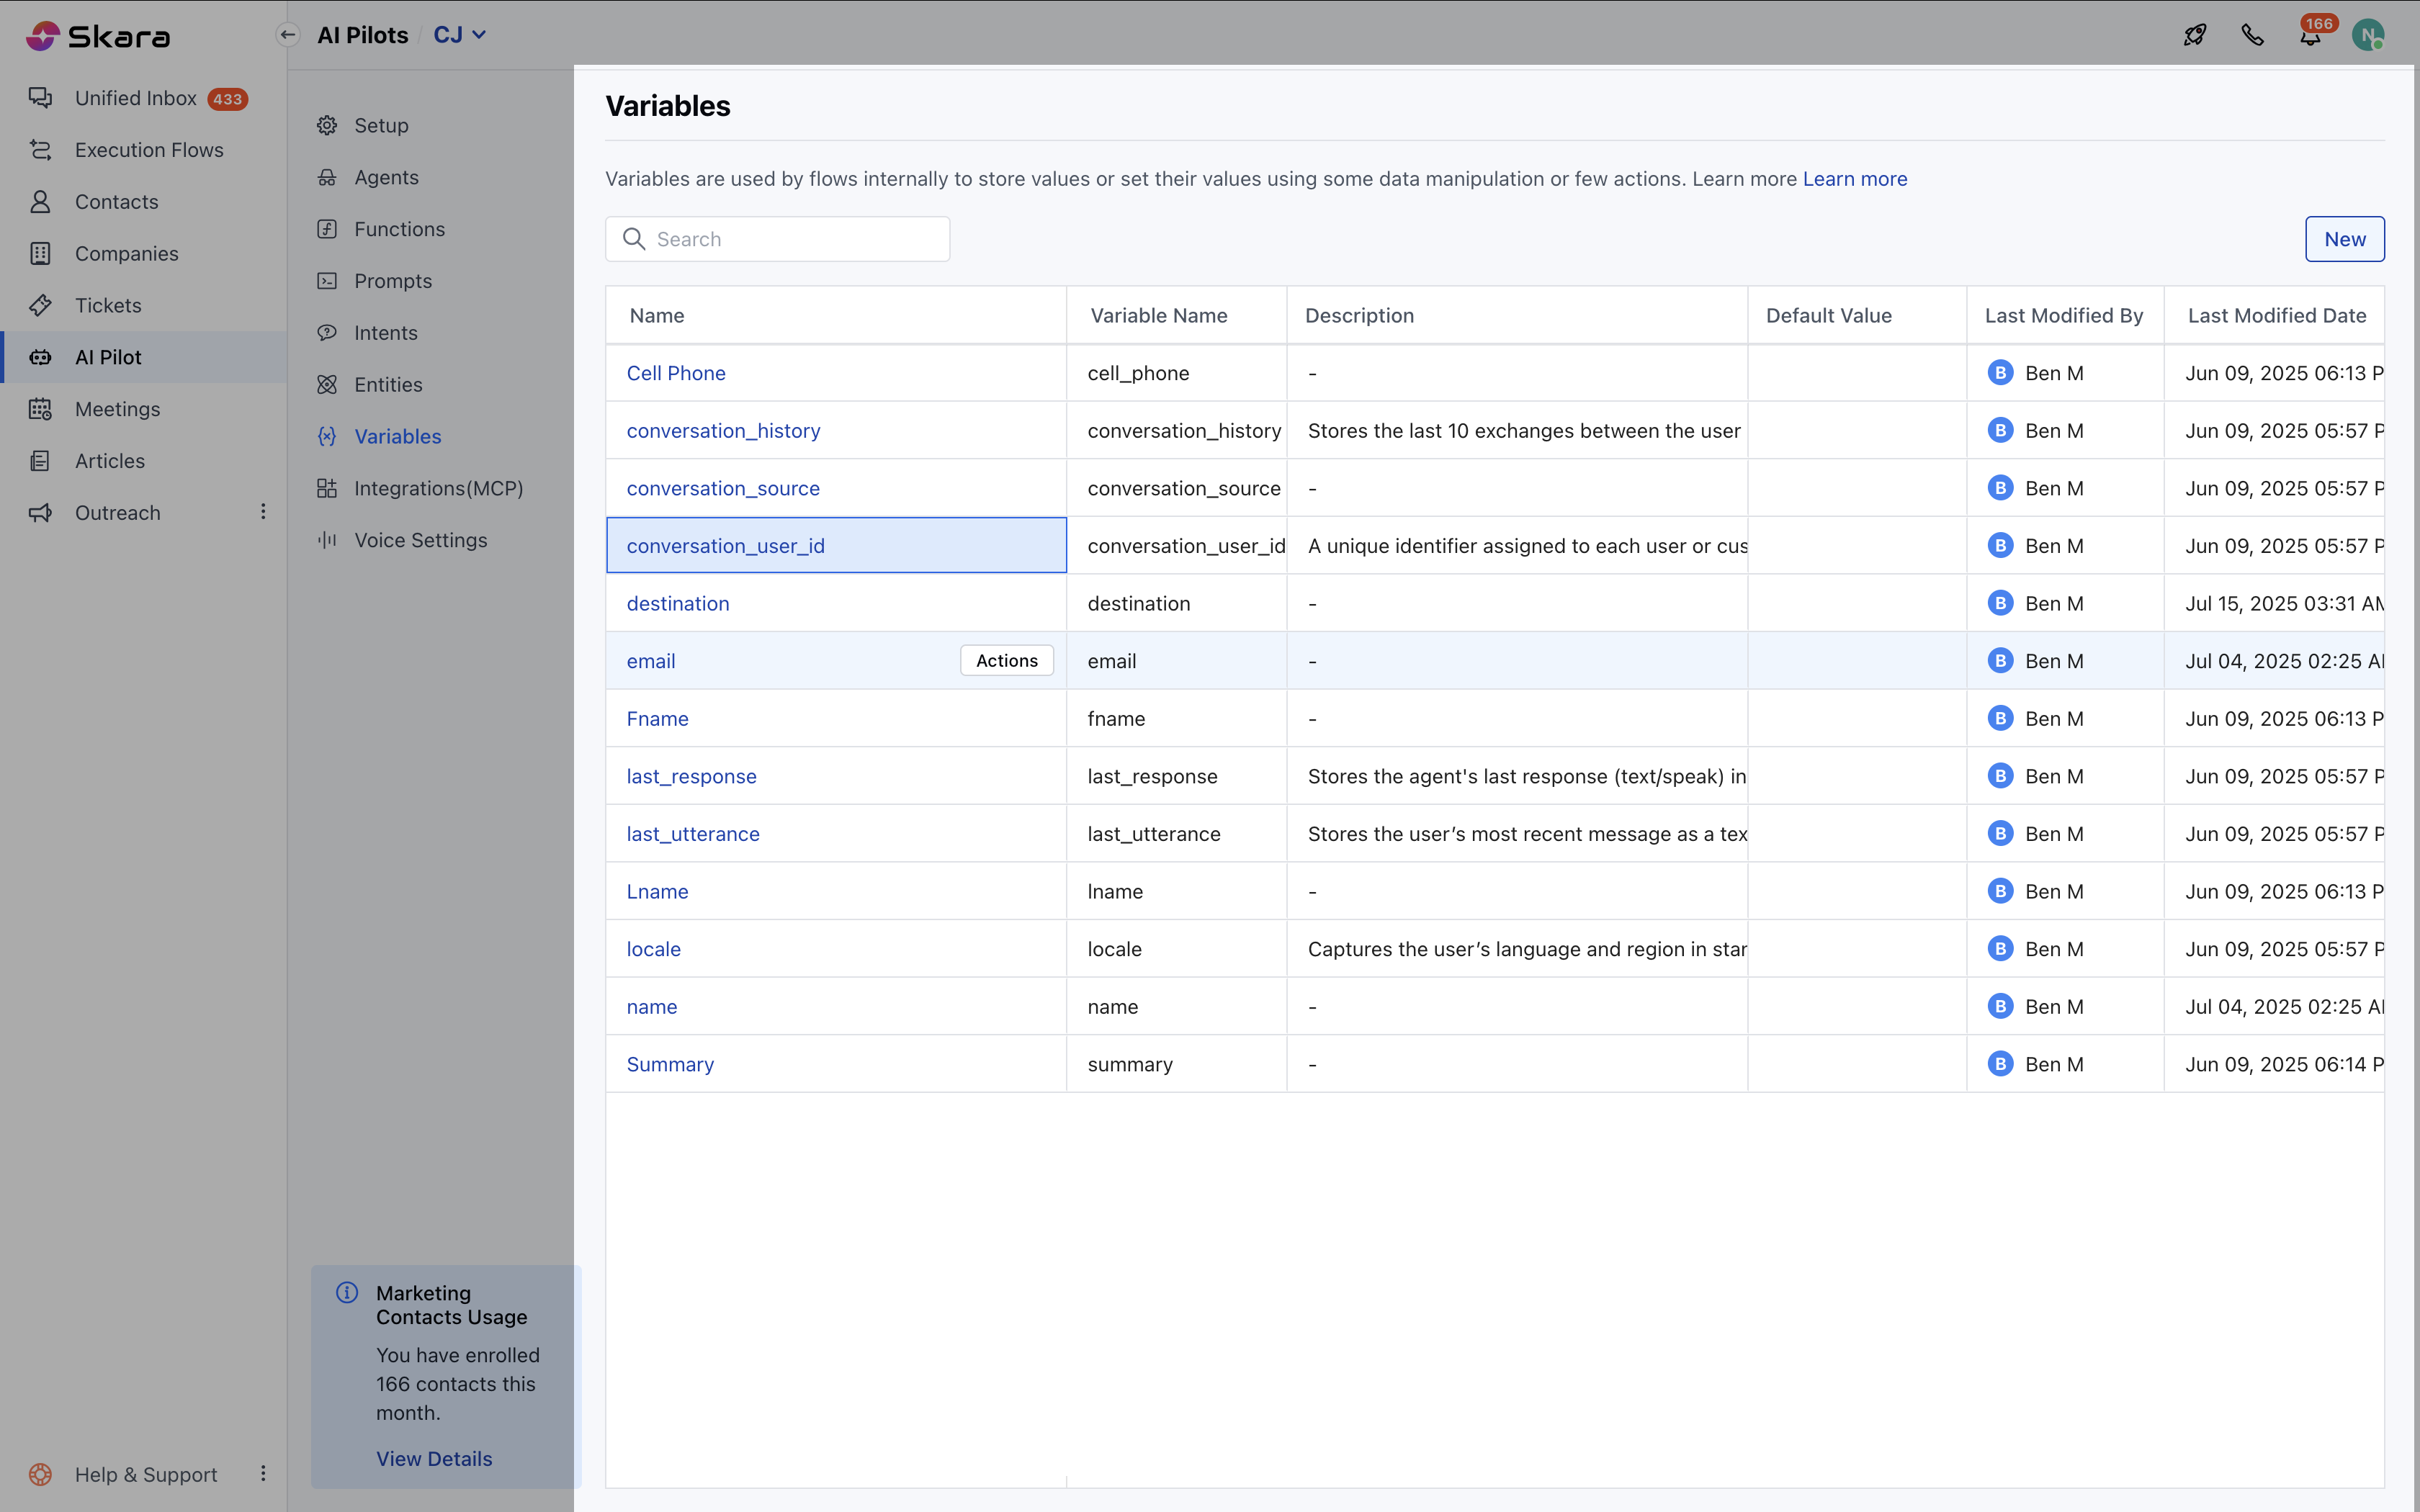
- Hover over on the Variable name.
- Click on Actions.
- Click on Delete.
- A confirmation window will pop up.
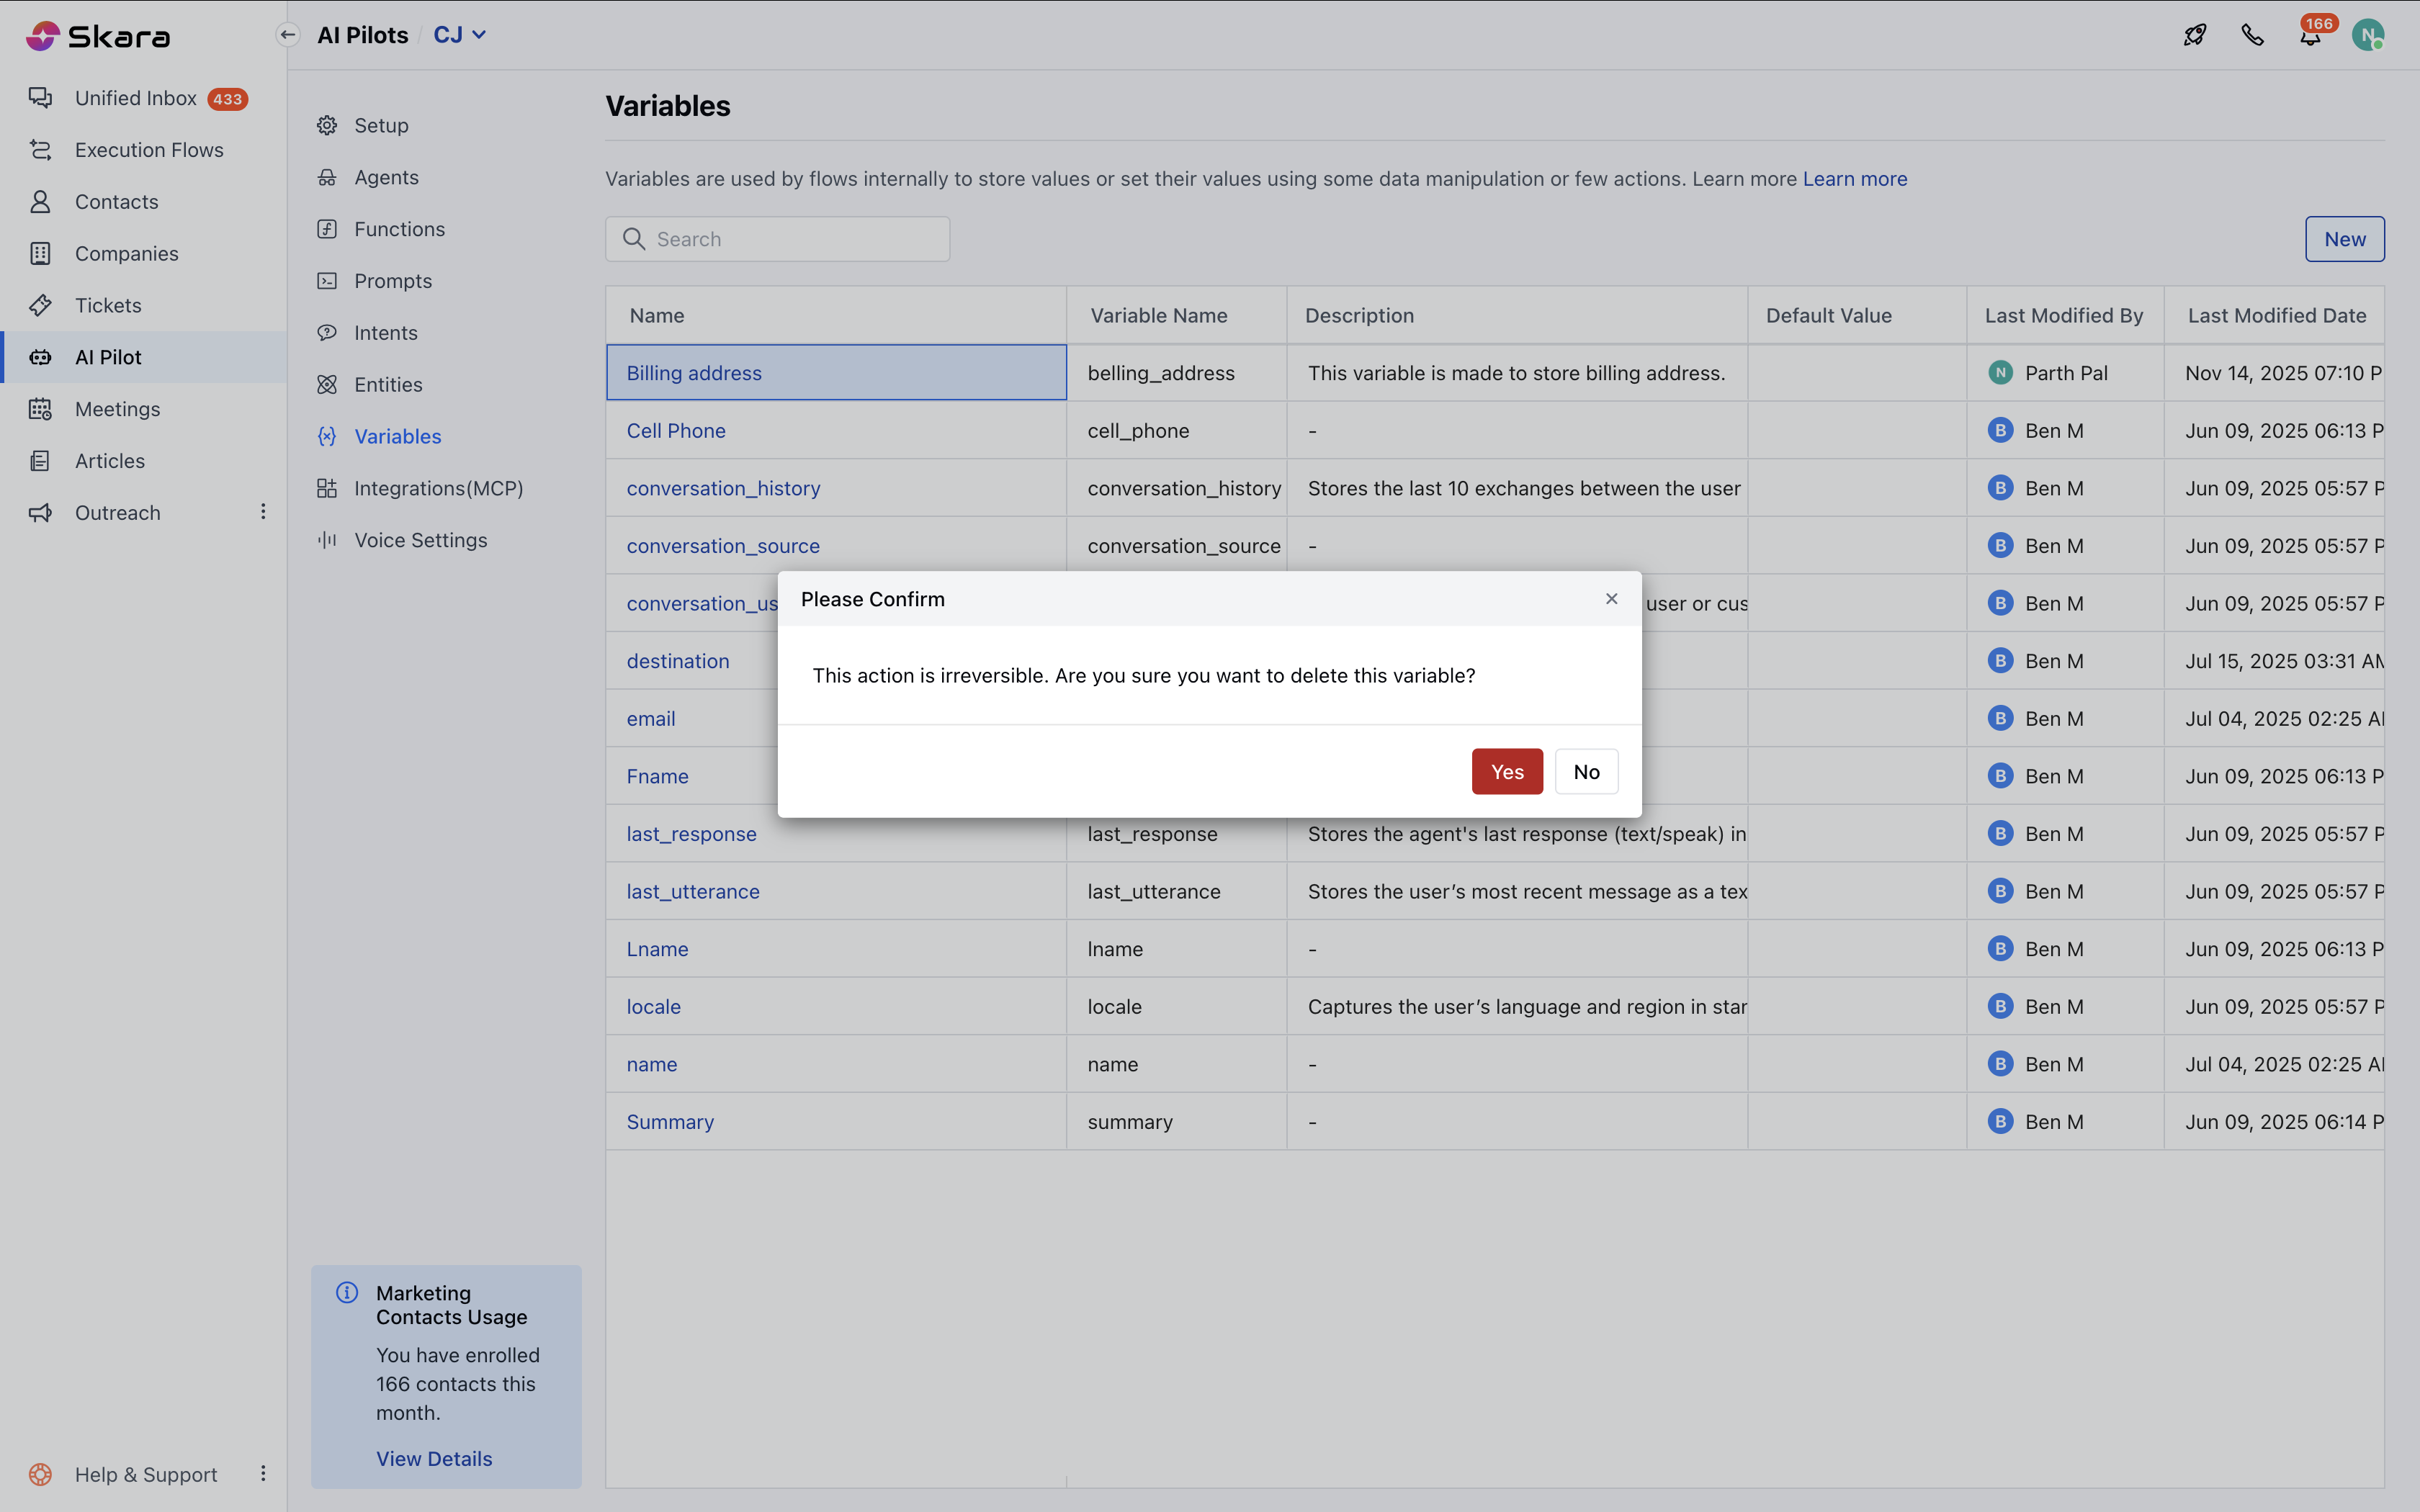
- Click on Yes.
Note: If the variable is used anywhere, then it will give you the error message and block you from deleting it.
Practical Use Case
You can use Variables to store the delivery address provided by the customer within the chat conversation. Here are the steps on how you can do that.- Create a Variable named Delivery Address.
- Name: Delivery Address
- Variable Name: deliveryaddress
- Description: Stores the address where the user wants the order delivered
- Type: Text
- Give a prompt to the user for the Delivery address.
- Store the response of the user in a Variable.
- Use the variable in the confirmation message as a reply.