Note: The option to Manage Global Availability can only be done by the users having Admin Profile.
- Topics covered:
- How to Manage the Availability
- Creating a New Schedule
- Edit Schedule
- Edit Title
- Delete Schedule
- Clone Schedule
- Set Schedule as Default
How to Manage the Availability
To manage Global Availability follow the below mentioned steps:- Navigate to theMore option from left sidebar menu
- Click on Meeting Scheduler
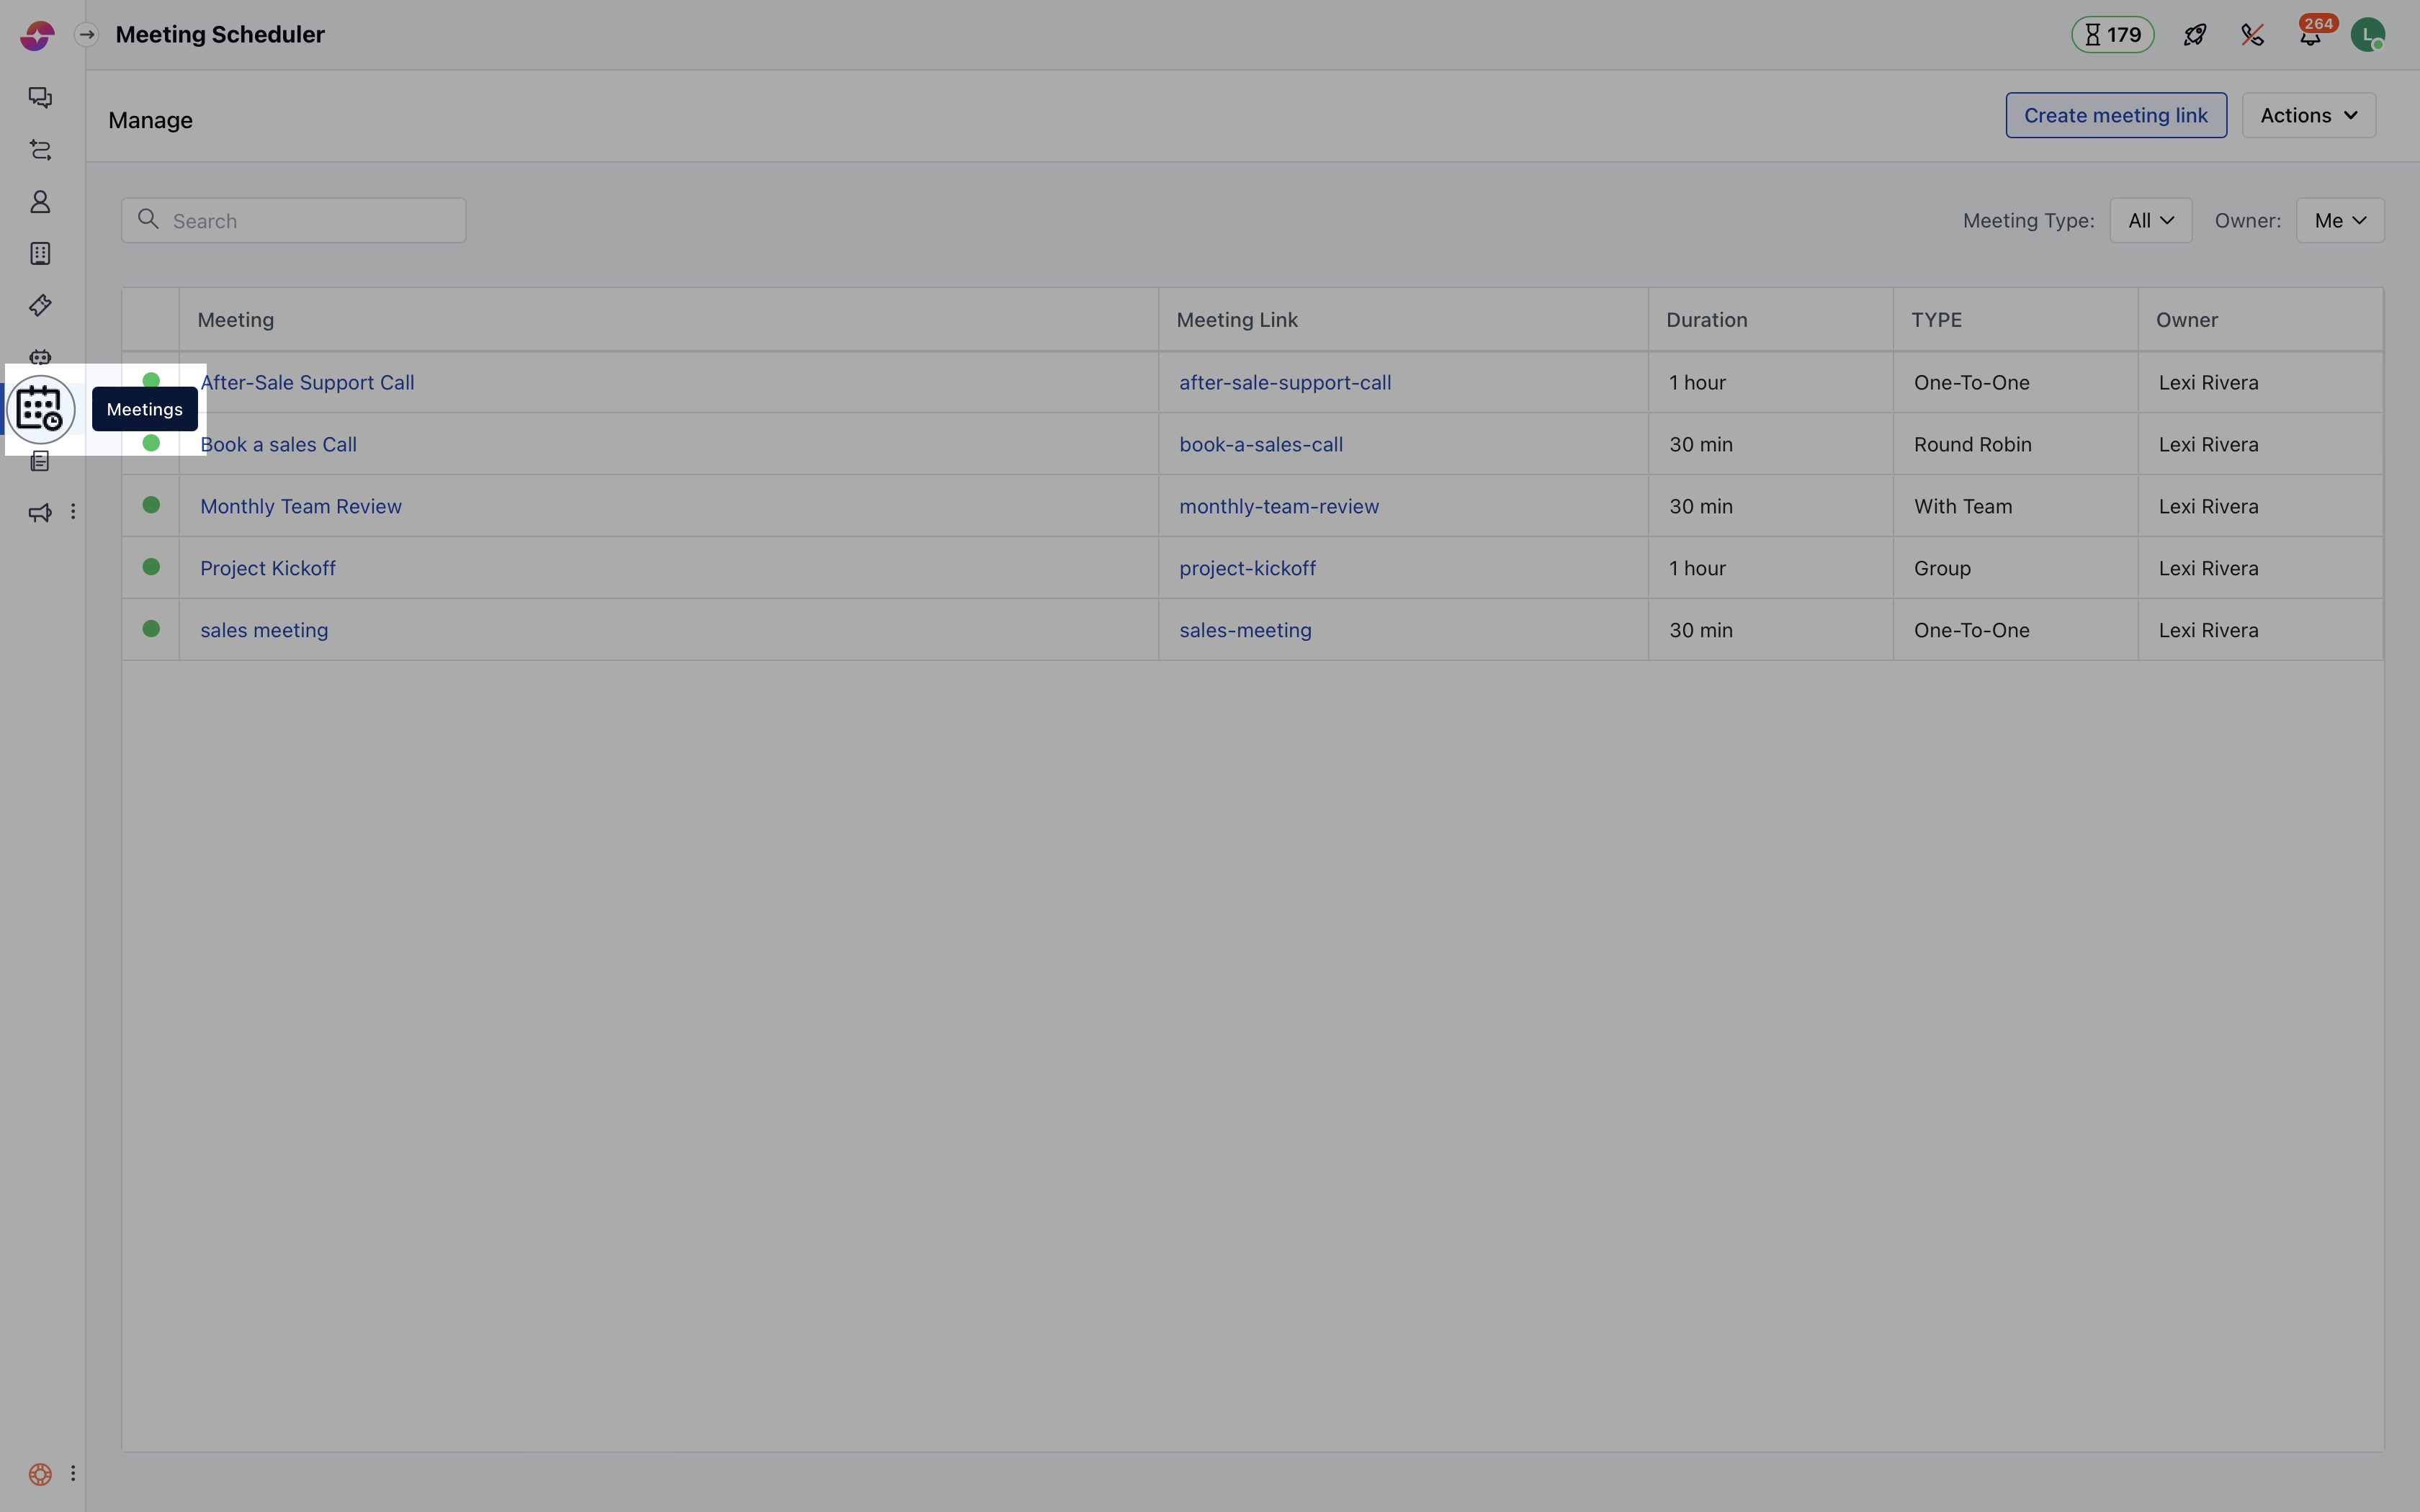
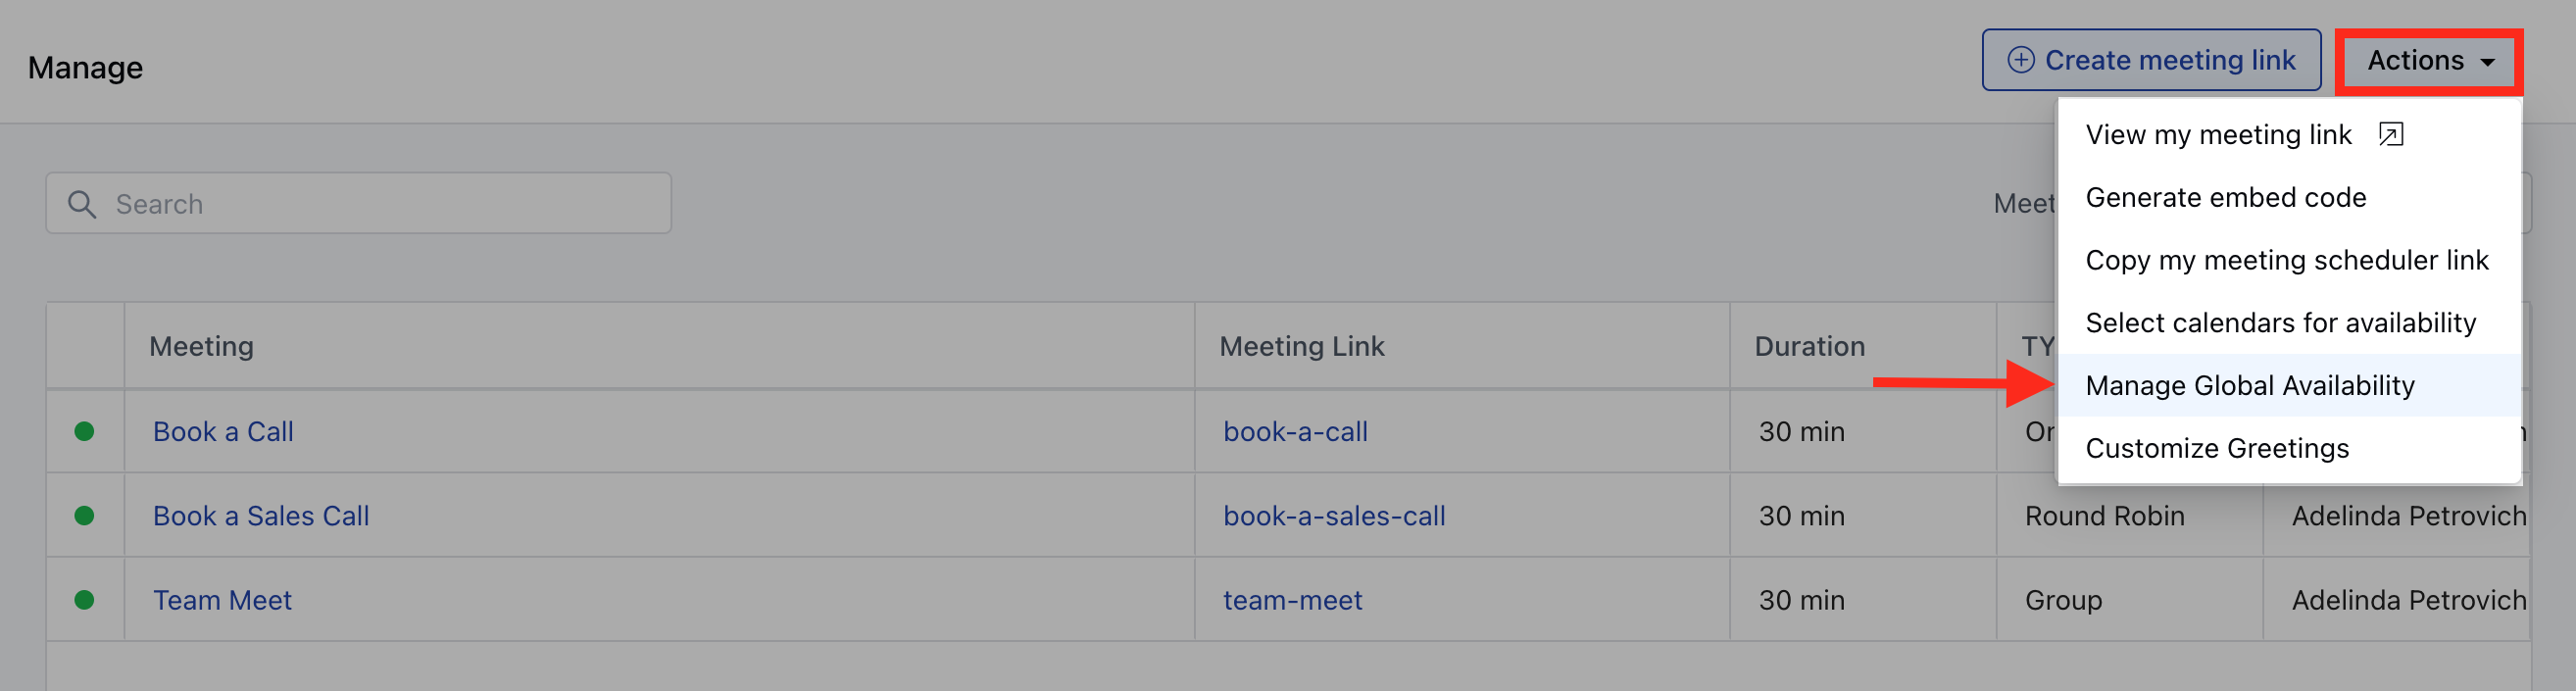
- Under Actions on the top right corner select Manage Global Availability.
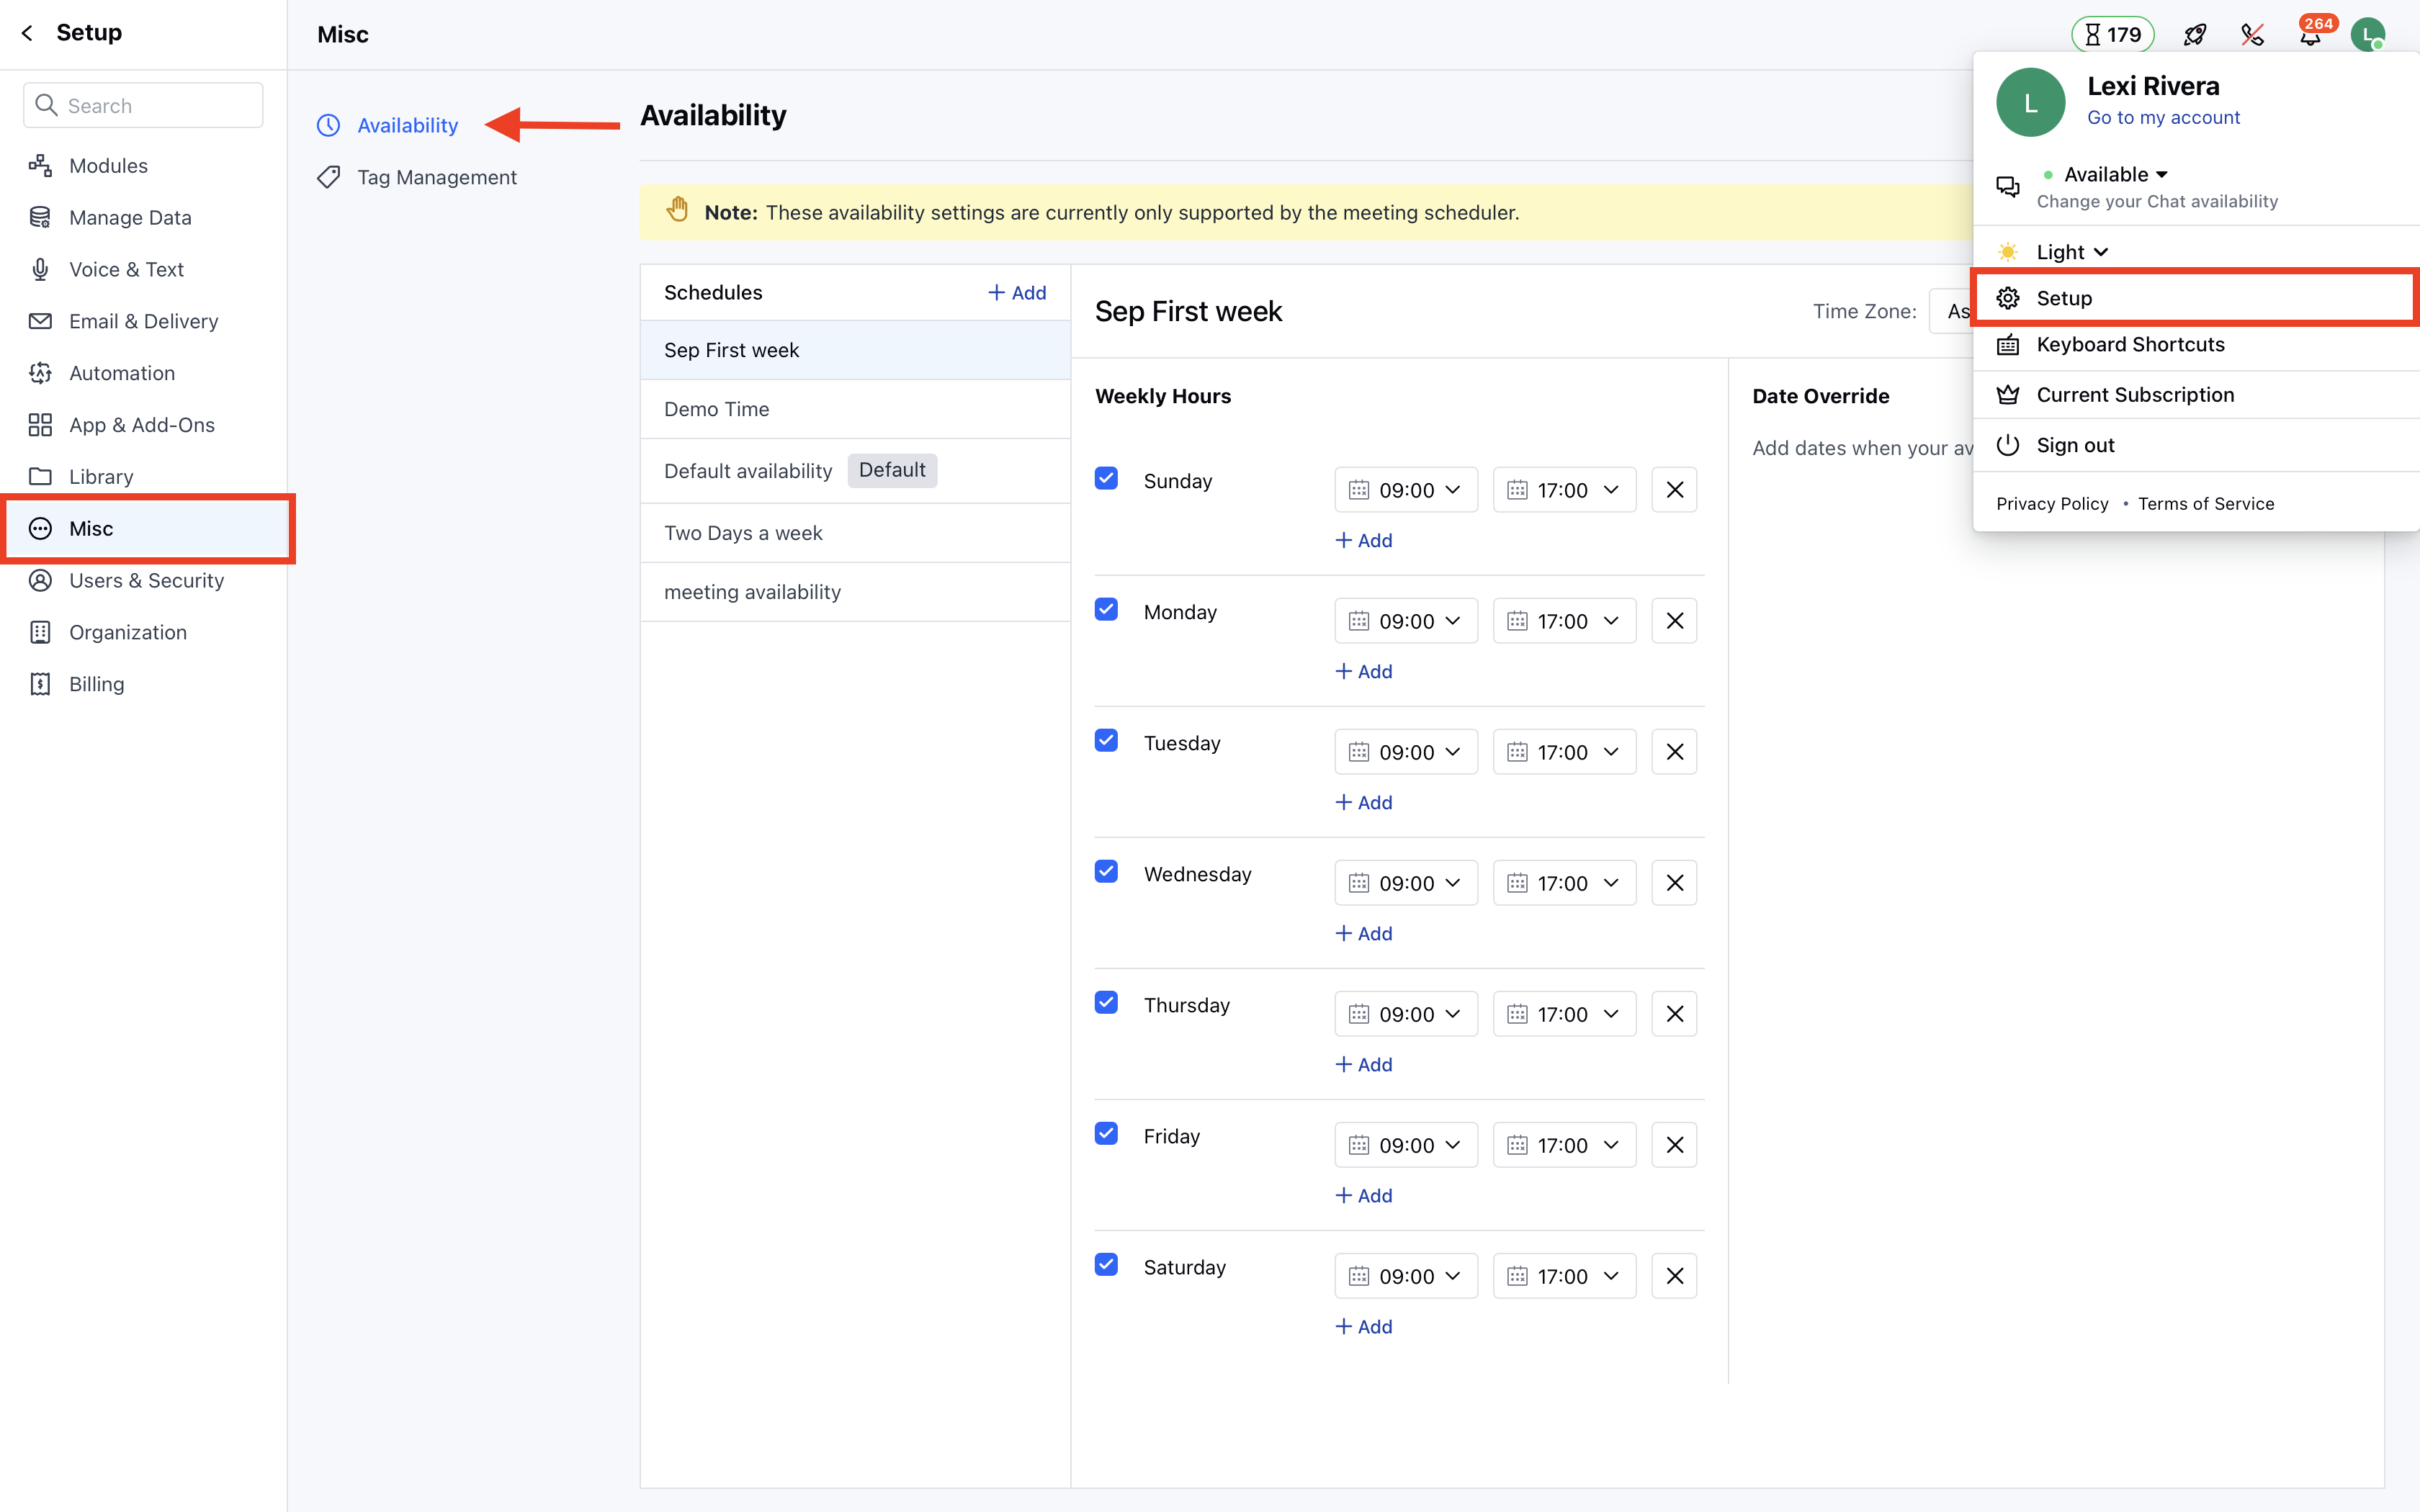
- Navigate to the Profile icon on the top right corner.
- Click on the Setup .
- Head over to the Misc category
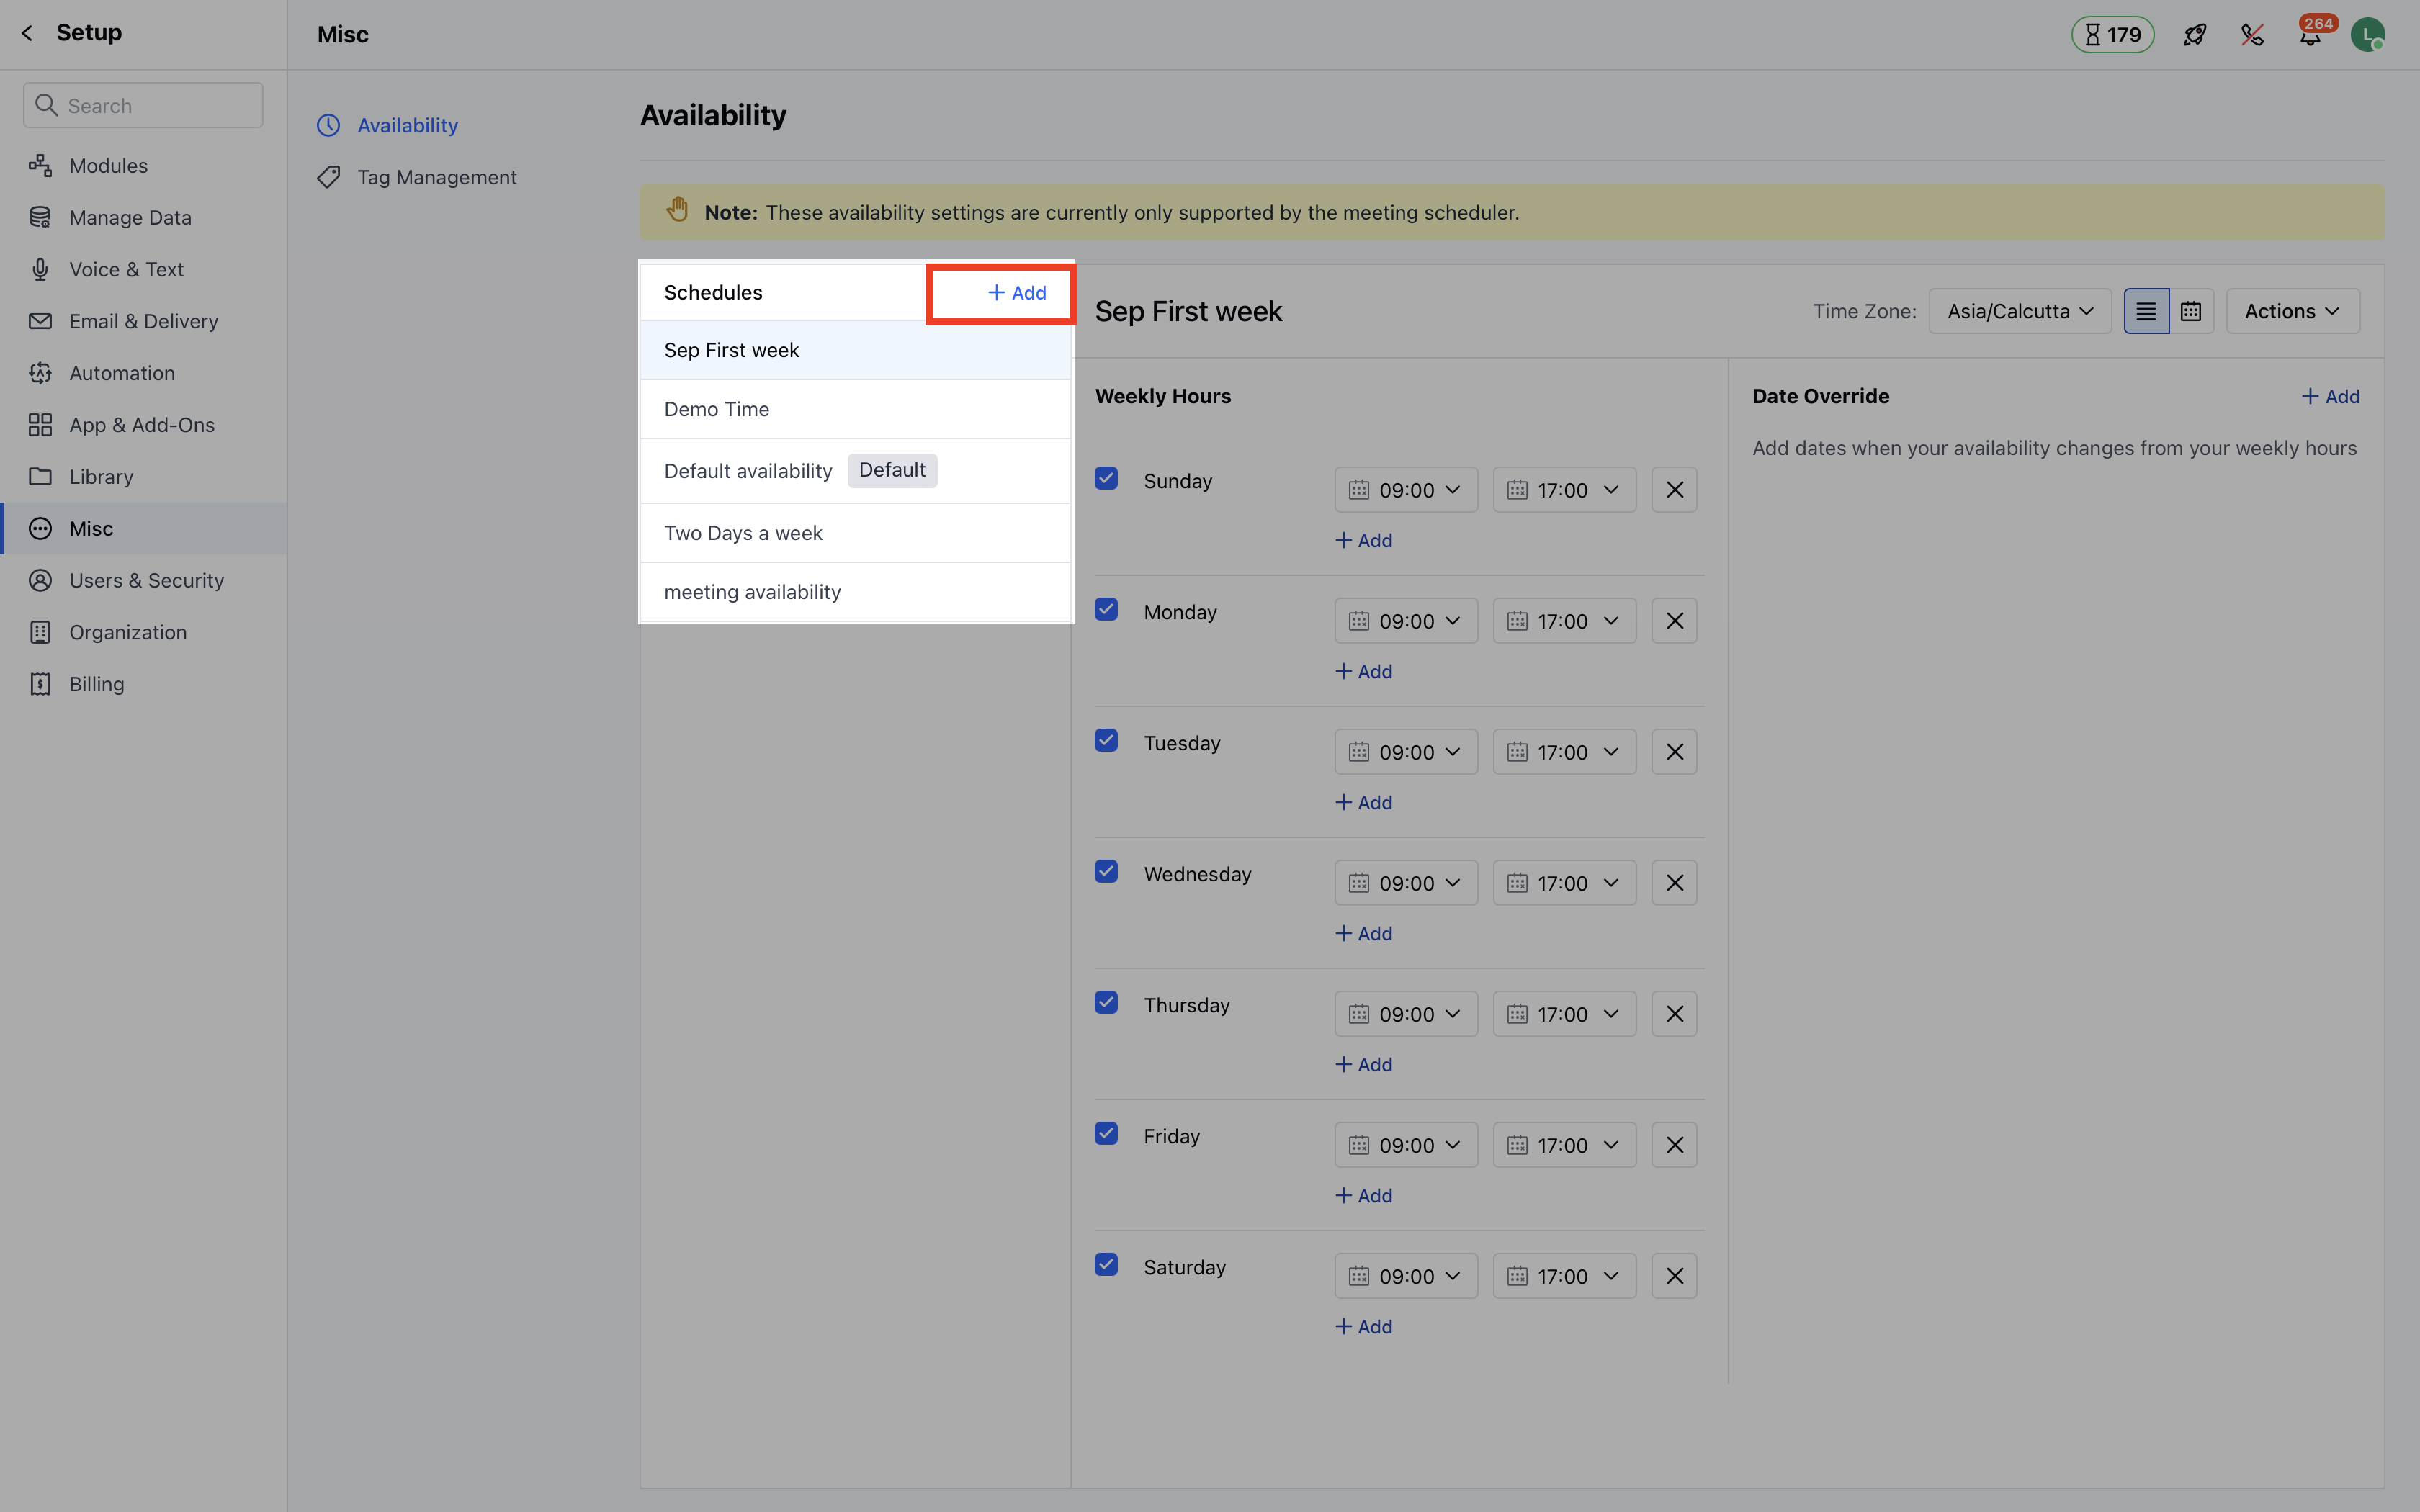
- Click on Availability
Note: Currently, this setting is only applicable to the “Meeting Scheduler”.
Creating a New Schedule
To create a new schedule, follow below steps:- Go to the Manage Global Availability page.
- Click on the New Schedule Button on the top right corner.
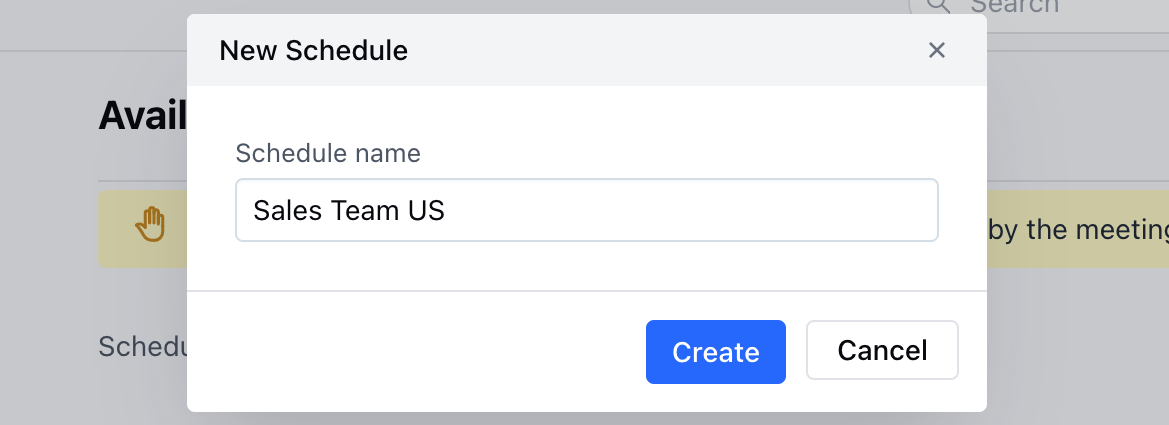
- A pop dialogue box would open up prompting you to provide the New **Schedule **Name of the Schedule.
- Hit the Create button and your new schedule will be successfully saved.
Edit Schedule
To edit a specific schedule, follow the below steps:- Go to the Manage Availability Page.
- Select the schedule that you wish to edit under the dropdown option.
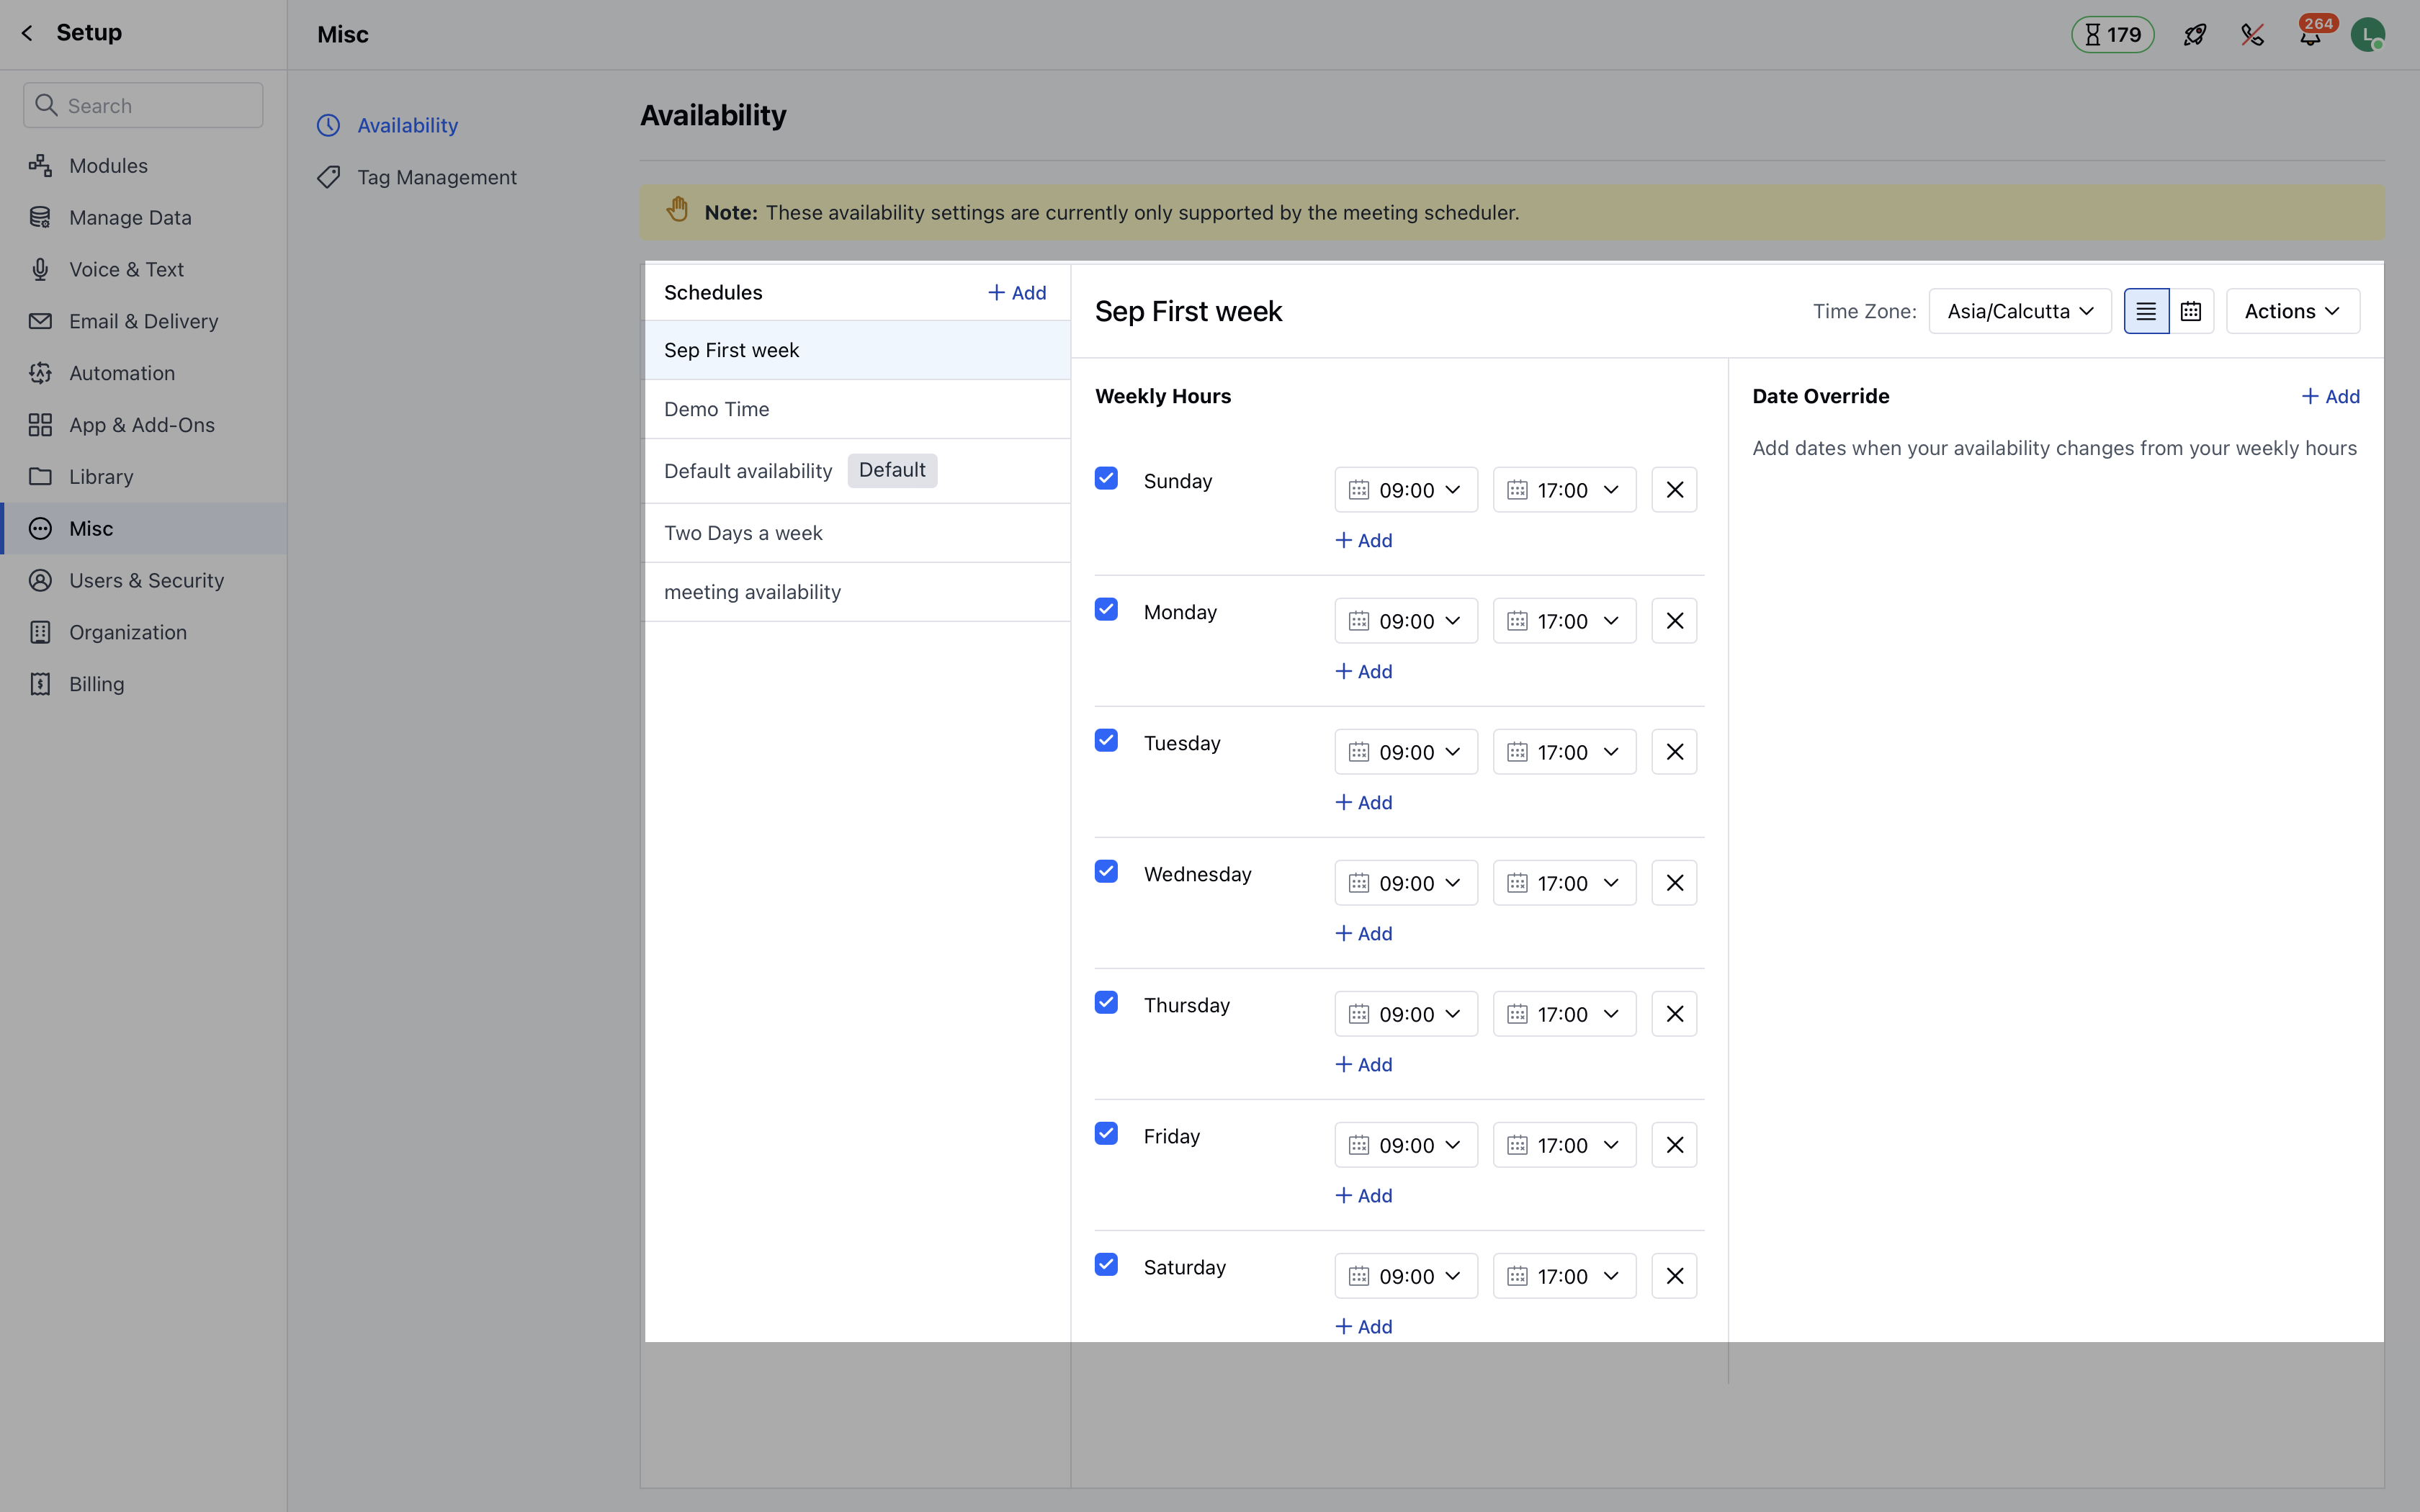
- Once you select the schedule, you will be able to edit the weekly hours and Date Override as required.
- Users will get the option to select the timezone for the specified weekly hours or the defined time slots.
- There are two views that are visible on the screen:
- List View
- Calendar View
List View
- Under the list view, users will be able to define the specified time slots for the weekdays.
- If no timeslot is defined for a particular day, then by default the user will be considered unavailable for that day.
- ****Multiple time ****slots can be also be defined for a particular day .
- If there are any overlapping time slots then the availability would be calculated in a continuous manner. For instance, if a user has defined time slots as 9:00 AM to 12:00 PM and 10:00 AM to 2:00 PM then the system would consider the availability as 9:00 AM to 2:00 PM.
- Users can also define the Date overrides i.e if they are not available on a particular working day or there are any holidays that need to be defined.
- A pop-up will be shown saying ” Changes Saved ” once you update the time slots.
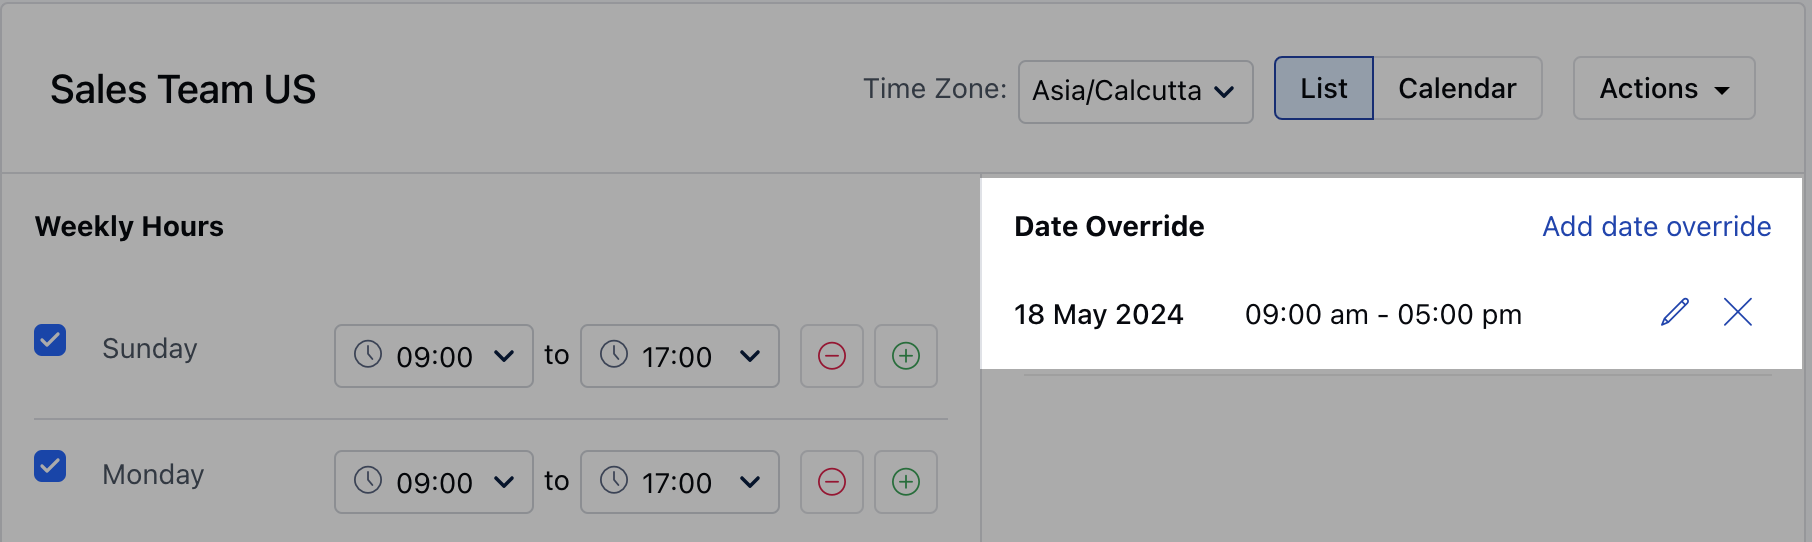
Date Override
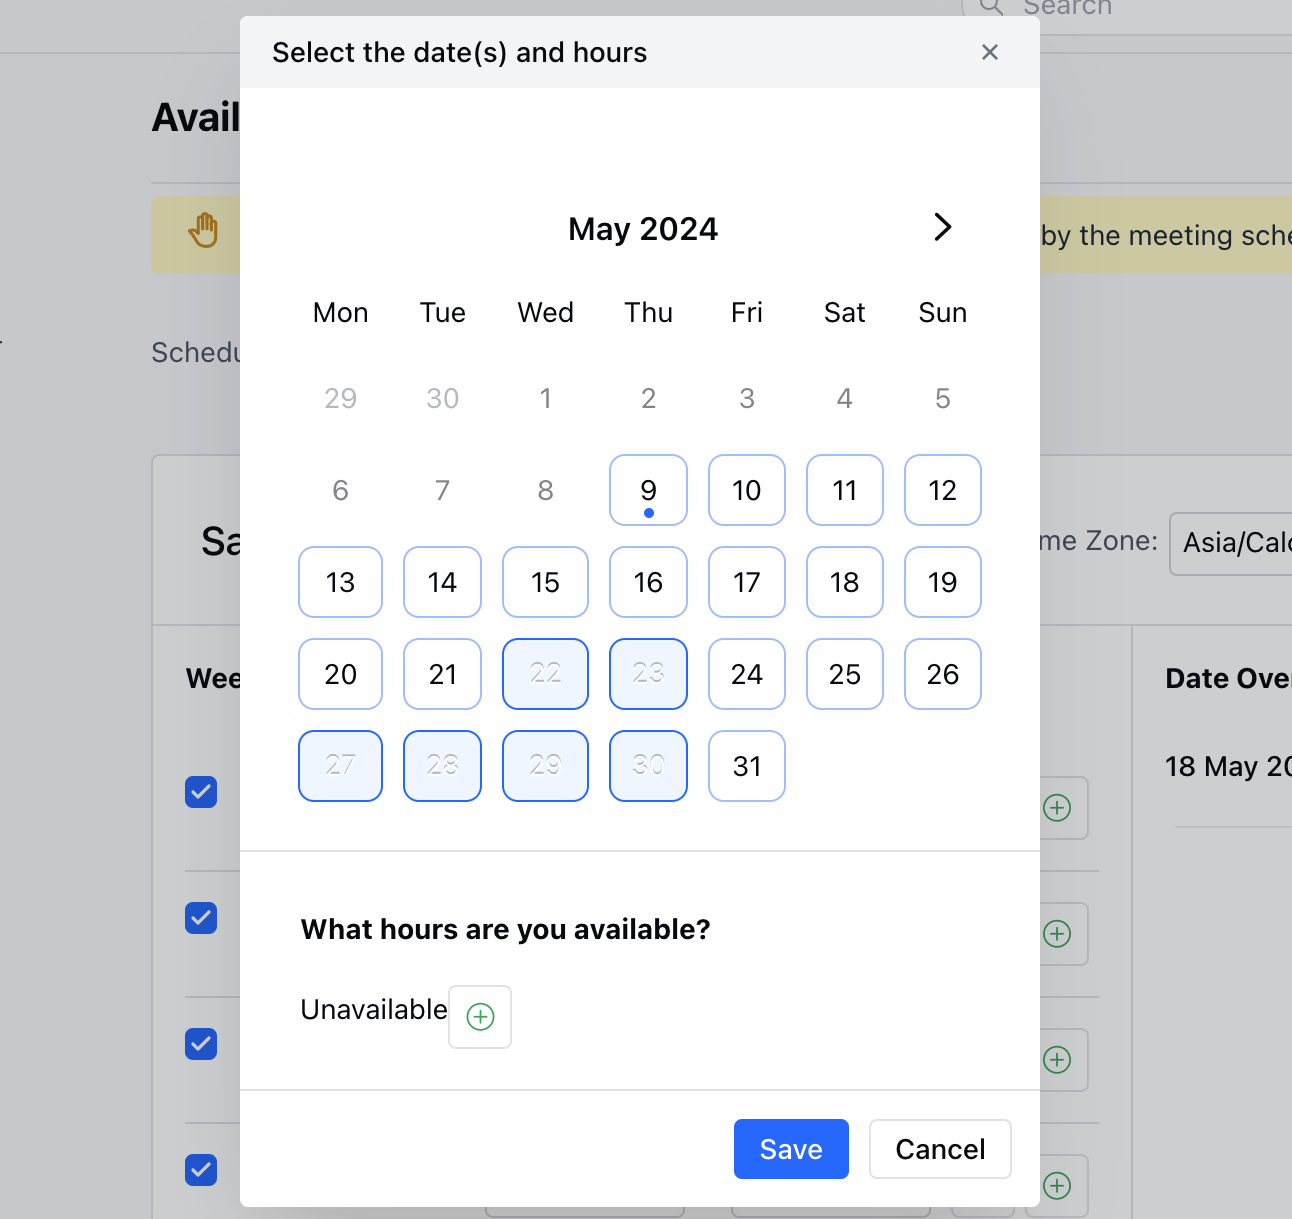
- To override the date, you can simply click on Add date override .
- On clicking, you will be asked to choose the dates for which you would like to override.

- While selecting the dates, the system would show you the availability that you have defined for those days.
- The user can:
- Add new time slots
- Remove time slots
- In order to make yourself unavailable , you can simply remove all the slots.
- In order to remove theDate Override you can simply click on the X icon.
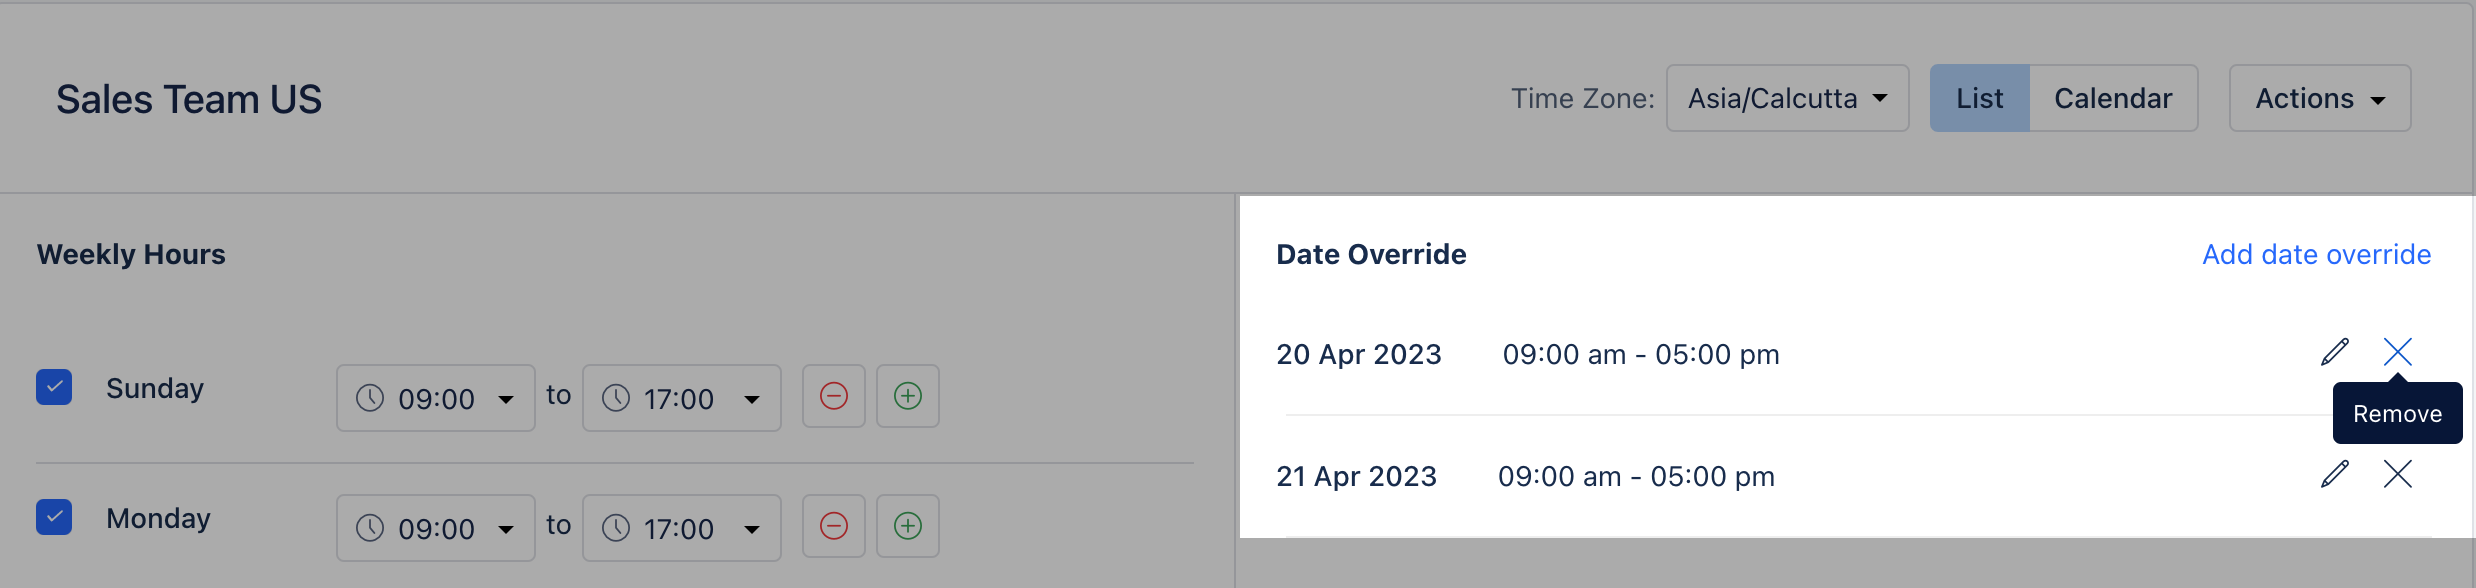
- Toedit the date override, the user can simply click on the pencil icon and make the necessary updates.

- Select the relevant date and time slots and hit update .
- In case the user does not select any time slots, the system will consider them as unavailable for those dates.
- All the dates would be shown individually under the date override section even if the user has selected multiple dates.
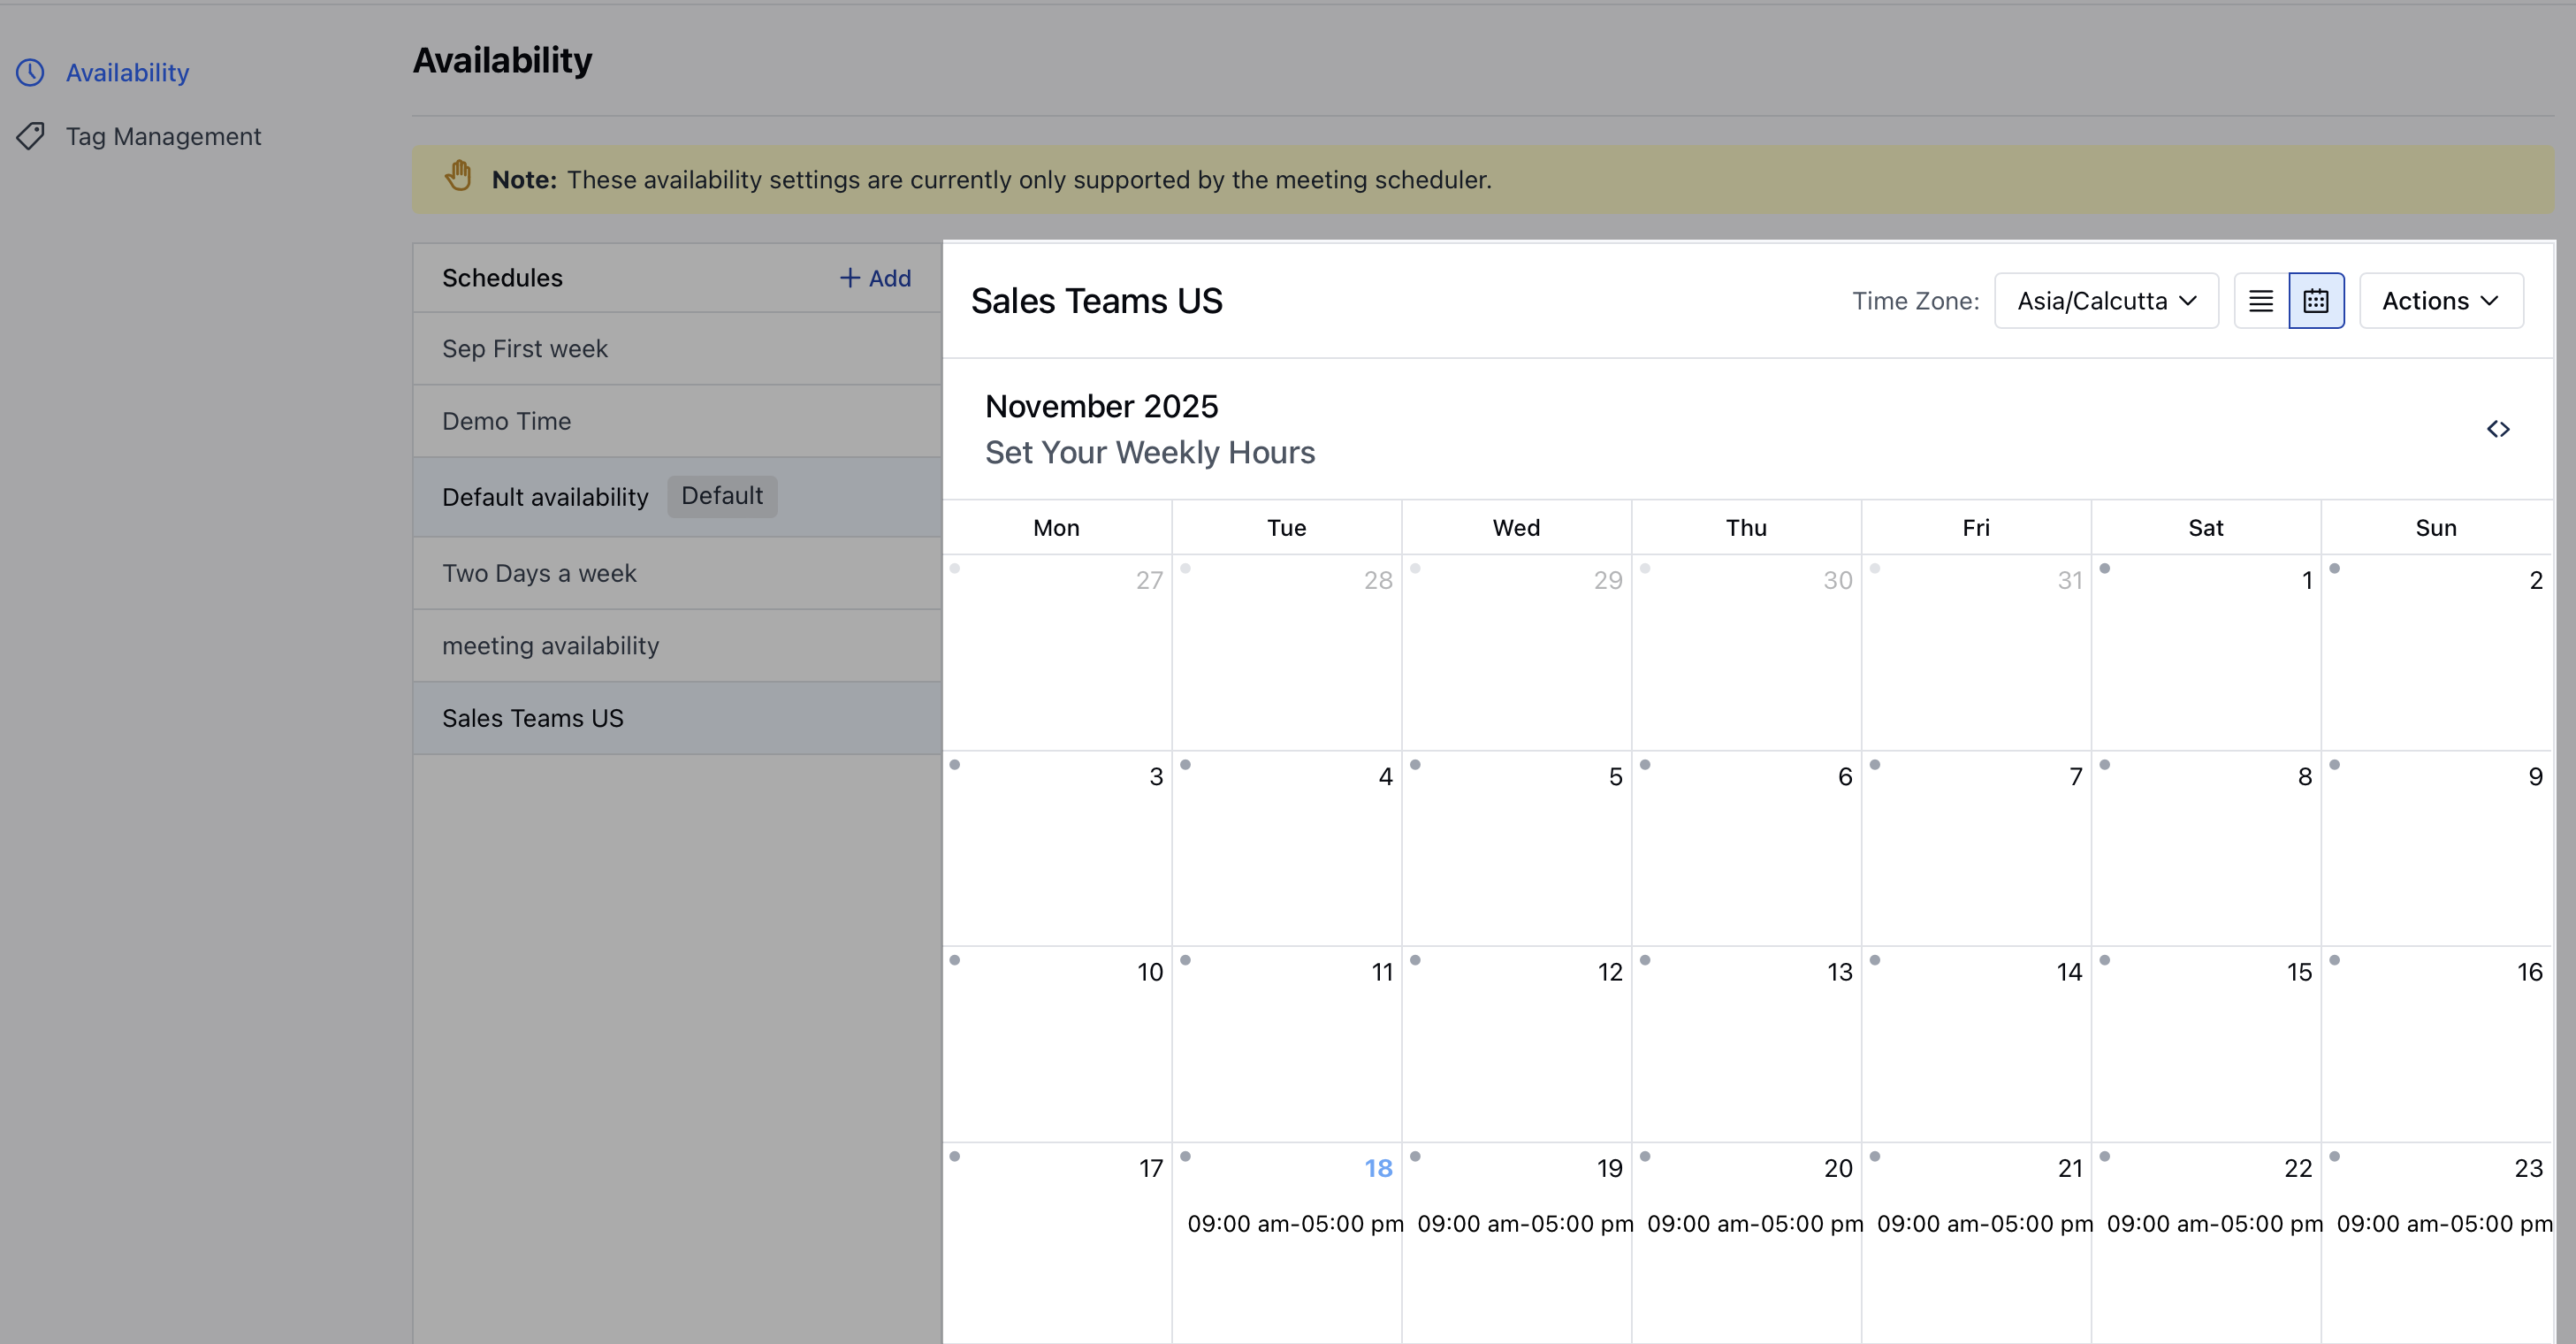
Calendar View
- The calendar would be shown in a monthly fashion by which the user would be able to see the availability on specific days .
- If the user is not available then no slots would be shown on that specific date.
- If the slots on a specific day do not contain any date override, then they will be denoted by a grey dot on the calendar
- If the slots on a specific day do contain date override, then they will be denoted by an orange dot.
- Users can also edit the time slots under the calendar view by simply clicking on any block/day, similar to the list view.
- Any changes made are saved in real-time.
Edit Title
To edit the title of the schedule, follow the below steps:- Navigate to the Profile icon on the top right corner.
- Click on the Setup .
- Head over to the Misc category
- Click on Availability
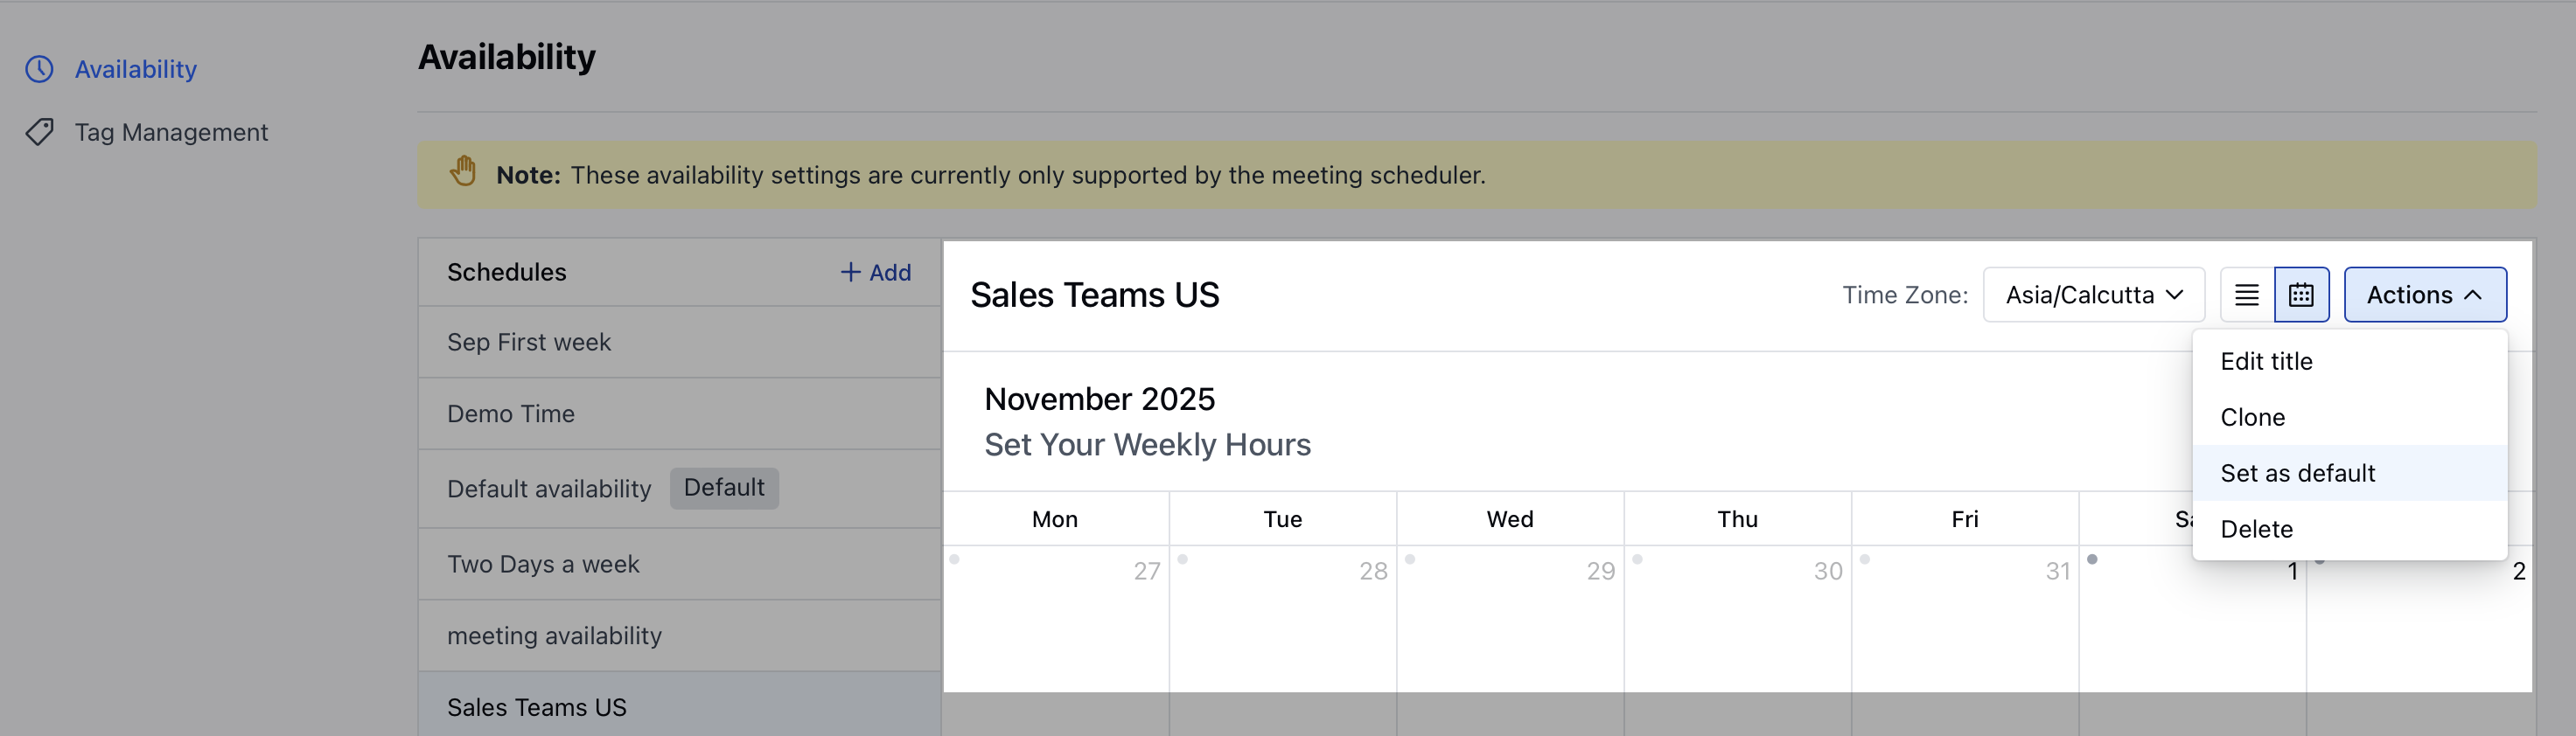
- Select the required schedule for which you wish to Edit the Title from the dropdown.
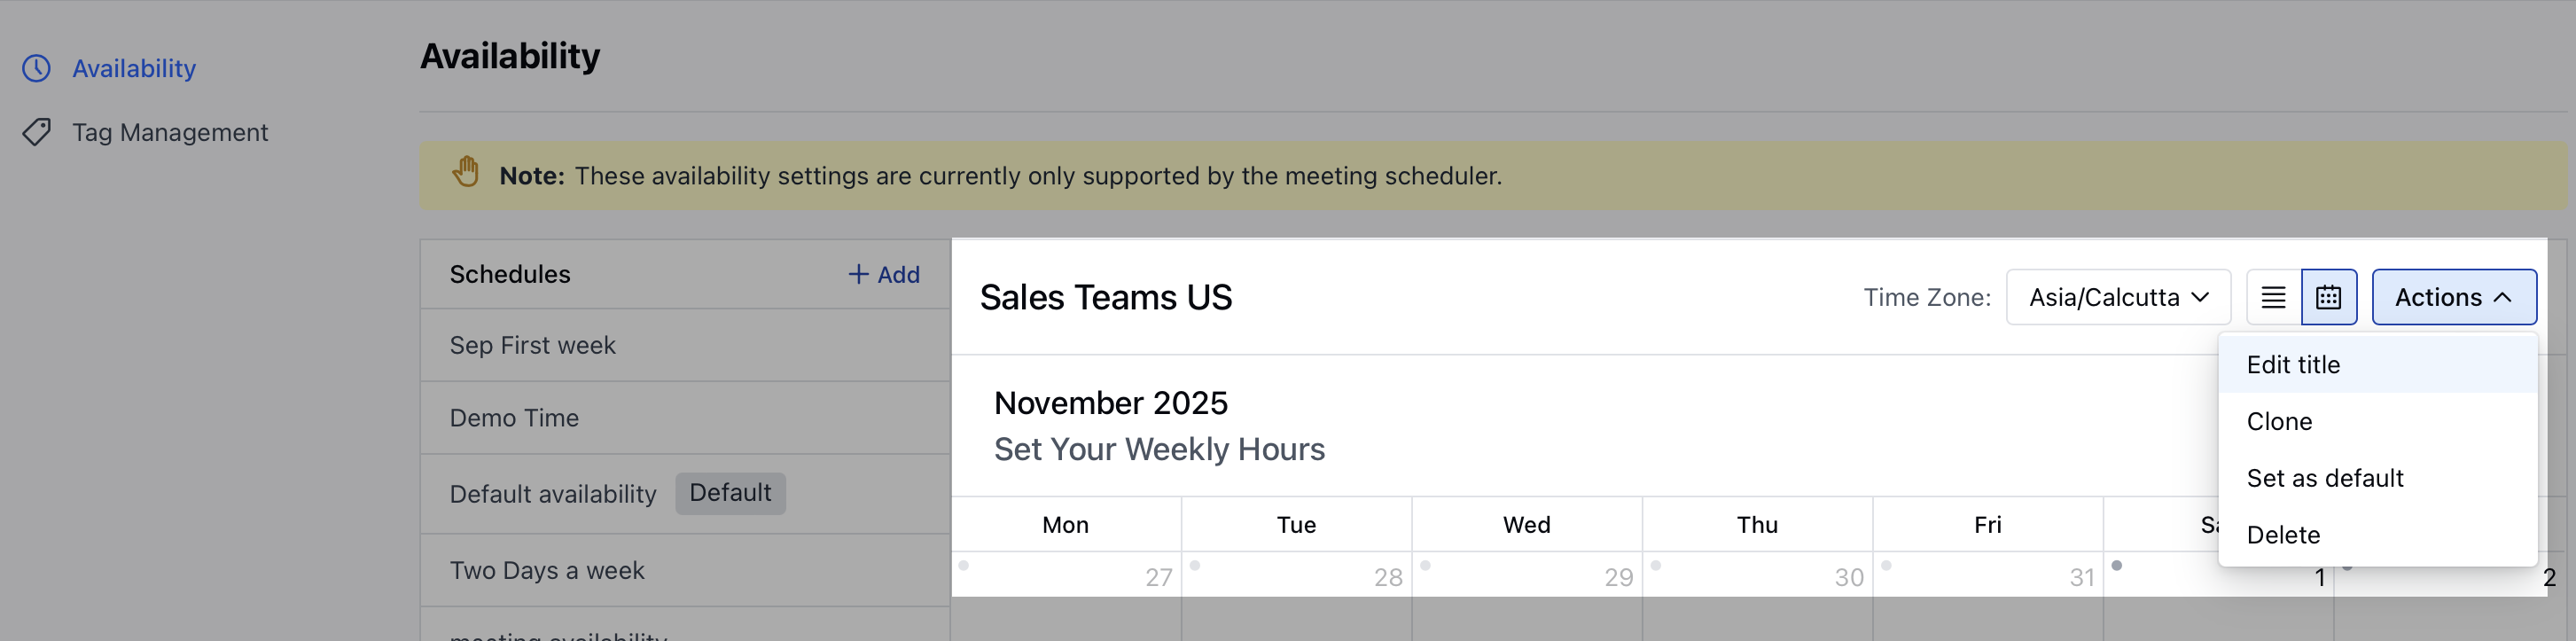
- Click on Actions and select
- Edit title.
- Once you click on Edit title, a pop-up dialogue box would open up prompting you to edit the title.
- Hit Update to save the changes.

Delete Schedule
In order to delete a schedule, follow the below steps:- Navigate to the Profile icon on the top right corner.
- Click on the Setup .
- Head over to the Misc category
- Click on Availability
- Select the schedule from the list under the dropdown.
- Once you select a schedule, click on Actions and choose the option to Delete.
- Confirm the pop-up message to delete.

- Please note, any records associated with this schedule will be set to custom availability with these hours.
Clone Schedule
To Clone the schedule, follow the below steps:- Navigate to the Profile icon on the top right corner.
- Click on the Setup .
- Head over to the Misc category
- Click on Availability
- Select the schedule from the list which you wish to clone under the dropdown
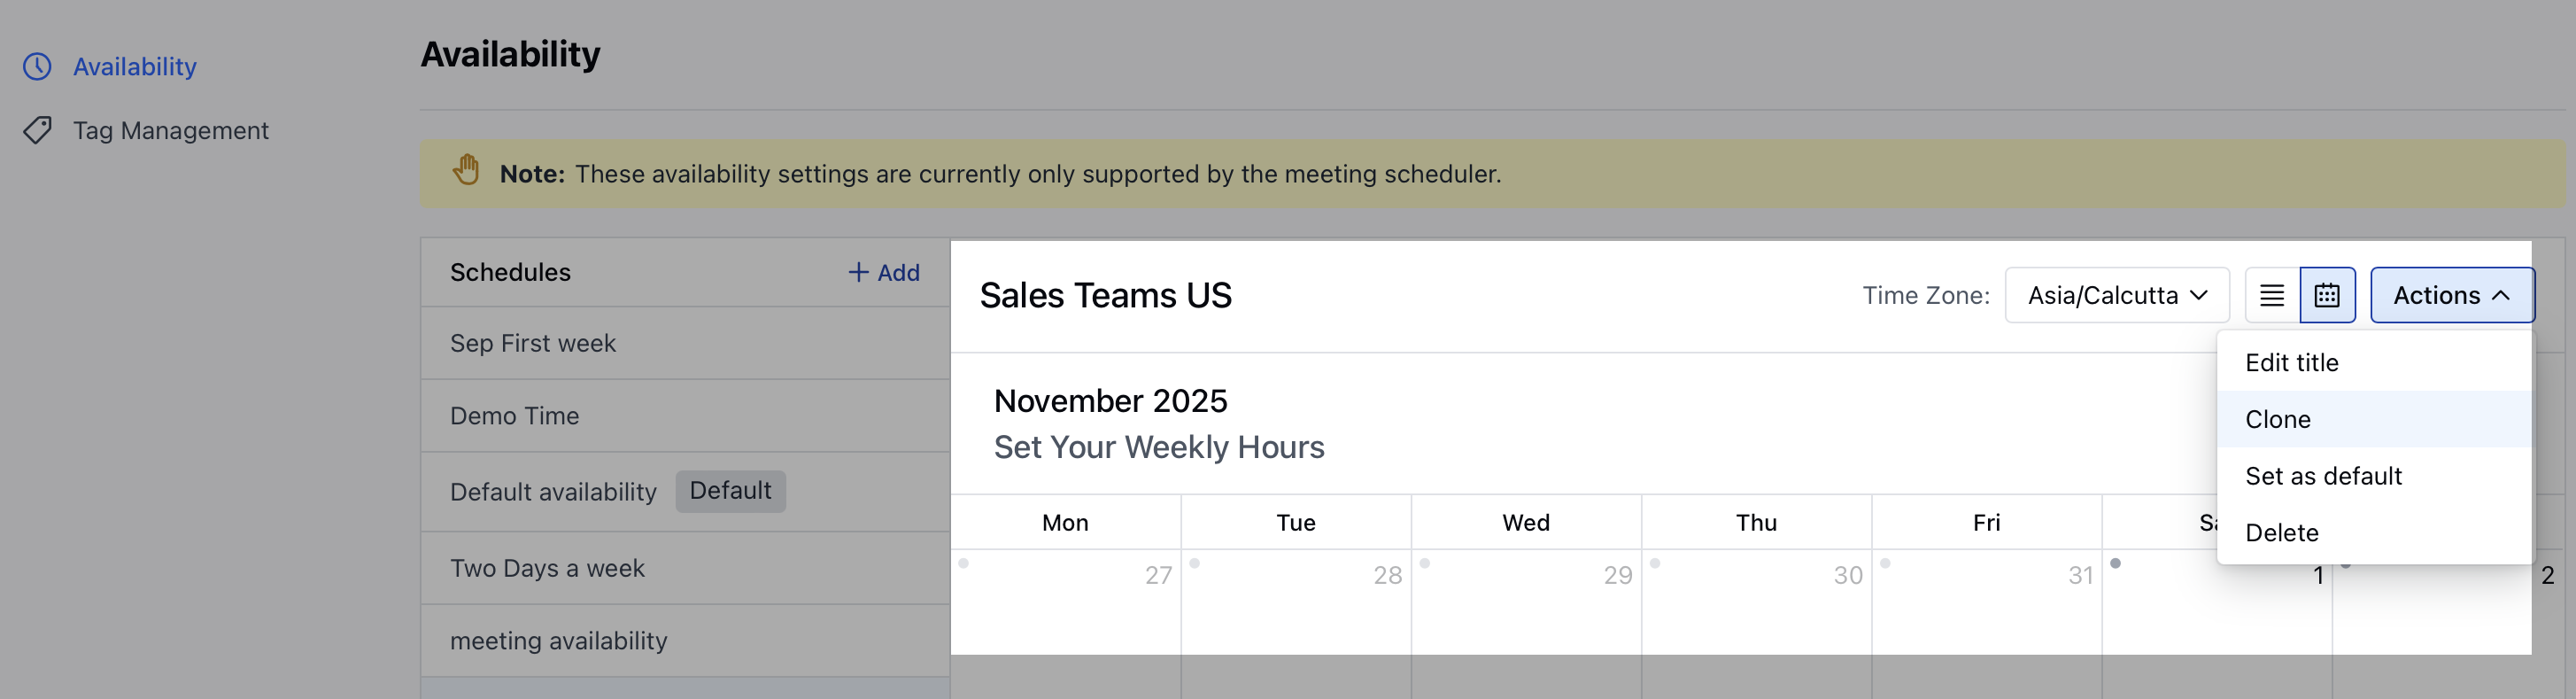
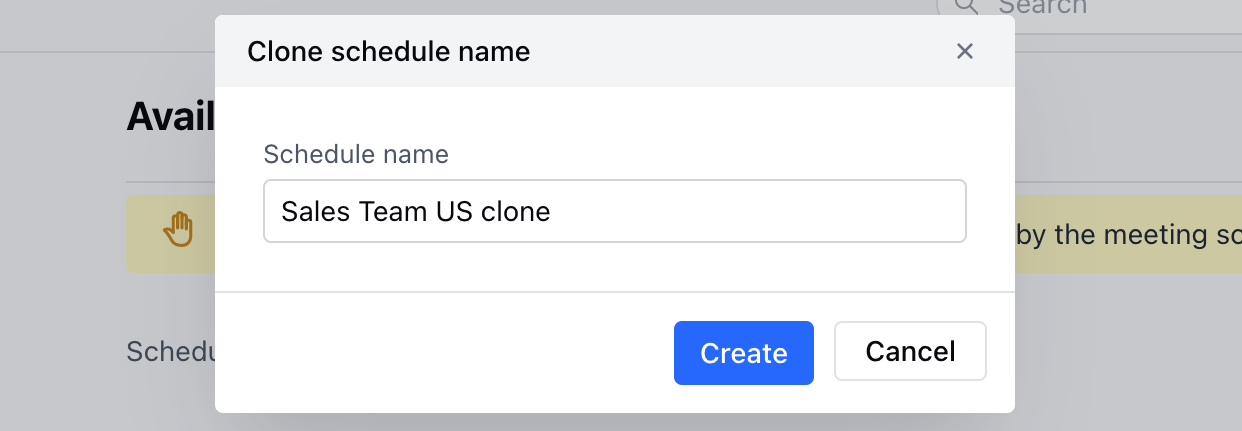
- Click on Actions and select Clone
- A pop-up box would open up prompting you to write the name of the new schedule
- Click on Create to save the new Schedule.
Set Schedule as Default
To set the schedule as Default, follow the below steps:- Navigate to the Profile icon on the top right corner.
- Click on the Setup .
- Head over to the Misc category
- Click on Availability
- Select the schedule for which you wish to set it as Default from the dropdown.
- Click on Actions and select
- Set as default.