Topics covered:
Follow the steps below to configure the Page Visited trigger in your chat execution flow:Add the Trigger
- Drag and drop the Page Visited trigger from the trigger list onto your flow canvas.
- Click on the trigger block to open its configuration settings.
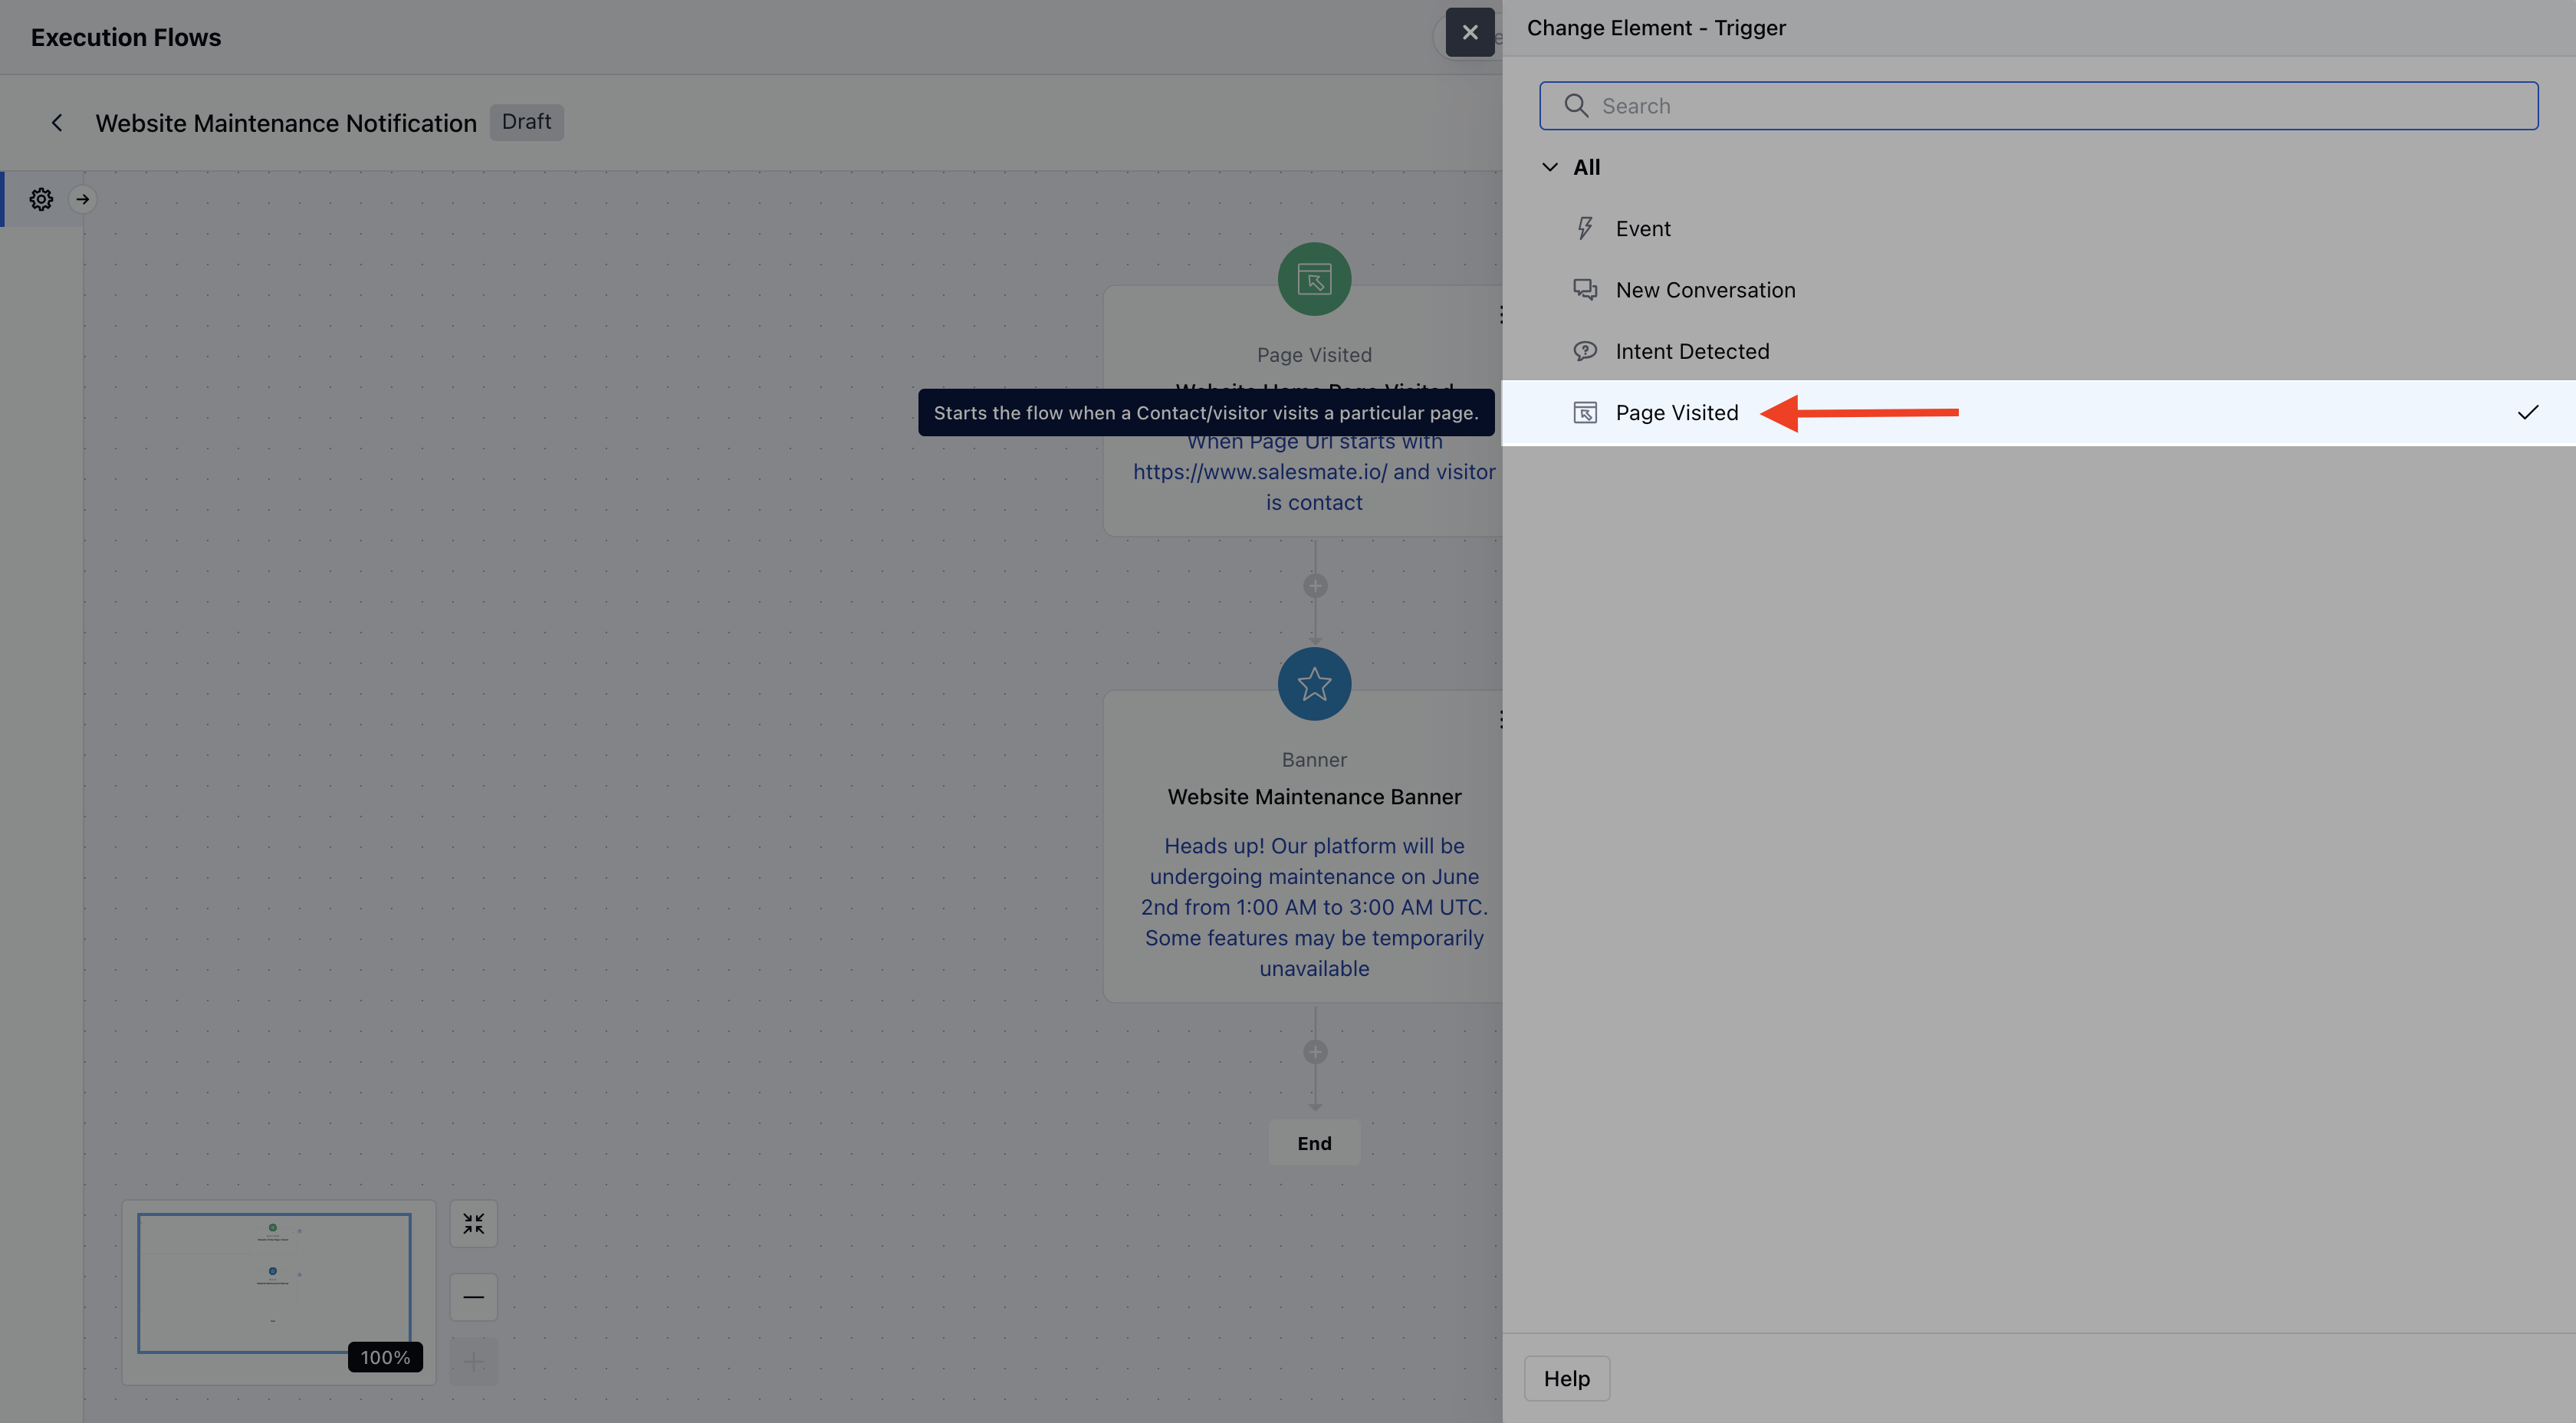
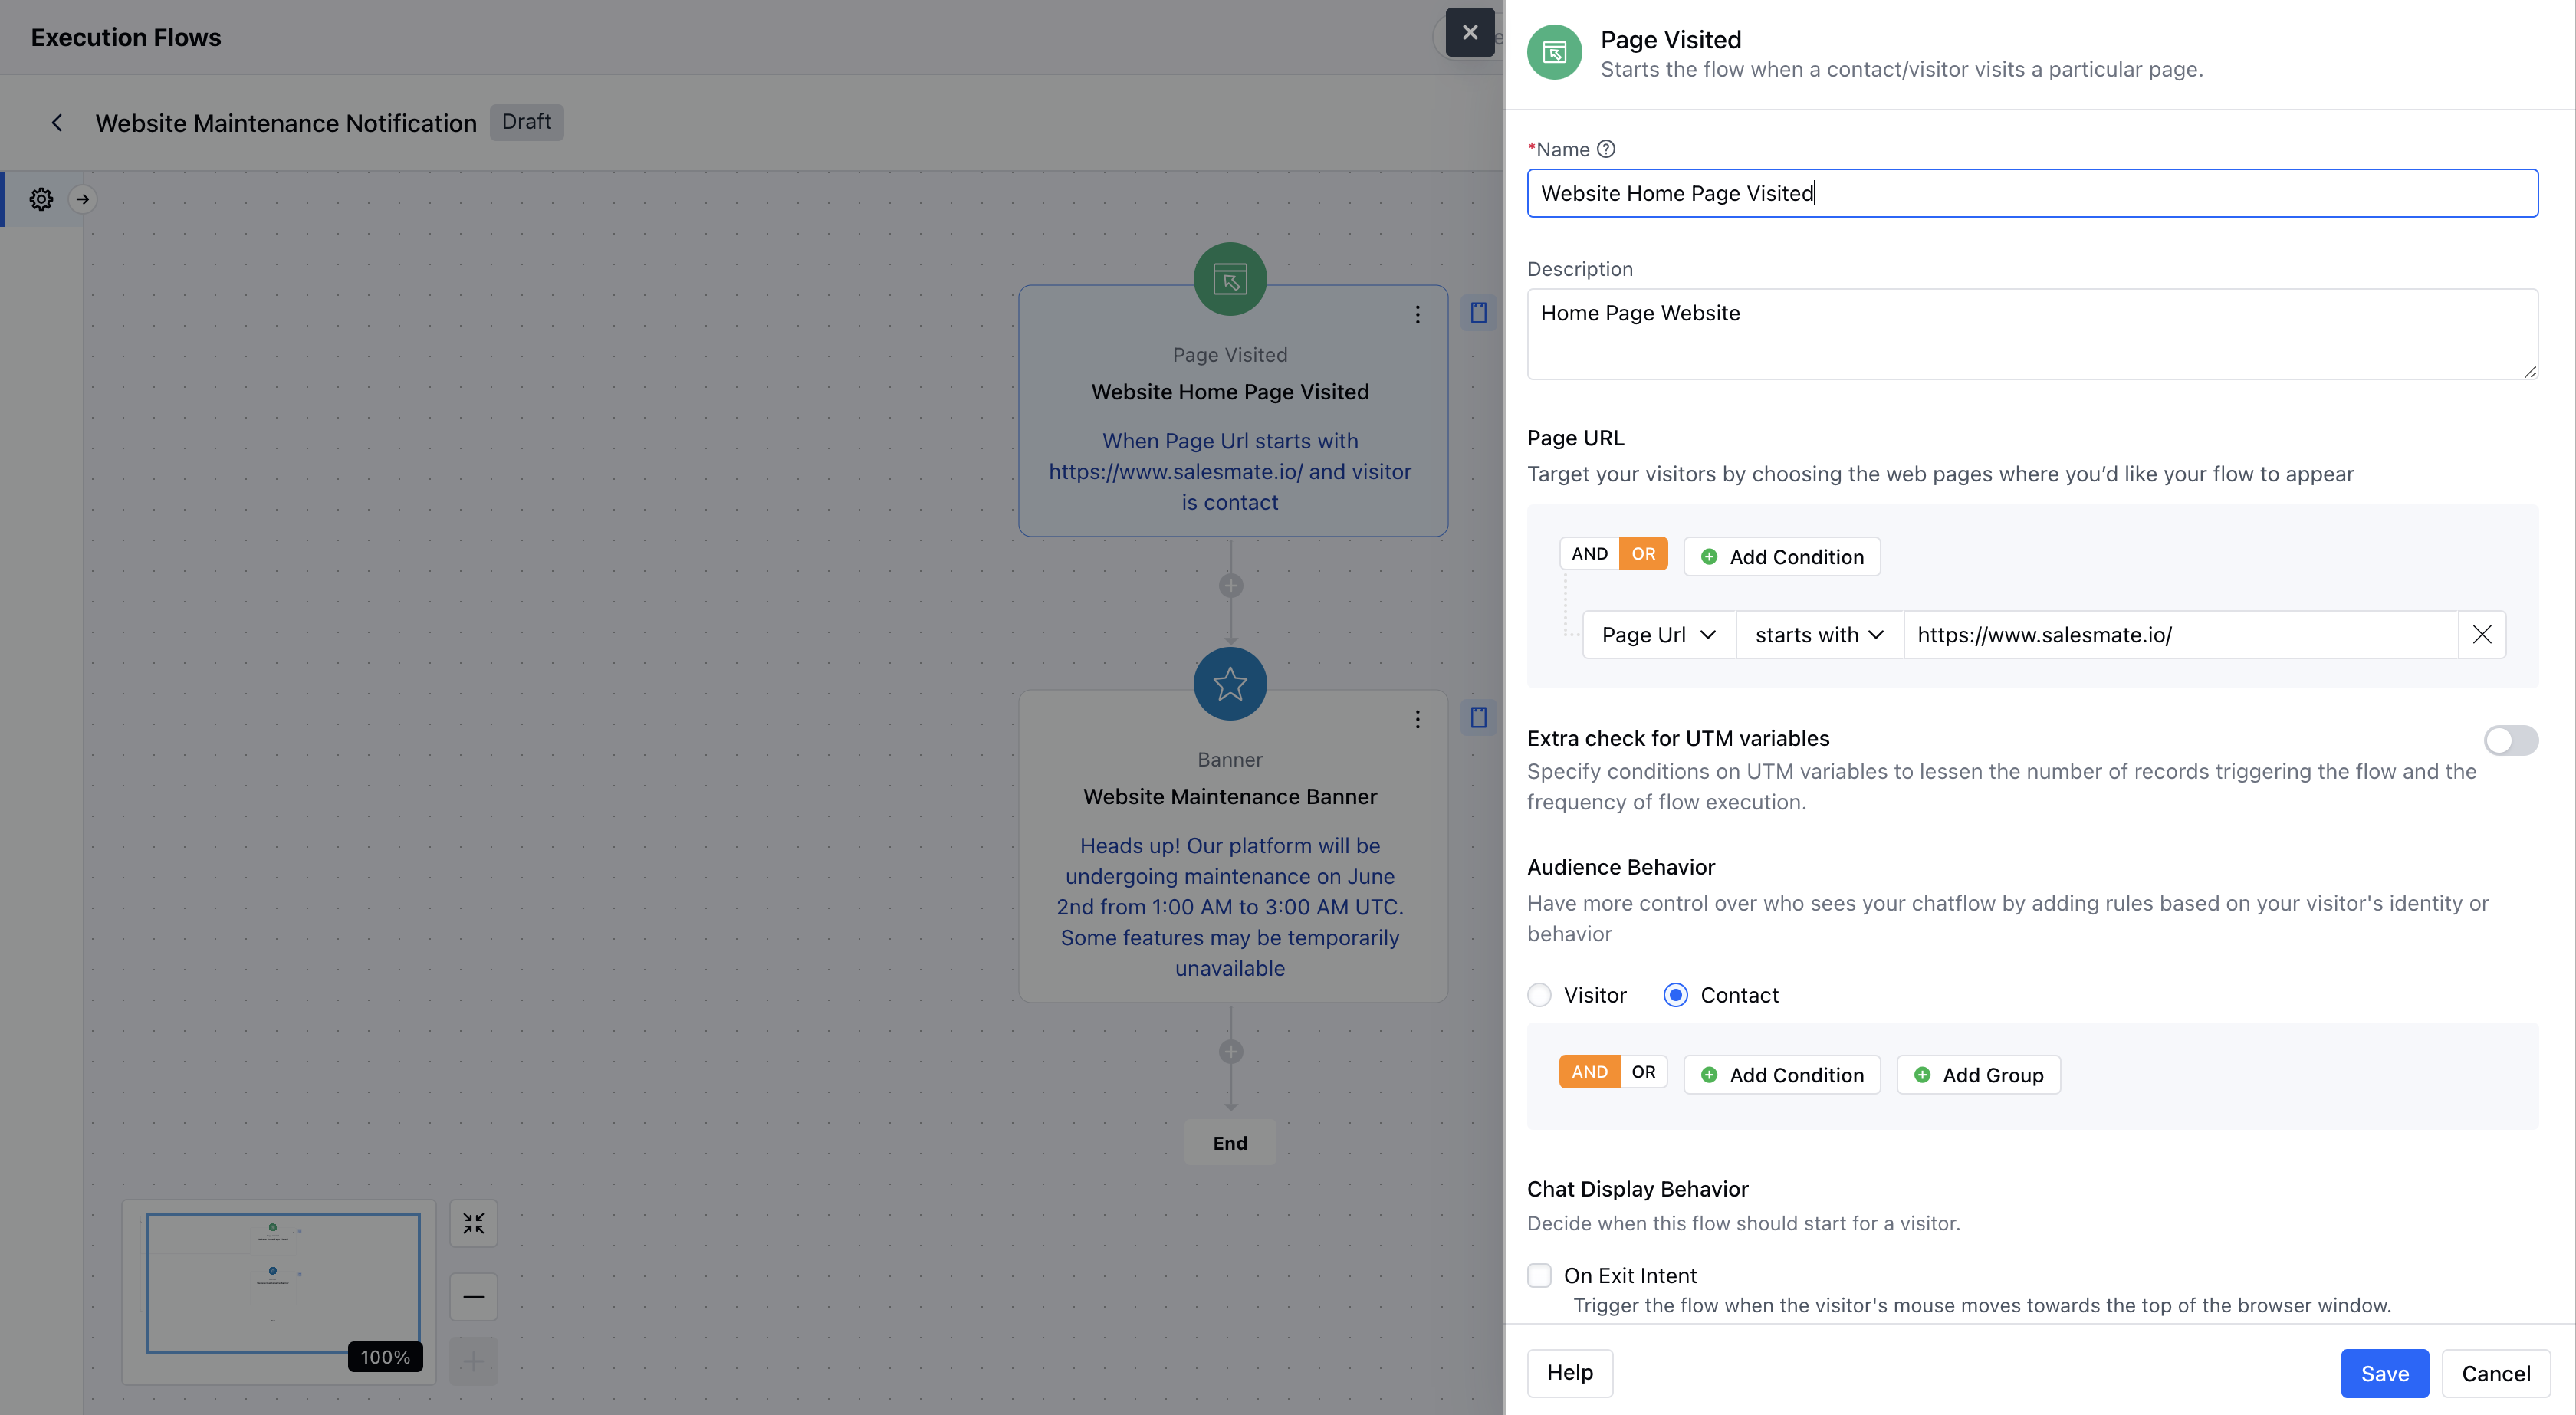
Configure the Page Visited Trigger
The configuration panel is divided into three sections: Page URL: Set the conditions that define when this trigger should activate based on the web page being visited.- Add multiple conditions using AND/OR operators.
- Choose from the following operators:
- is not empty (default – no value input required)
- is starts with
- ends with
- contains
- does not contain
- wildcard
utm_sourceutm_mediumutm_termutm_contentutm_campaign
- Visitor (default) – applies to any anonymous visitor.
- Contact – targets only identified users (logged-in or recognized).
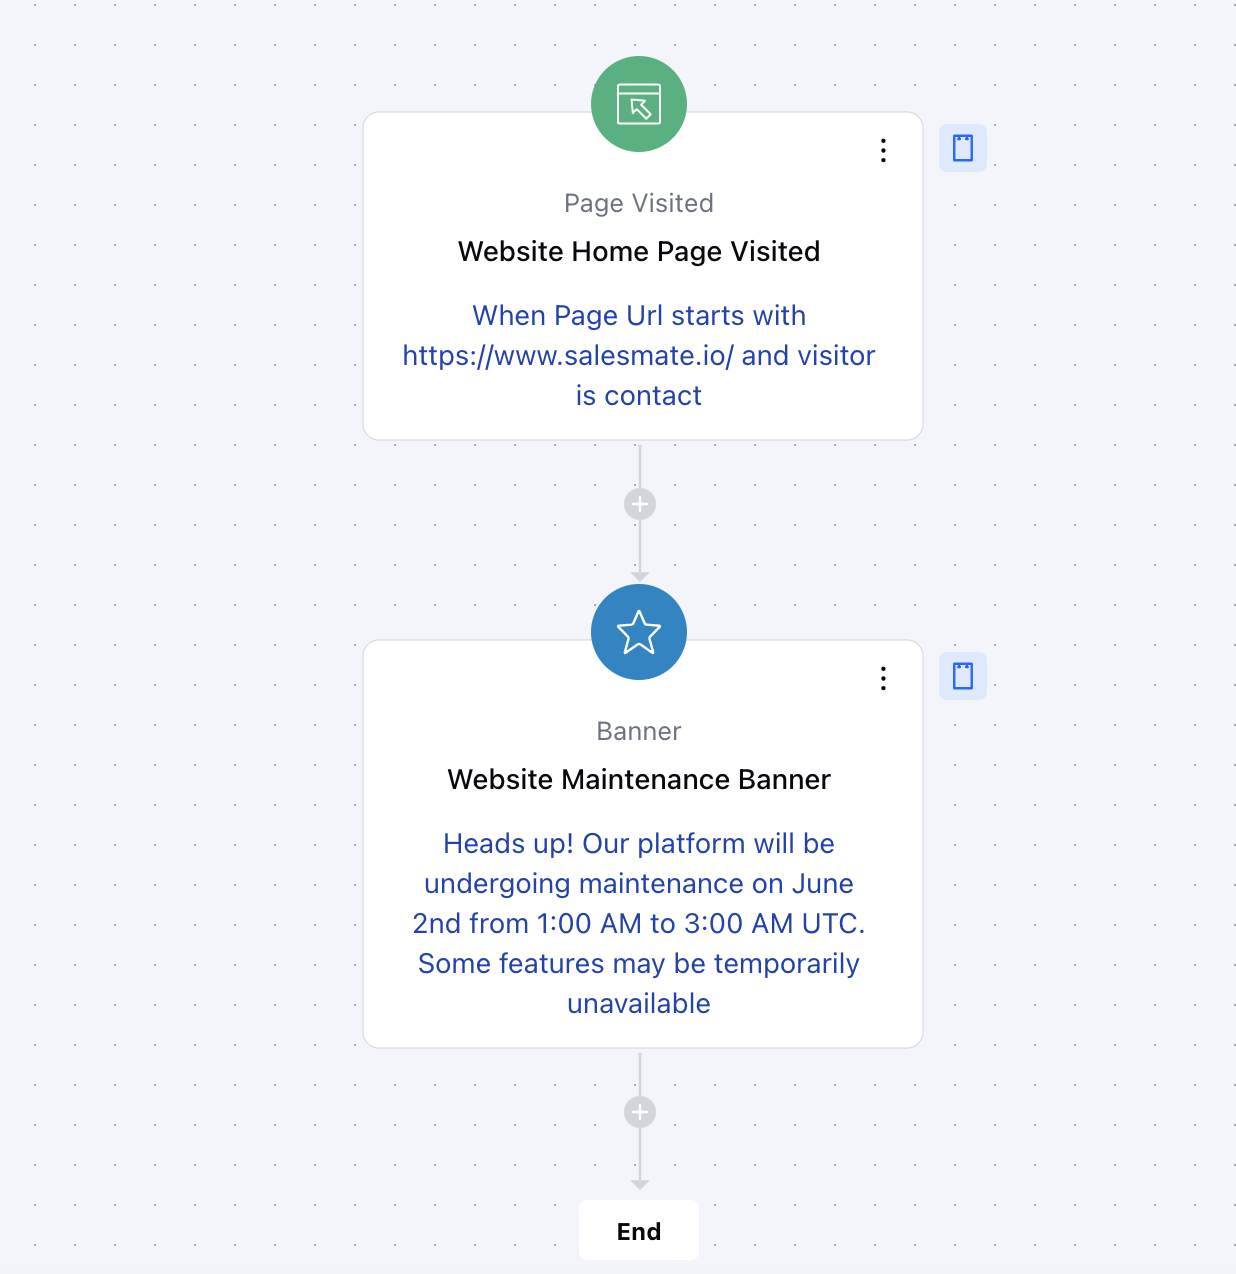
Practical Example
Let’s say you want to notify your customers or website visitors when they land on a specific page of your website — such as a new feature announcement, a discount offer, or a personalized message. You can use the “Page Visited” trigger to do exactly that.