Note: Only users with ‘Manage Messenger Settings’ access can configure these settings.
- To install chats to your iOS app, click here.
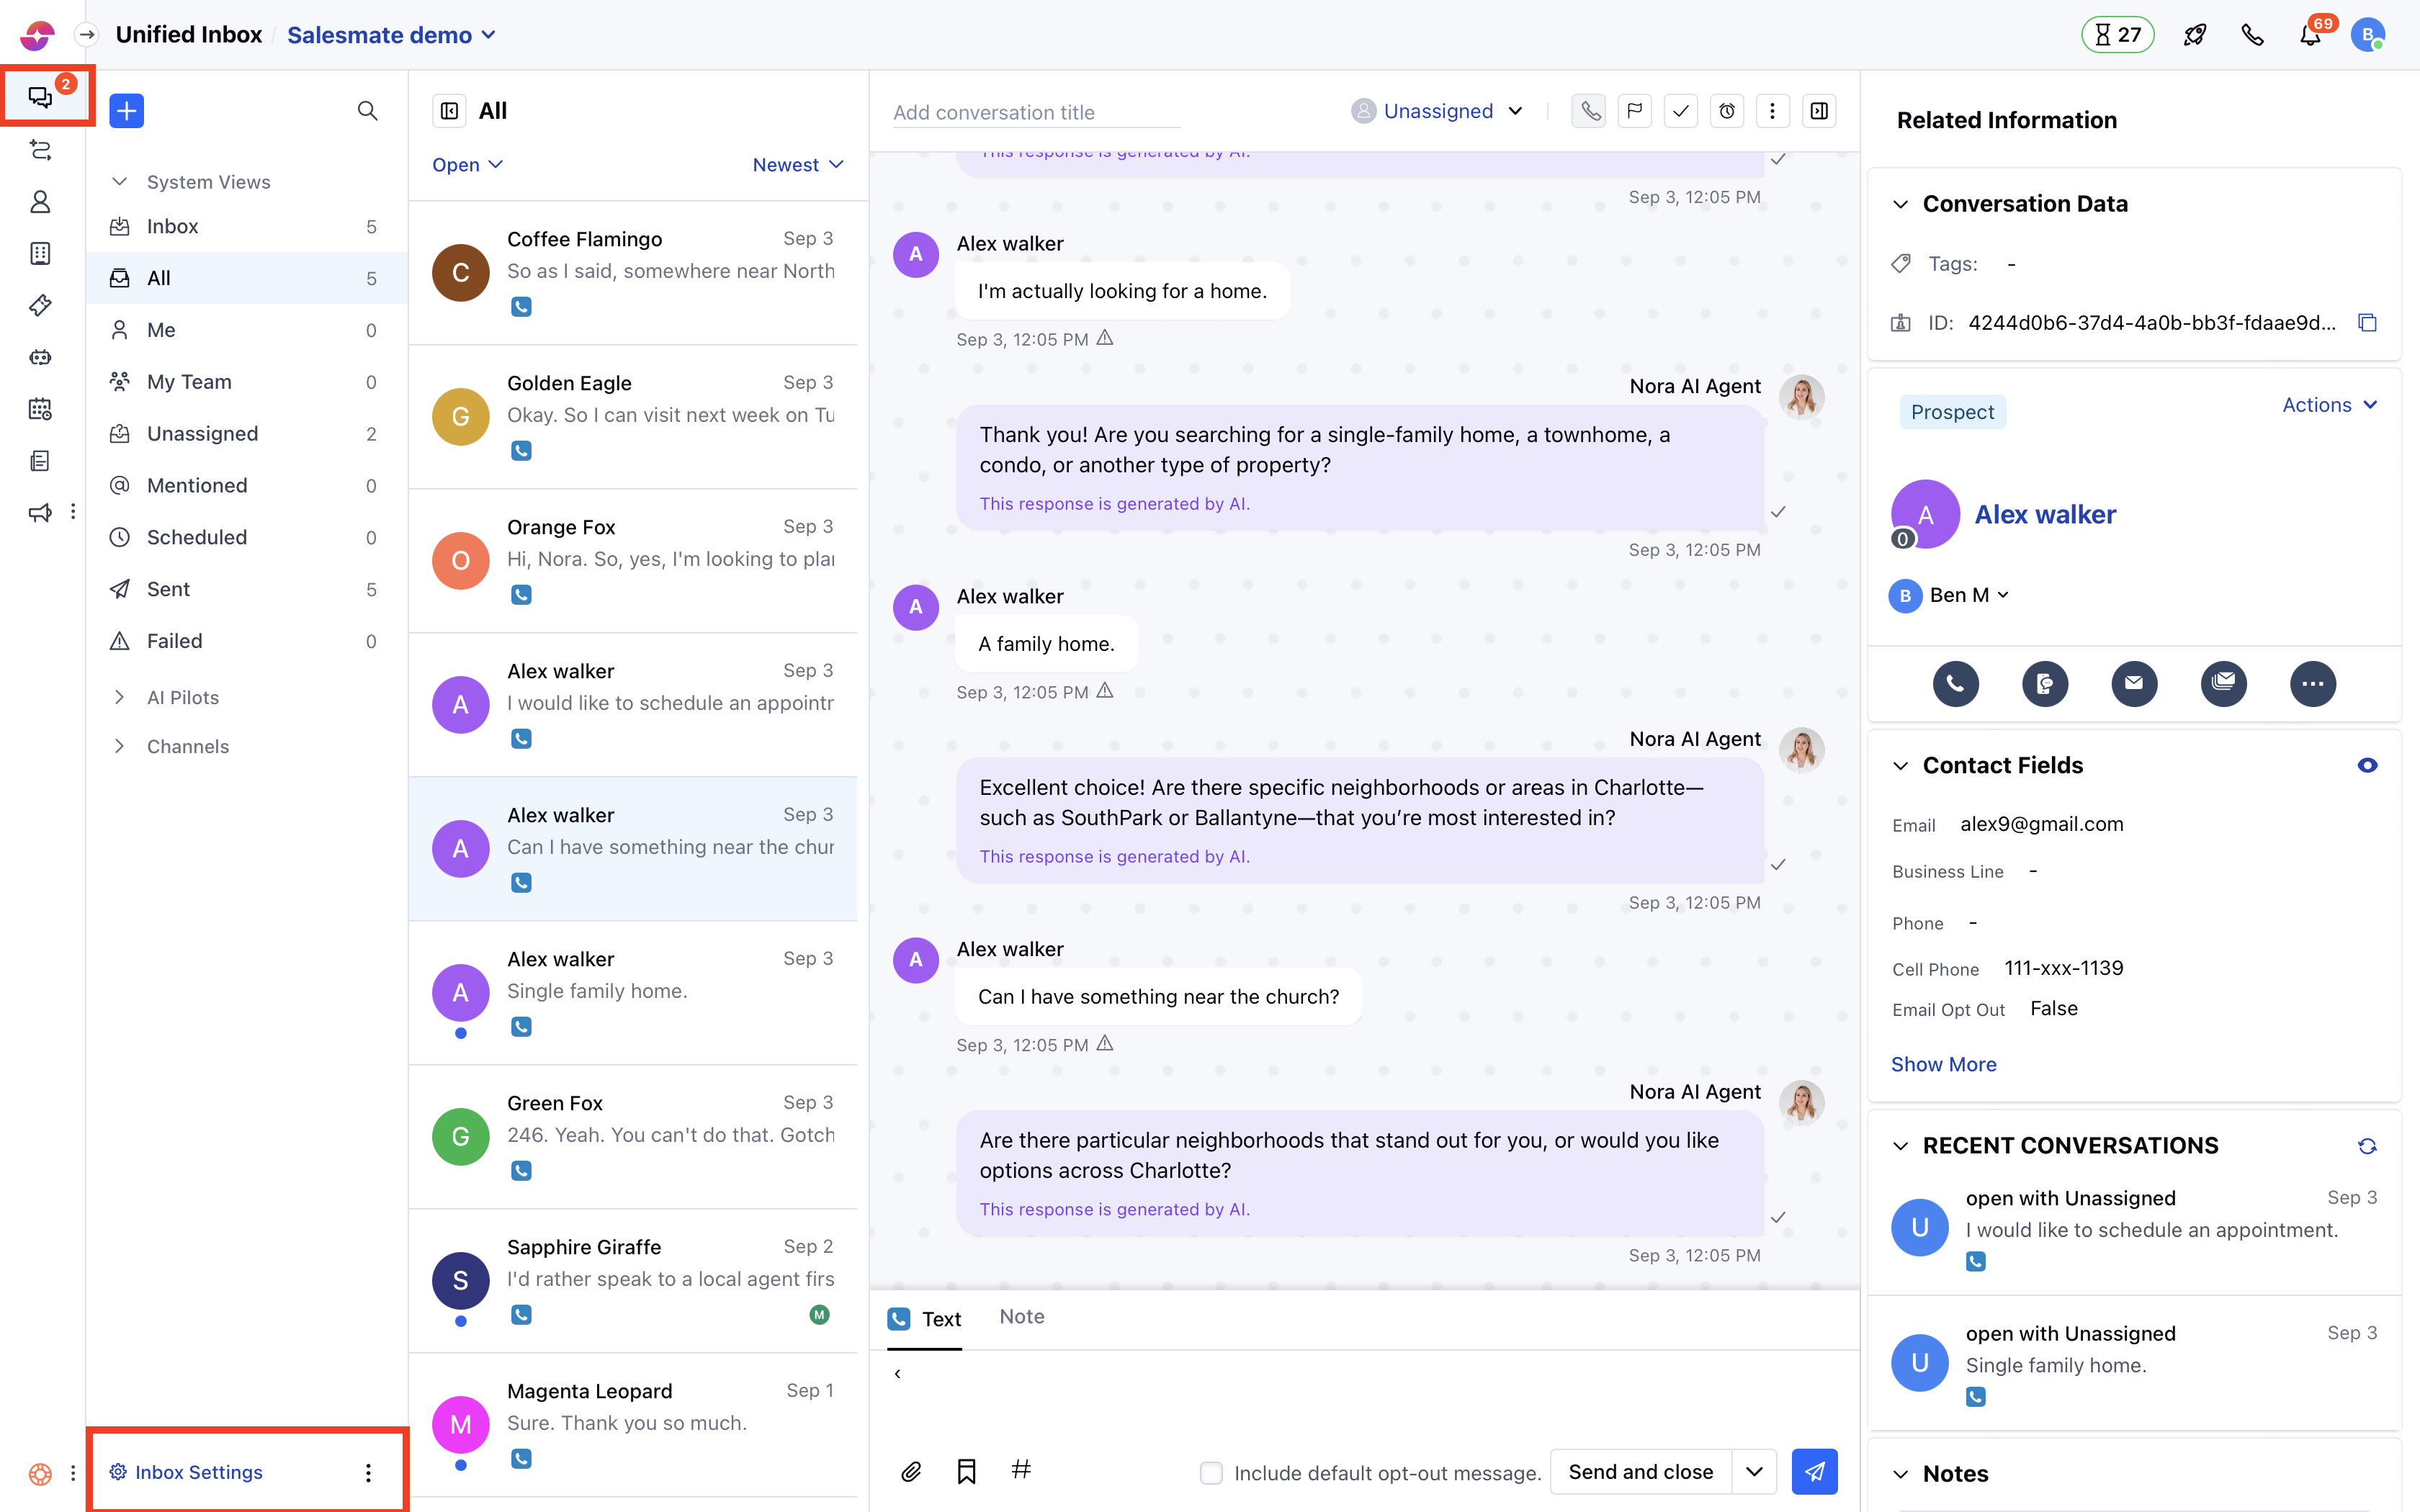
- Navigate to Conversations Icon on the left menu bar
- Click on Chats
- Head to Inbox Settings on bottom left.
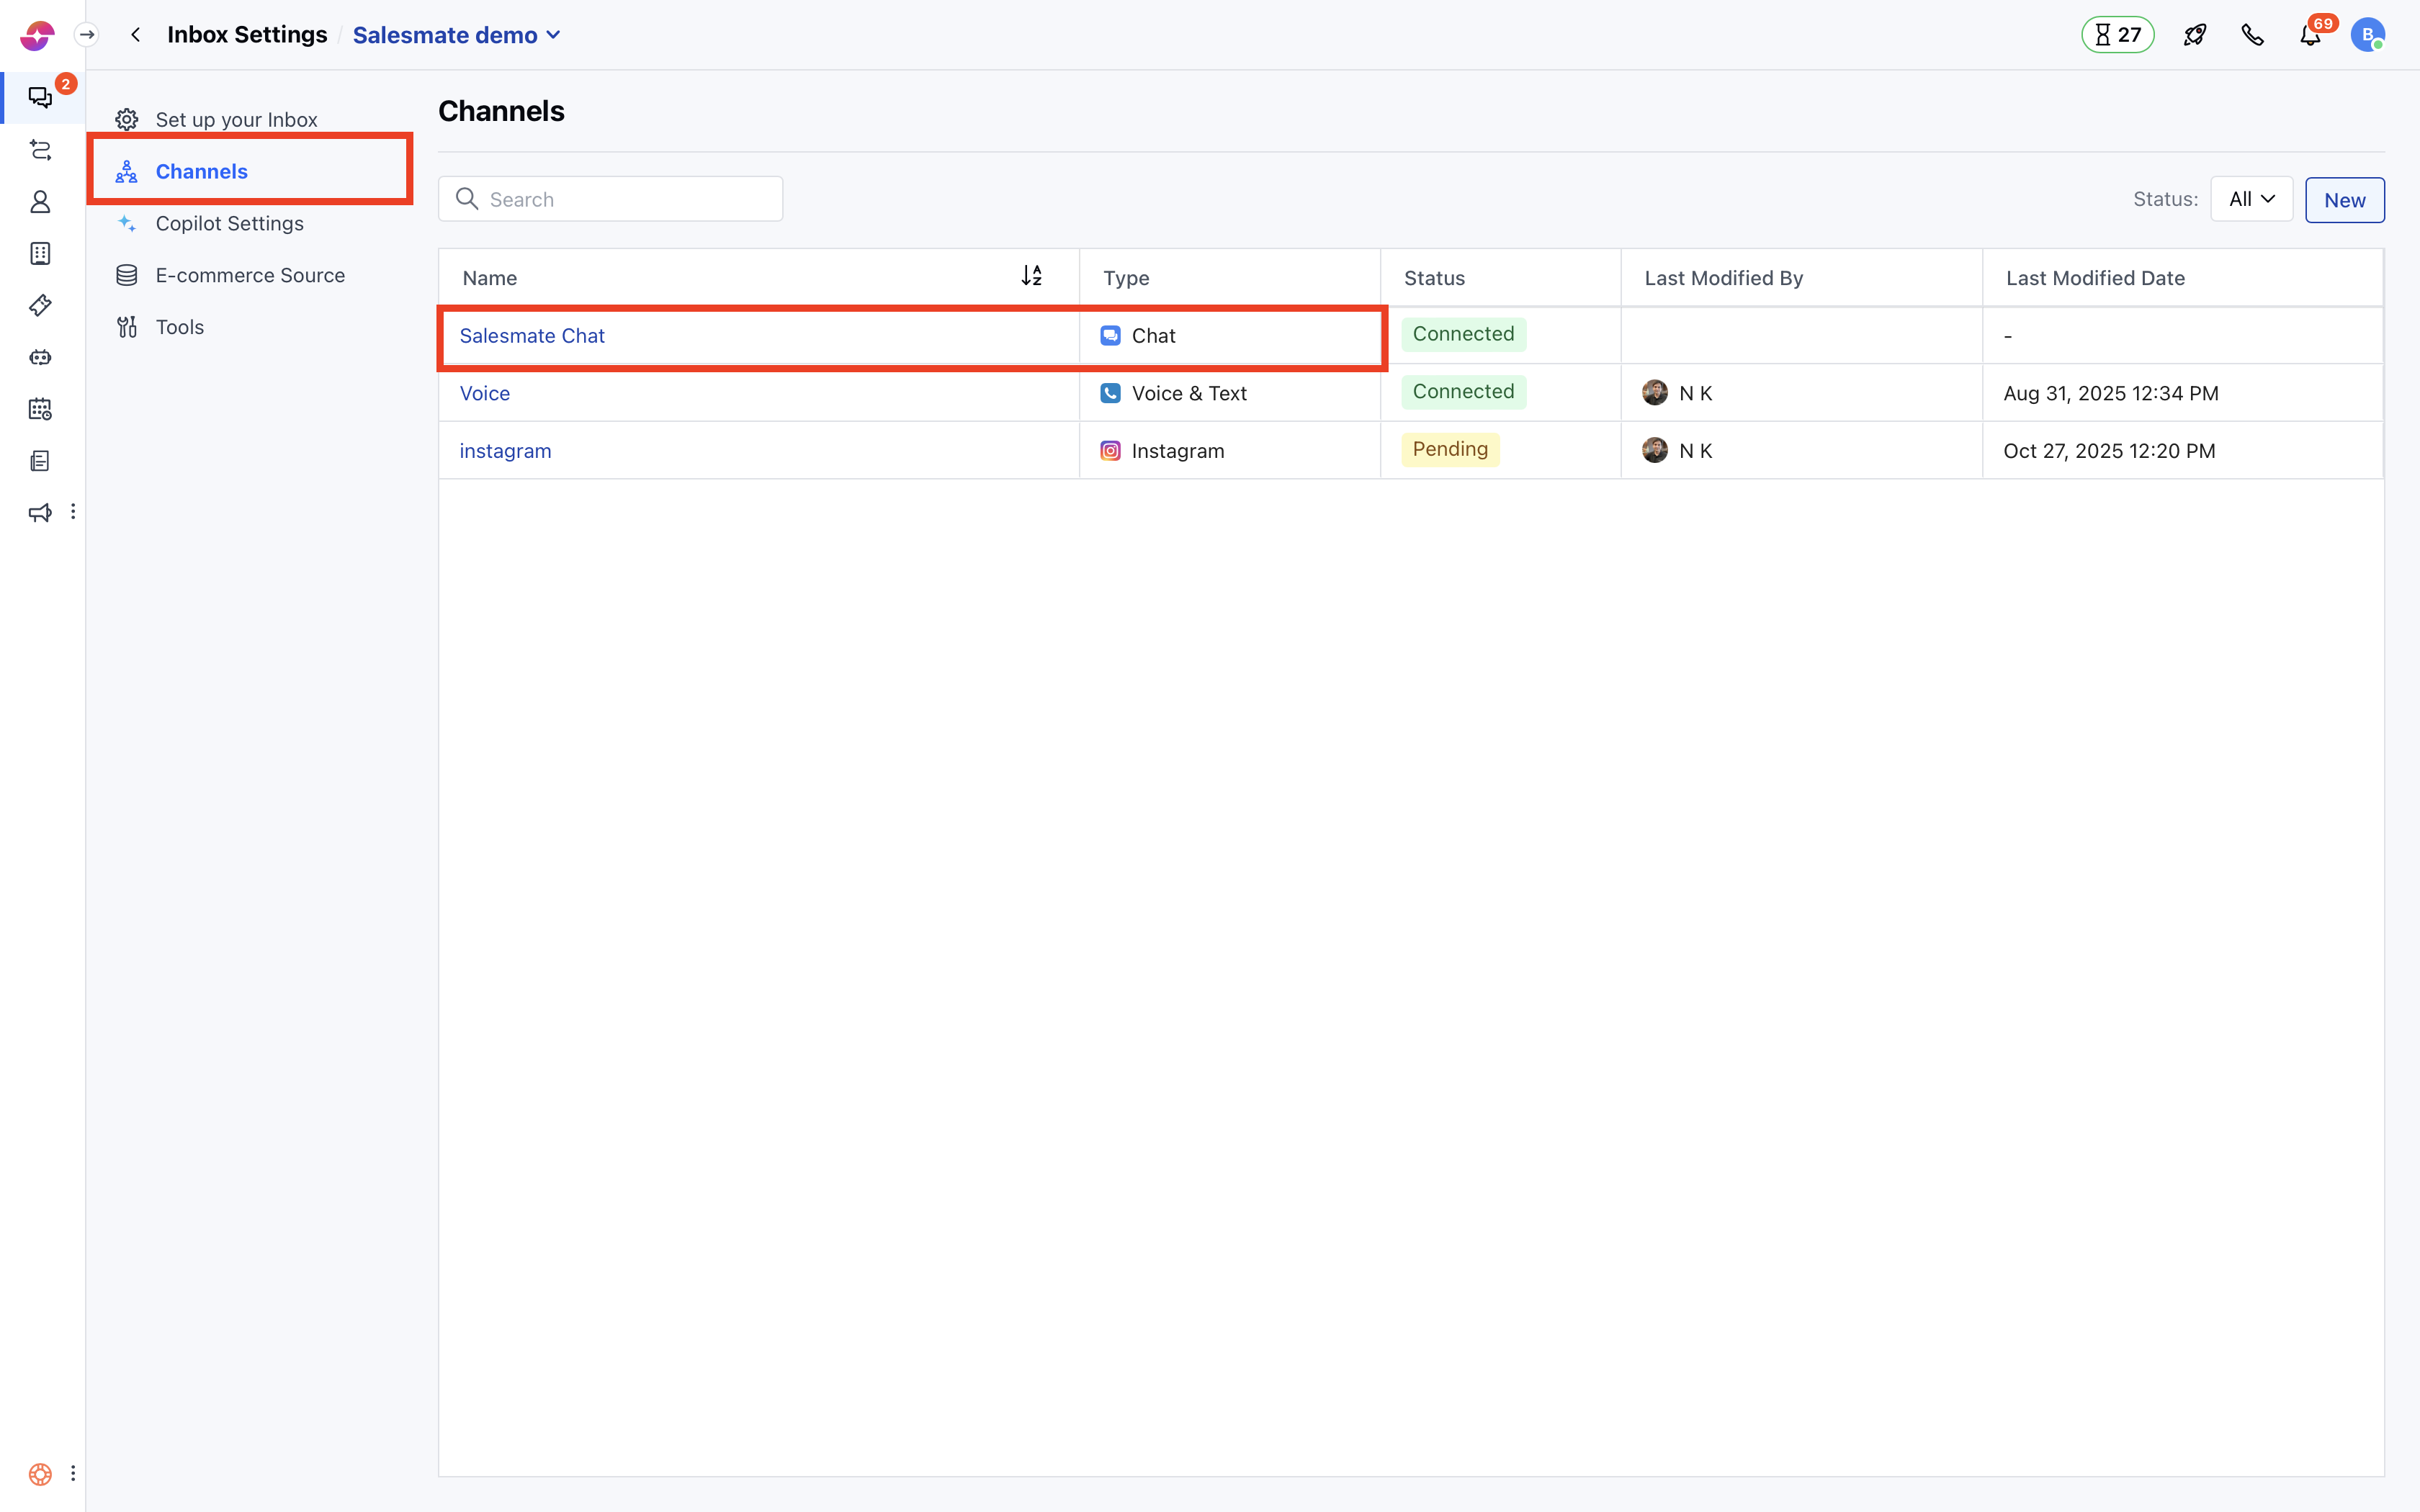
- Here, click on Channel and then locate the Skara Chat channel. From the Actions menu, select Edit.
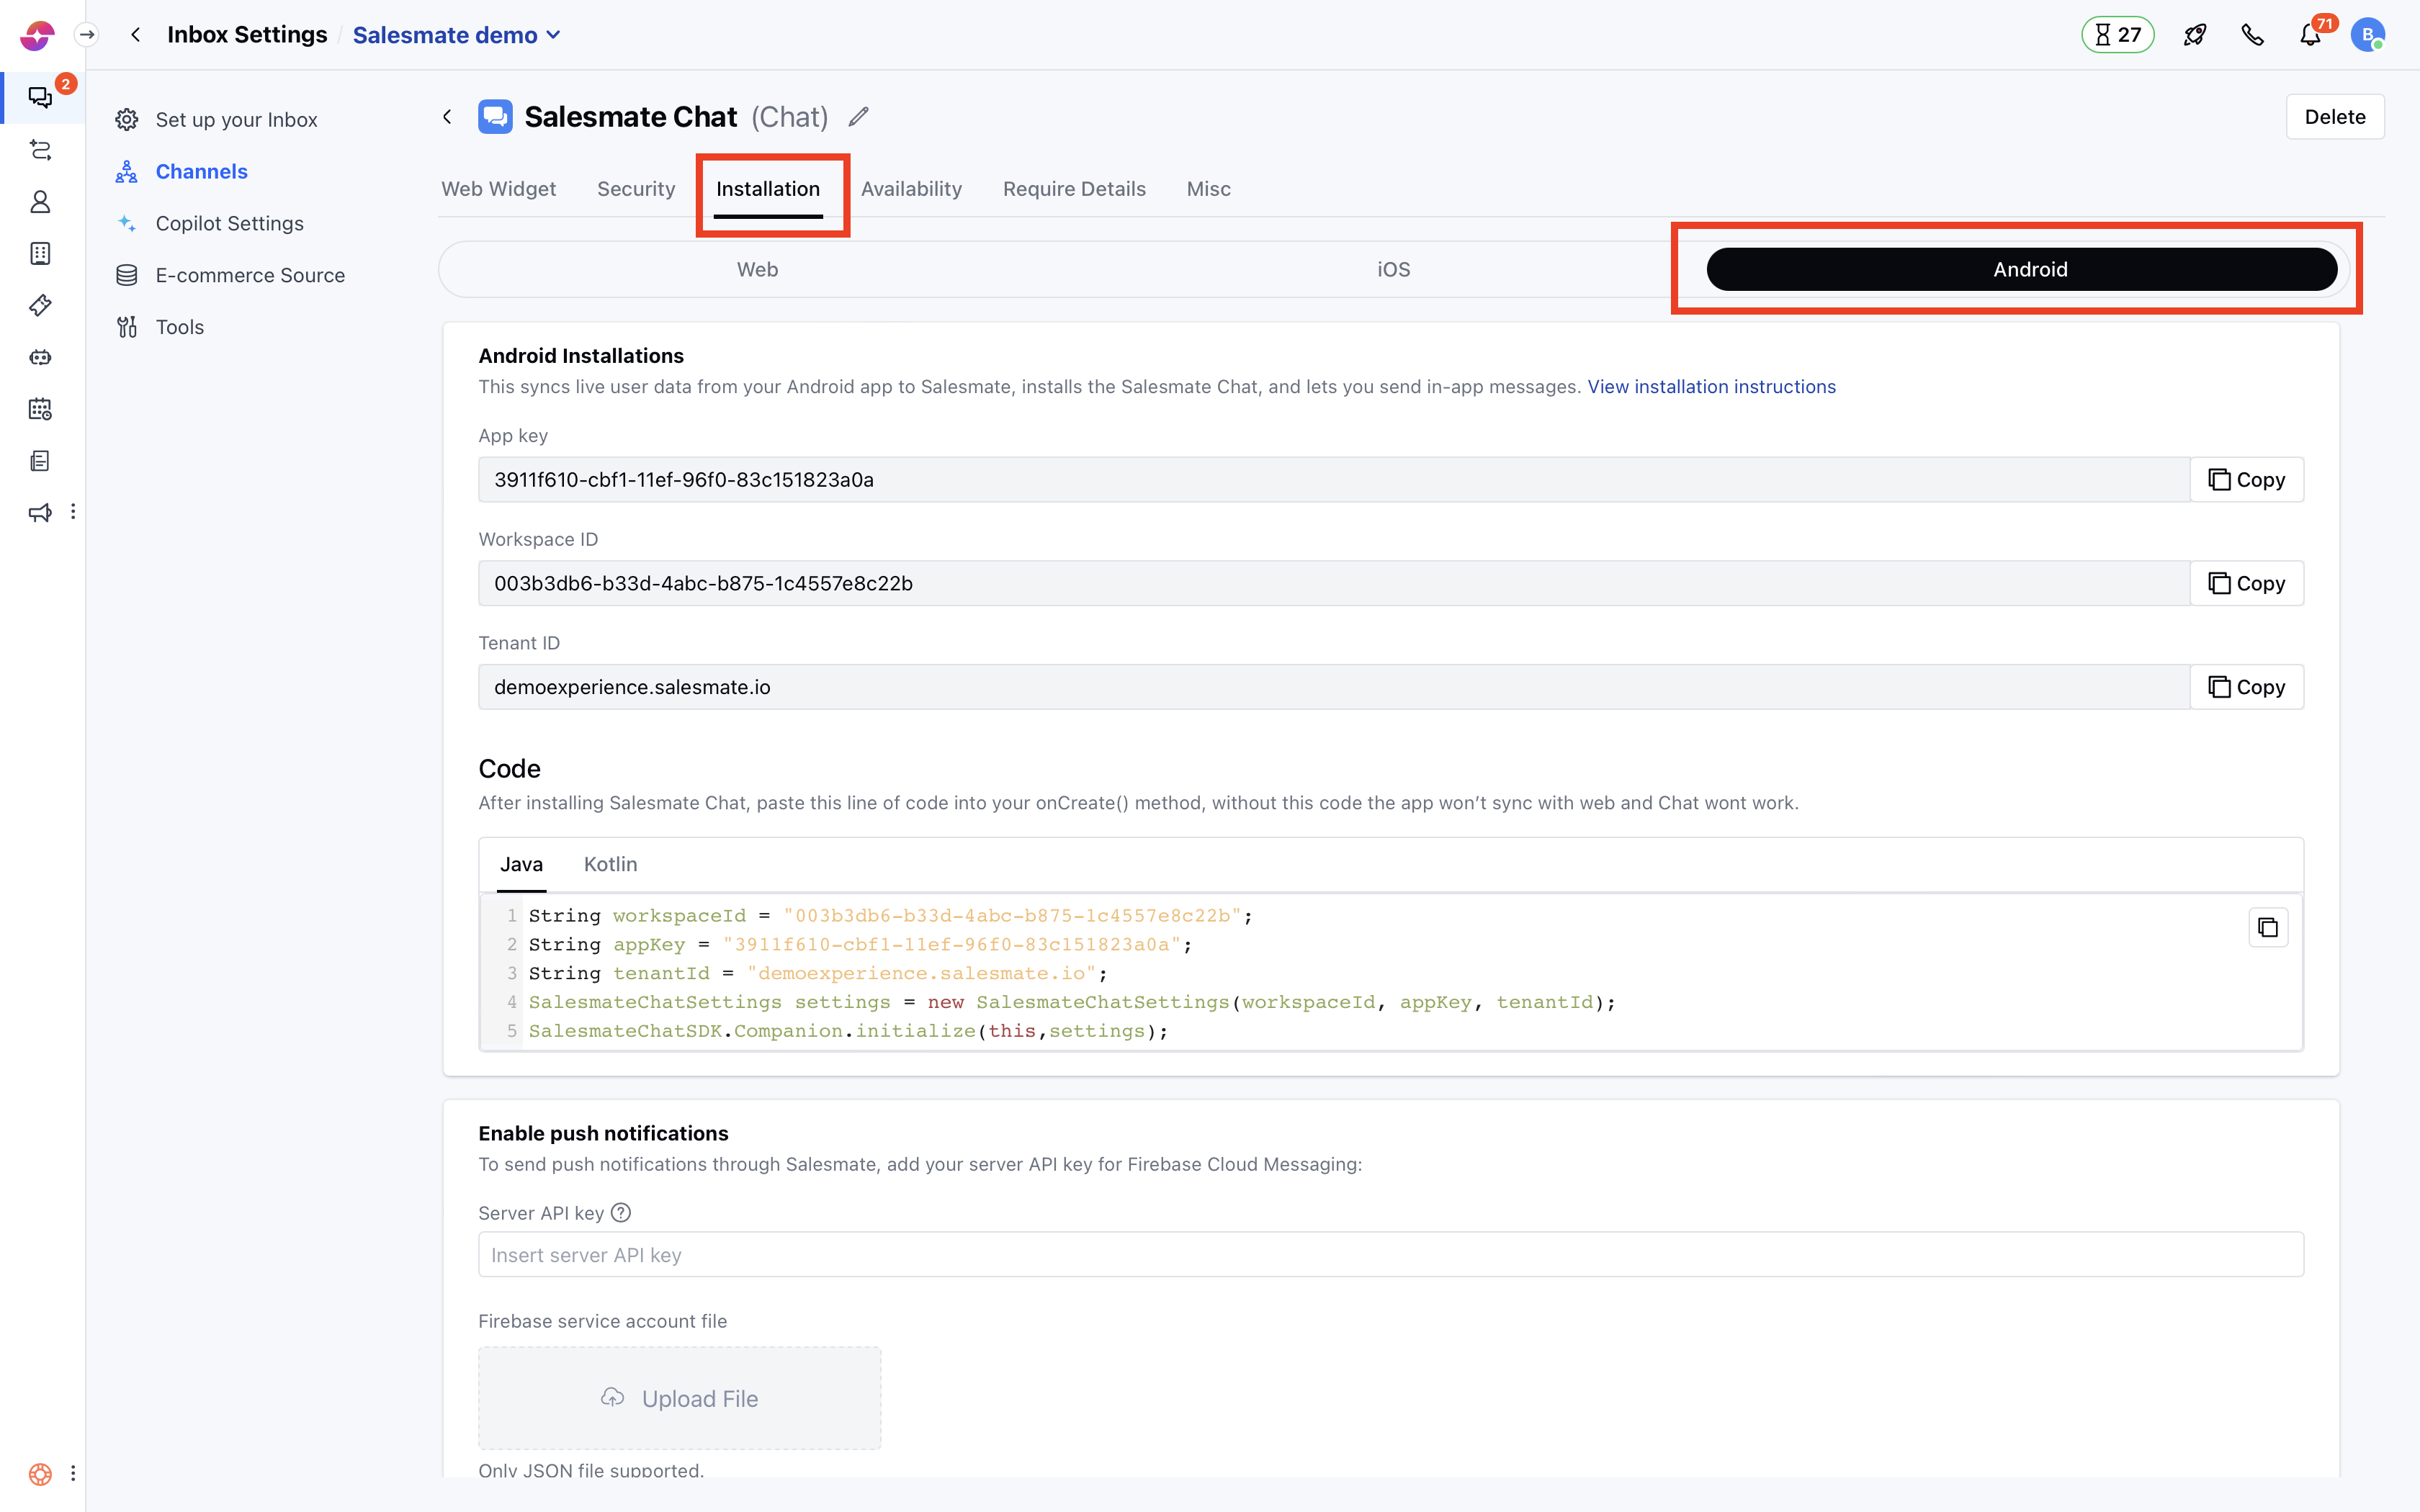
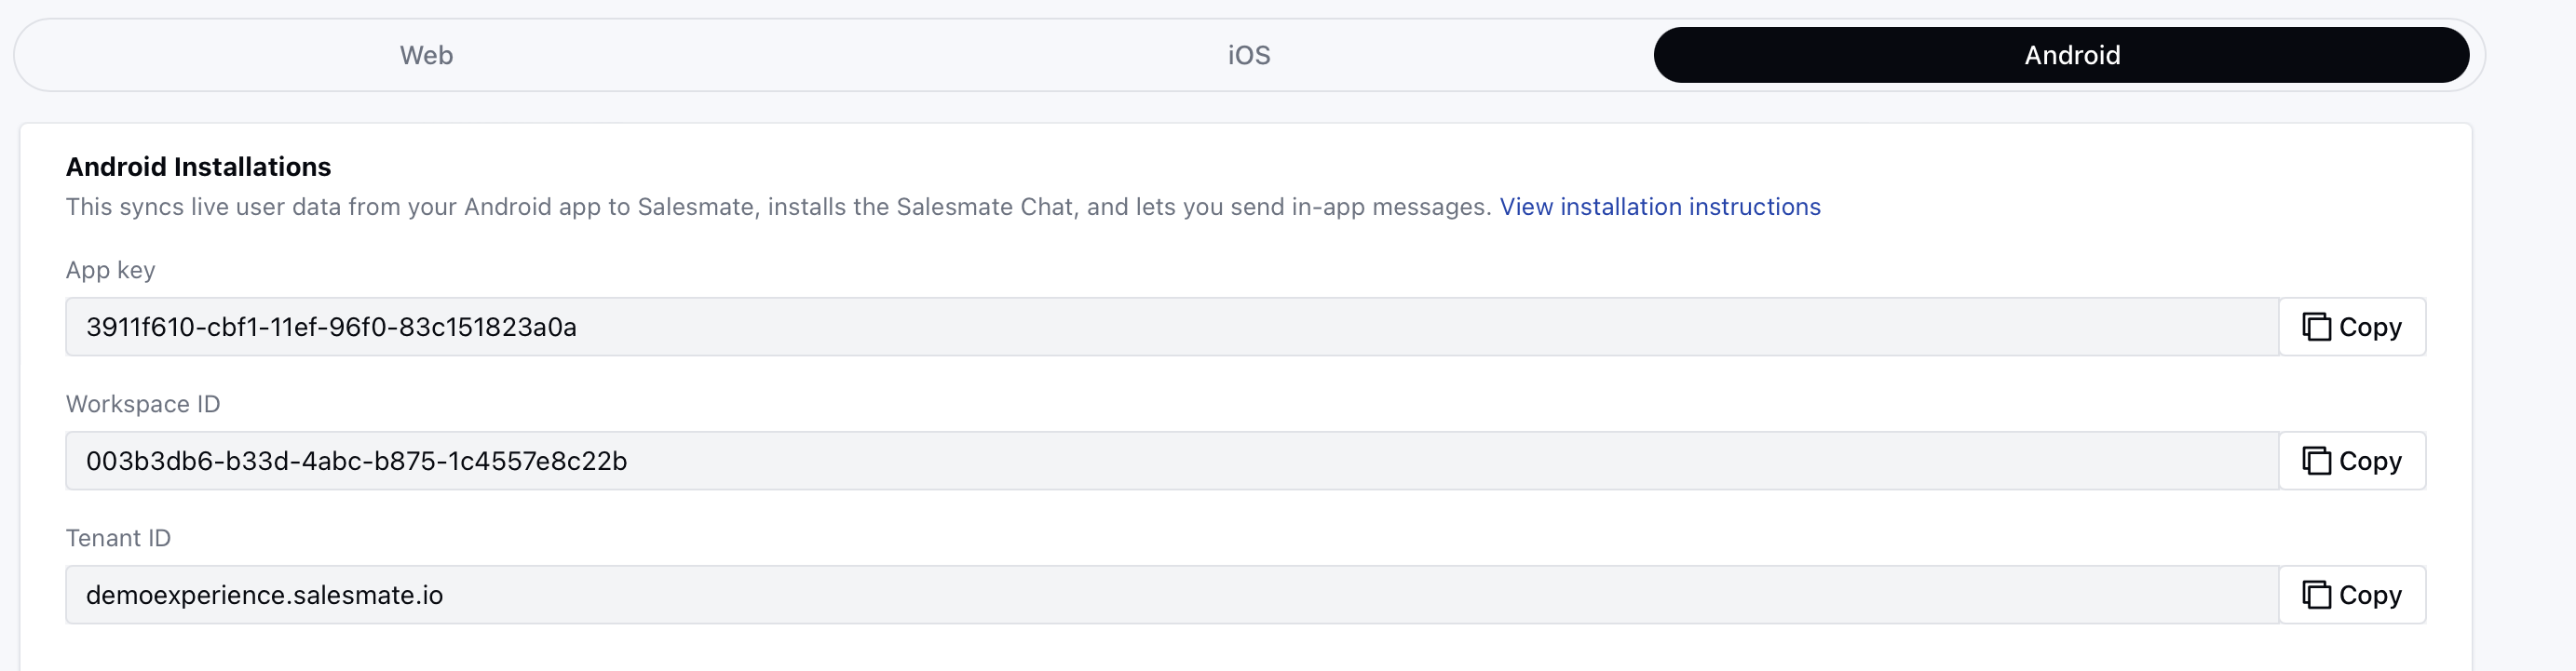
- Here, click on Installation and you will get 3 tabs Web, iOS, and Android, select the Android tab.
- Installation of Chat on your Android app helps sync live user data from your Android app to Skara, and lets you send in-app messages.
Installing:
The android installation screen has two sections- API Key
- Push Notifications
API Key: - You can use the below keys to add the Skara Chats to your app.
- API Key: A unique key for your Skara account.
- Workspace ID: A unique key for your Skara Chat workspace
- Tenant ID: This is your Skara domain link.
- The code is available in two languages
- Java-Kotlin

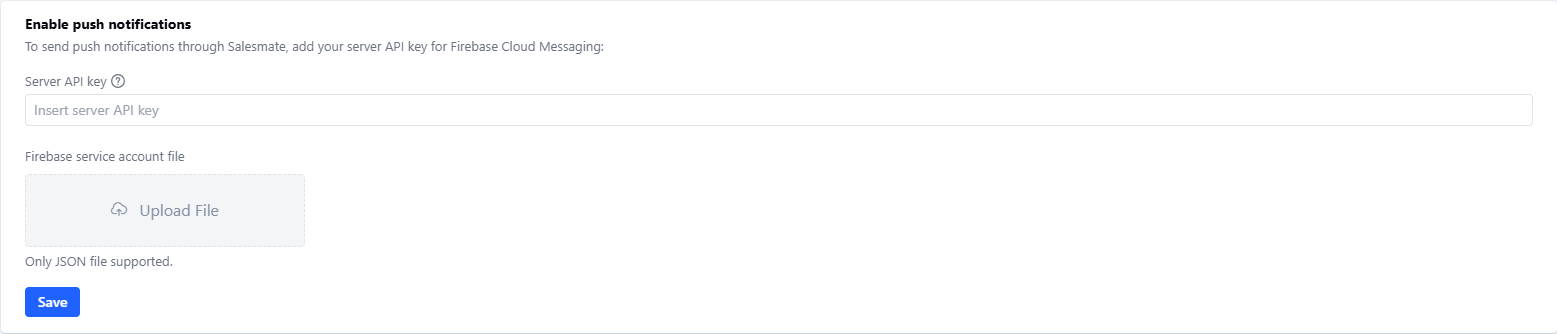
Enable Push Notifications: - To send push notifications through
- Messenger to your Android device, you need to configure the below settings.
- The push notifications are sent for newly received messages on Skara Messenger when visitor/contact leaves the app. Here, you need to add the below details to the Skara Chat settings
- Server API Key: Add your server API key for Firebase Cloud Messaging
- Firebase service account file (Only JSON file is supported) Once, you add the above information, the Save button would be enabled.