How to Create an SLA
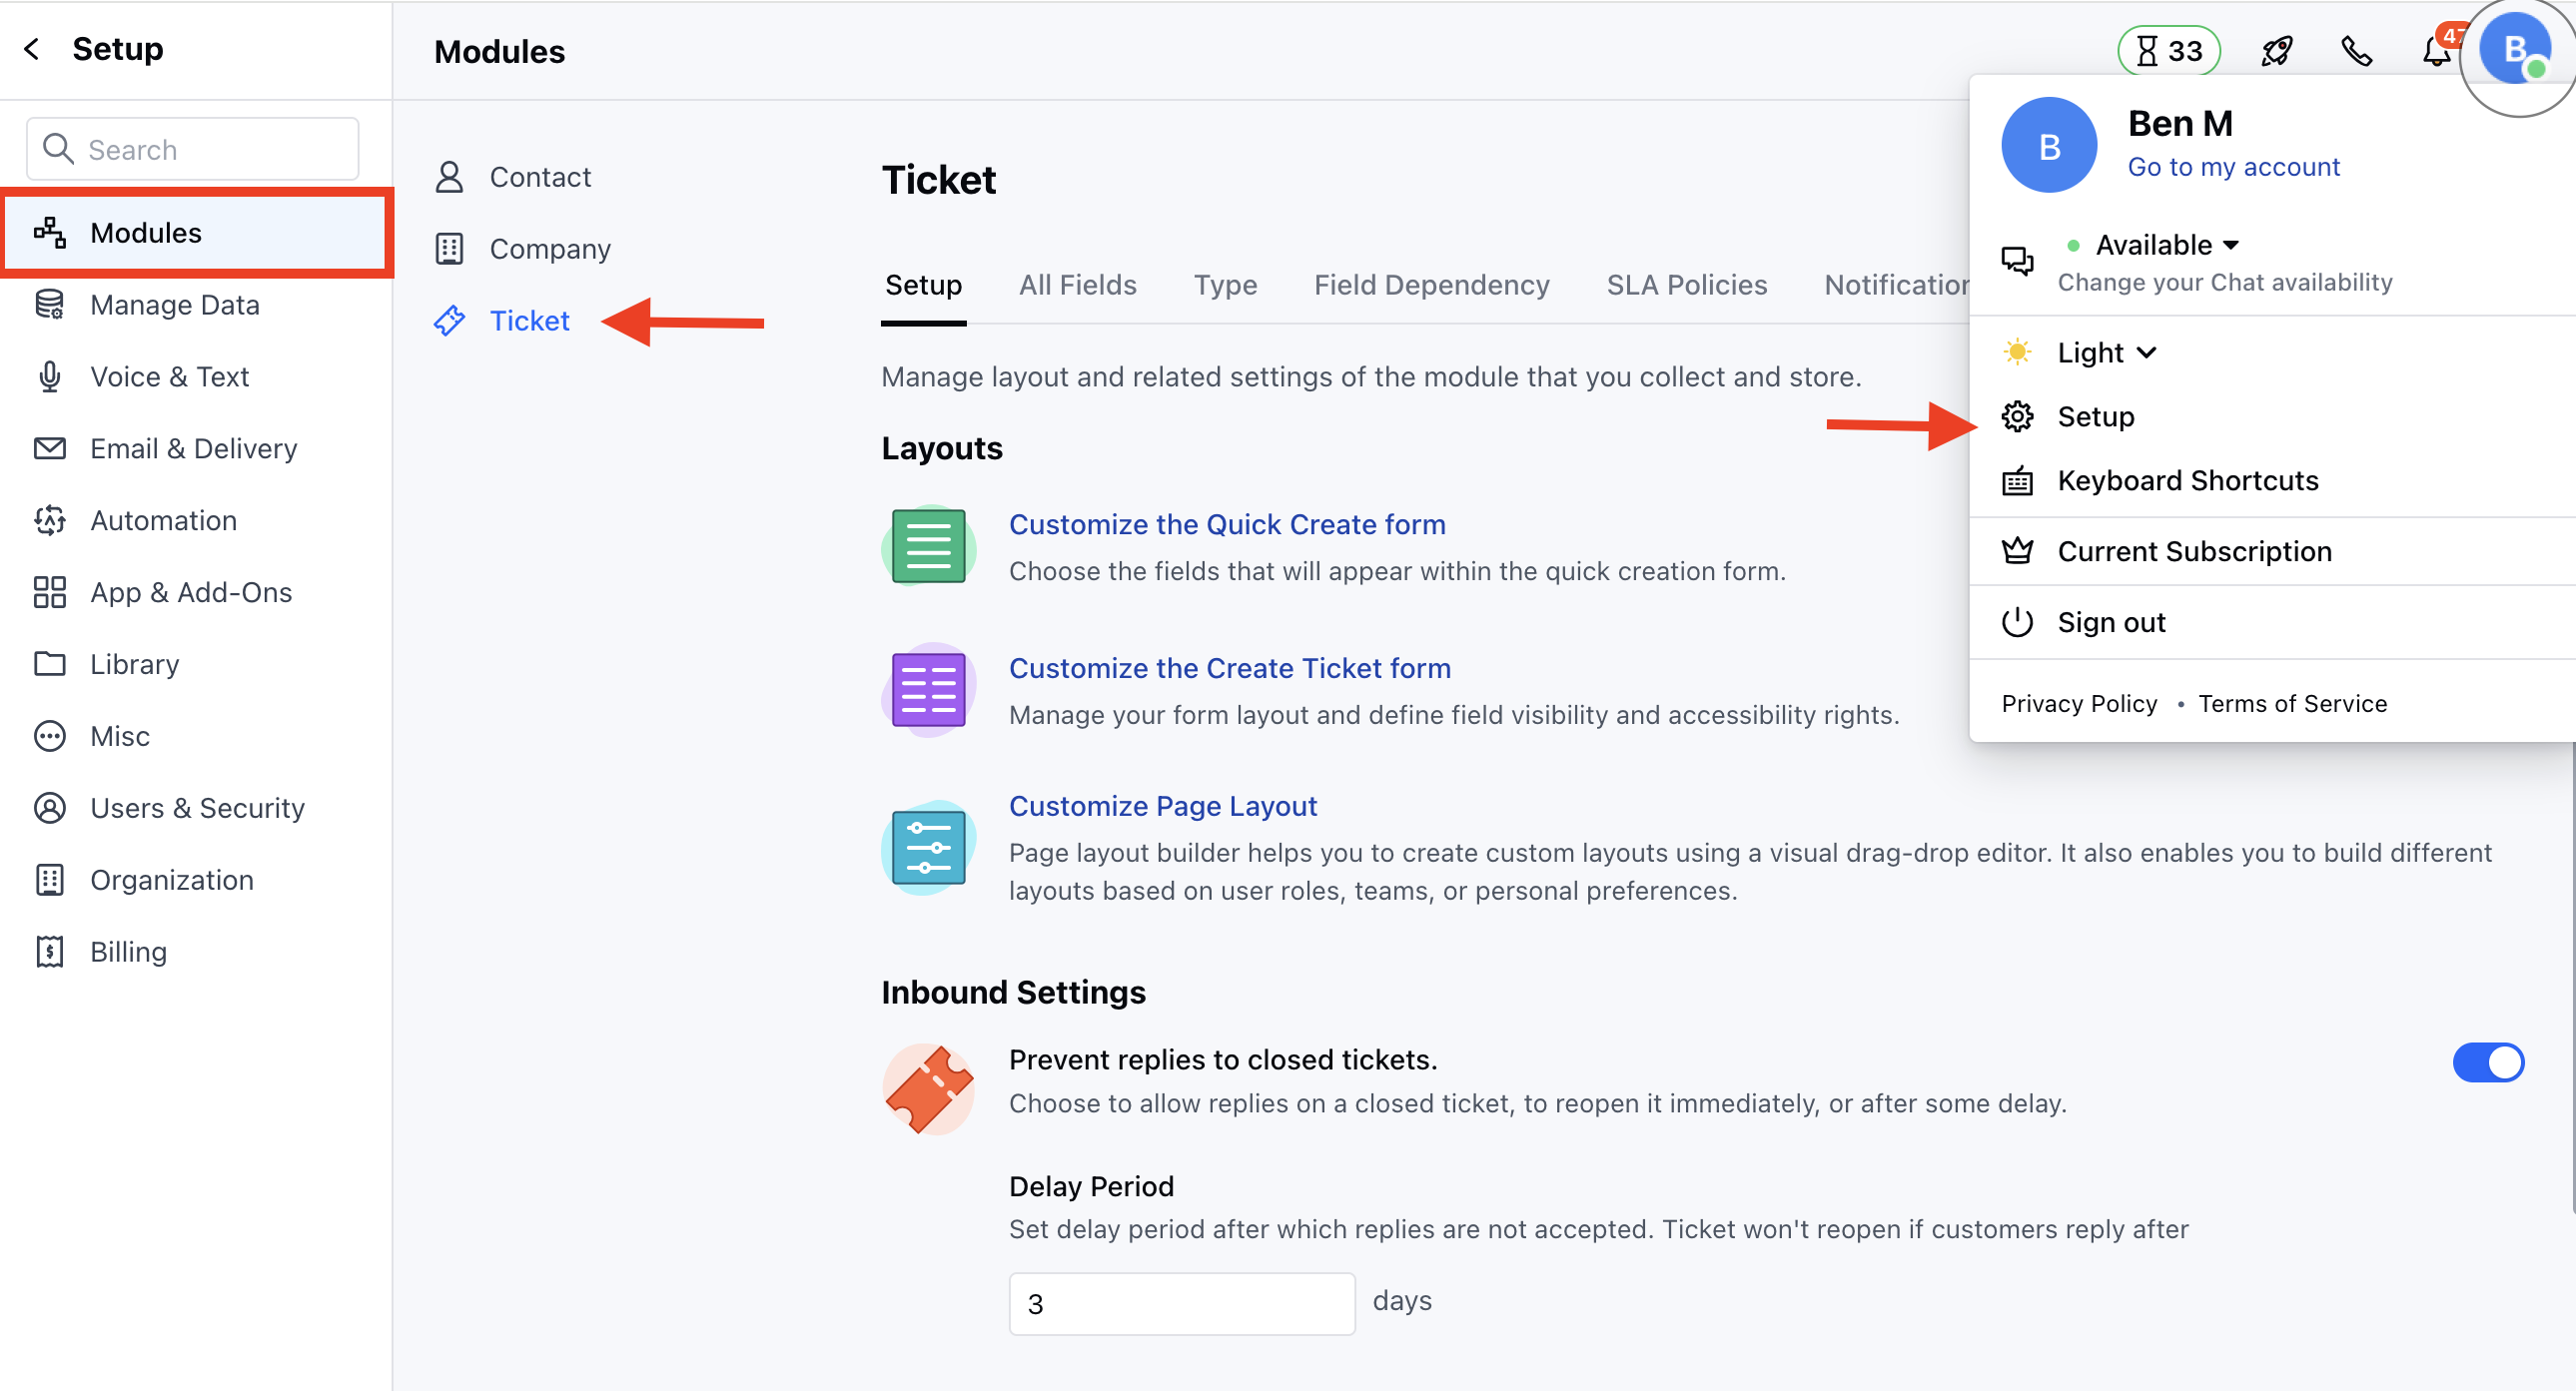
To create an SLA policy,- Navigate to the Profile Icon on the top right corner
- Click on Set Up
- Head over to the Modules category
- Click on Tickets
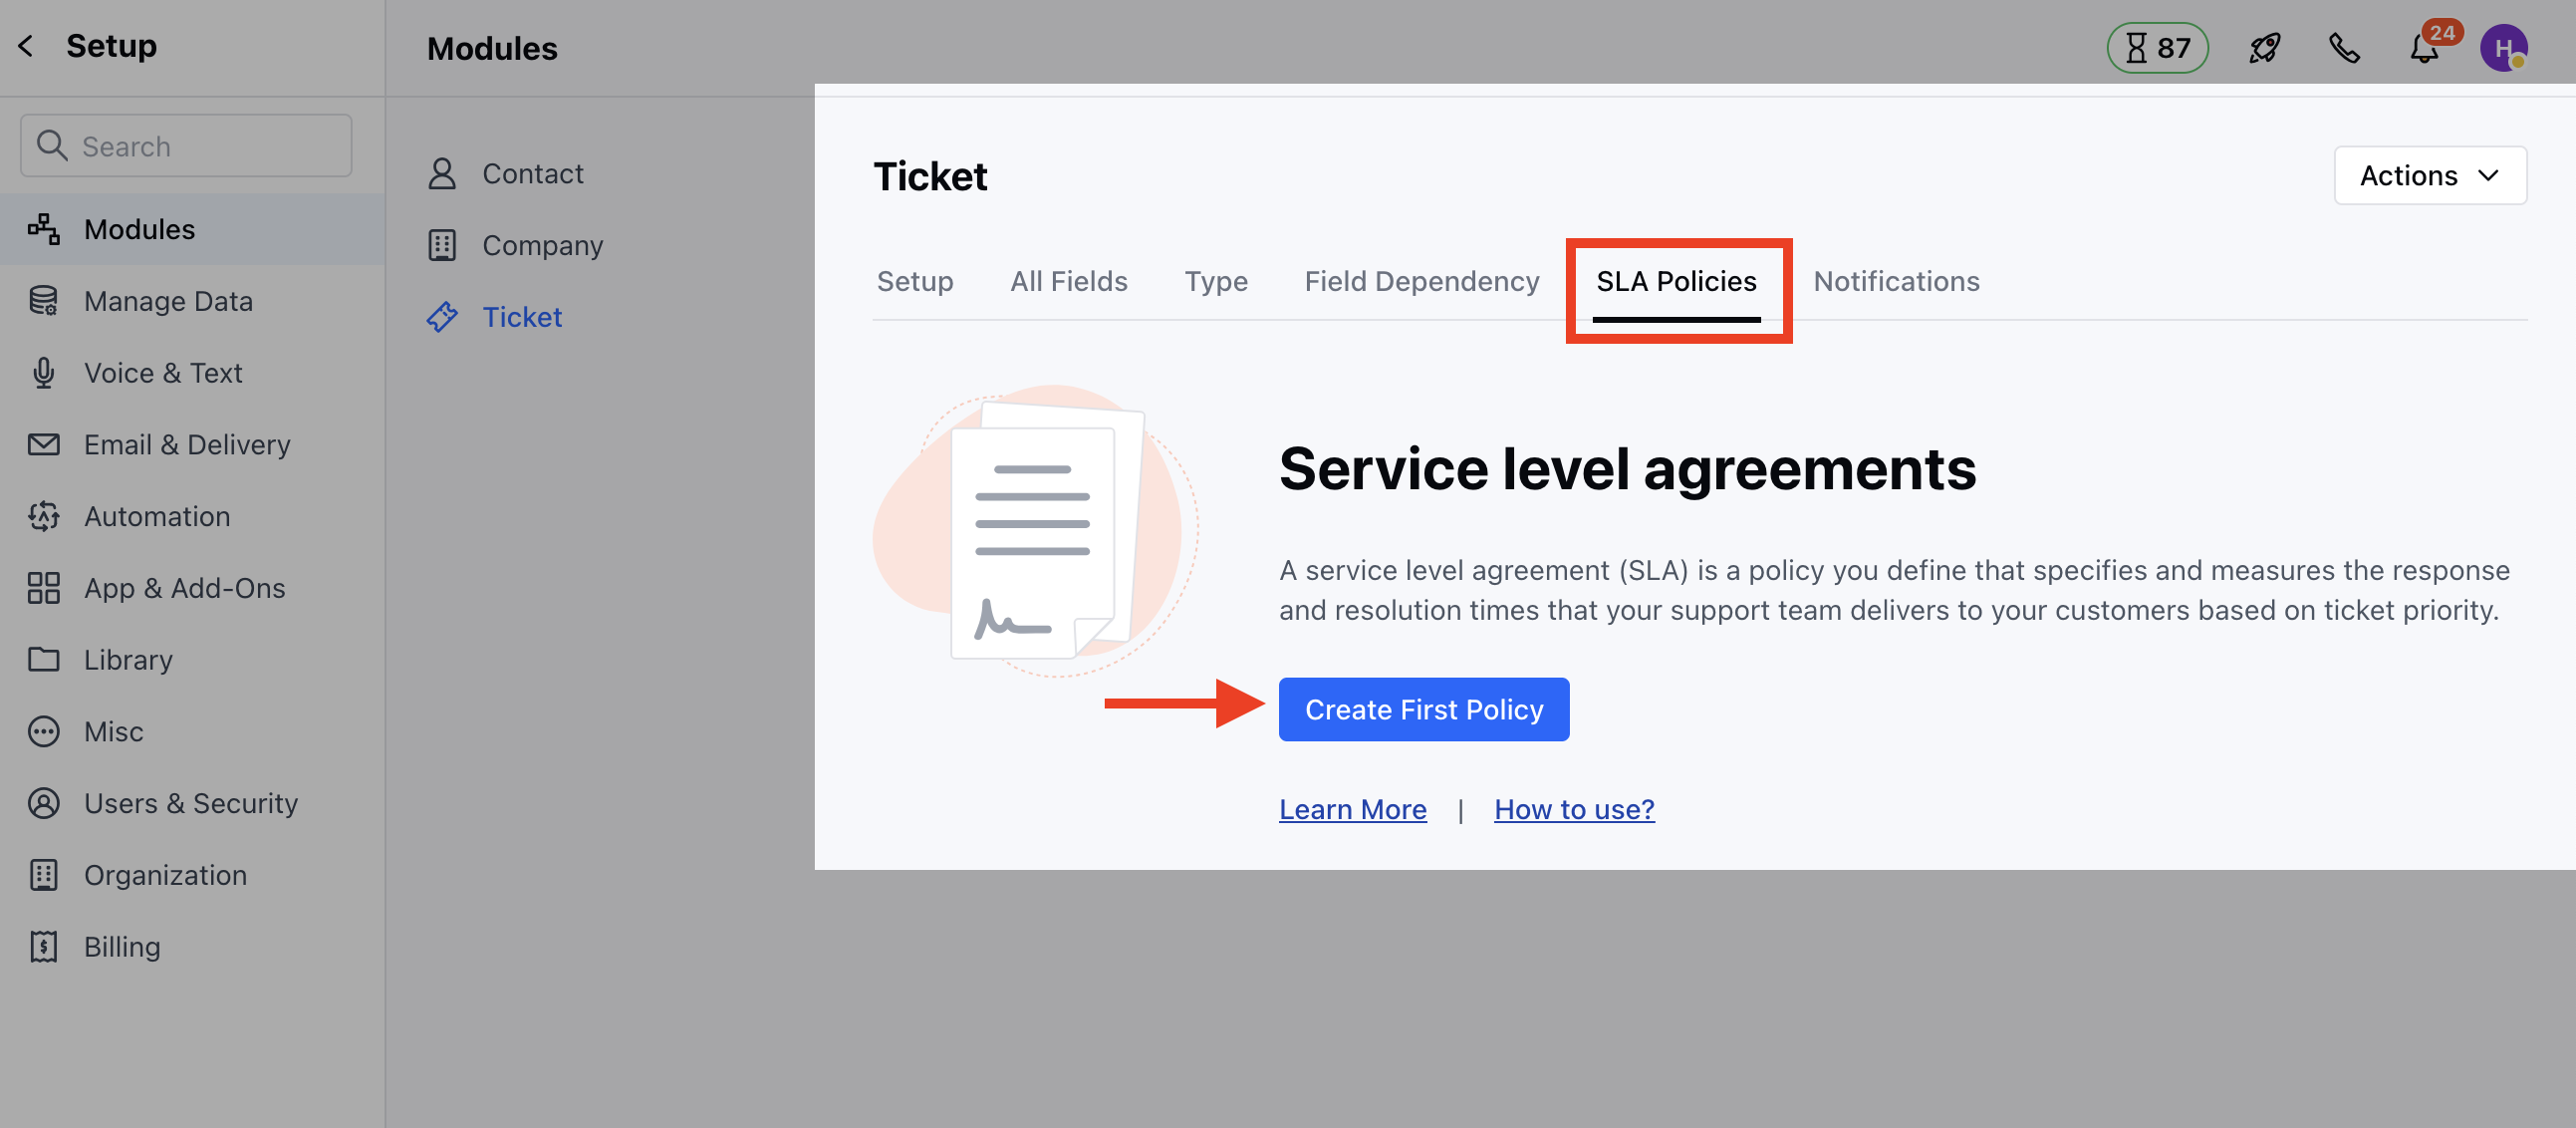
- Head to the SLA Policies section
- Click on Create First Policy to create a new policy
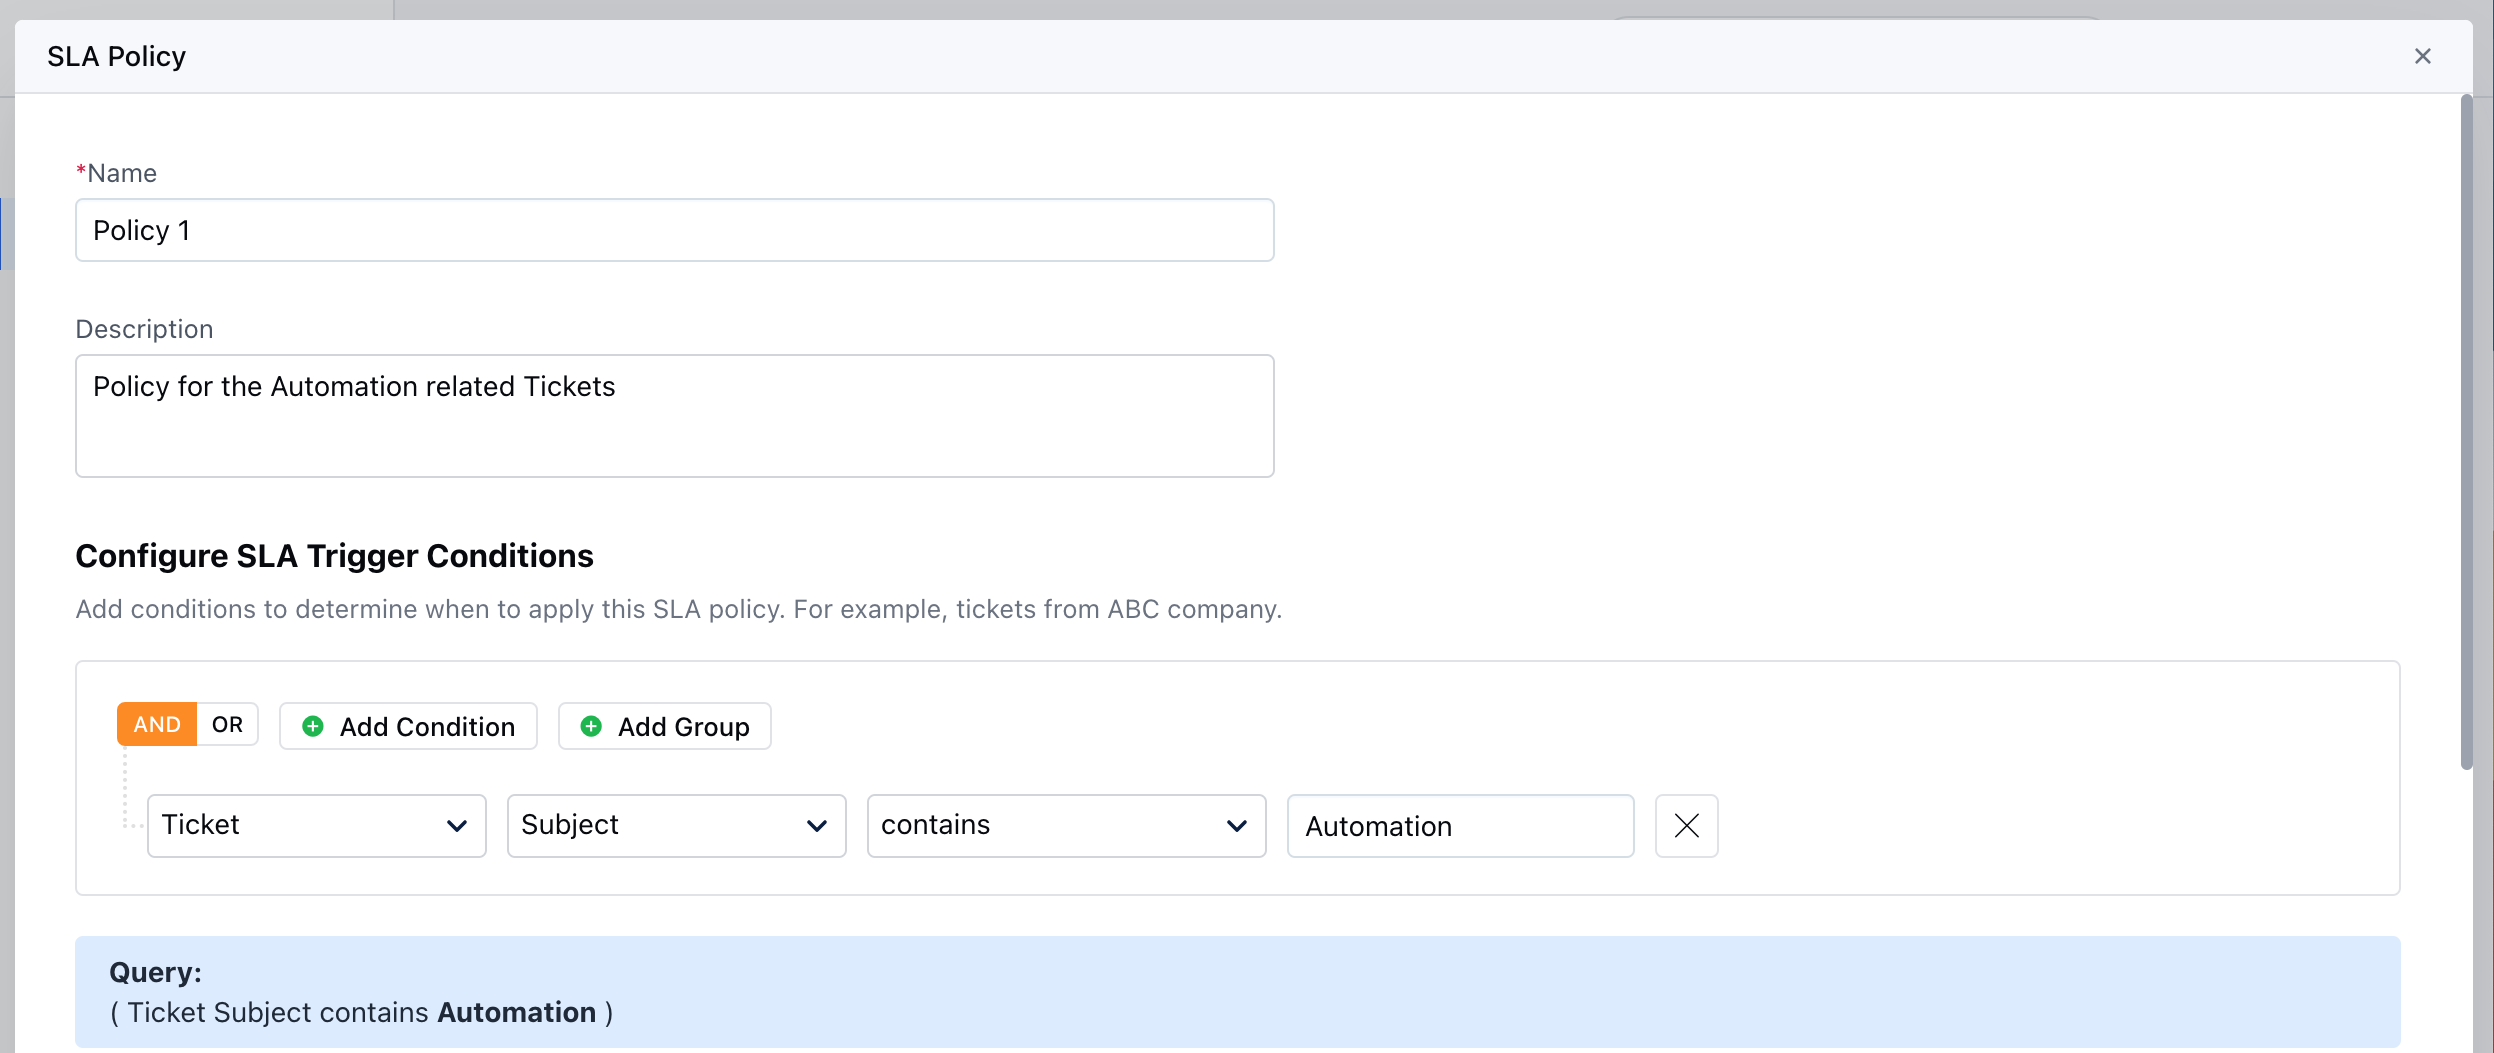
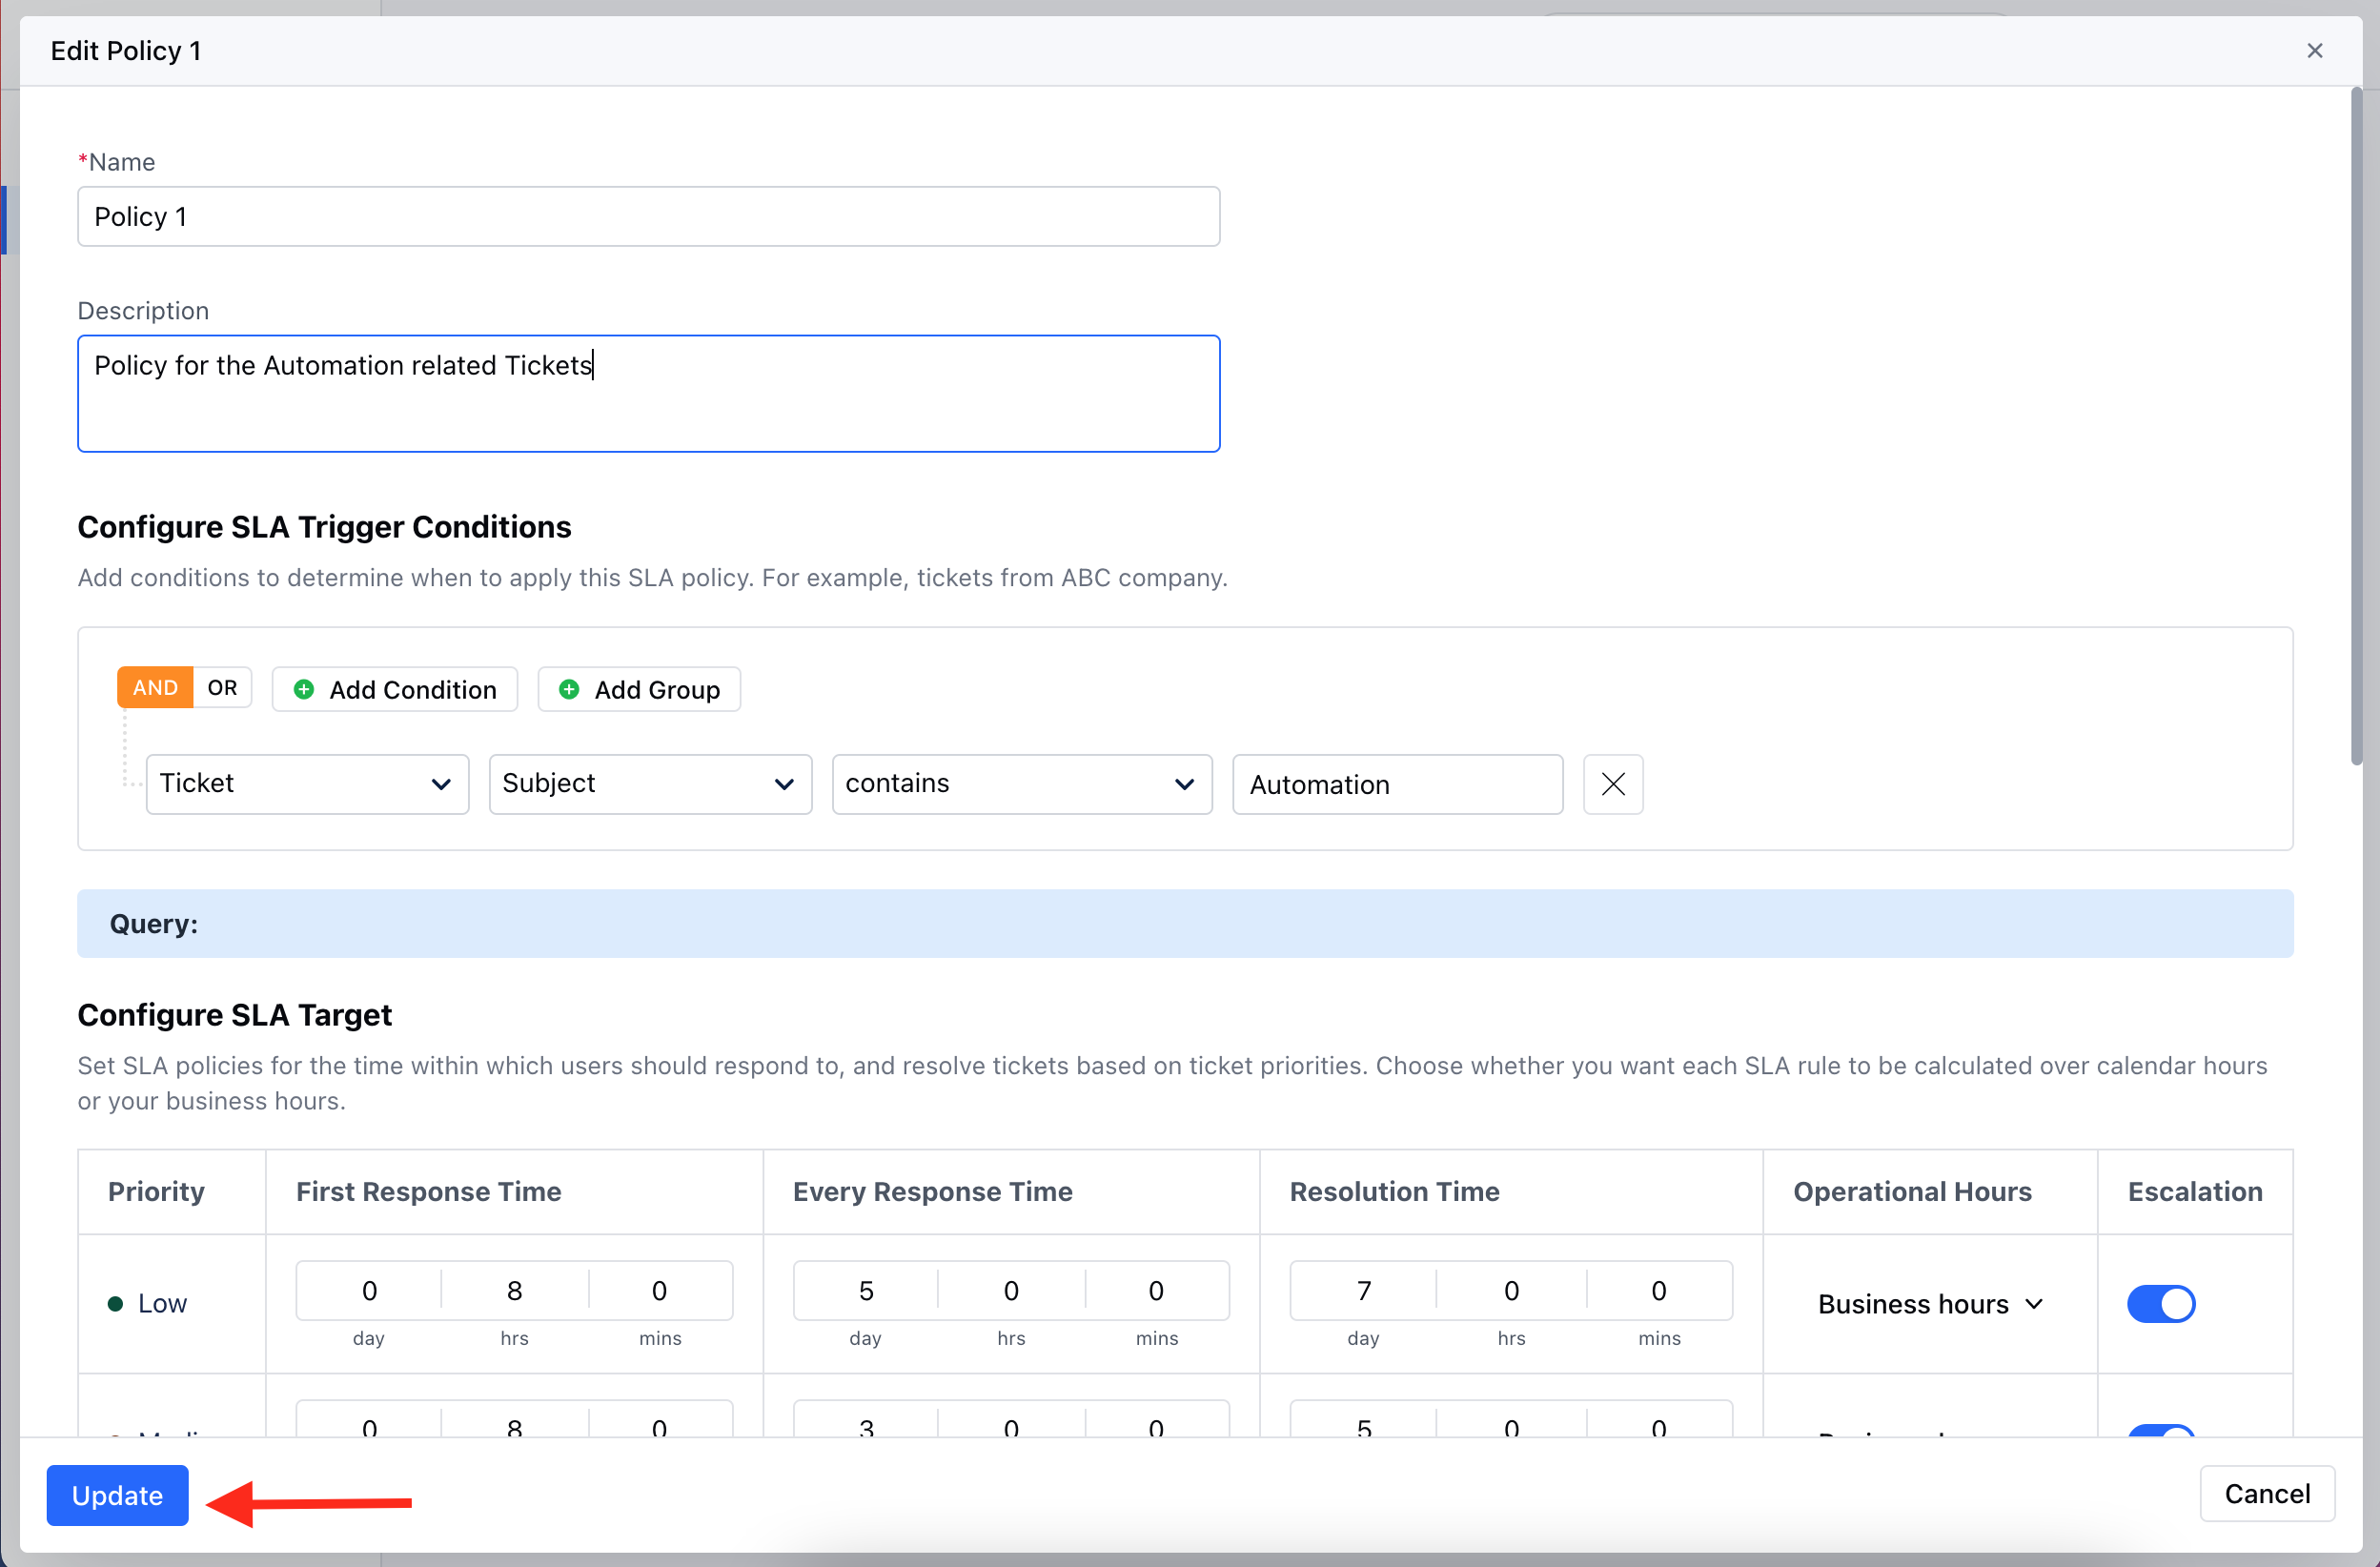
- Name - Enter an appropriate name for the policy
- Description - Enter the brief description explaining the Policy you are creating.
- Configure SLA Trigger conditions - Mention the Condition to determine when the Policy should be applied.
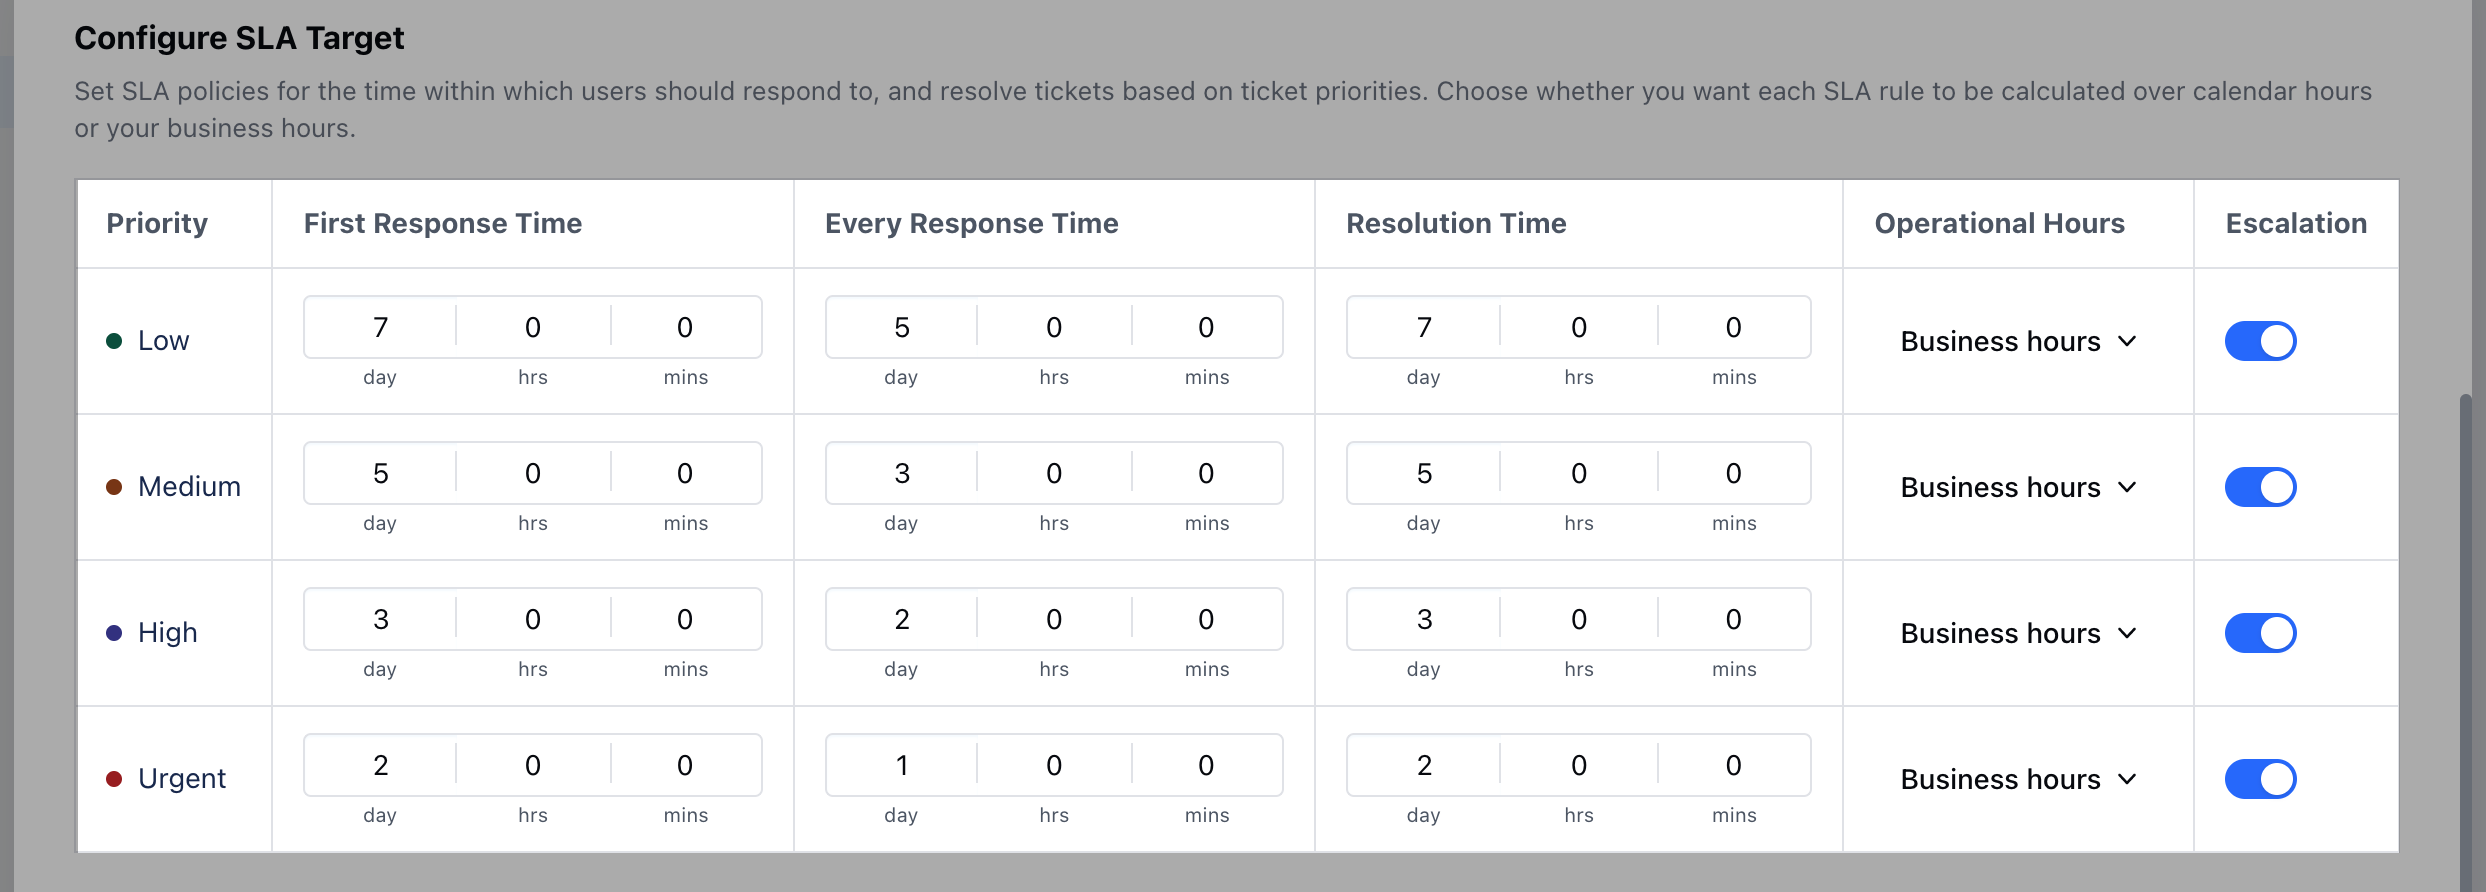
- Configure SLA Target - Set SLA policies for the time within which users should respond to, and resolve tickets based on ticket priorities. Learn More *
- Priority* * First response time * Every response time * Resolution time * Operational Hours * Escalation
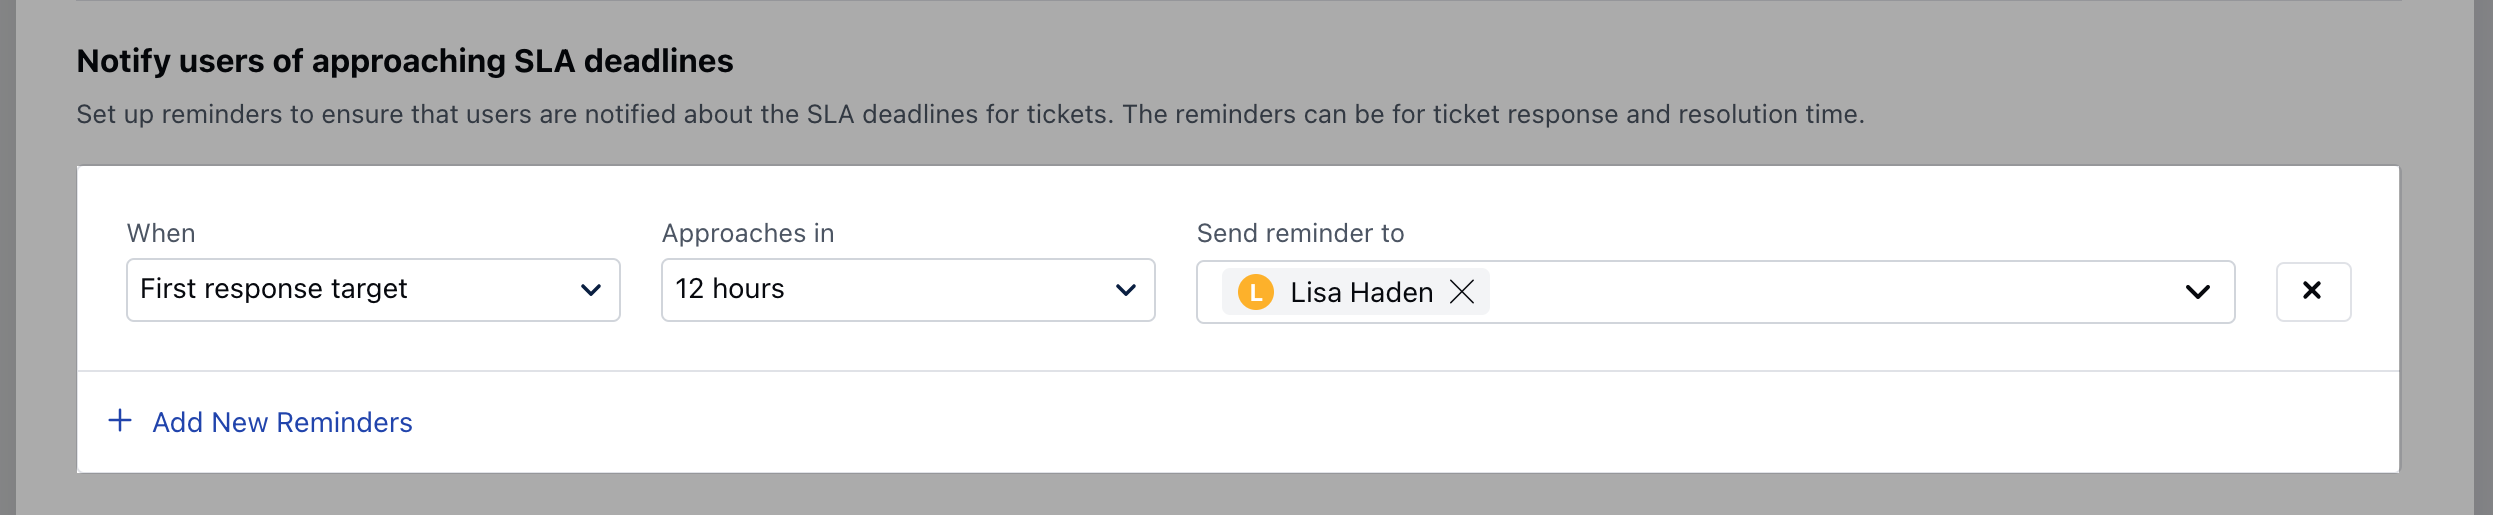
- **Notify Users of approaching SLA deadlines - ** Set Up reminders to notify Users when the SLA is approaching the deadlines. You can choose single or multiple active Users/Teams to be notified * When - Choose the Metric for when the User should be notified * Approaches in - Select the Time for the User to be notified * Send Reminder to - Select the User/Team that should receive a Notification while the deadline is approaching
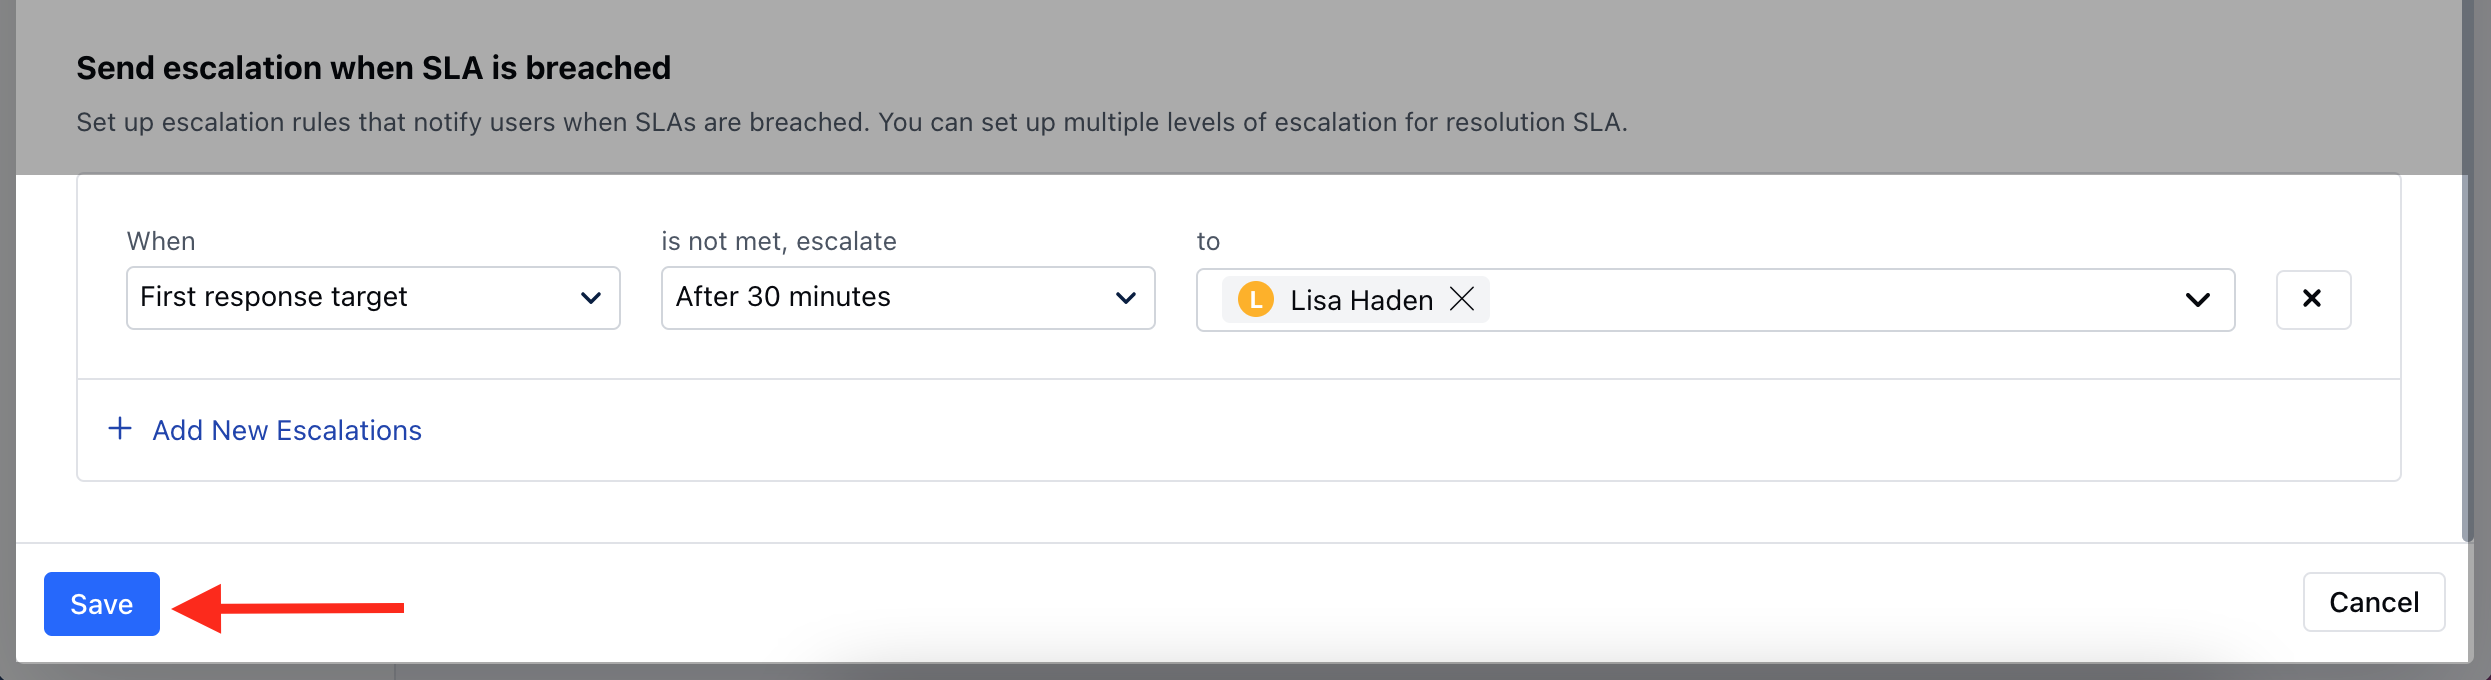
- Send escalation when SLA is breached - Set Up escalation to send an alert to the Users when the SLA is violated. You can choose single or multiple active Users/Teams to be notified. * When - Choose the Metric for when the User should be notified * Is not met, escalation - Select the time to send an alert * To - Select the User/Team that should receive an alert when SLA is breached
How to Edit SLA
To Edit SLA,- Navigate to the Profile Icon on the top right corner
- Click on Set Up
- Head over to the Modules category
- Click on Tickets
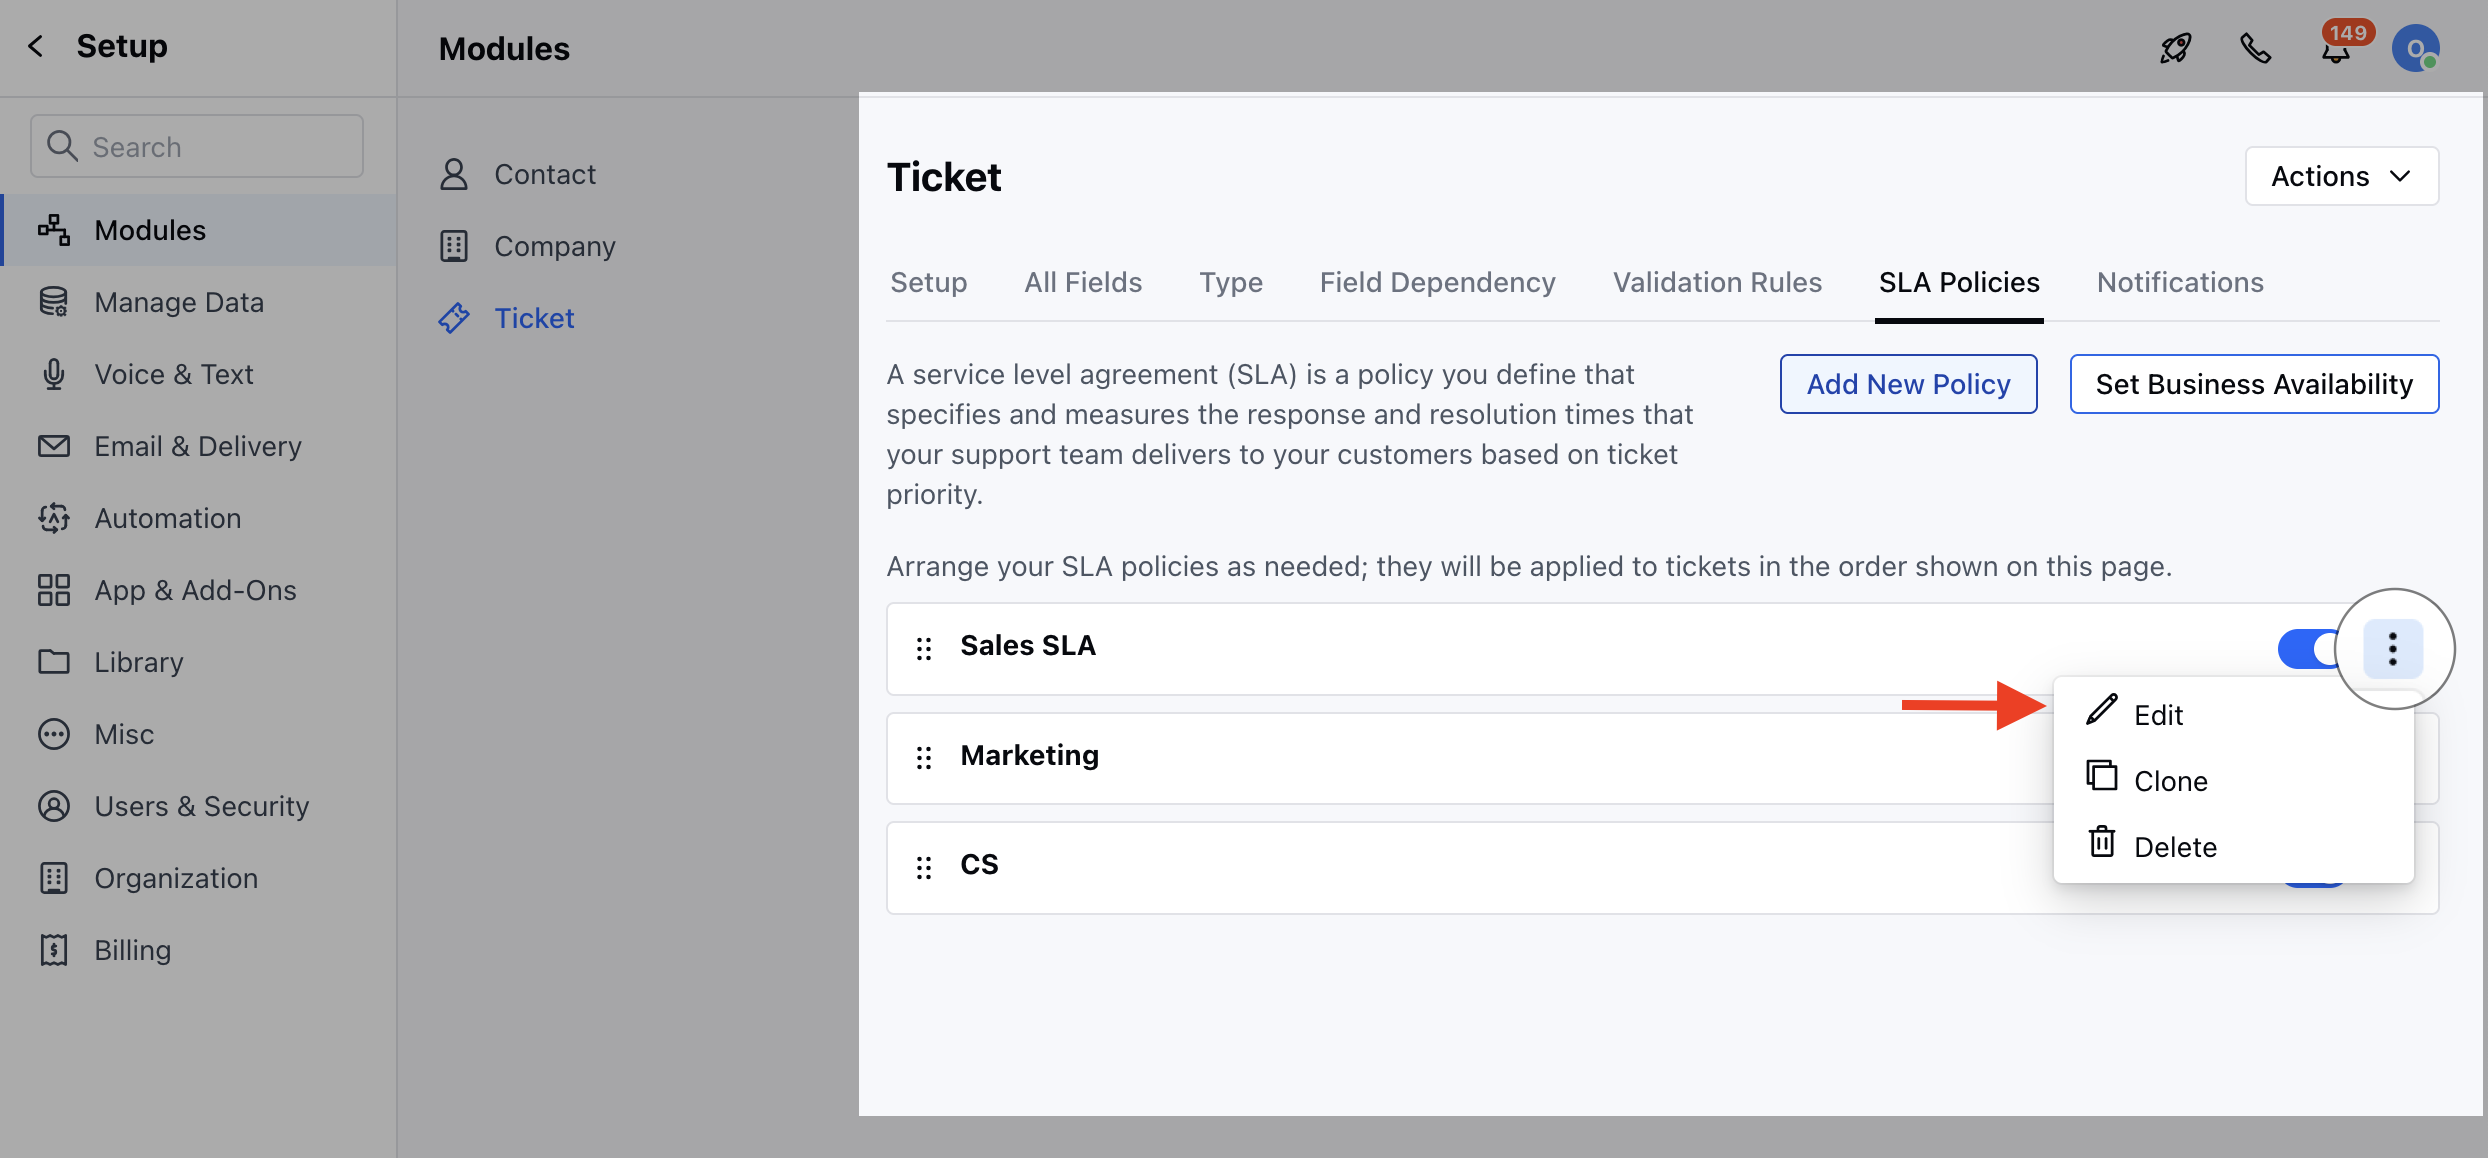
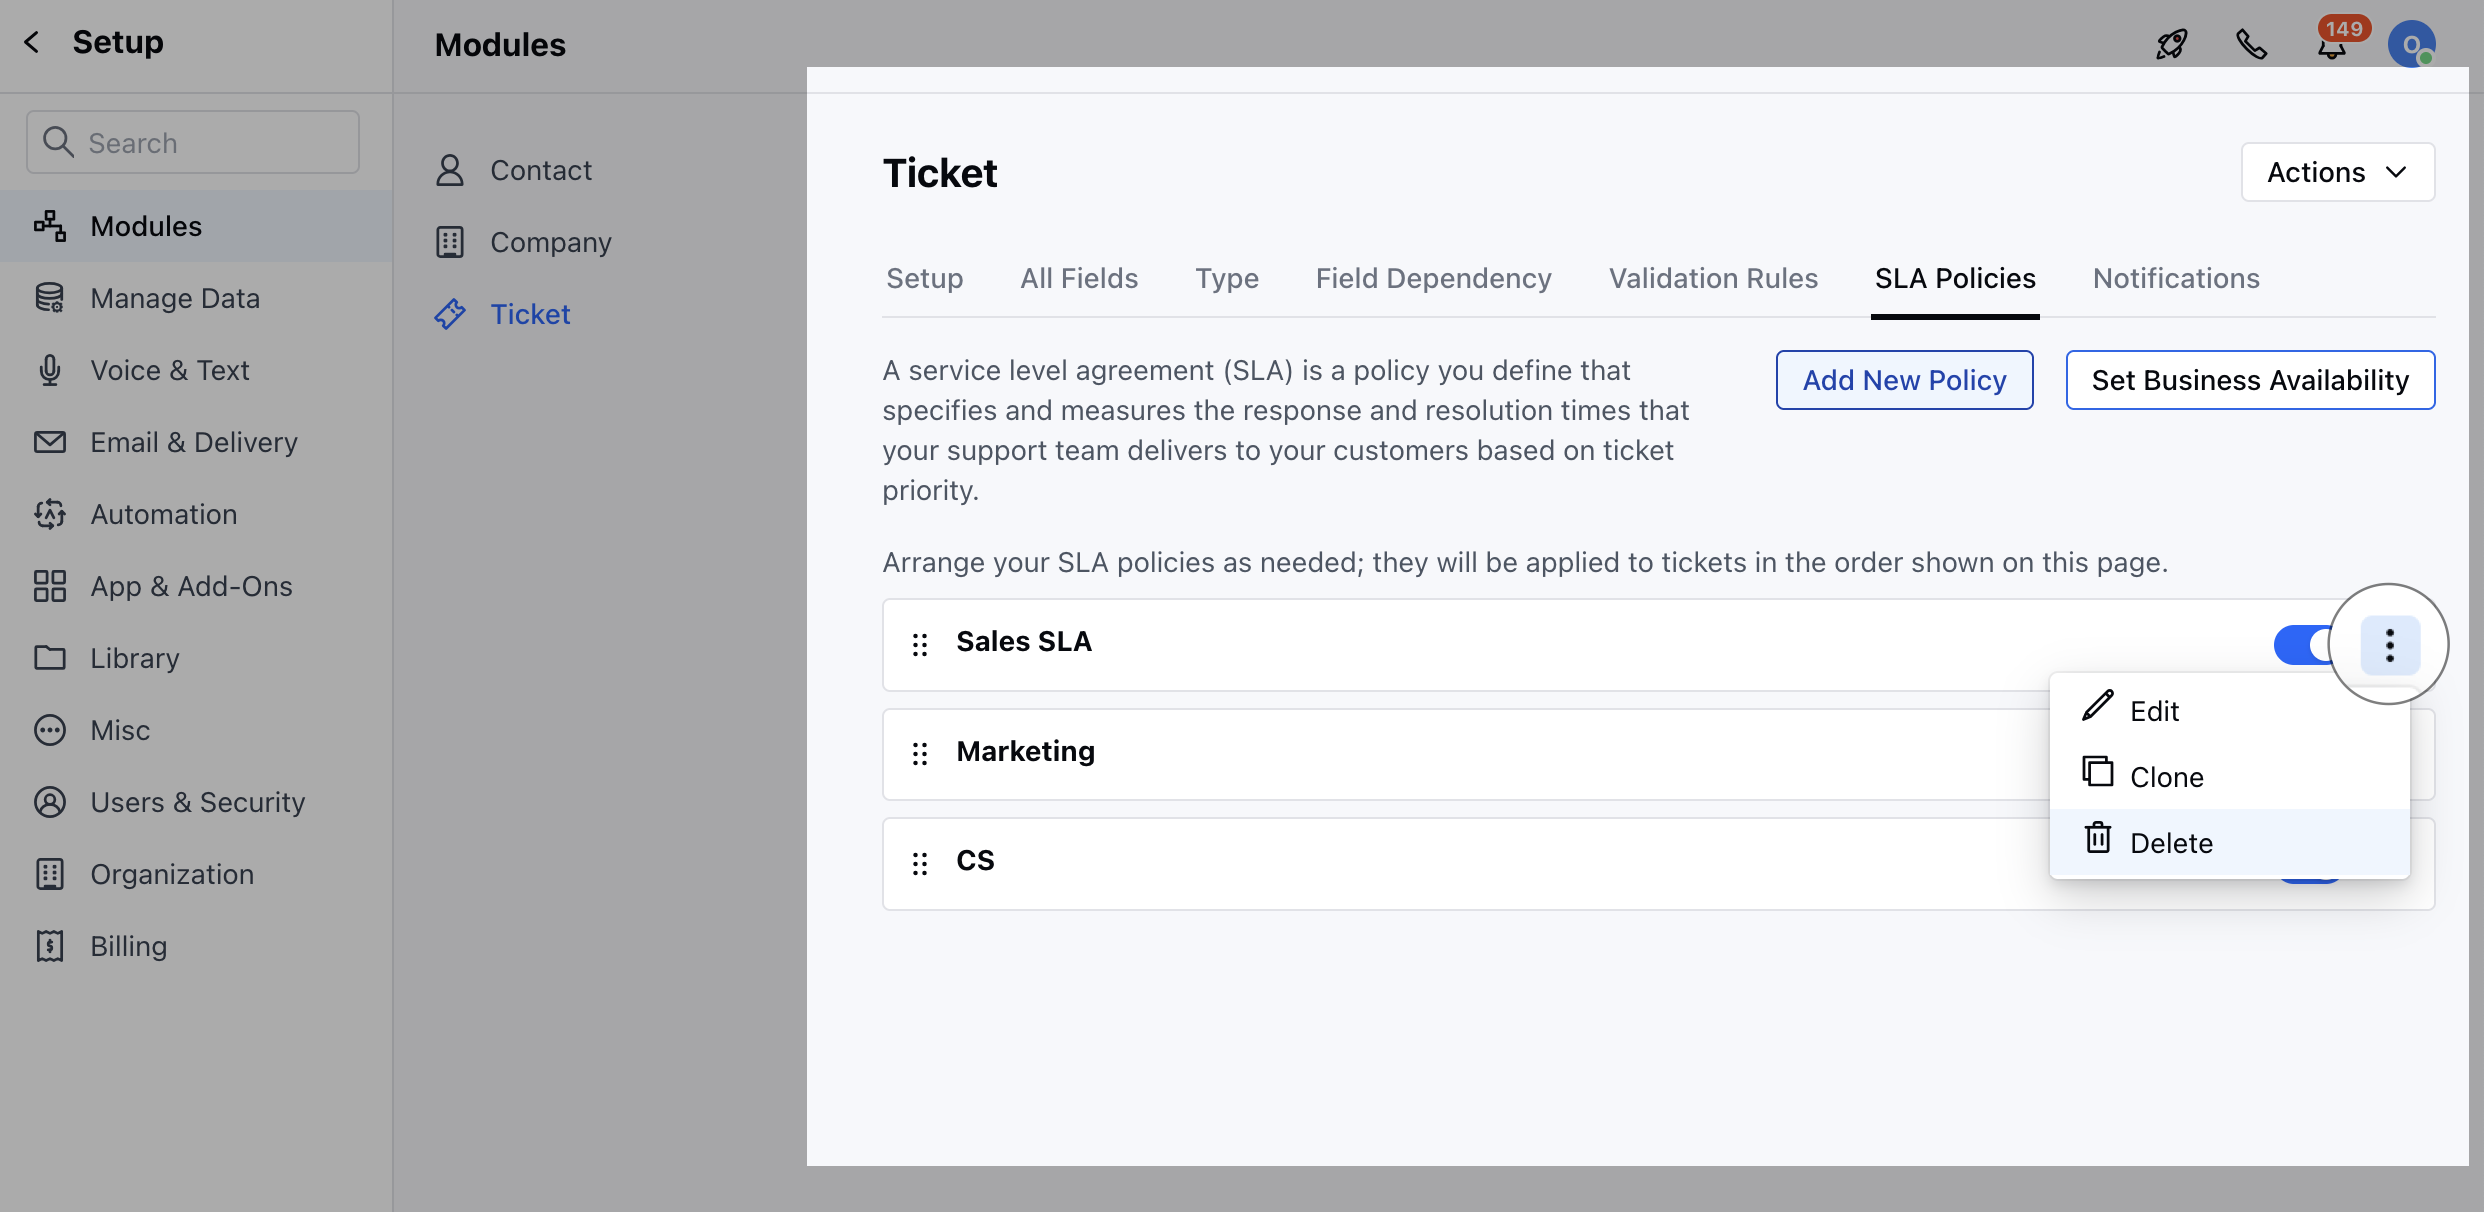
- Find the required SLA from the already defined SLAs. * Click on the three dots (active menu) and choose the EDIT option.
- Make the Necessary changes and click on Update to save the changes
How to Clone SLA
To Clone SLA,- Navigate to the Profile Icon on the top right corner
- Click on Set Up
- Head over to the Modules category
- Click on Tickets
- Find the required SLA from the already defined SLAs. * Click on the three dots (active menu) and choose the Clone option. * Make the necessary changes if required and hit on Save

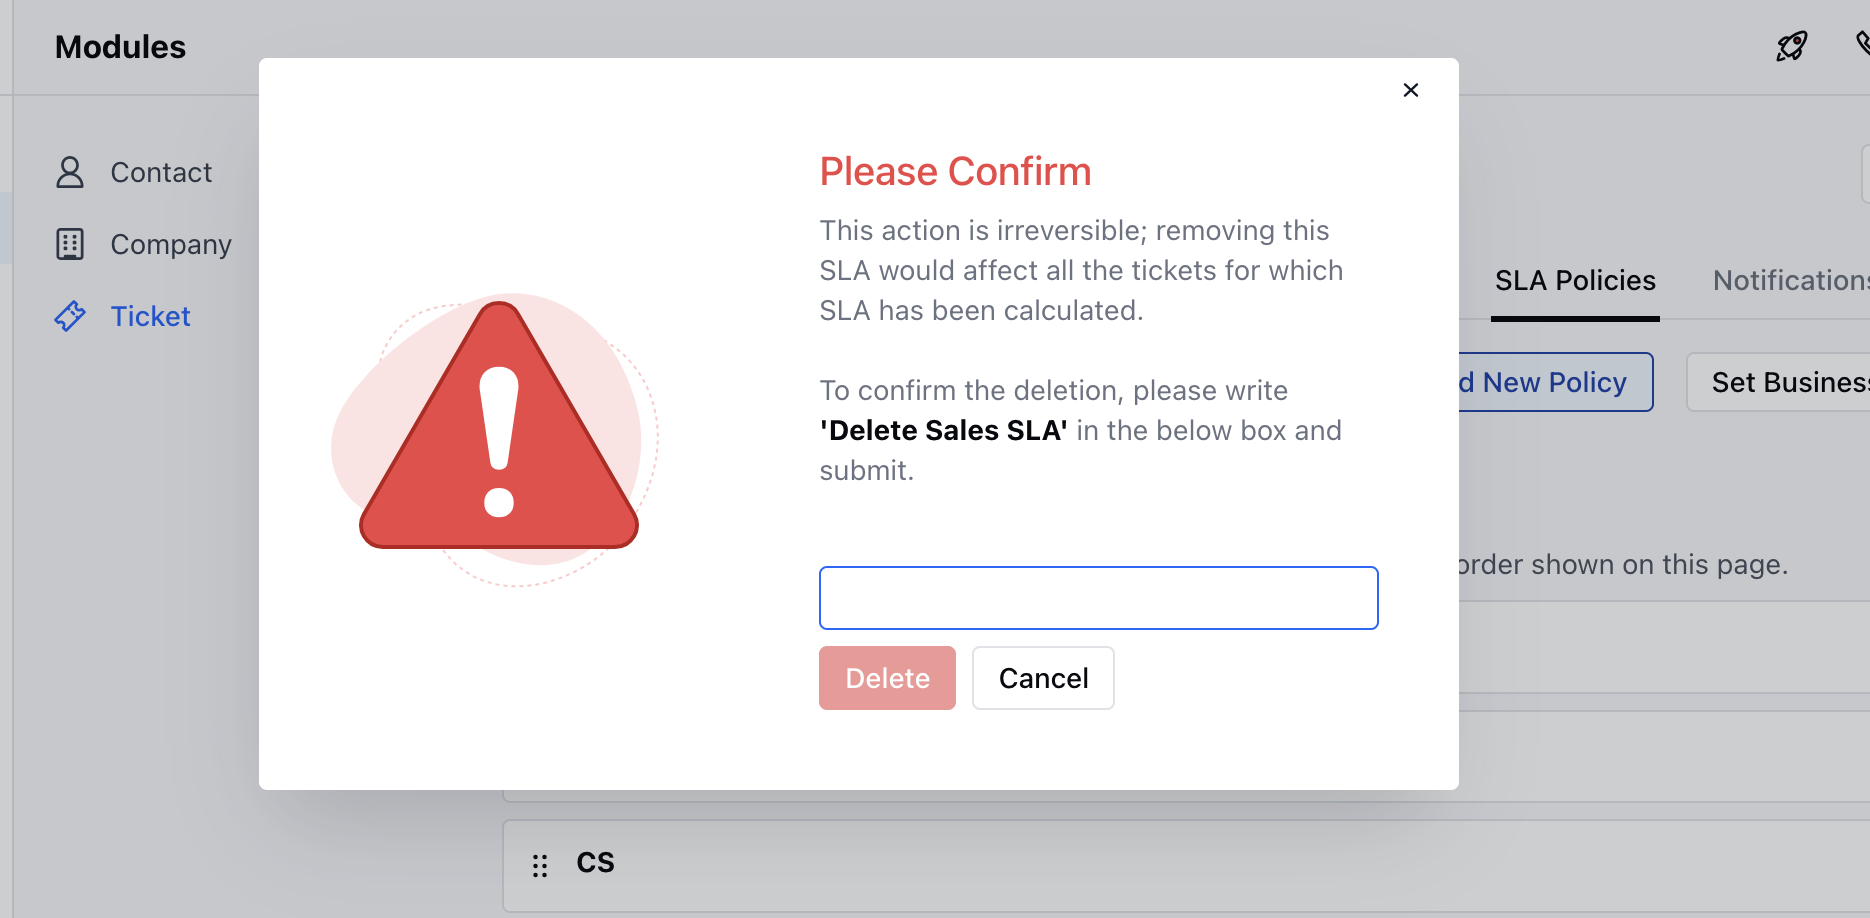
How to Delete SLA
To Delete SLA,- Navigate to the Profile Icon on the top right corner
- Click on Set Up
- Head over to the Modules category
- Click on Tickets
- Find the required SLA from the already defined SLAs. * Click on the three dots (active menu) and choose the Delete option.
- Confirm the Action to continue Deleting the SLA