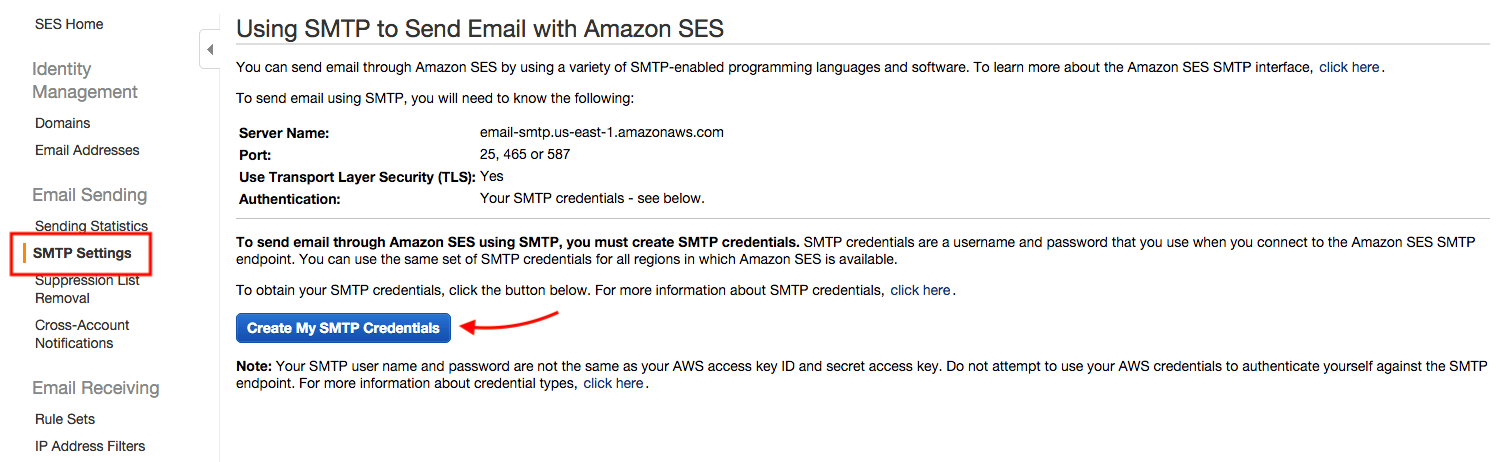
- Create SMTP Credentials
- Verify An Email Address
- Request Removal Of Amazon SES Restrictions
- Add The Account In Salesmate To Use Amazon SES
Create SMTP Credentials
To send emails through the Amazon SES SMTP interface, begin by creating SMTP credentials - a username and a password - as shown below: Log into the AWS Management Console.Click the “SES Email Sending Service” option.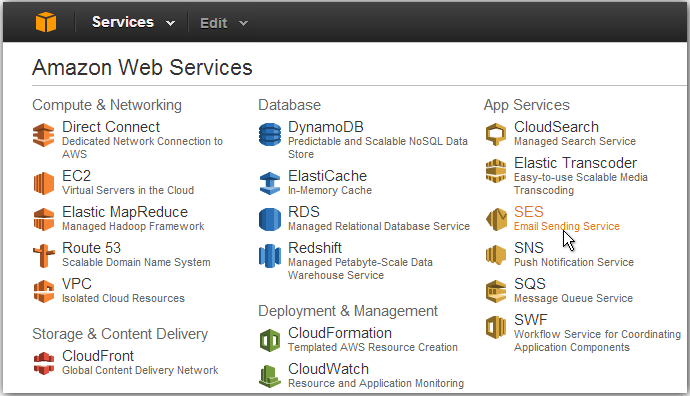
Verify An Email Address
Add and verify your email address following these steps: Log into the Amazon SES Console.Click the “Verify a New Email Address” link.In the “Verify a New Email Address” dialog, enter the email address you wish to send messages from and click the “Verify This Email Address” button.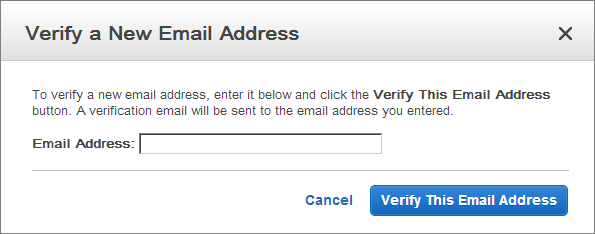
NOTE: The verification link is only valid for 24 hours after your original request.Check the status of the email address in the Amazon SES Console. The status of the email address should change from “pending verification” to “verified”.You can now use Amazon SES to send email messages from this address. To send a test email, check the box next to the verified email address, and then click the “Send a Test Email” button. Refer to the Amazon SES documentation for more information.
Request Removal Of Amazon SES Restrictions
To protect customers from fraud and abuse, Amazon SES does not immediately grant unlimited Amazon SES usage to new users. A number of restrictions are initially in effect, such as only being able to send email to and from verified email addresses and being limited to a maximum of 200 messages in every 24-hour period.To remove these restriction on recipient addresses and increase the sending limits, request a higher level of access in the Amazon Support Center.Add The Account In Salesmate To Use Amazon SES
Navigate to the Profile Icon the top right cornerClick on “Go to My Account” Head over to “Email Settings” >> “SMTP & Bcc” Click “Add Email Account” Select “Custom SMTP”
- From Name: NAME
- From Email: EMAIL_ADDRESS
- Host: email-smtp.us-east-1.amazonaws.com [ Replace based on your SMTP Settings page value for Server Name ]
- Port: 465
- Secure: SSL** USERNAME and PASSWORD placeholders should be replaced with the correct values from the credentials created in Step 1, while the EMAIL_ADDRESS placeholder should be replaced with the SES-verified email address. HOST will change based on LOCATION you are at. Thus, verify it on your SMTP Settings
