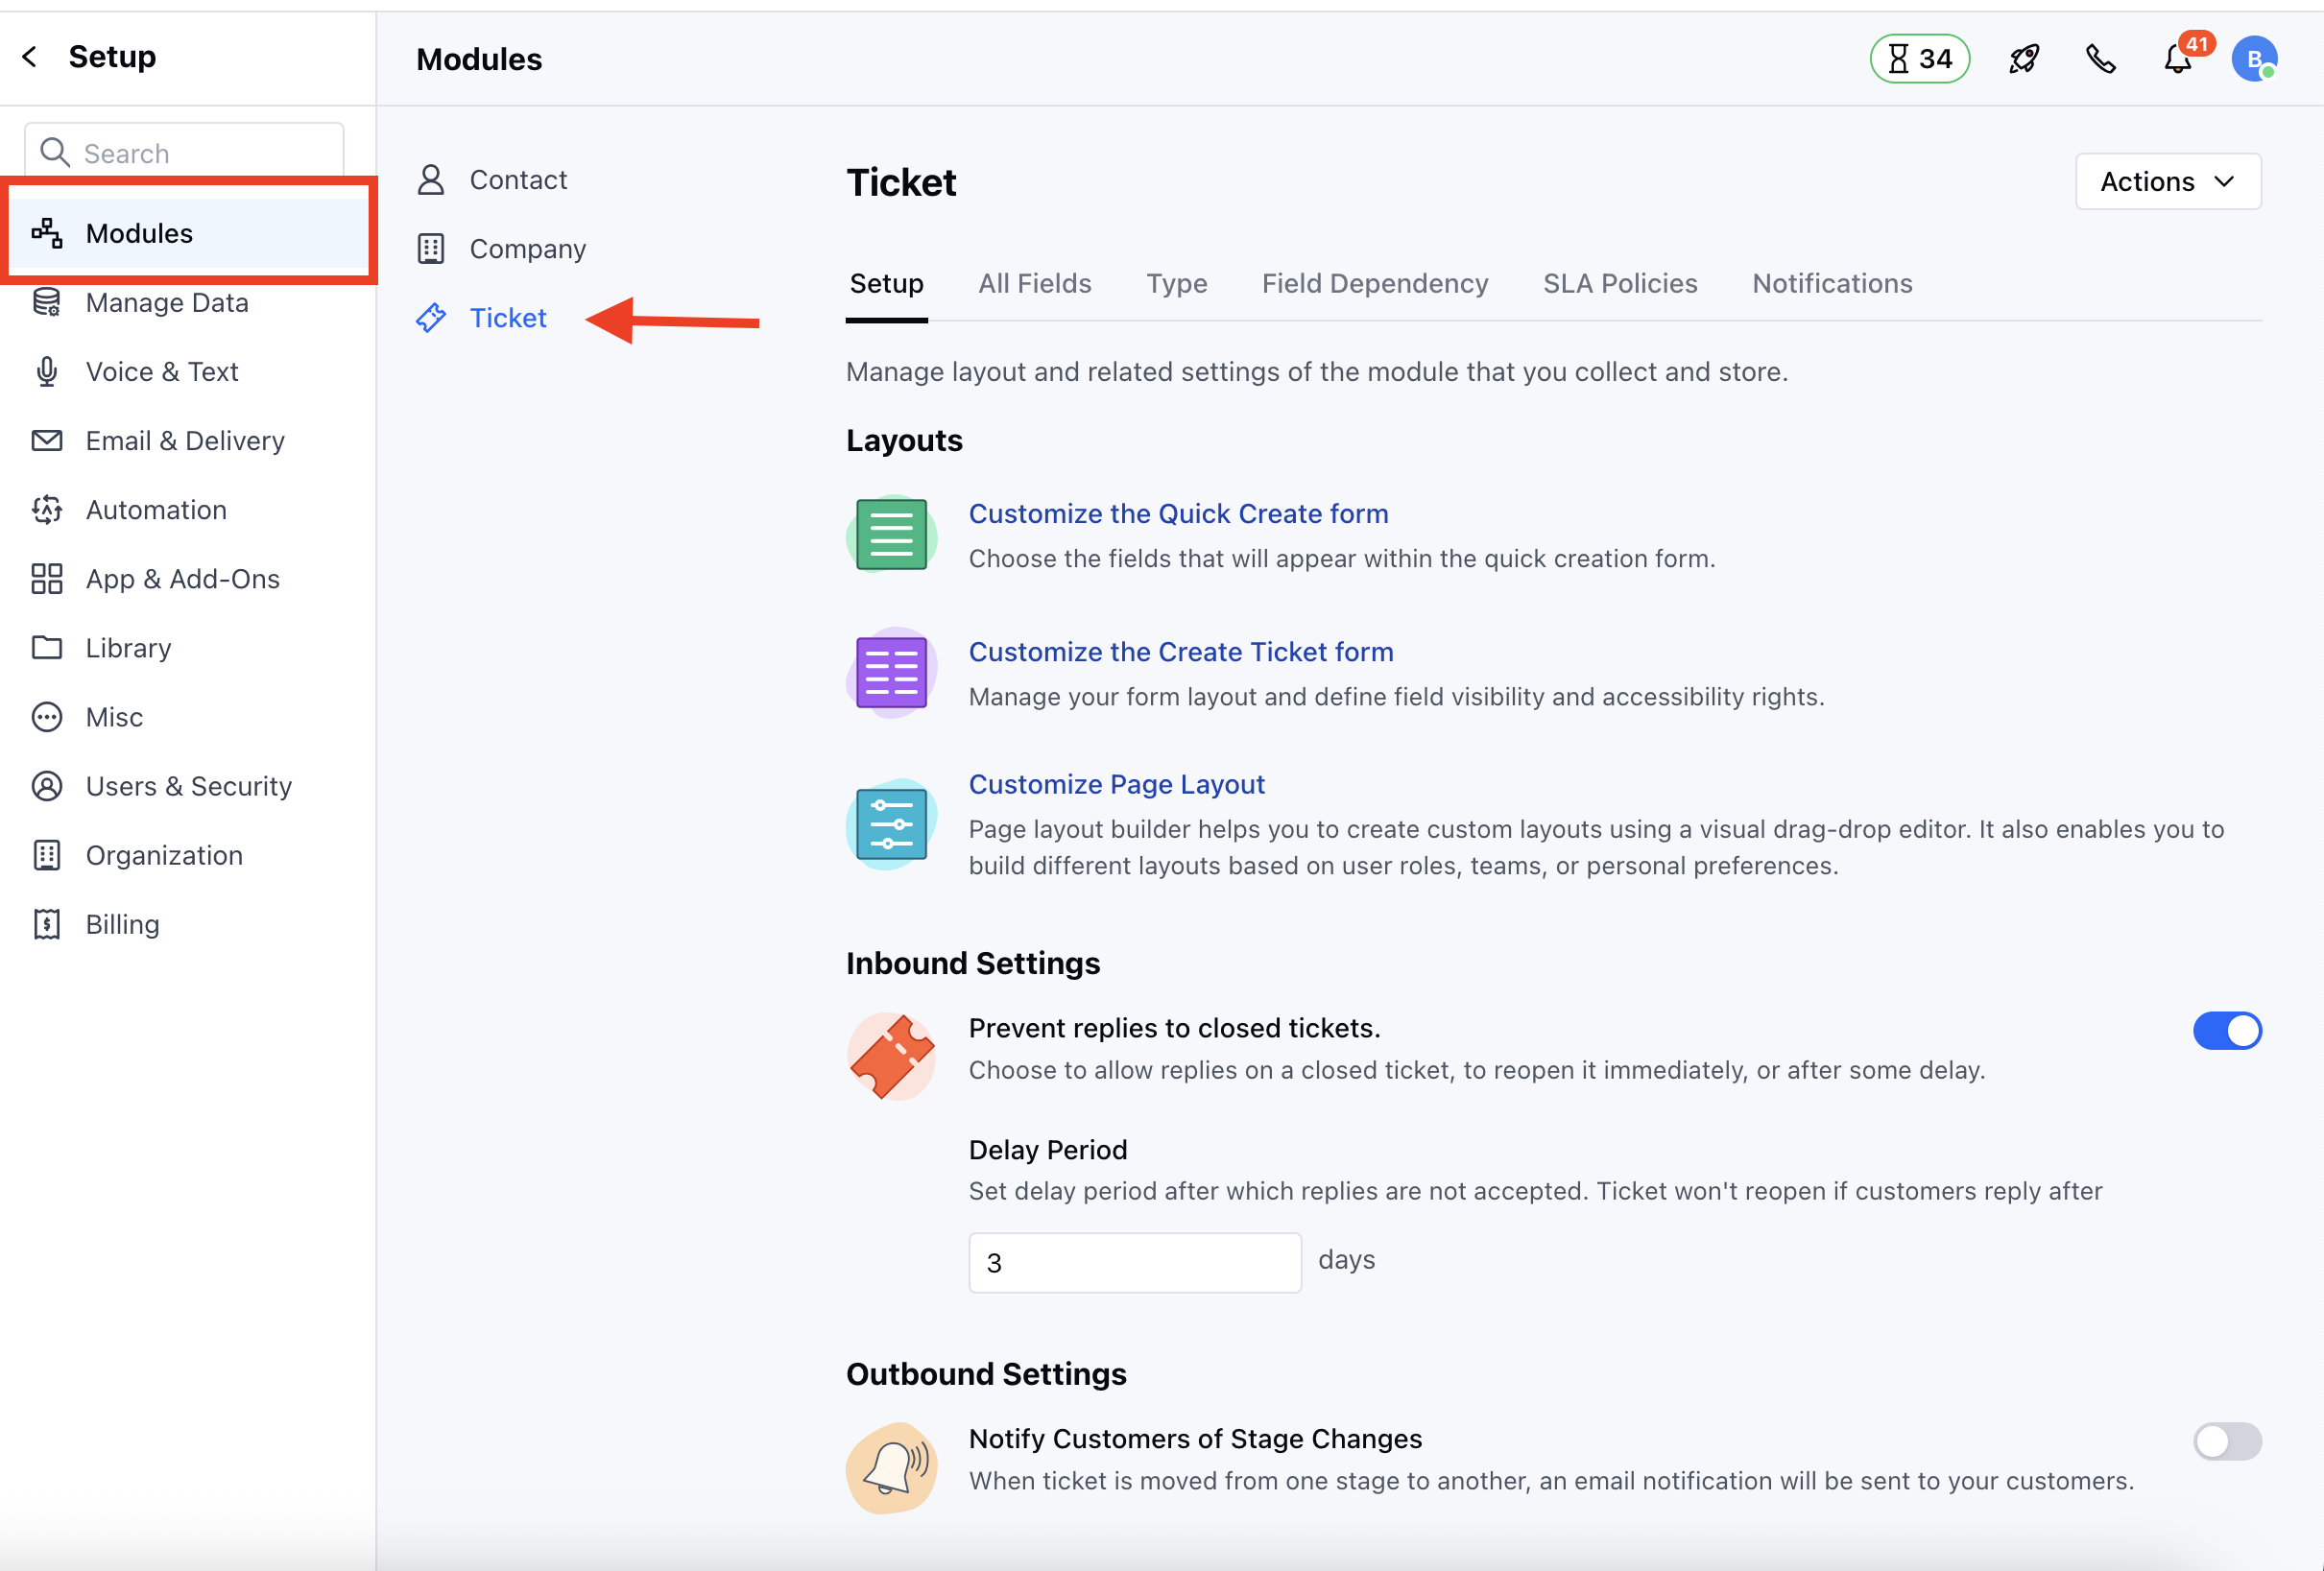
- Navigate to the Profile Icon on the top right corner
- Click on Set Up
- Head over to the Modules category
- Click on Tickets
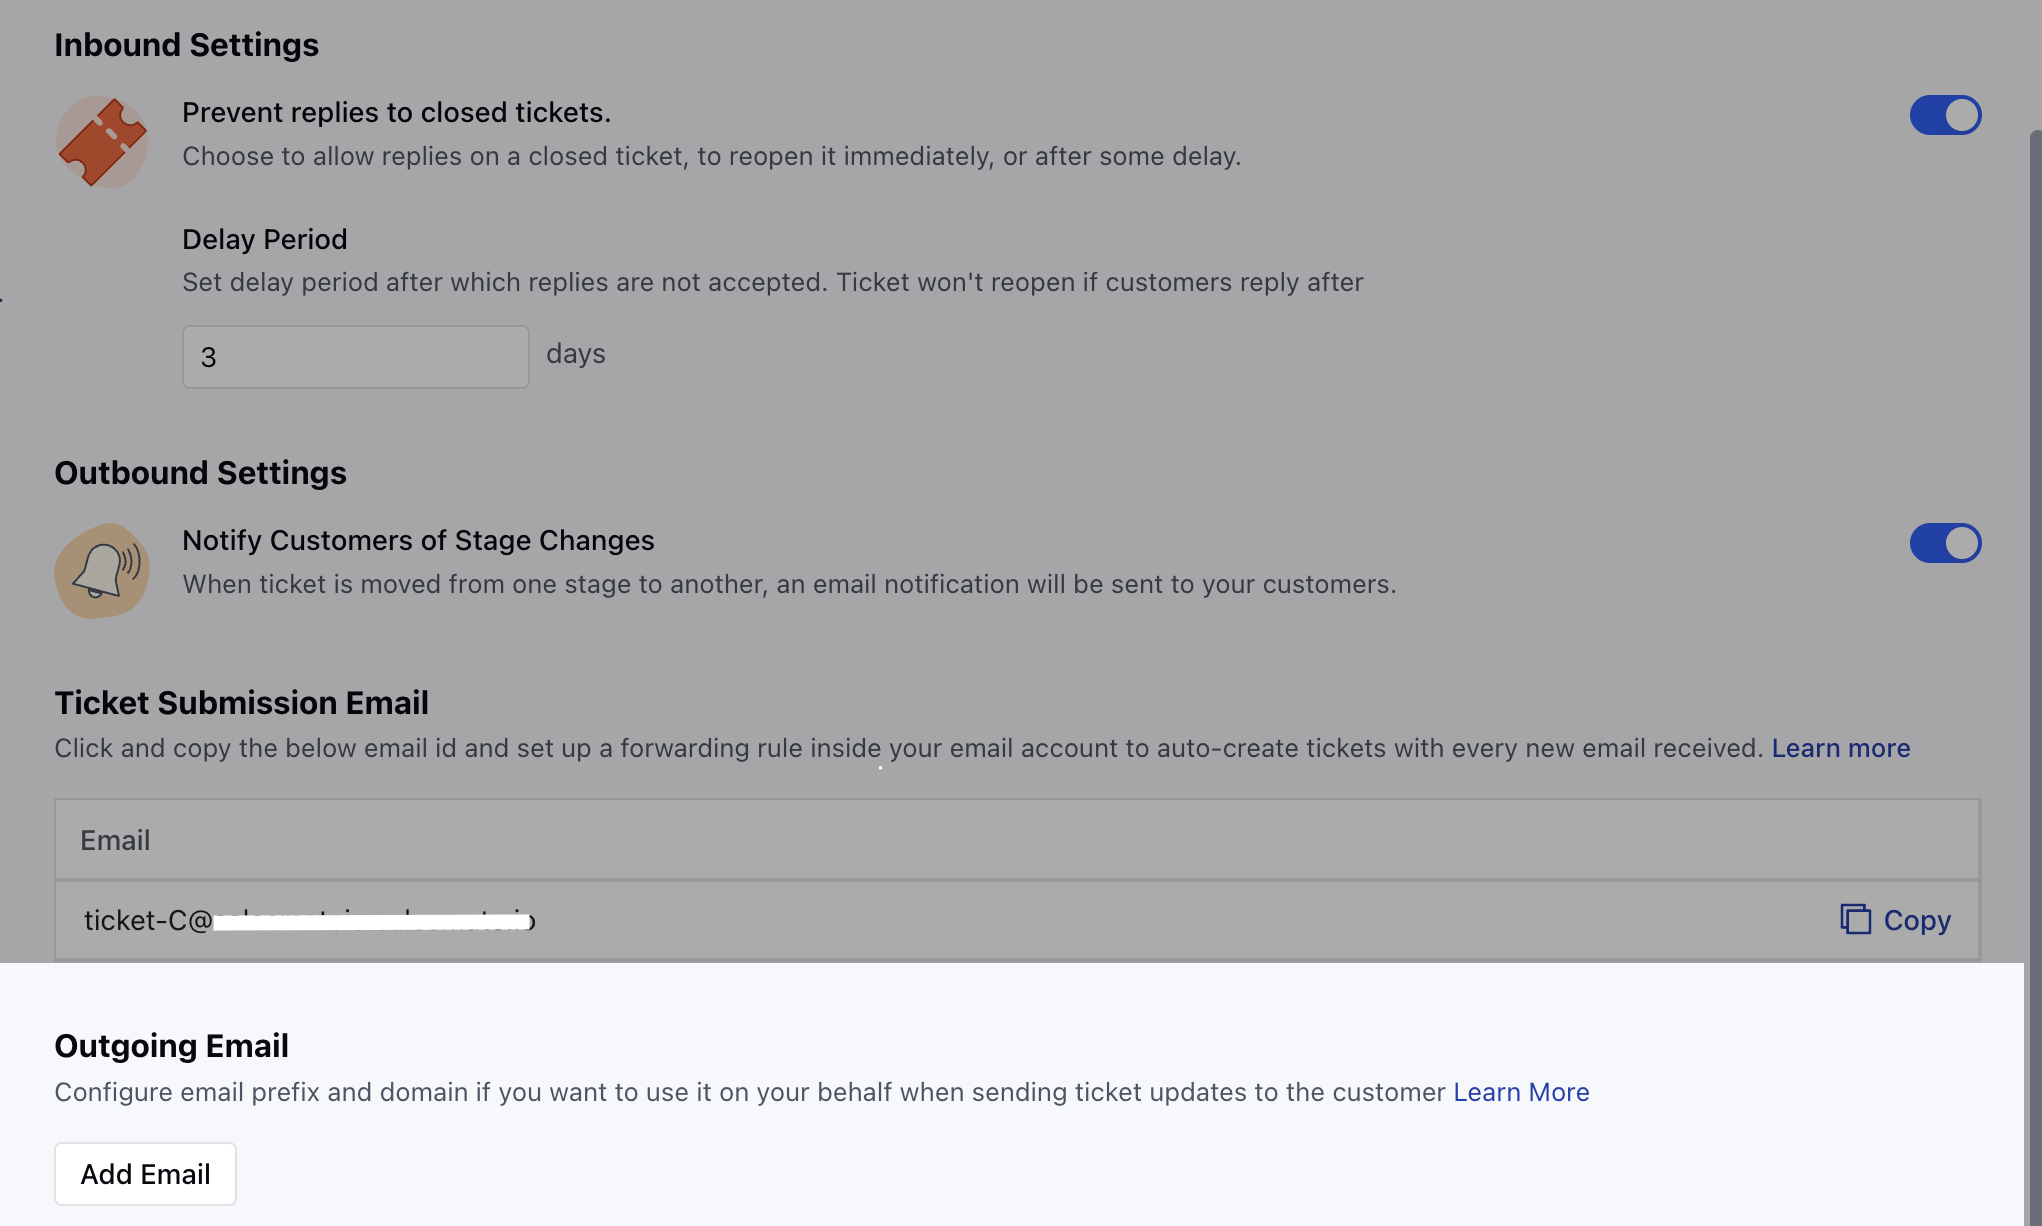
- Here, on the bottom of the Page, you will see the option Outgoing Email
Verify your Domain:
Depending on the domain verification status, the options available to you may vary:If the domain is not verified a warning message will appear: “Your email domain is not verified. Verify it now to send ticket updates from Skara using your domain.”- Until verified, ticket update emails will be sent from the Skara domain: noreply@salesmatemail.com
- Click ‘Verify it now’ will redirect you to Email Sending Domain setup
- Learn More to verify your domain in Salesmate
- If the domain is verified: You will see the option to Add a new outgoing email address
- Click Add to proceed to the next step
Configure Outgoing Email:
Upon clicking Add, a popup will prompt you to fill in the following fields:- Email Prefix:
- Enter the part of the email before the @ symbol
- Example: For support@yourdomain.com, the prefix is support
- Max limit: 64 characters
- Email Domain:
- If multiple verified domains exist, select one from the dropdown
- If only one domain exists, it will be pre-selected
- Only one domain can be selected at a time
- From Name:
- This name will appear as the sender in customer inboxes
- Defaults to your organization name if left blank
- Max limit: 50 characters
- Reply-To Name:
- This name appears when customers reply to the email
- Defaults to your organization name if left blank
- Max limit: 50 characters
