Team Meeting The meetings where users get to invite their teammates are referred to as Team Meetings. Here, while an invitee schedules a meeting with the User, an invitation is also sent to the teammate which the users have added to the meeting Setup.
Topics covered:
Creating Meeting Link
To create a Team Meeting Schedule link:- Navigate to the More Icon from the left menu bar
- Click on the Meeting Scheduler
-
Head over to Create Meeting Link

Note:
- This option will be available only if the Calendar Sync is enabled.
- You can also enable the sync upon notification popup being prompted if sync is broken/disconnected - “Please enable calendar sync for using this feature. Click here to connect the calendar.”
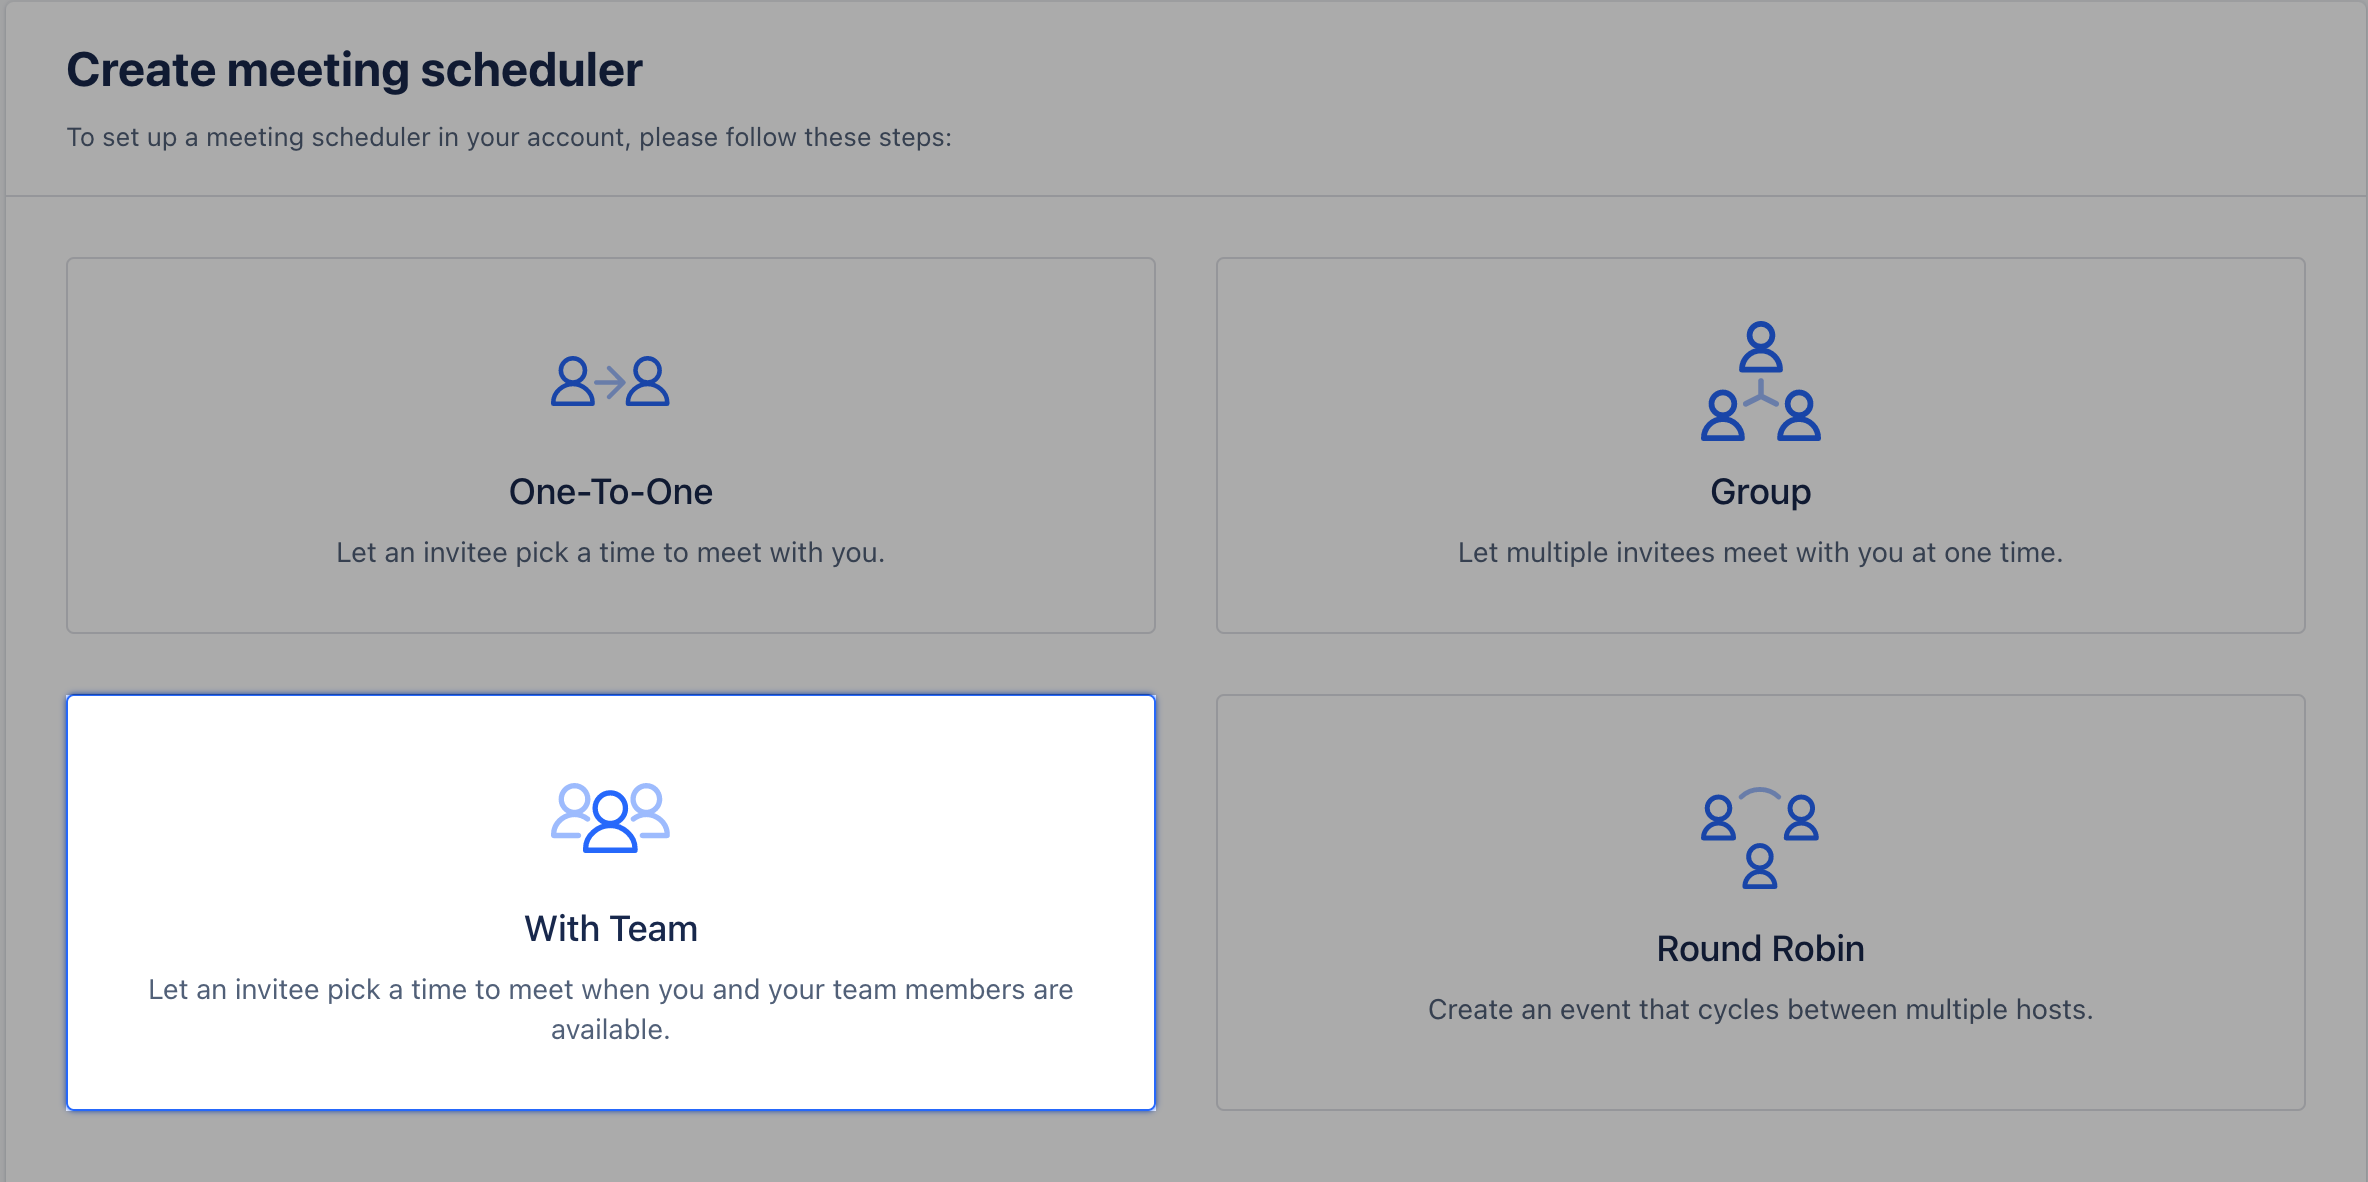
- Select ” With Team” meeting
- Meeting description: The description will appear as an additional context to customers for booking any new meeting. * Give your invitees a hint of how this meeting can help them.
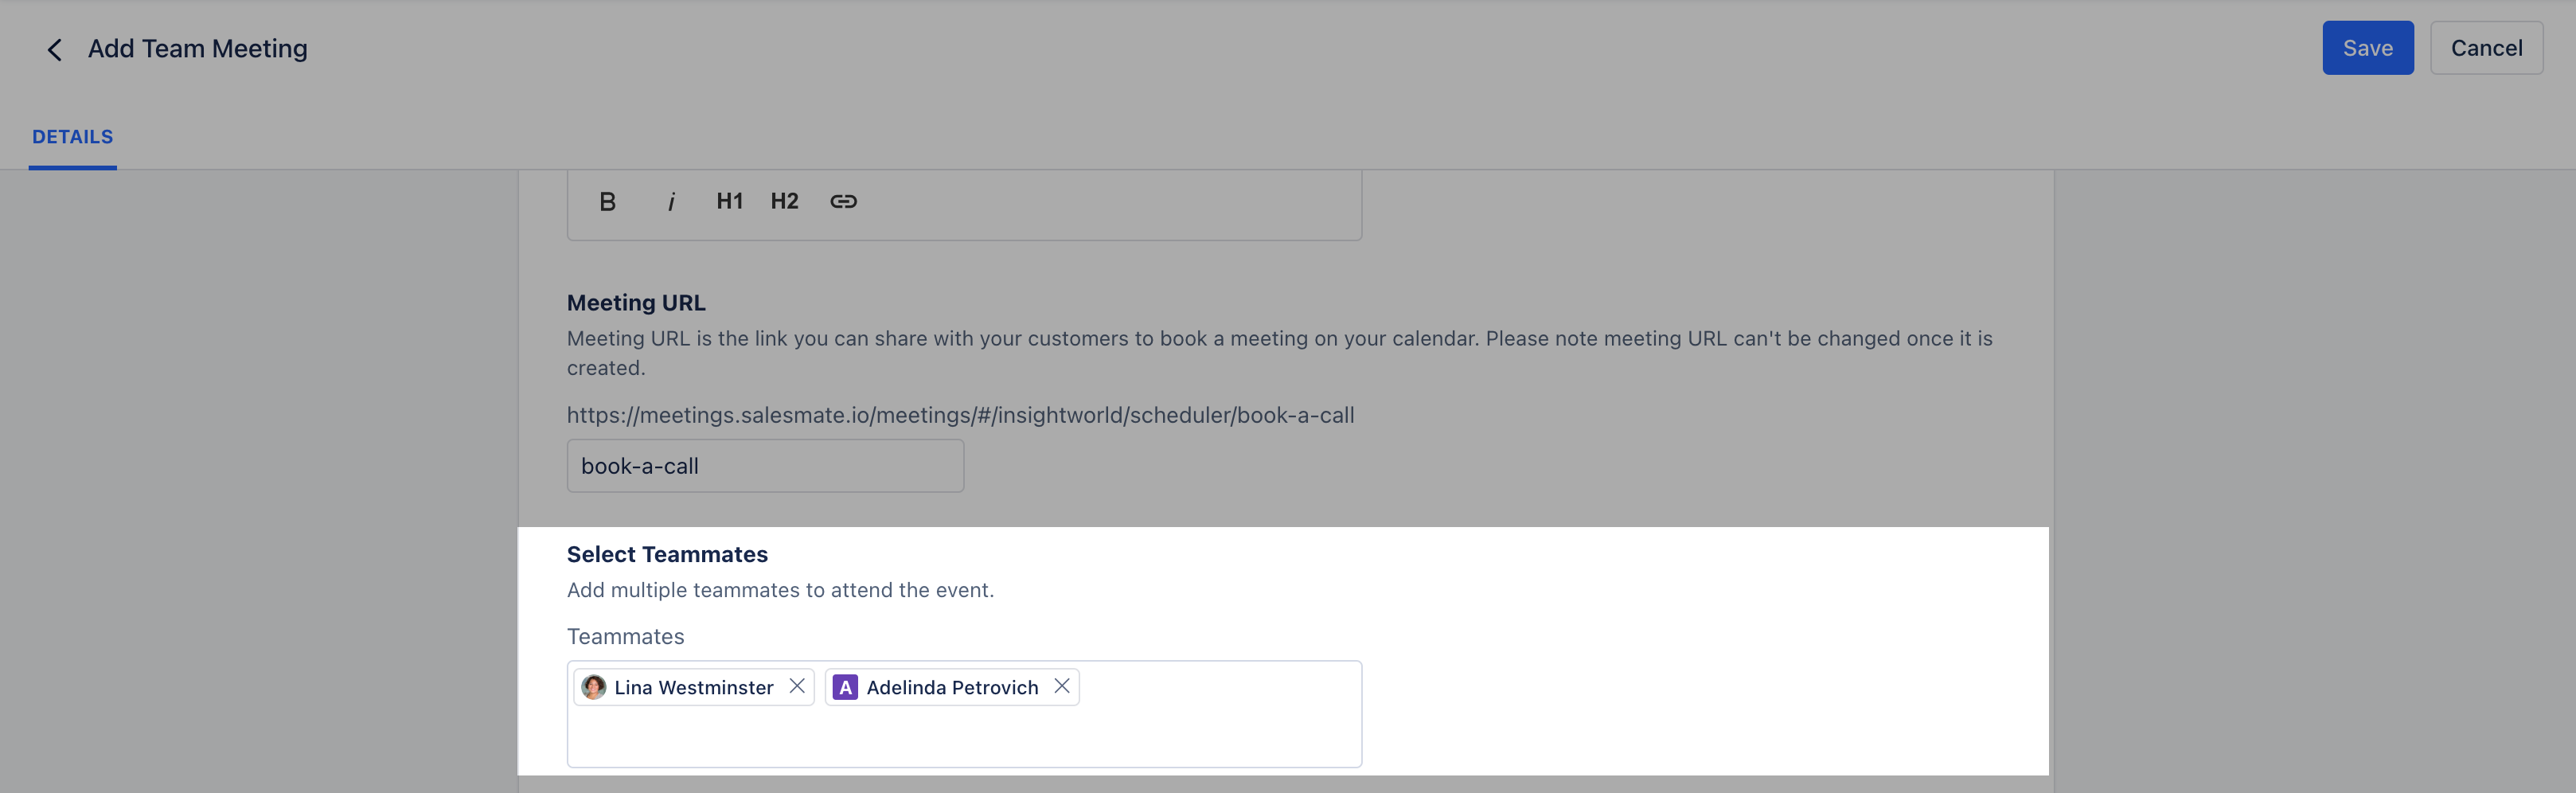
- Meeting URL: The meeting URL is the unique link you can share with your customers to book a meeting on your calendar. * Please note that the meeting URL can’t be changed once it has been created

- Since it is a Team Meeting , you will need to specify the
- Teammates who are also going to be a part of the meeting, add the information in the “Select Teammates” Box.
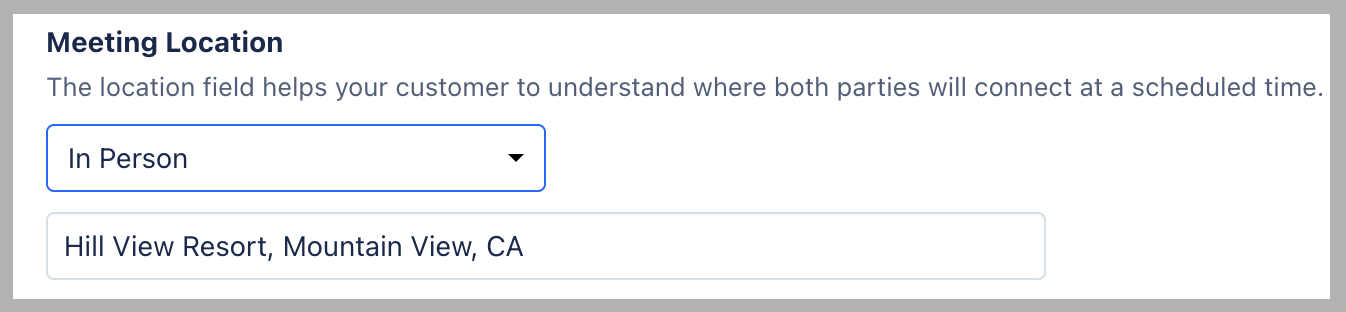
- **Meeting Location:**The location field helps your customer to understand where both parties will connect at a scheduled time.
- **In-Person **: It will be a blank section where the user can add the location of the meeting. * You can add your unique conferences link via which invitees can join an online session or just the name of the place where the meeting would take place.
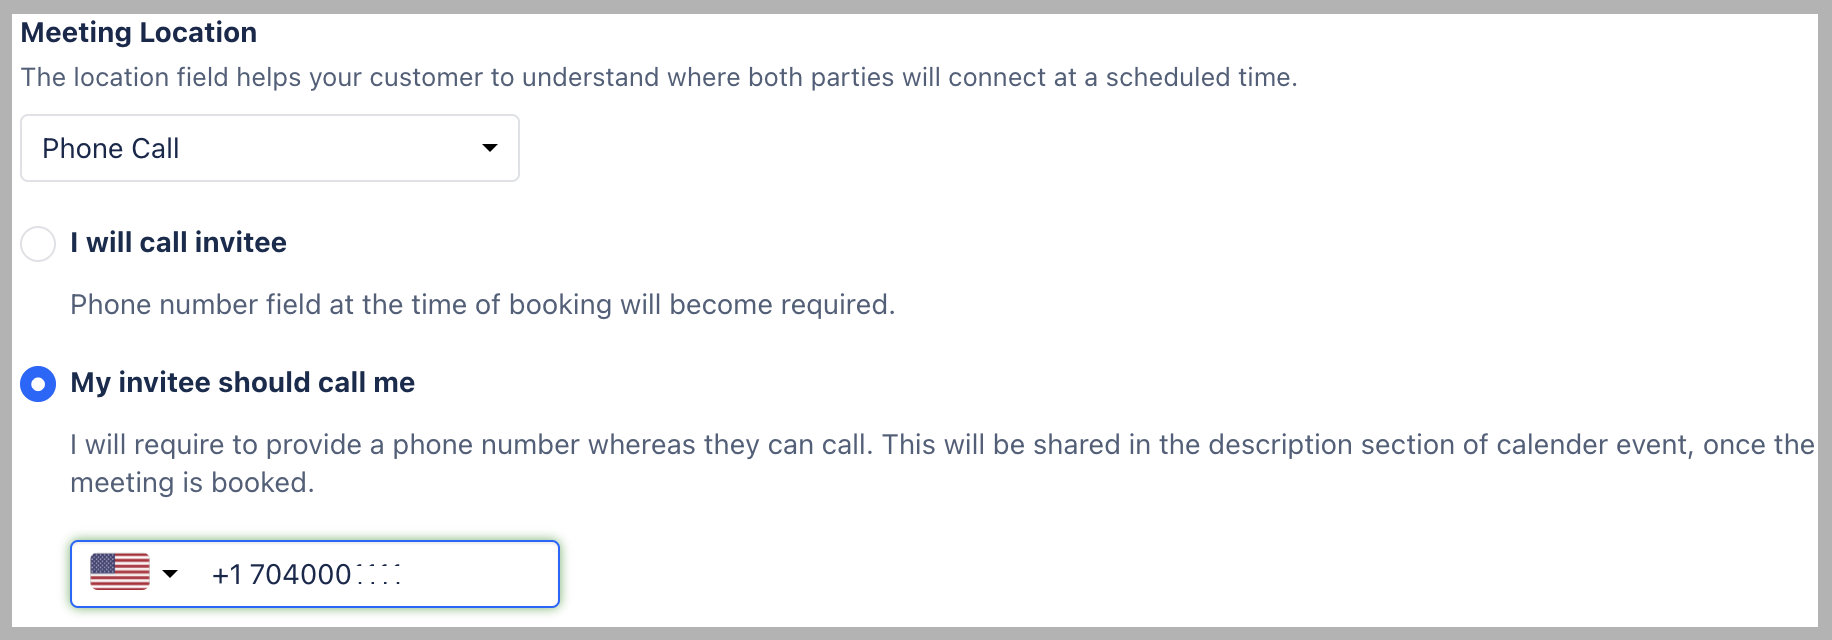
- **Phone Call : This selection means that the meeting will be a phone call wherein the user will either call their customer or vice versaI will call Invitee : This will give the invitee an option to feed their number at the time of bookingMy invitee should call me **: You will get an option to enter your number on which the invitee would be calling at their preferred time

- Note*:
- It requires you to pre-configure your Zoom application with Salesmate by clicking on Profile Icon > Setup >
- Apps & Add Ons>Apps>Zoom>Install.
- Alternatively, you will be prompted on the Zoom selection to connect with Zoom - “Zoom hasn’t configured. Go to apps to configured it.” Click on the Message to get redirected to the app for zoom connection.
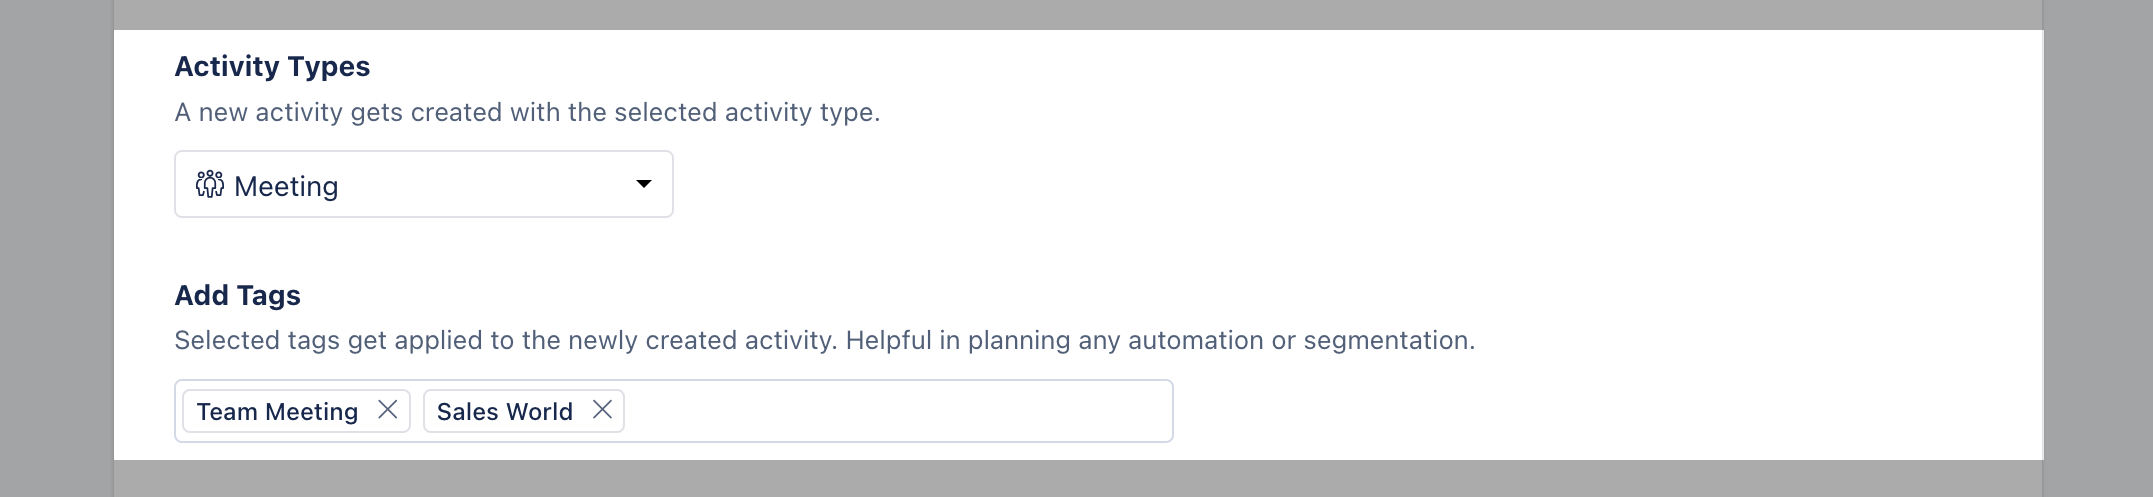
- Activity Types: This option helps you to choose the new activity being created with the selected activity type.
- Add Tags: The Selected tags will get applied to the newly created activity which would help plan any automation or segmentation.
- Date and Time Availability
- Form Questions
- Email Notification
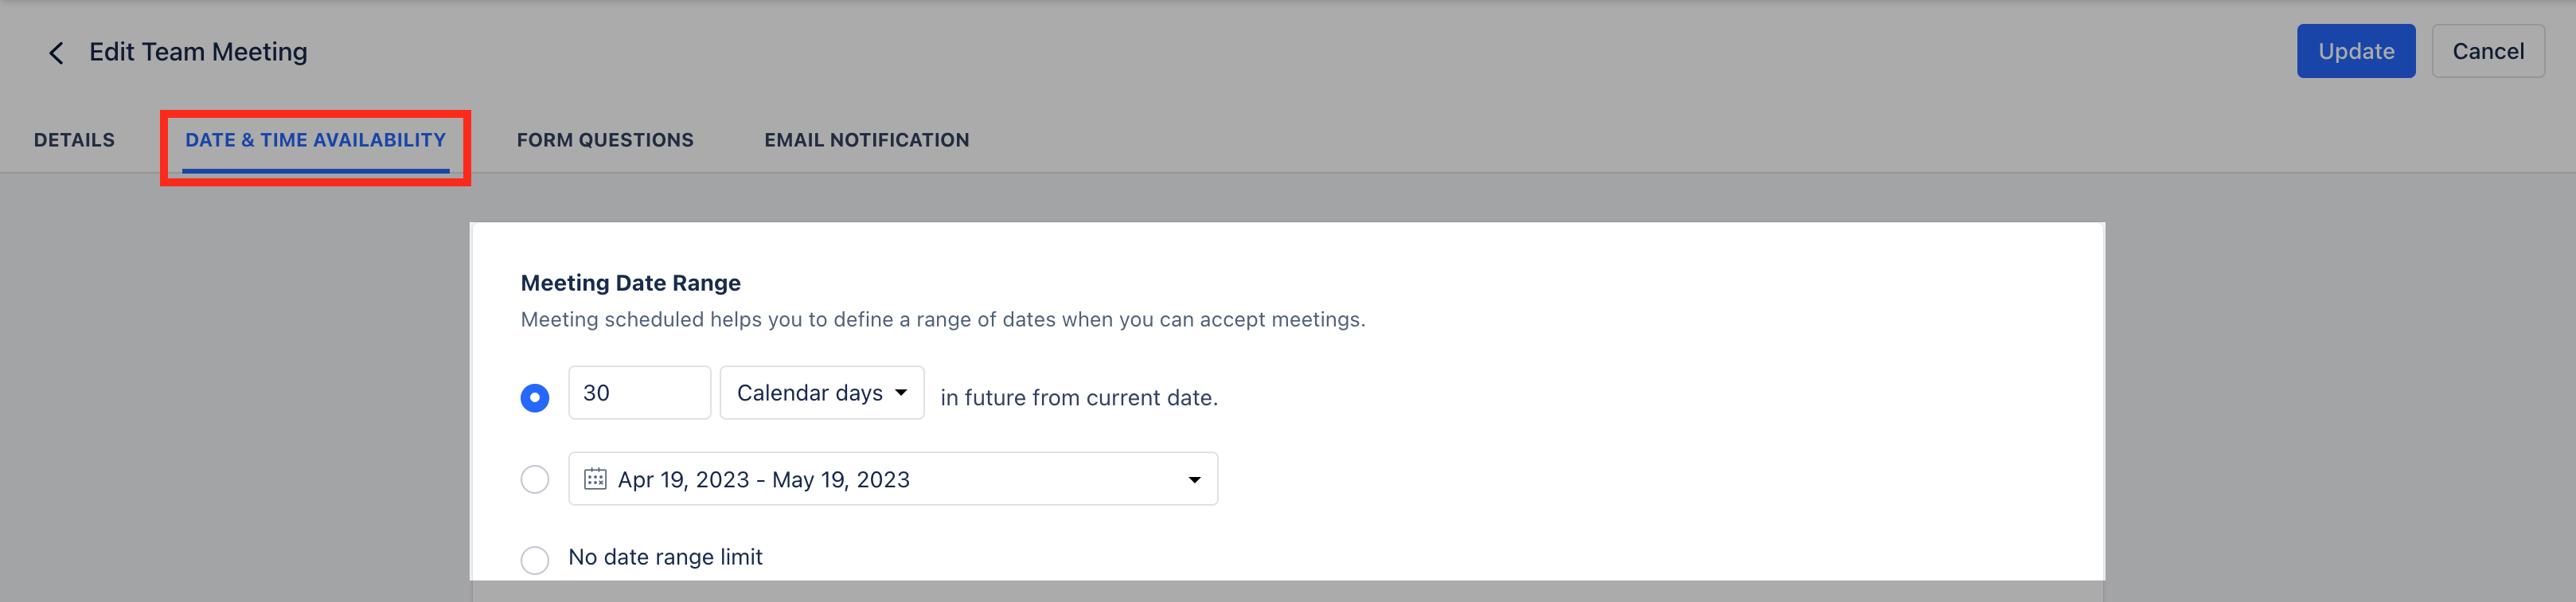
Date and Time Availability
- **Meeting Date Range:Define the date range for which you can accept the meetings, following are the option through which you can set up the date rangeCalendar Days **: If you select this option, invitees can book a call for any day in the next 30 days.
- **Business Days **: If you select this option, invitees can book a call on any weekdays i.e. except for the weekends(Sat/Sun).
- **Custom Date Range: This allows **you to select the date range of your choice like Current - Week, Month, Quarter, or Year. Alternatively, you can define your custom start and end date.
- No Date range: There will be no date range on this selection, invitees will be able to book a meeting even for the next year.
- **Availability:Choose your daily time availability for which you can accept the calls/ meetings List ** view for custom schedule selection
- The view helps you in defining Day(s) and hours by selecting the Time Zone and managing date overrides using a List of days as a selection menu.
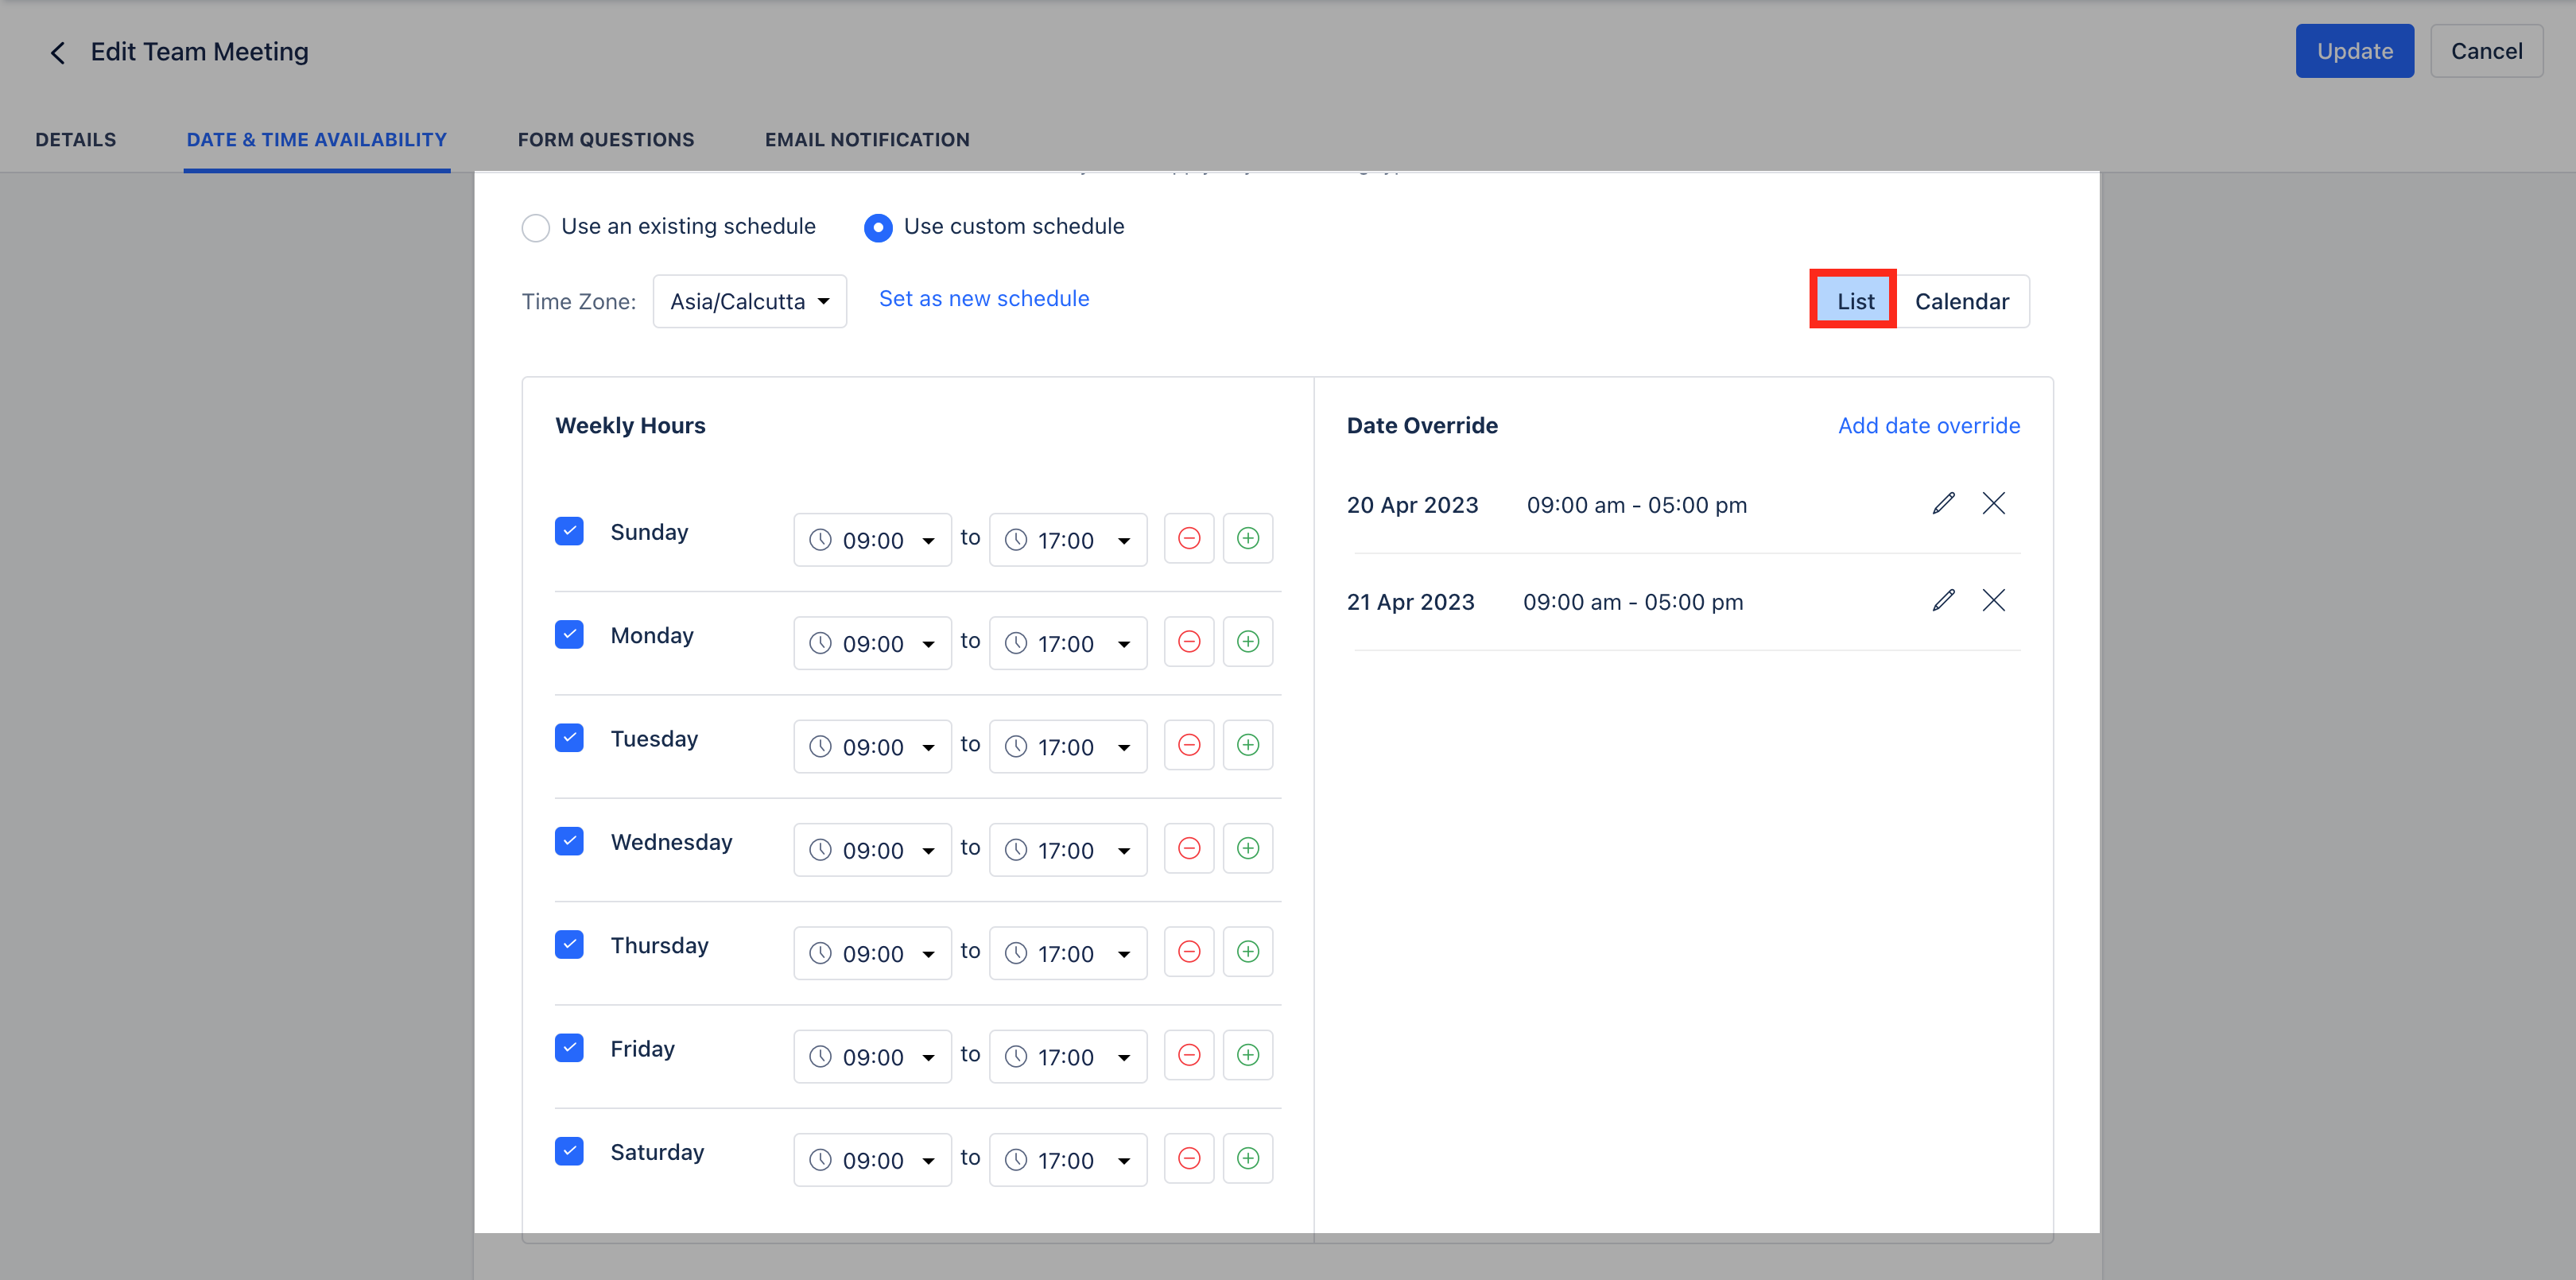
- Use an Existing schedule: By default business days (Mon - Fri) and common business hours (9 AM - 5 PM) will be selected along with your personal time-zone
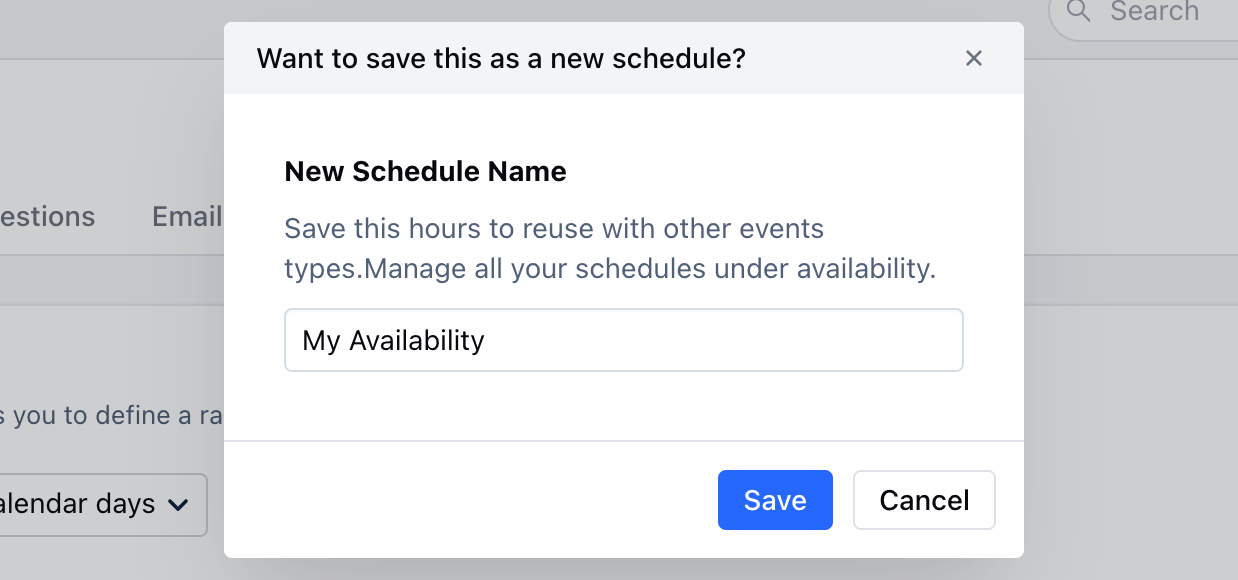
- **Use Custom Schedule:Here you can create multiple schedules by selecting: _ Custom businessdays of the week _ Custom businesshours ** of the day * Custom **Timezone Set as new schedule: It helps you to save custom portfolios to be shared with other users. This saves hours to be reused with other events types. You can manage all your schedules under availability.
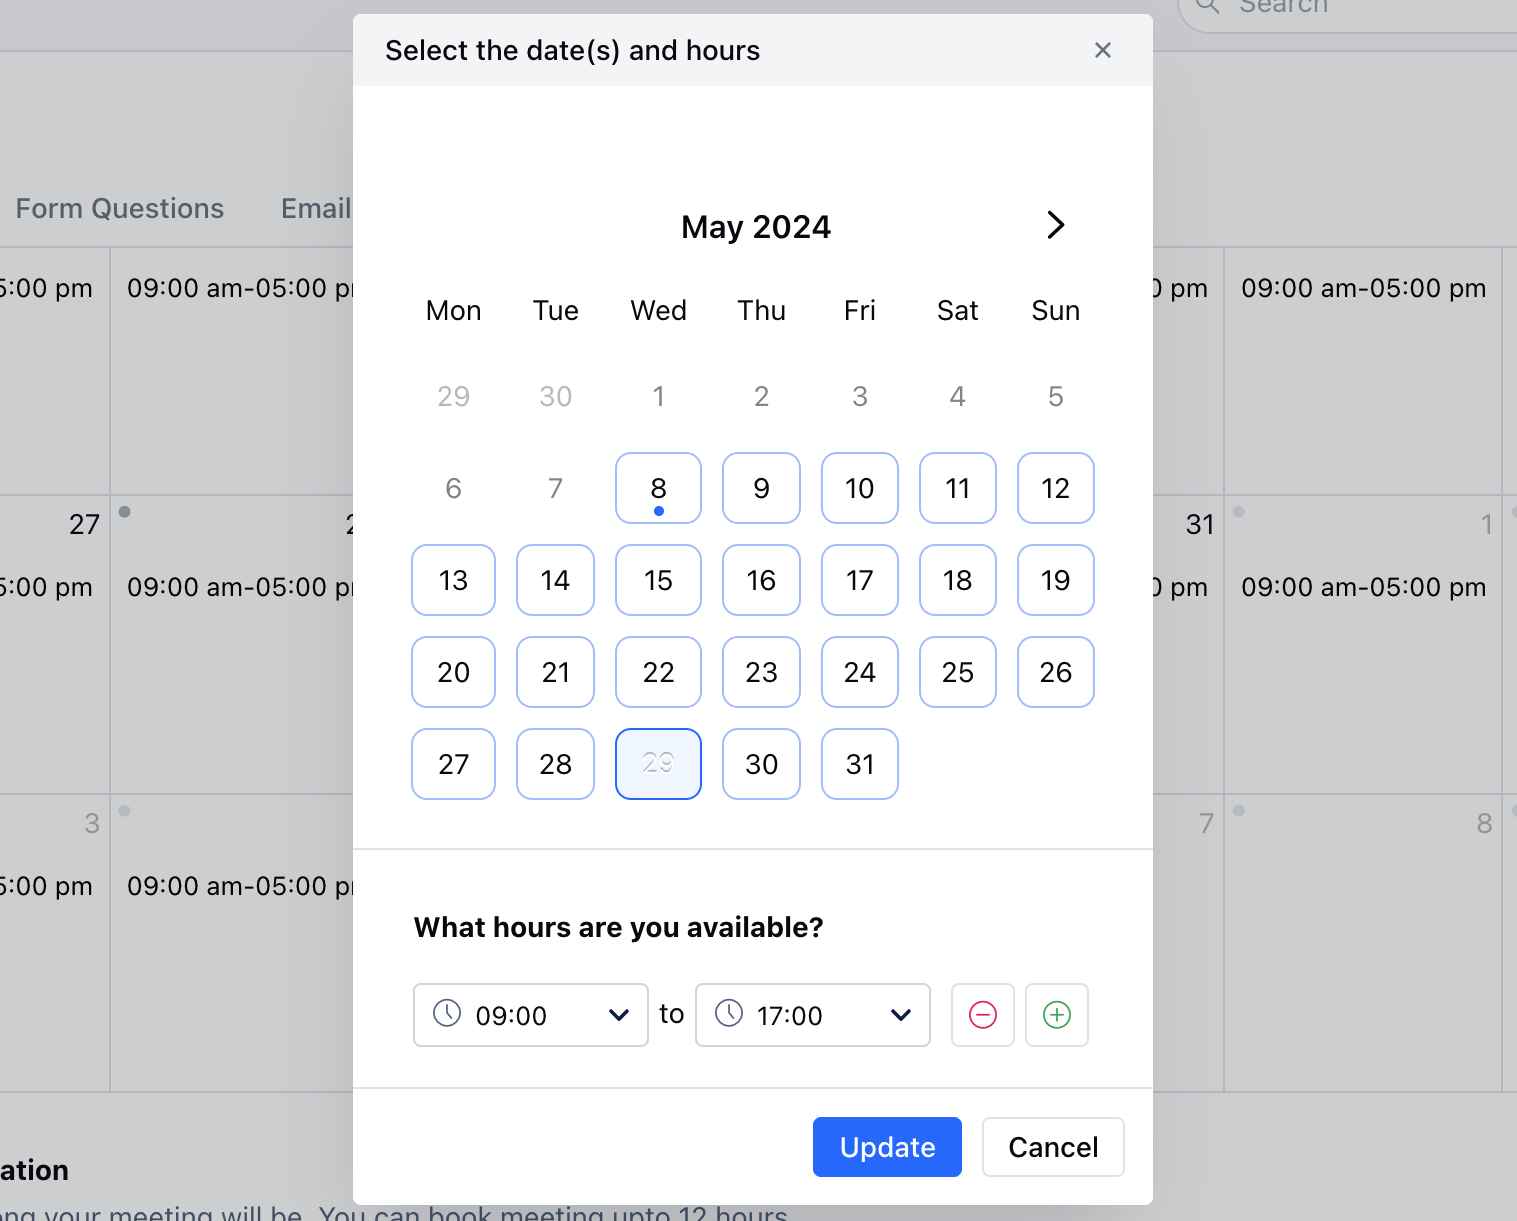
- Date Override: Users can add dates when their availability changes from regular weekly hours.

- By clicking on ” Add date override ” user’s can define the date(s) and hours of their availability for the limited duration for which the meeting schedule can be booked.

- Calendar* view Date(s) and Hours selection
- The current view offers defining Day(s) and hours by selecting the Time Zone using a Calendar view along with a custom schedule screen.
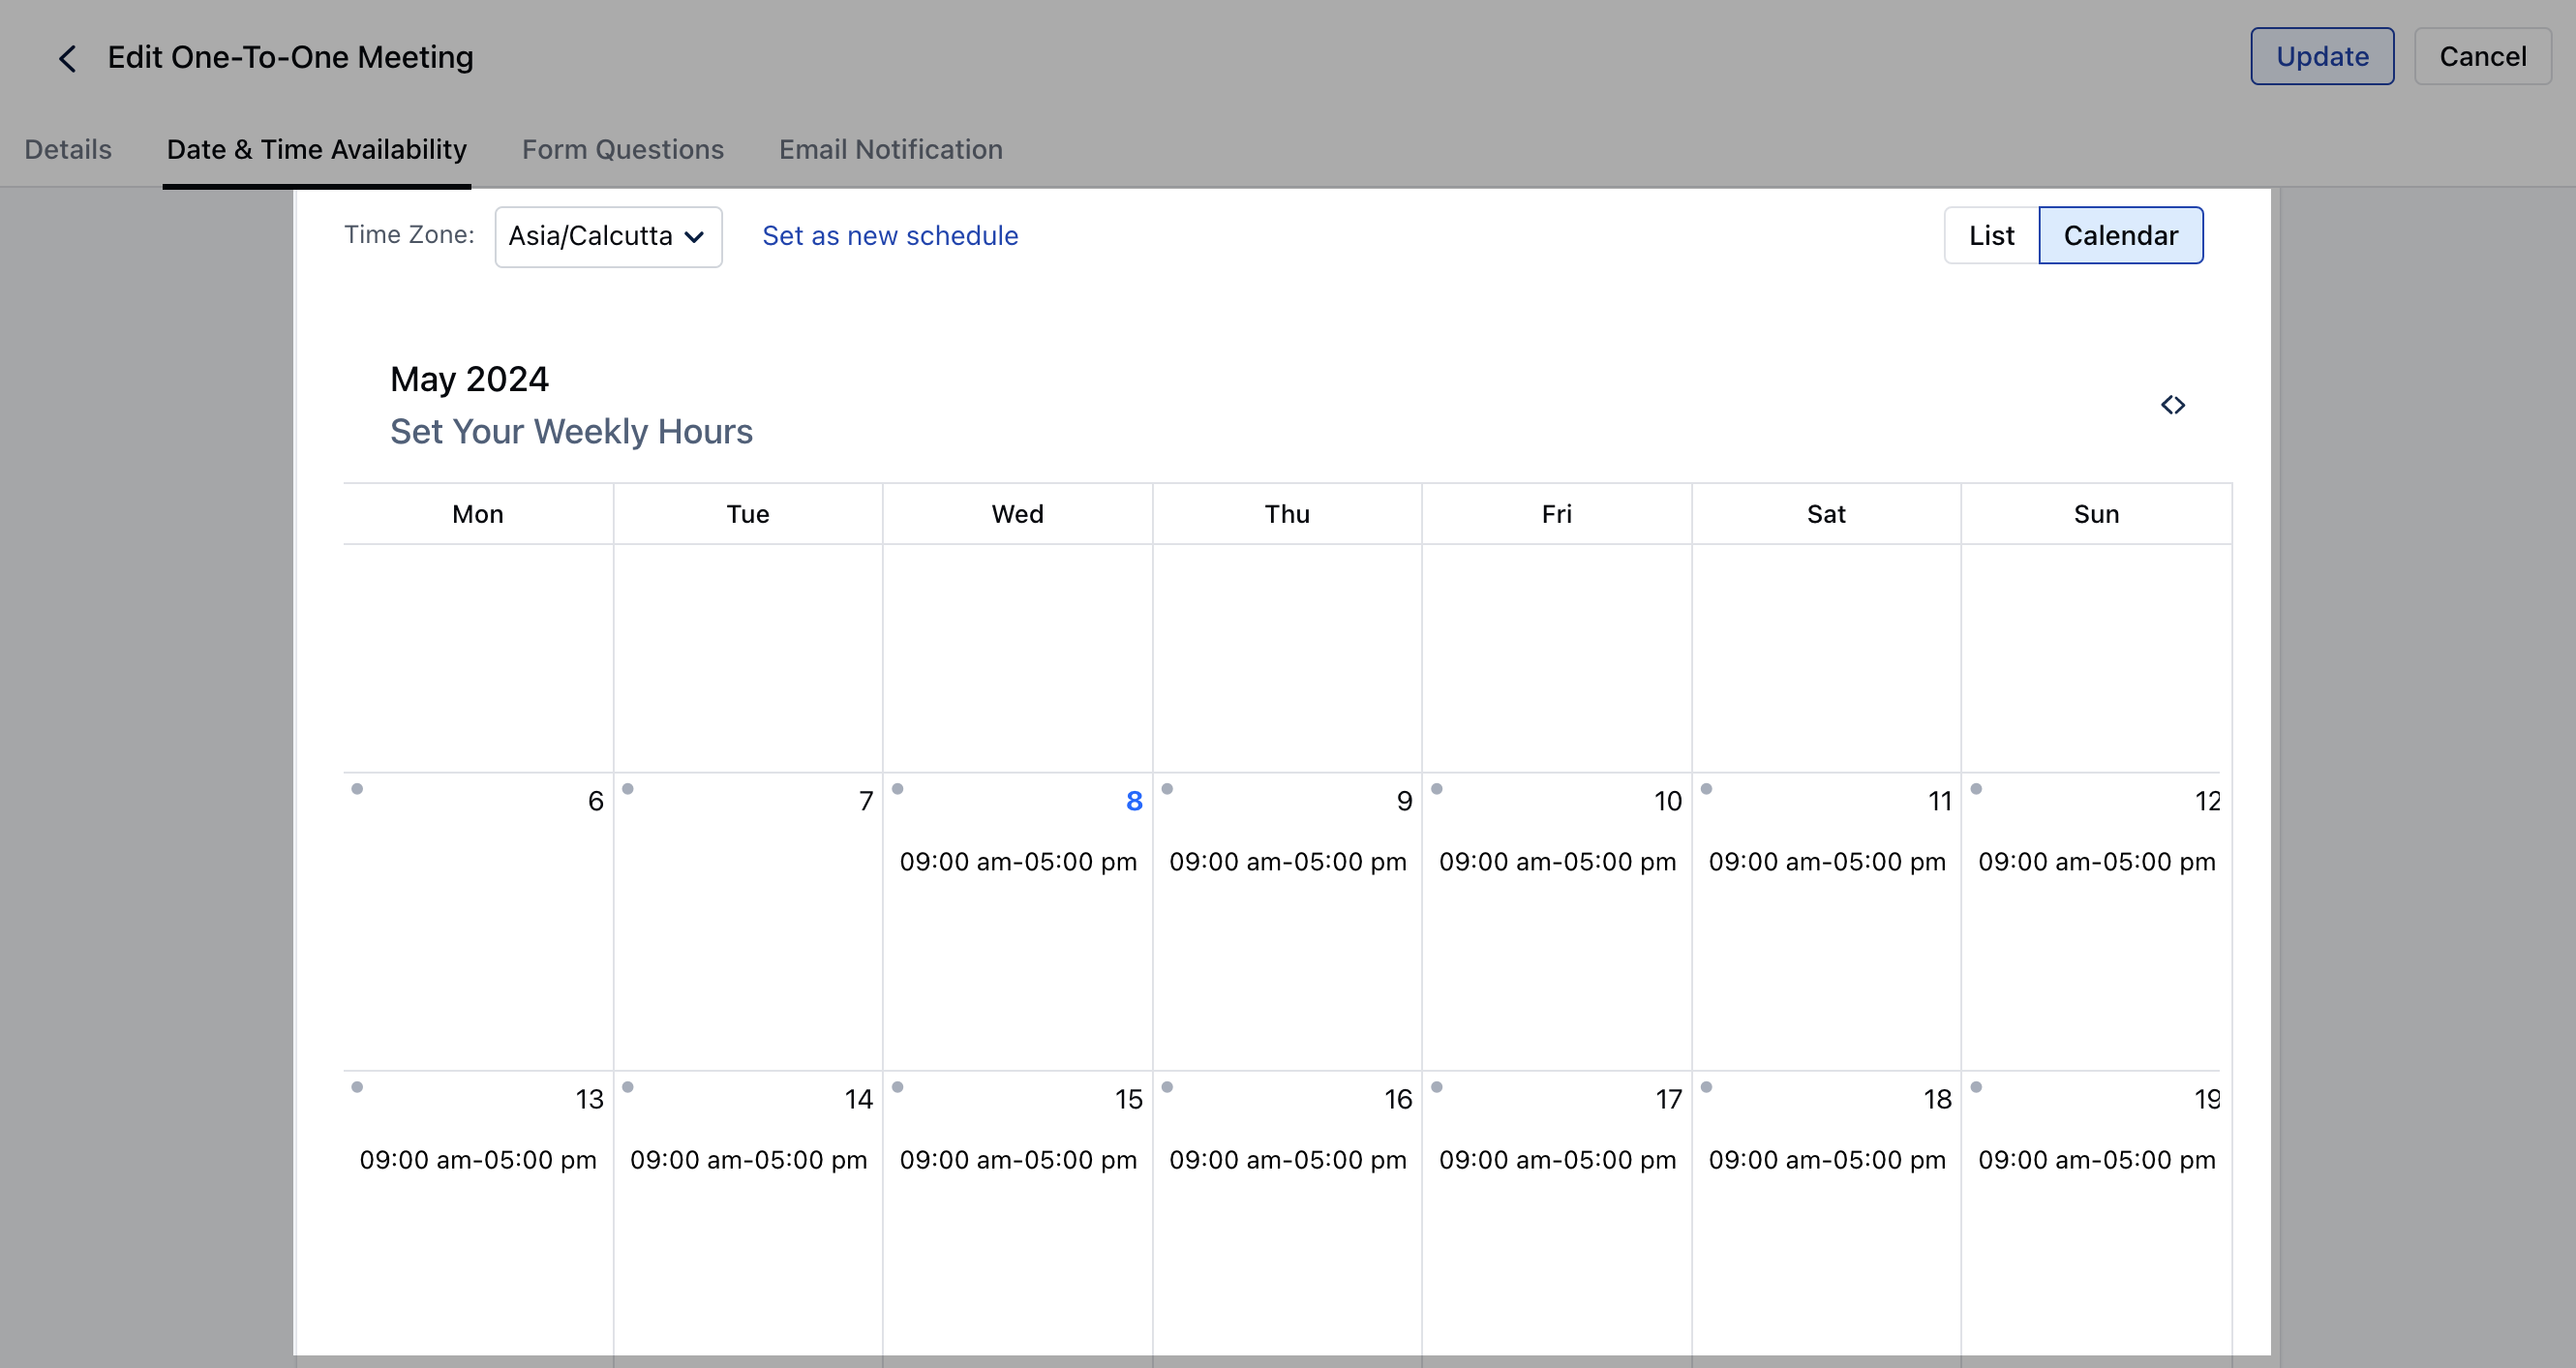
- Select Business Days
- Select the Available Time Slots
- Meeting Duration: Select how long your meeting can go on, you can book a meeting for up to 12 hours.
- Buffer Time: Allot time before or after the meeting to prepare for the next one or wrap the current.
- Show available start times in increment of: Select the frequency of the slots to be displayed * Eg: if you have select 1 hour here, then the slots will be shown as 8:00 AM, 9:00 AM, 10:00 AM & so on
- Minimum Notice Time: Set the minimum amount of time before a meeting that someone can book with you. * Eg: If you select this as 4 hours and it’s 12:00 pm right now then the invitee will see the next available schedule after 4 pm
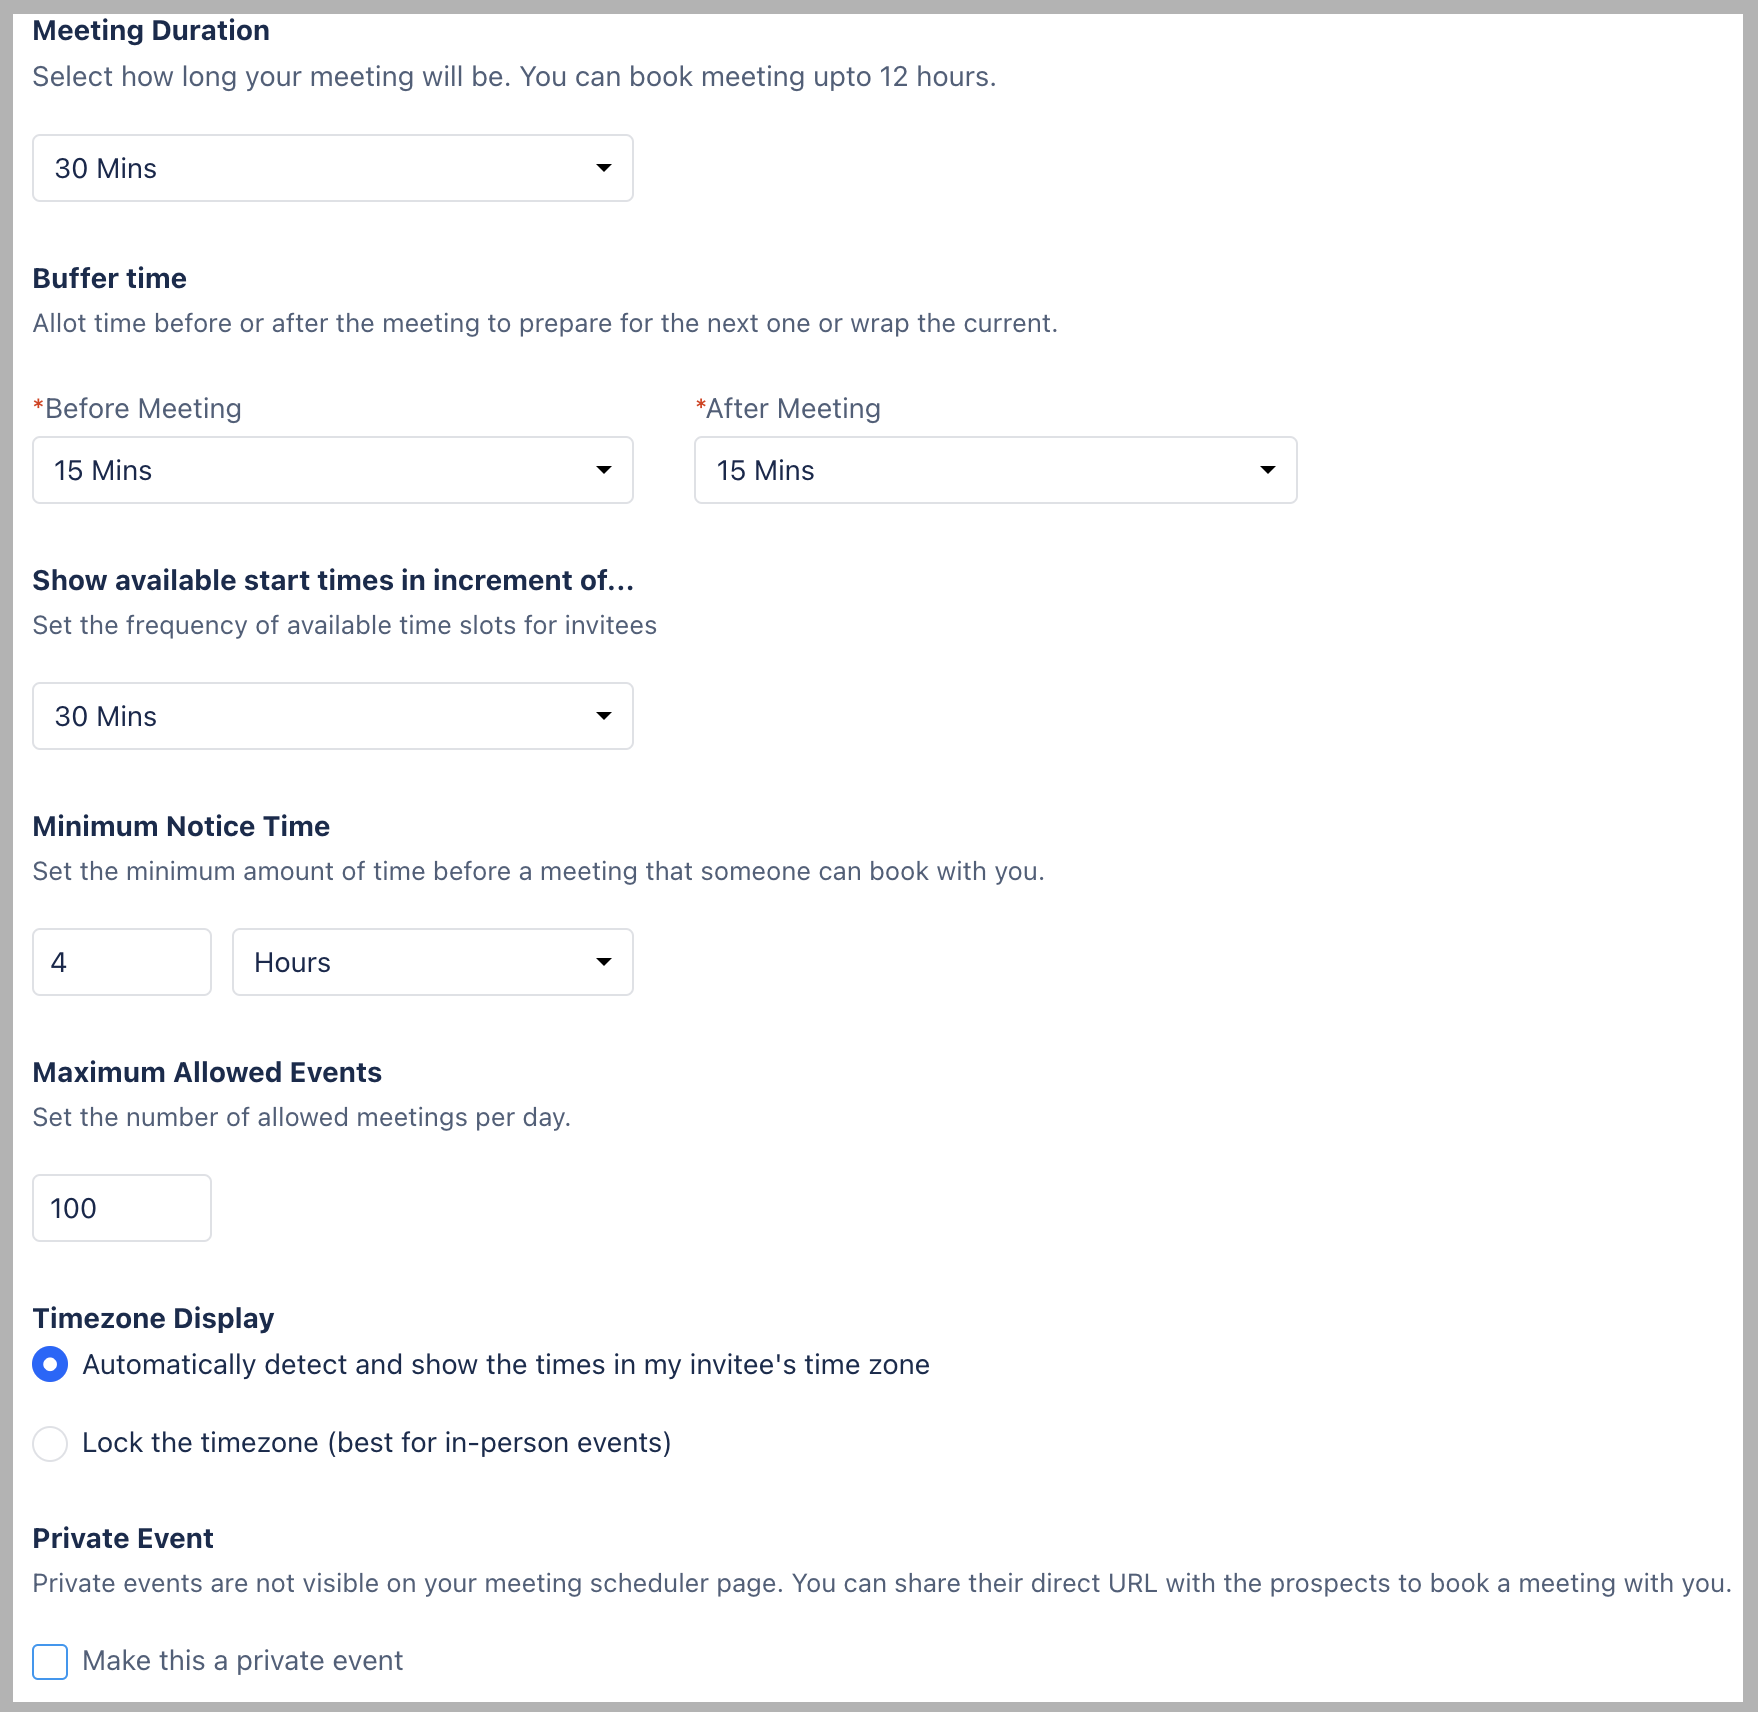
- Maximum Allowed Events: Select the maximum events that can be booked in a day
- Timezone Display: Automatically detect and show the times in my invitee’s time zone: It will auto convert your available time slots into their timezone slots
- Lock the timezone (best for in-person events): A single timezone will be locked where the invitee can only see the timezone you have locked
- Private Event: Select the check box to make this a Private event which the invitees can only see if they have a Scheduling link for this meeting