- Navigate to the Tickets module from the left menubar
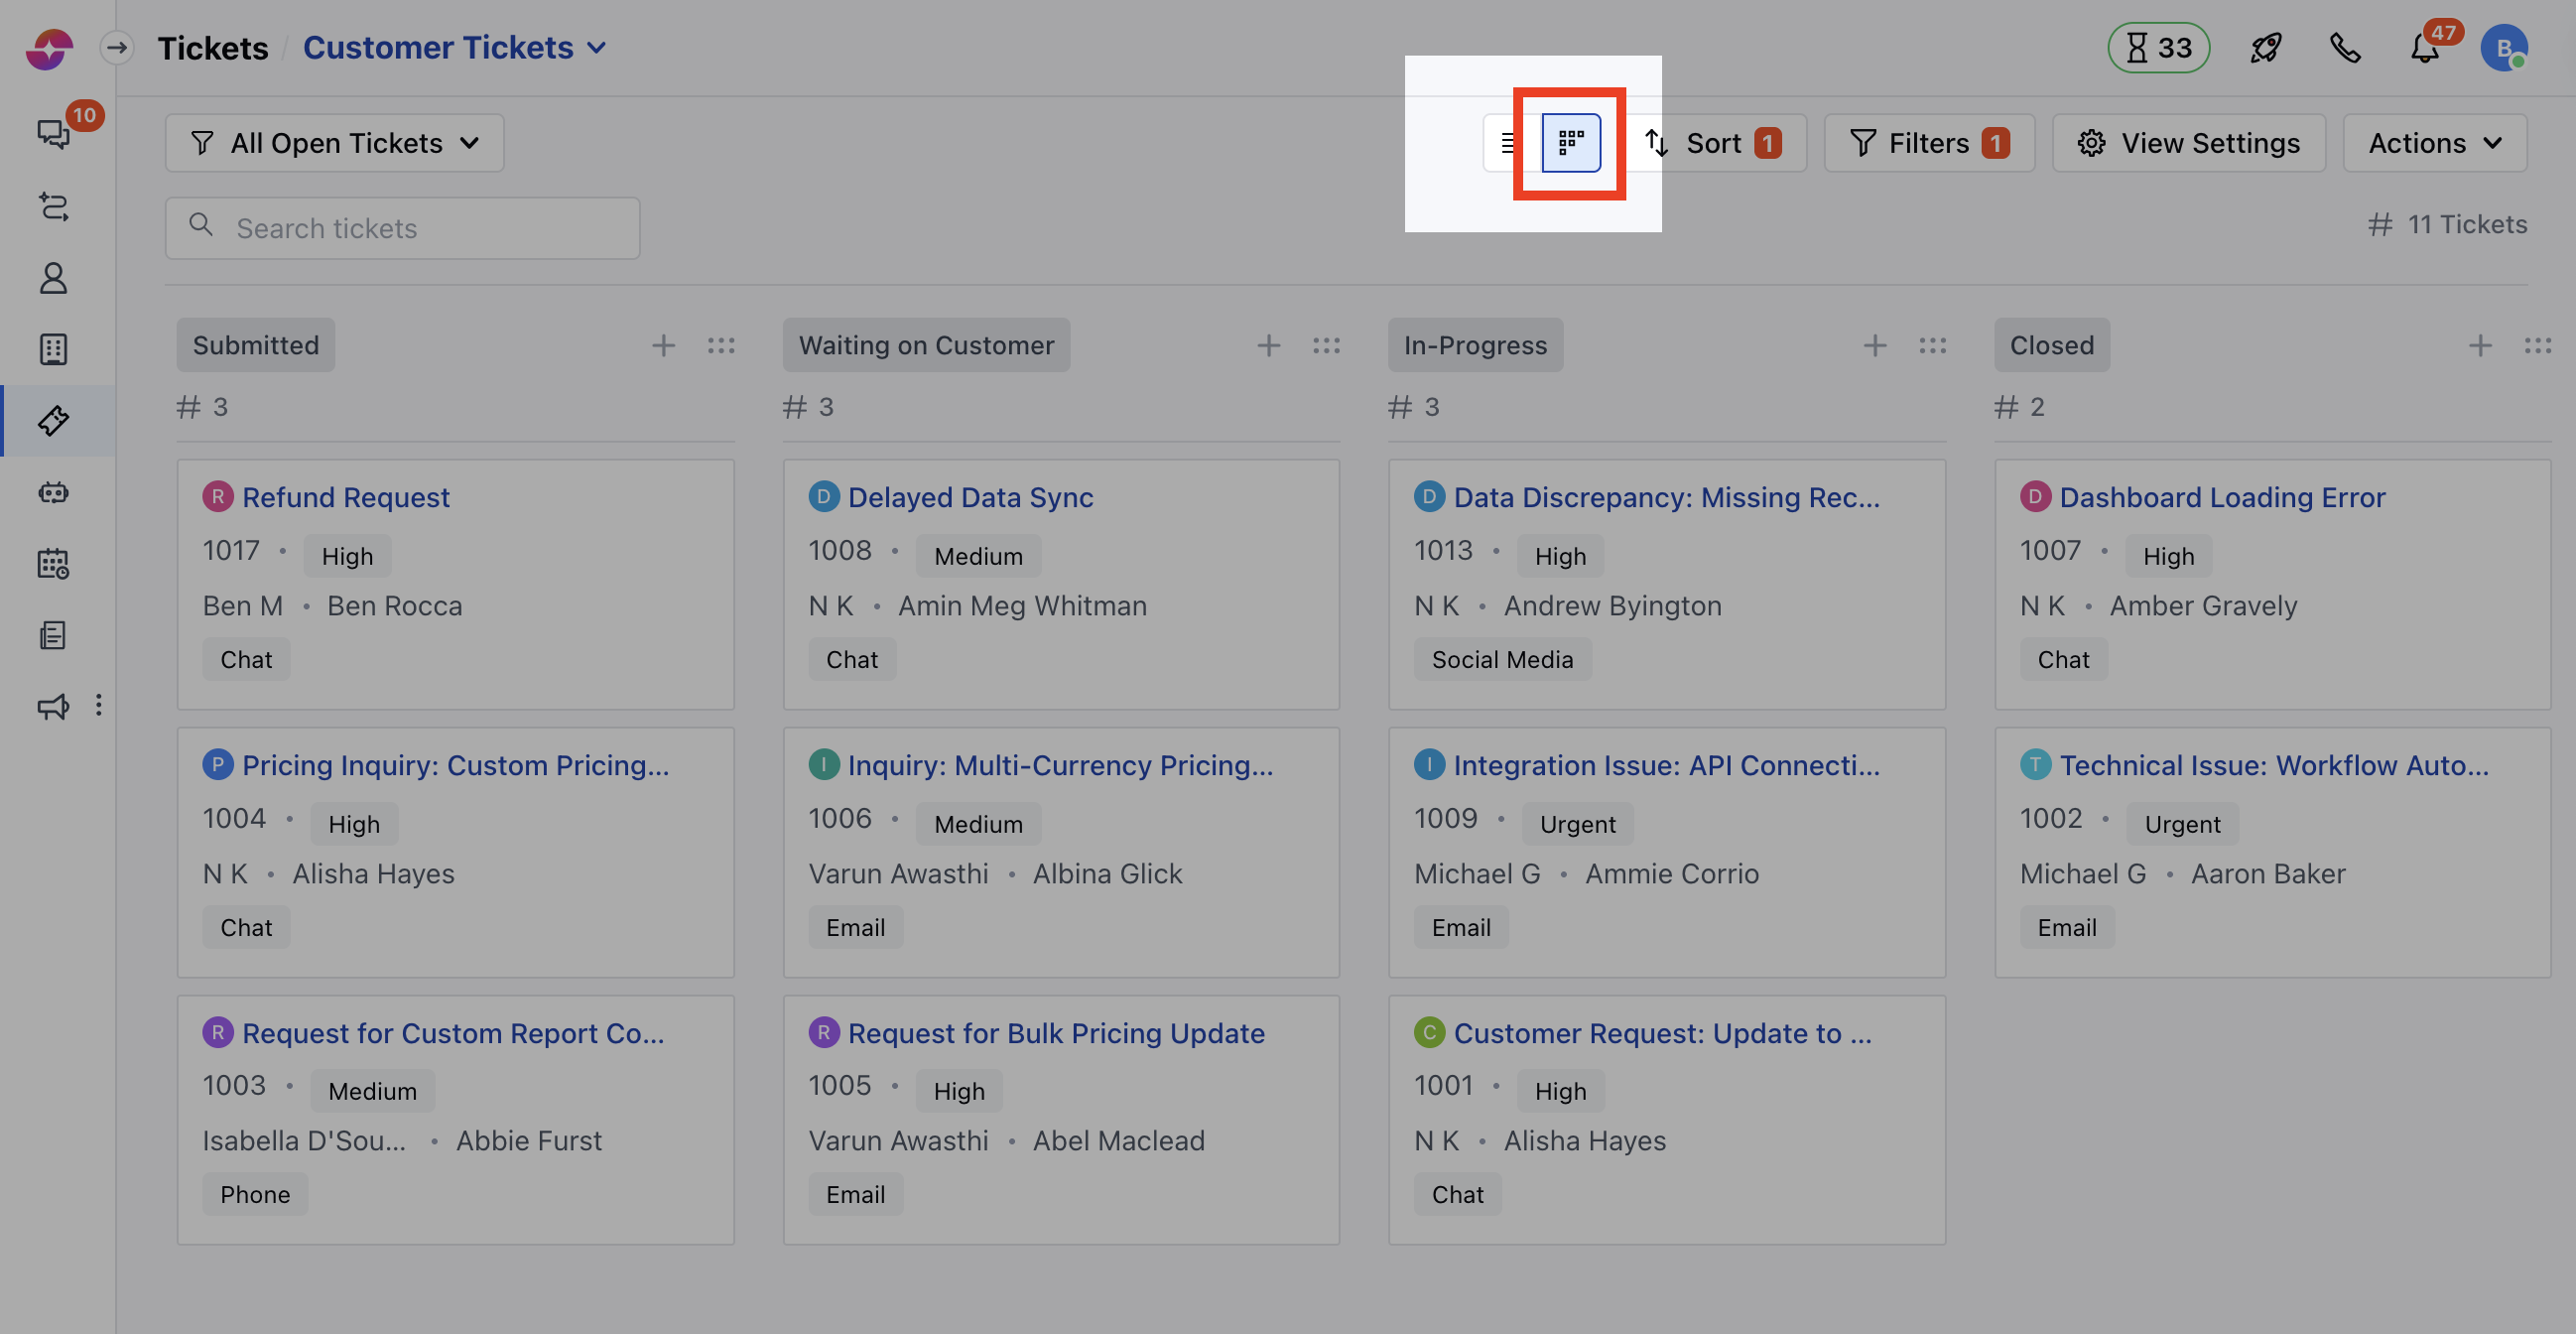
- Head over to the Board View option on the top right
- You will be redirected to the Board View screen
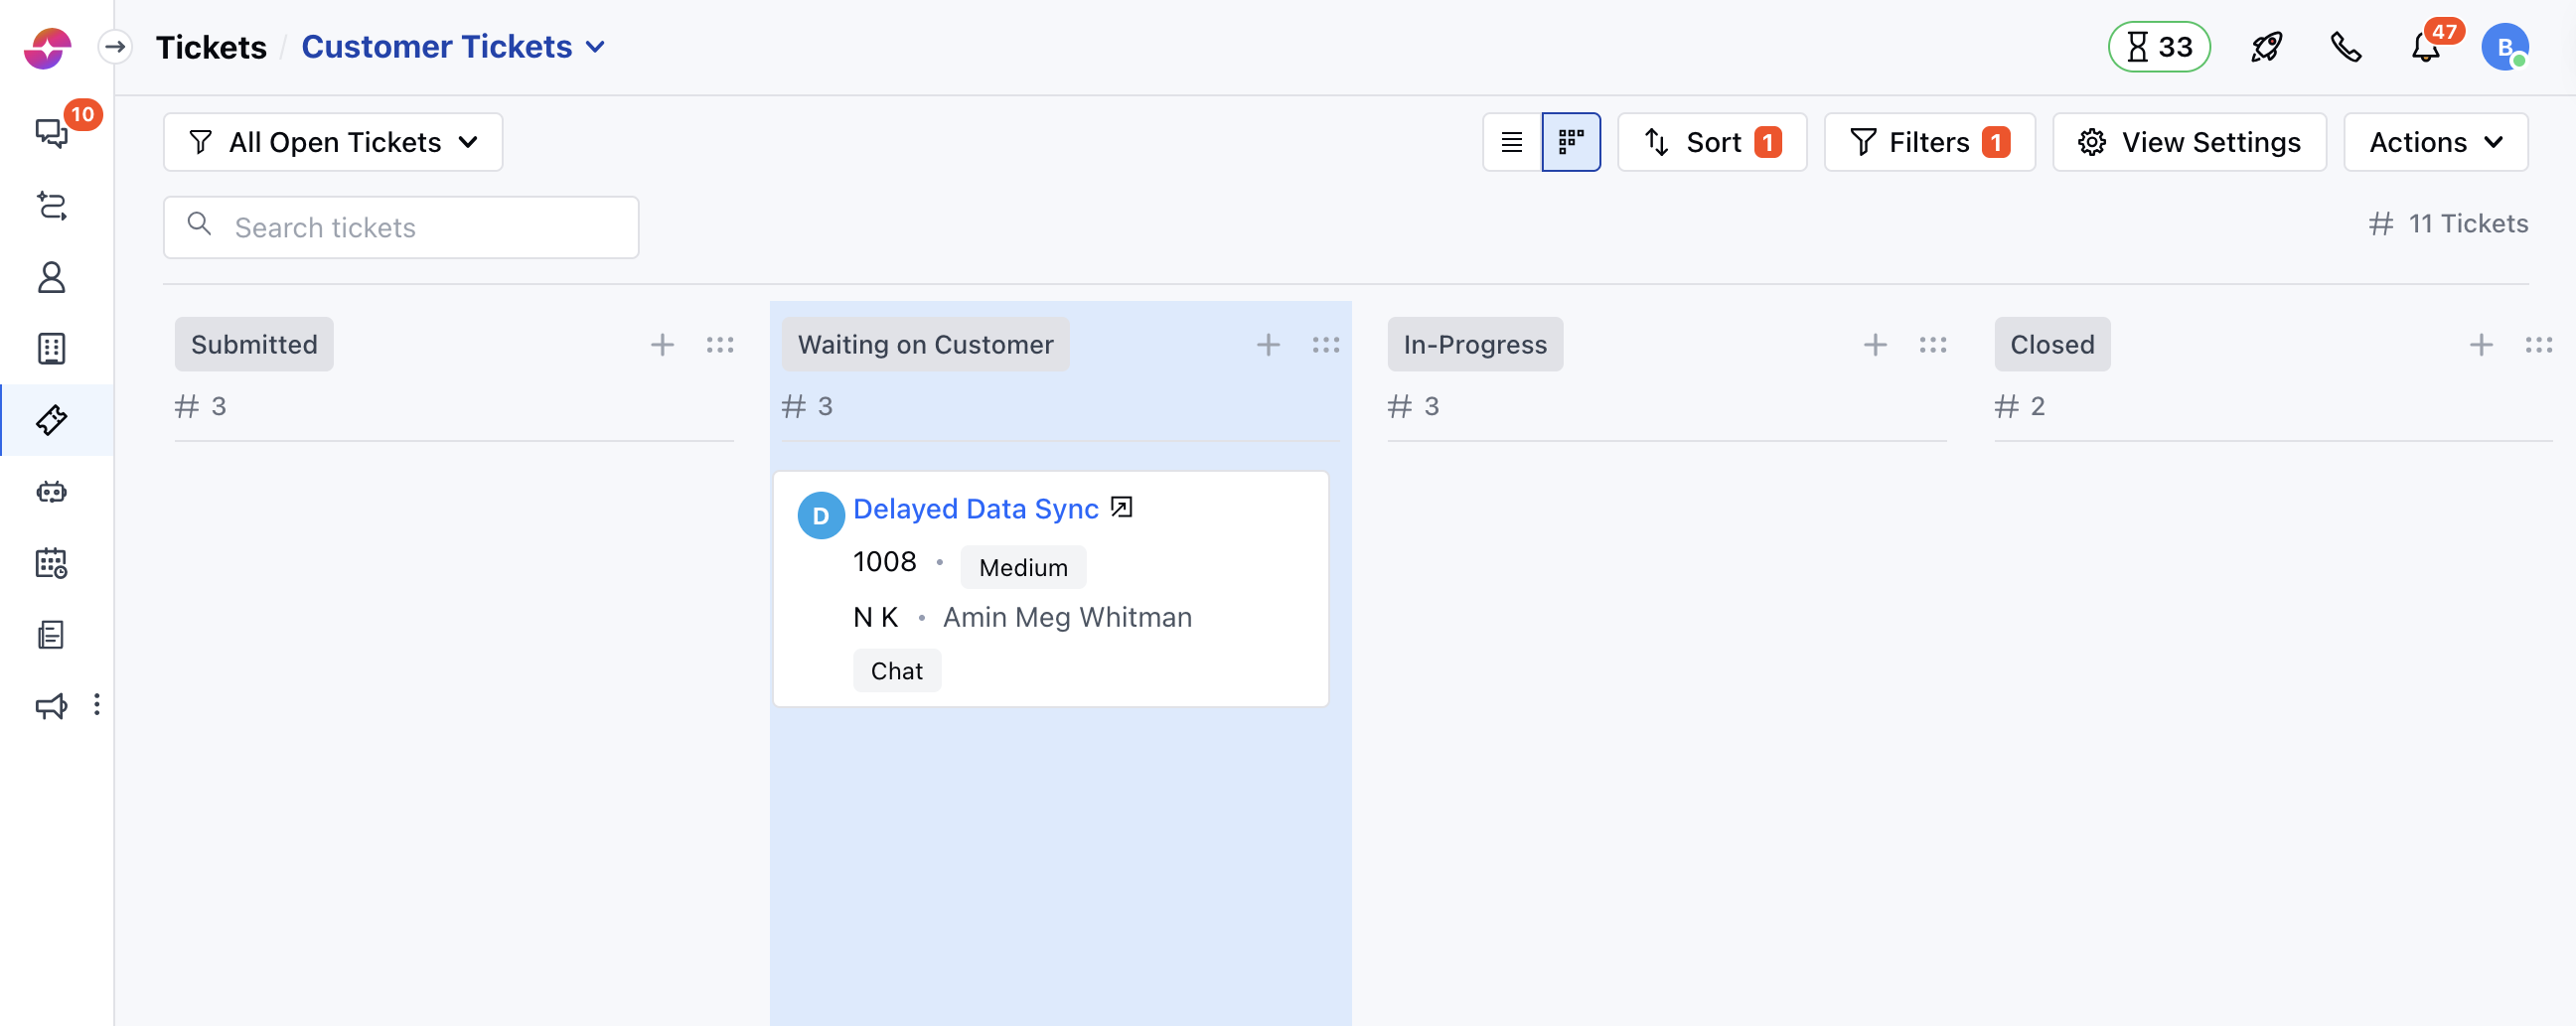
- In the board view, the columns will be displayed based on the stages you have created.
- You can drag and drop the Stages to reposition
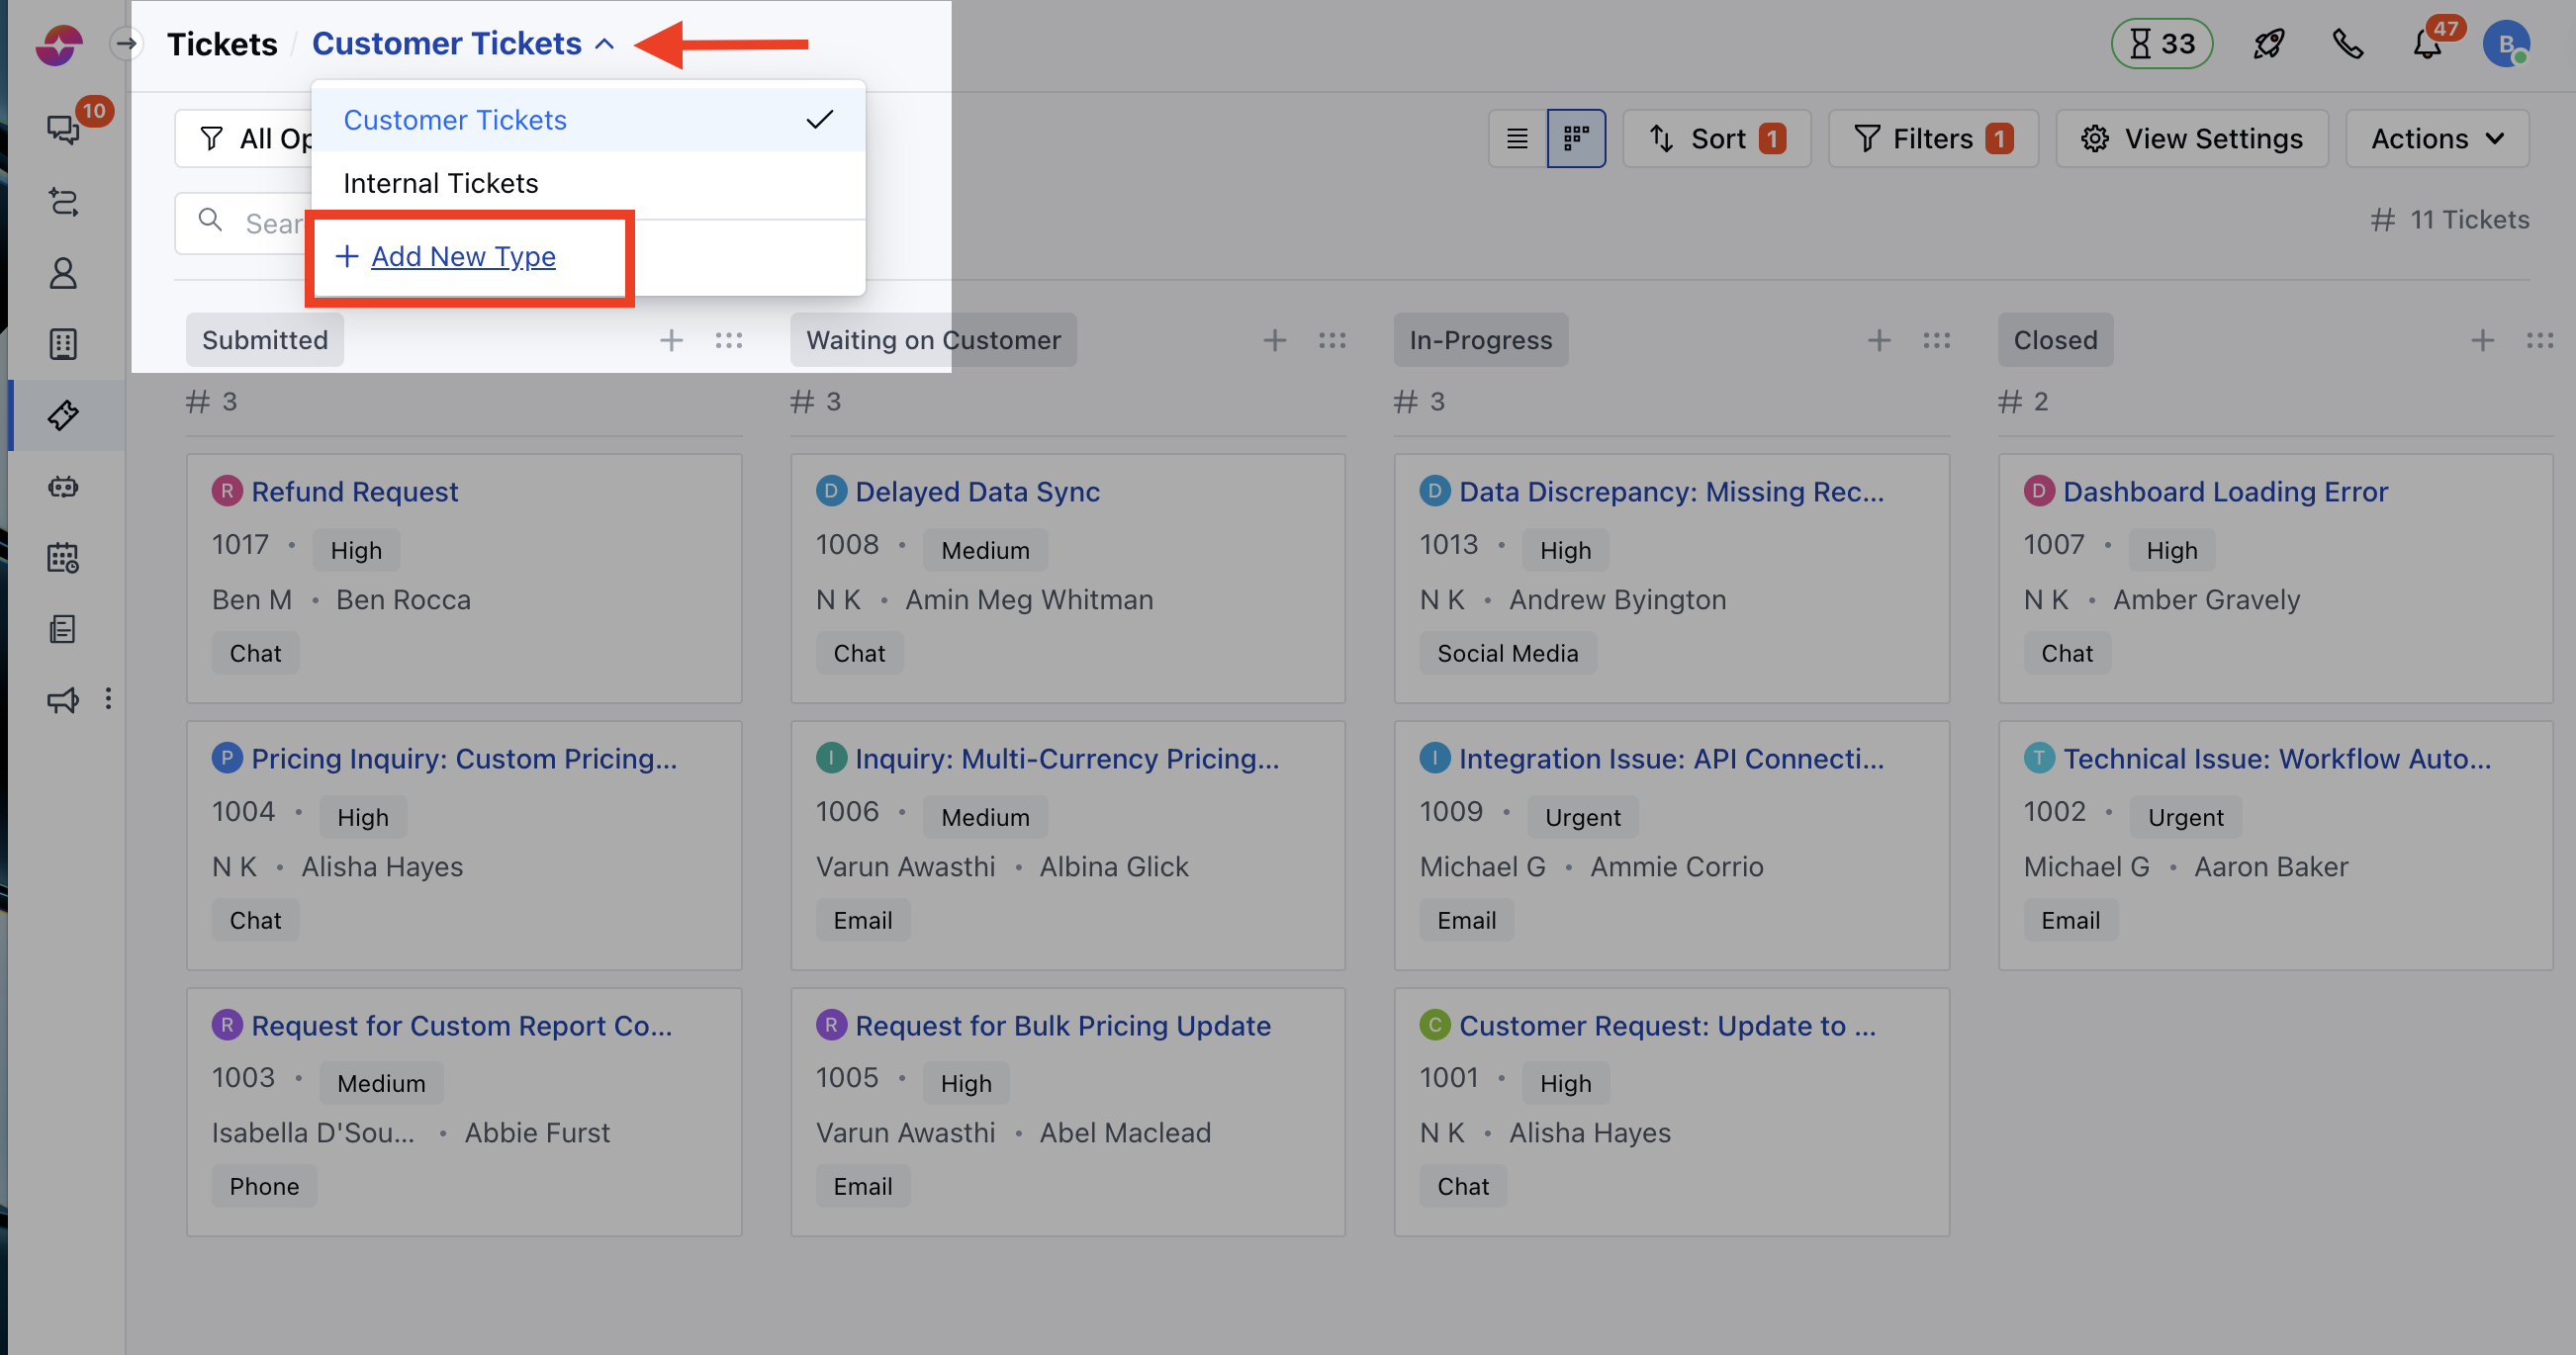
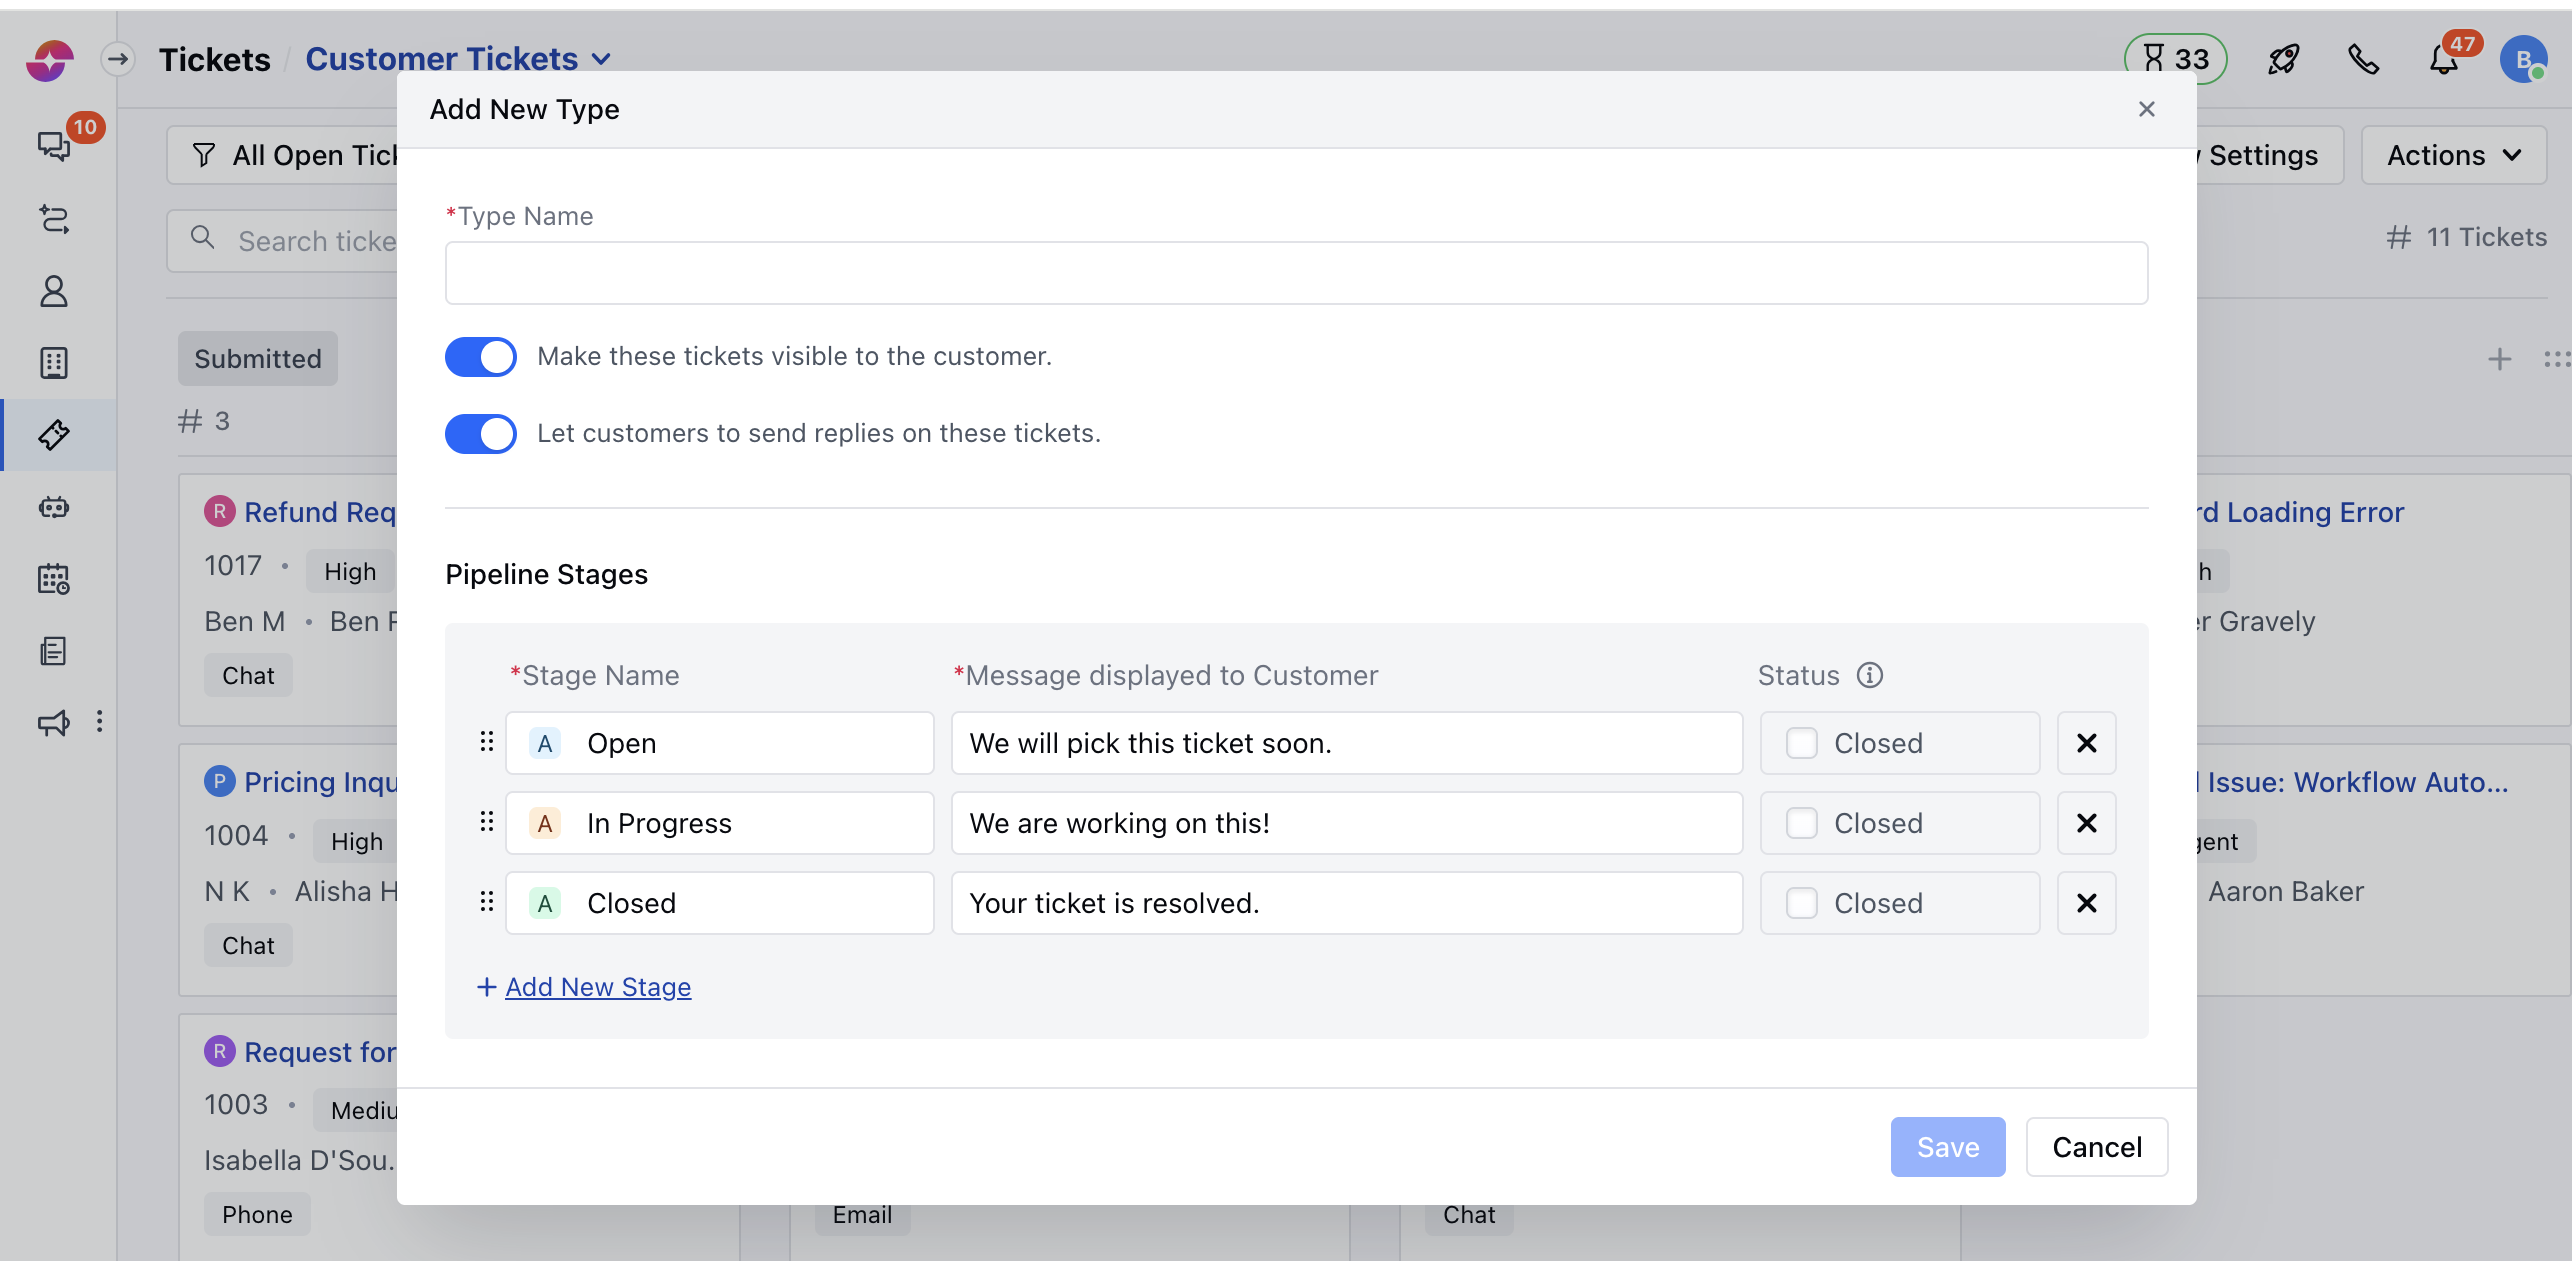
Create a New Type
- Navigate to the All Pipeline option
- Click on the Add New Pipeline options
- Enter the Pipeline Name
- Make these tickets visible to the customer: Enable this option if you wish the pipeline to be visible to your customers.
- As soon as you enable this option another option will appear.
- Let customers to send replies on these tickets - Enable this option if you want your customers to engage in ticket discussions and add their comments on it
- If you wish to Add in any new stages click on Add New Stage
- Click on Save
Customize the Card
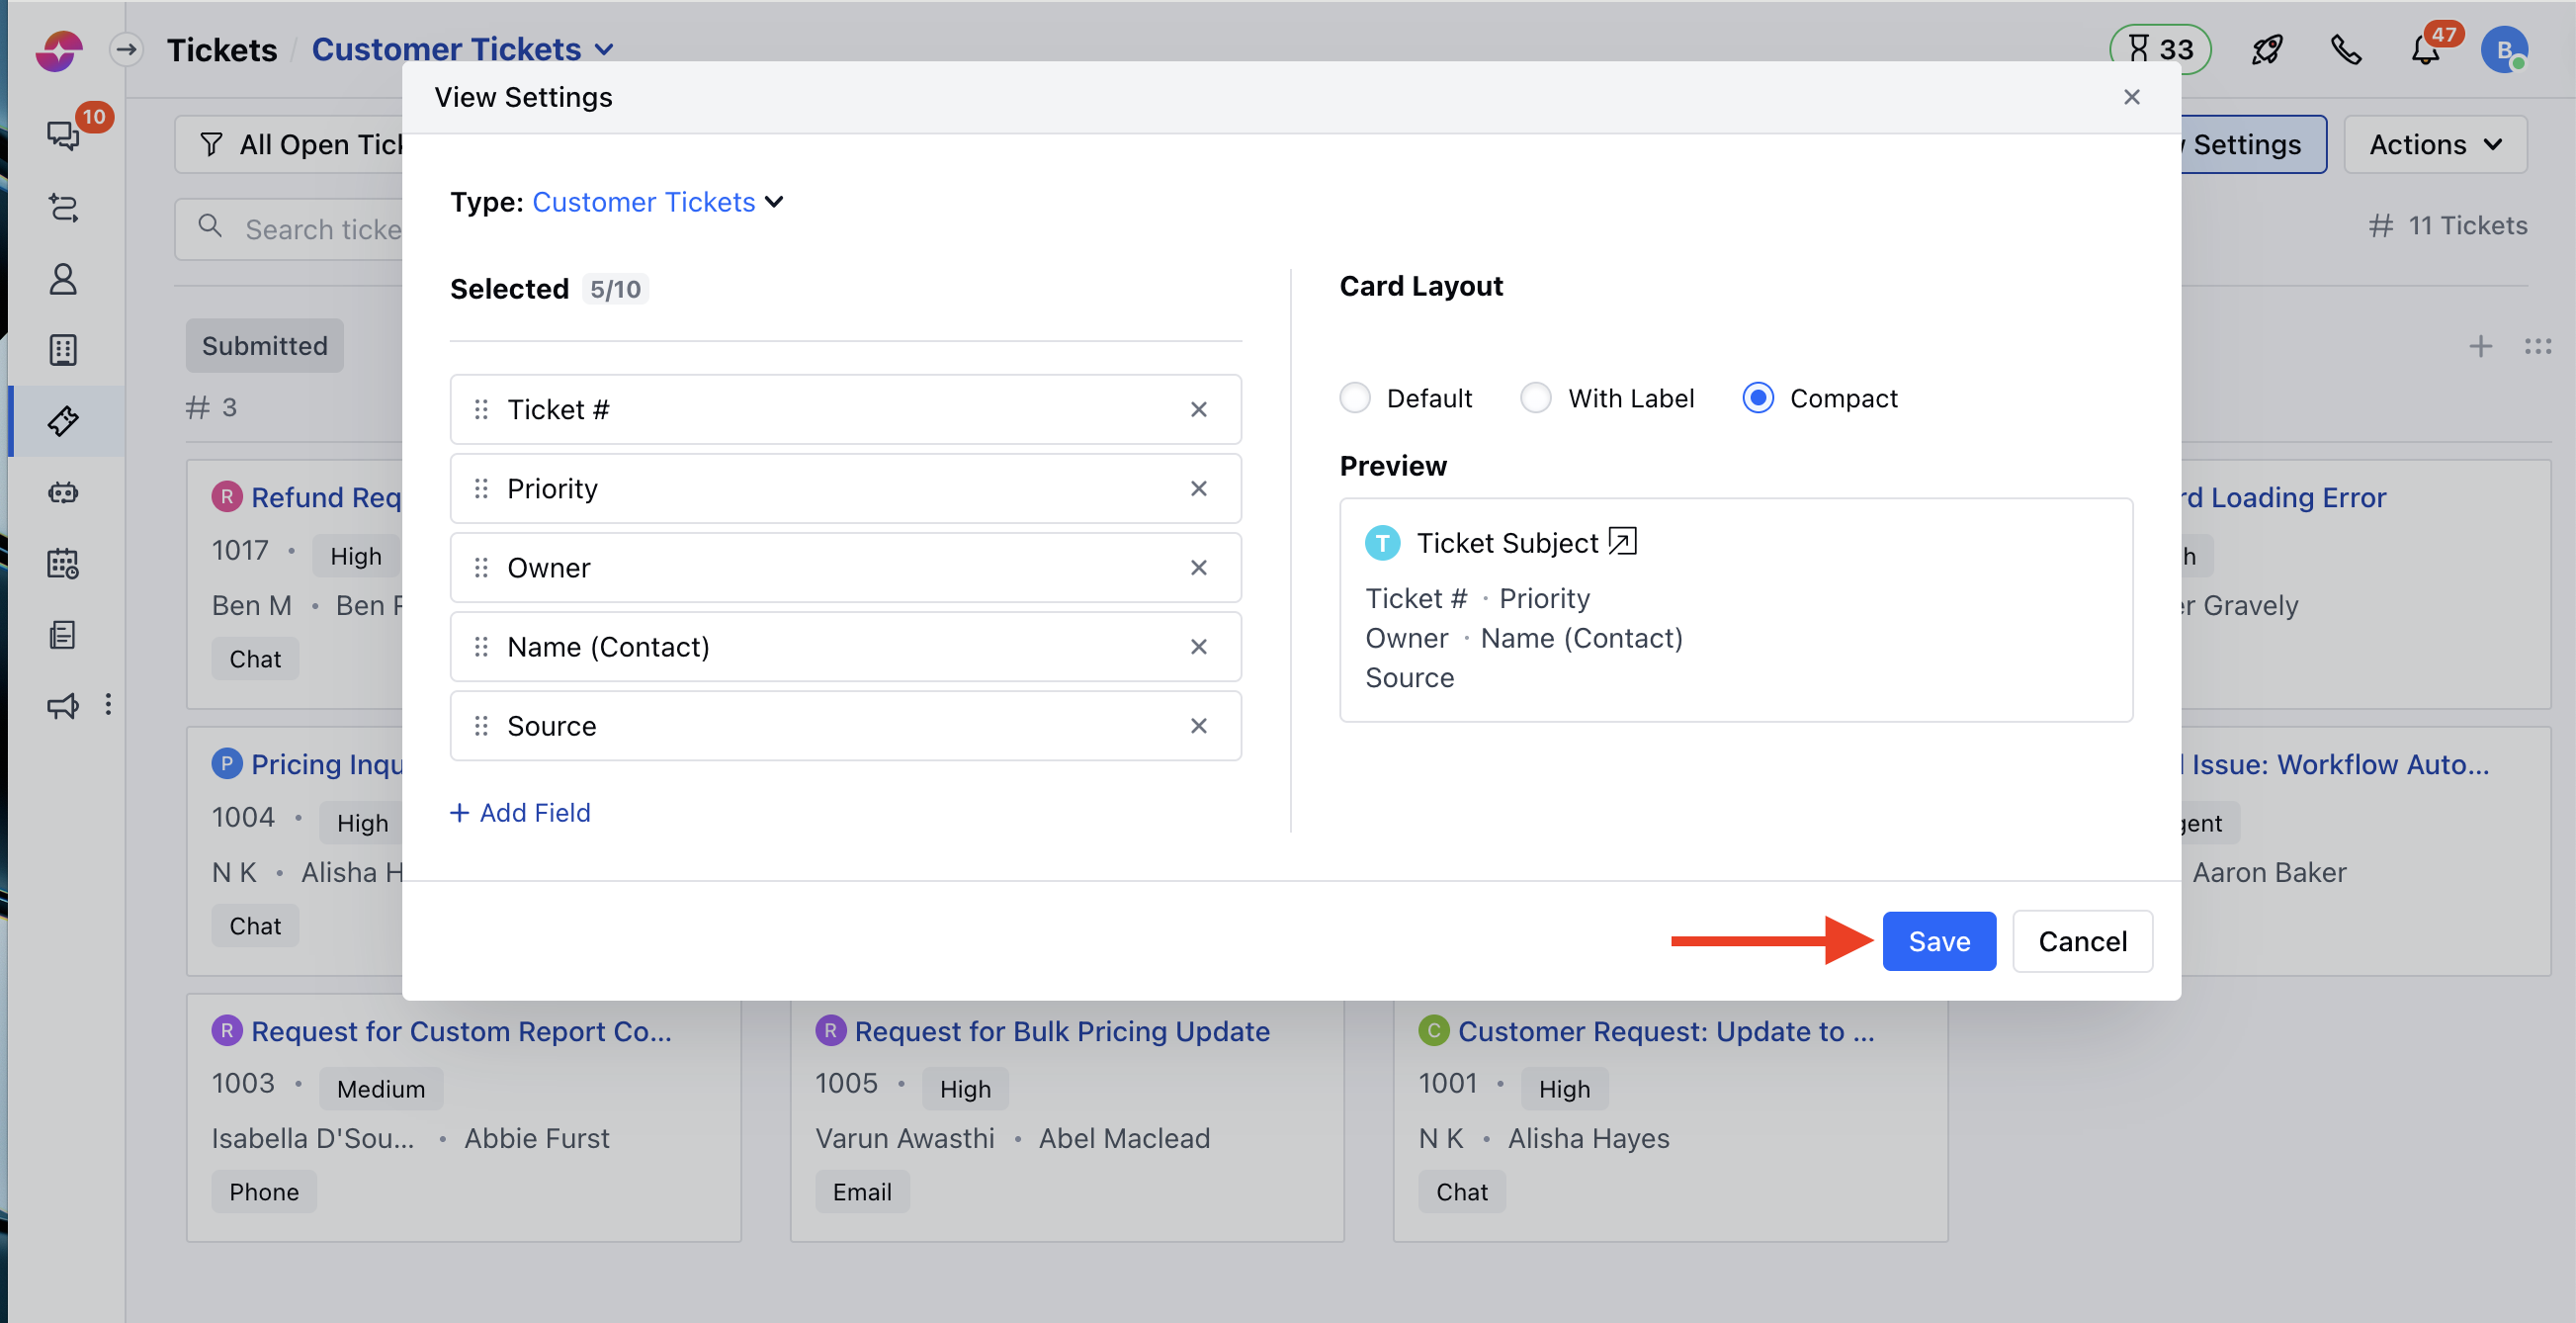
- You can also choose the design of the card and what details should be shown by clicking on the View Settings button and configuring the popup with your desired details
- Pipeline - Select the Pipeline for which you wish to Customize the Card
- Add Field - Select the Fields you would like to appear on the Card, you can easily Add or remove the fields.
- Then, choose the Card Layout,
- Default - To display the values of the selected fields with their icons on the card.
- With Label - To display the field label and their values for the selected fields in the card.
- Compact - To display the values of the selected field in a compact view.
- Preview - Will show how the Card would appear with any of the above Card layouts.
- Once you have chosen your preferences, hit the Save button
Actions Under Stage Title
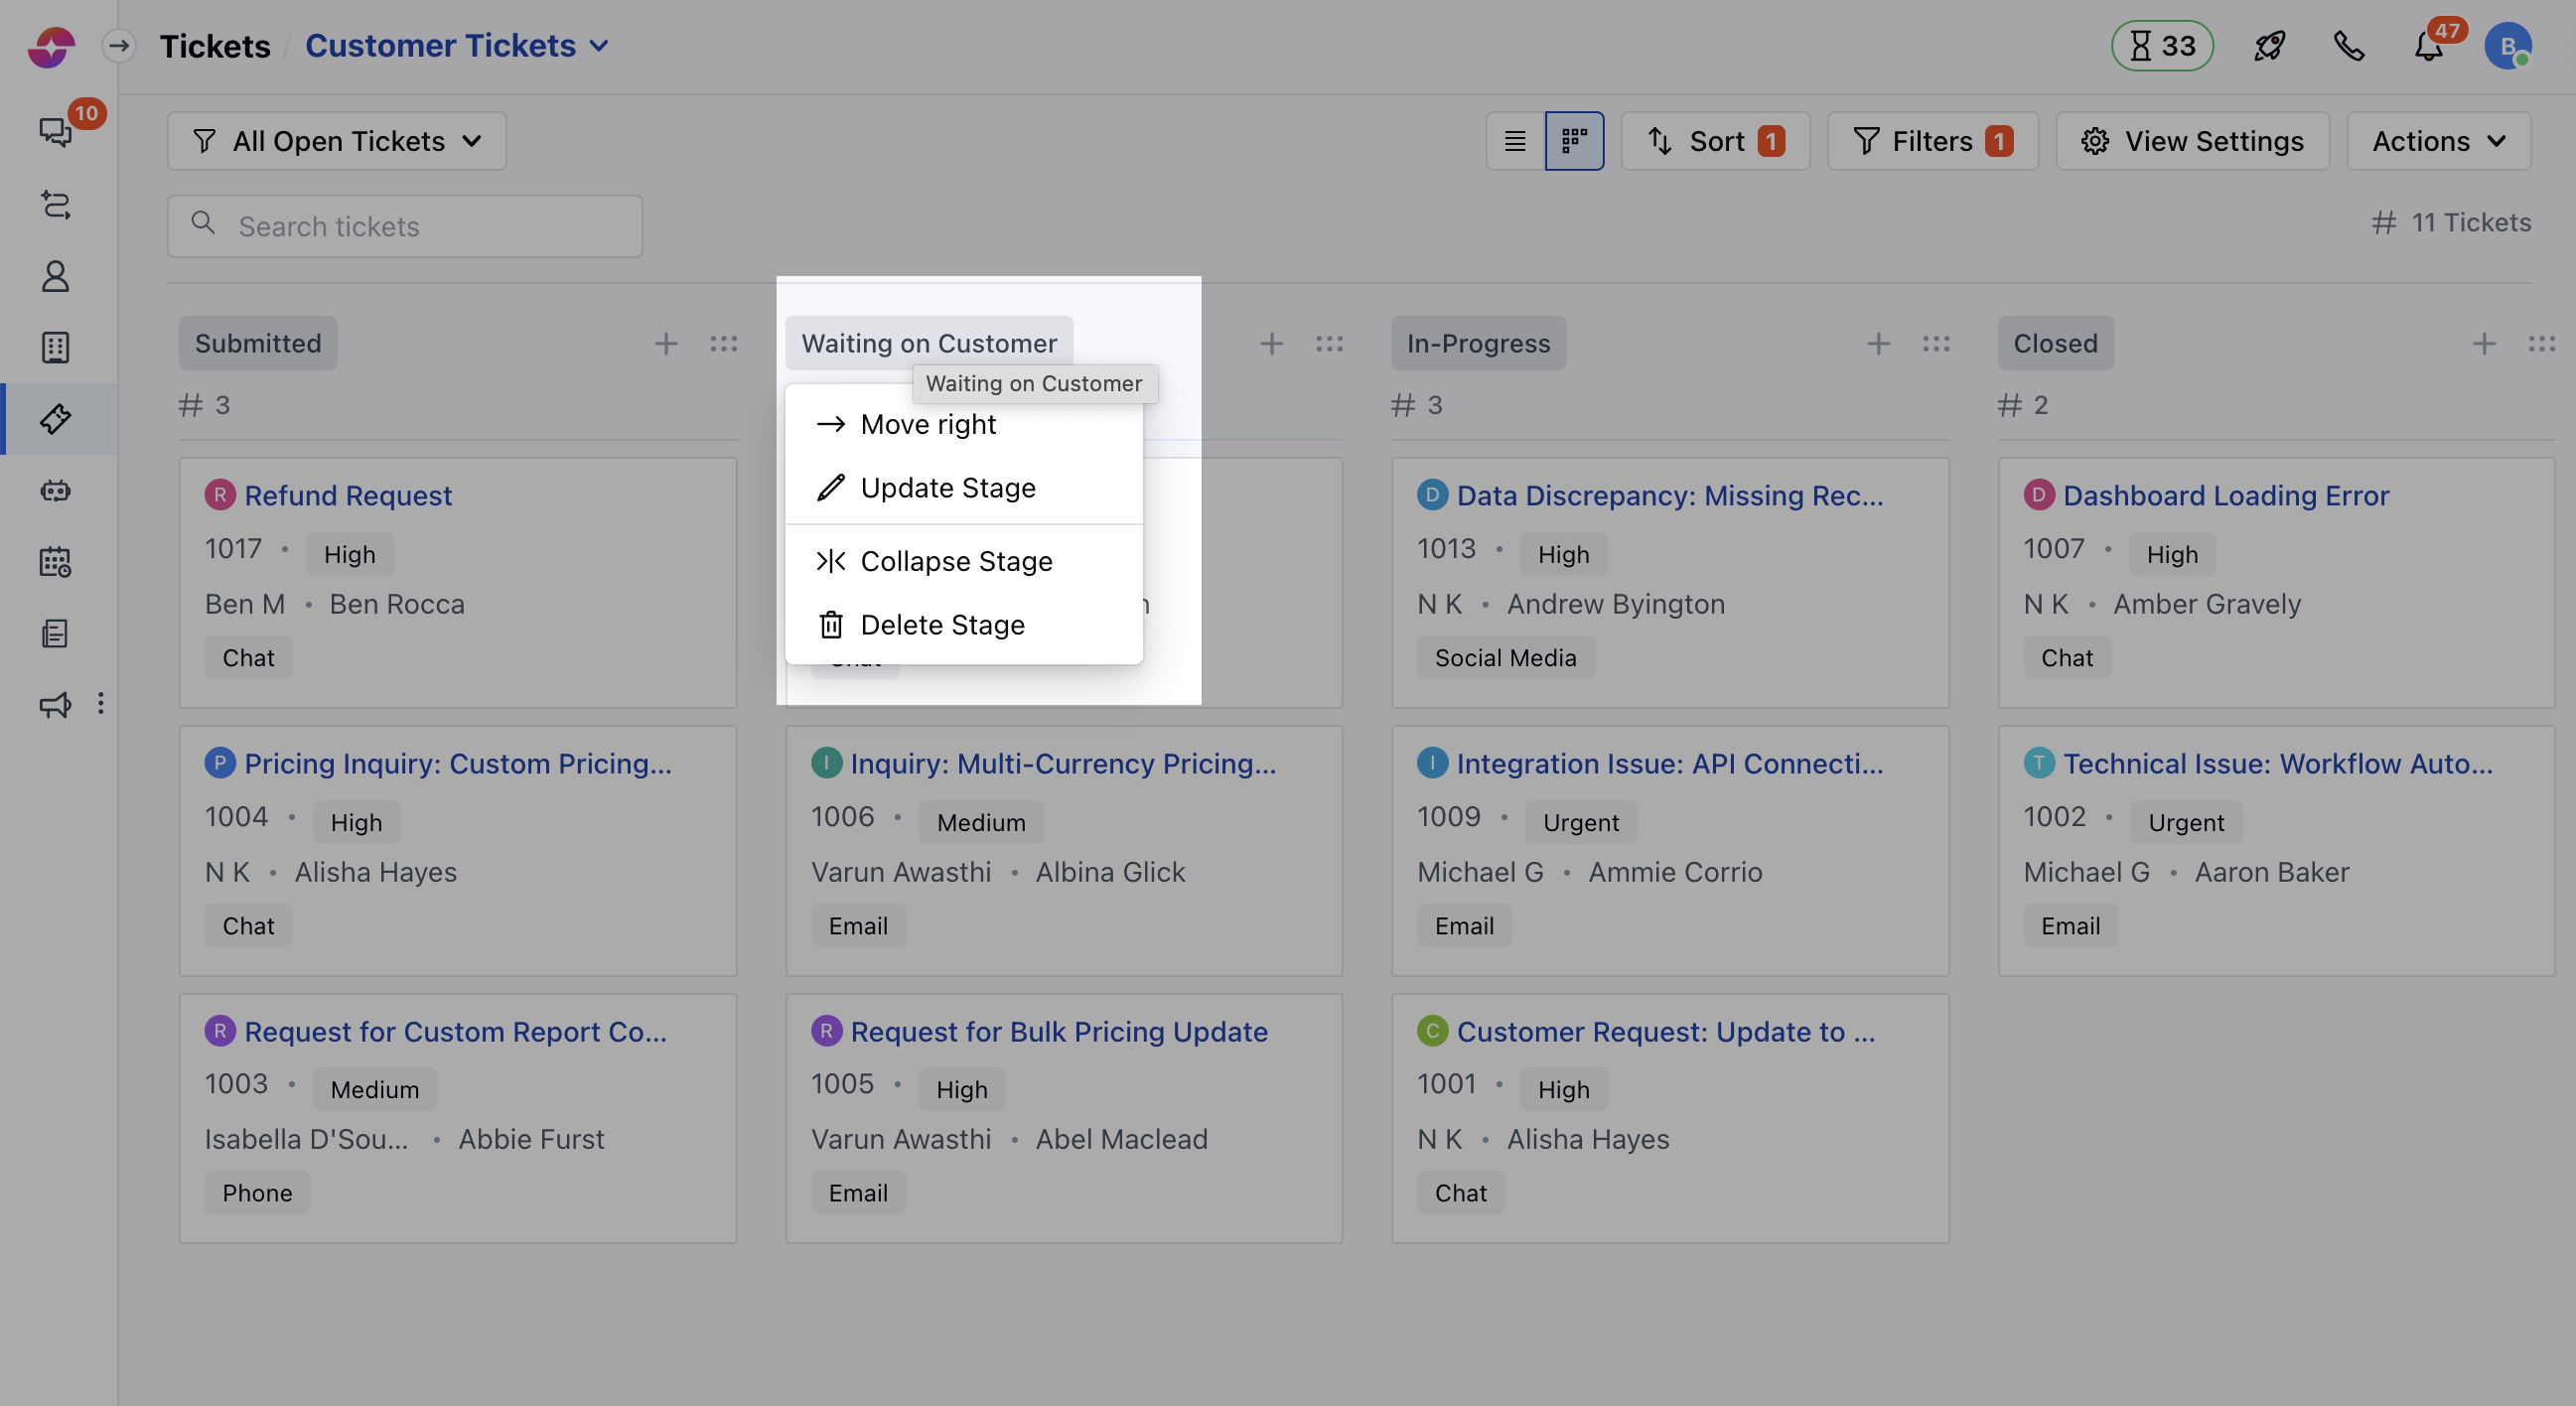
- As you click on the stage Title, it will allow you to perform the following actions,
- Move Left - This option allows you to move the Stage to Left
- Move Right - This option would allow you to move the Stage to Right
- Update Stage - This option would allow you to Update the Stage
- Collapse Stage - This option lets you temporarily hide the Stage
- Delete Stage - This option would let you Delete the Stage if not required