- Navigate to the Tickets module from the left menu bar
- You will be presented with the Ticket module’s List View.

- Quick Search
- Multiple Column Actions
- Add a Column
- Add Filters
- Manage View Settings
- Operations Under Actions
- Bulk Operations
Quick Search
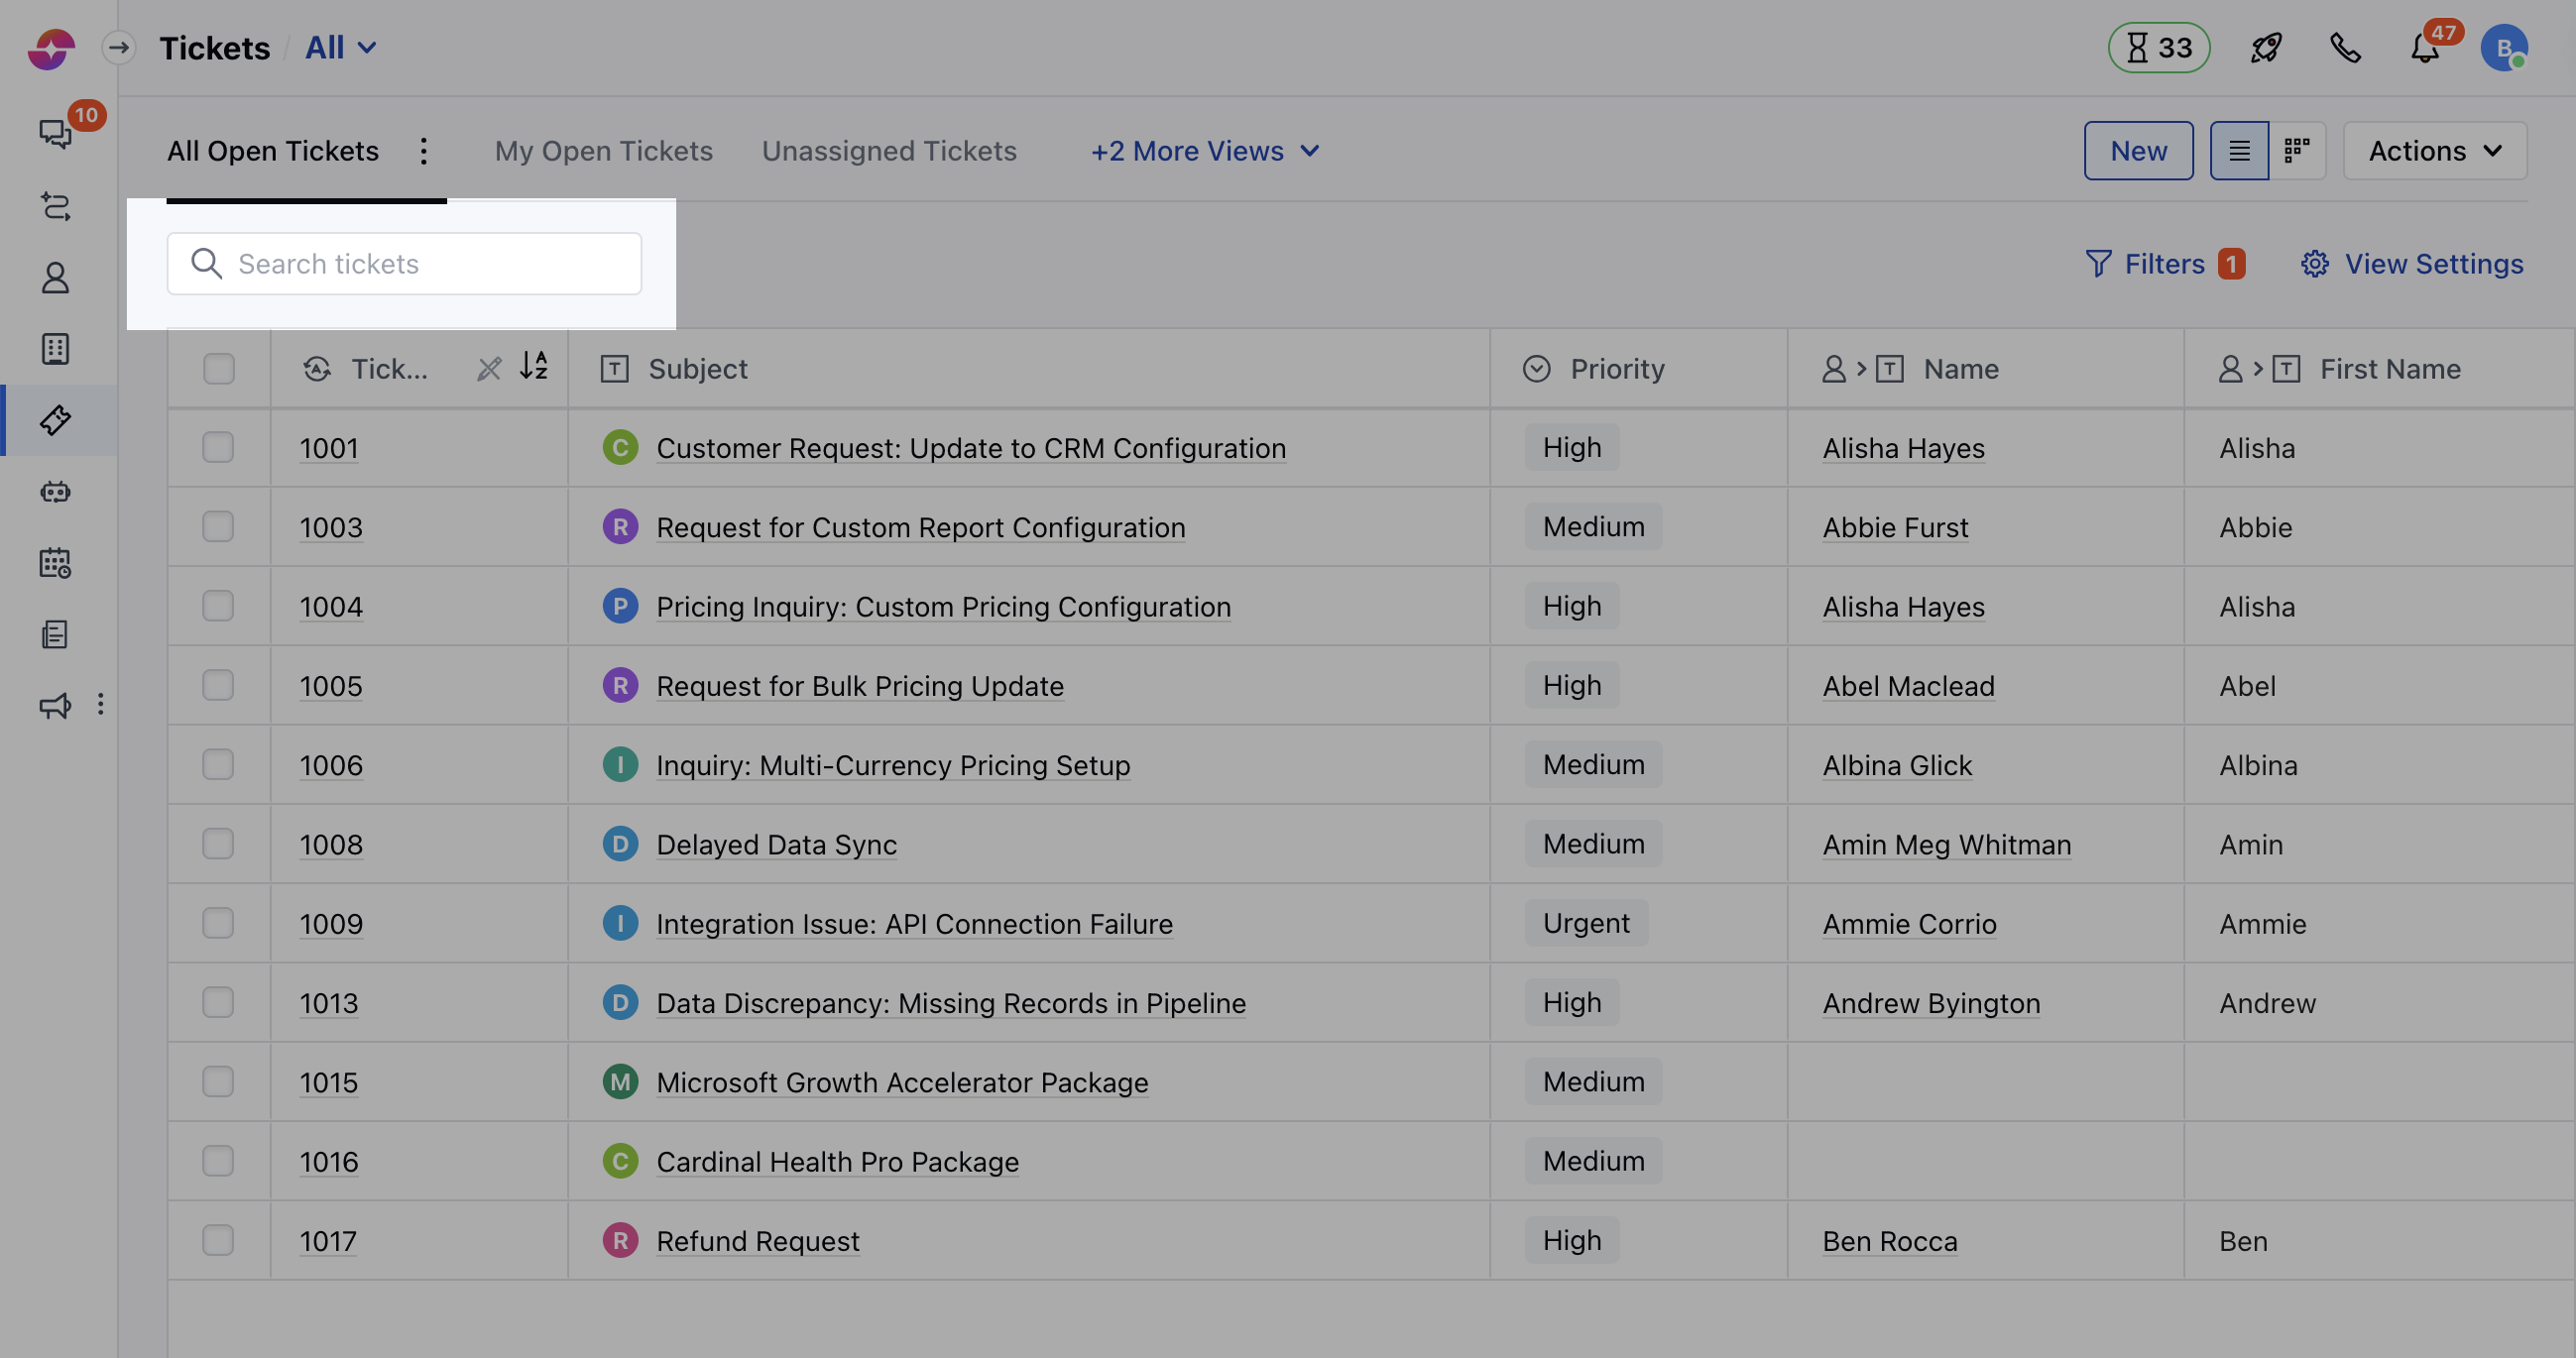
- Navigate to the Quick Search Option on the top
- You can easily search any Ticket details within a View using the Quick Search Option
- You can search for a ticket in the current view by Title/Subject, or ID field
Multiple Column Actions
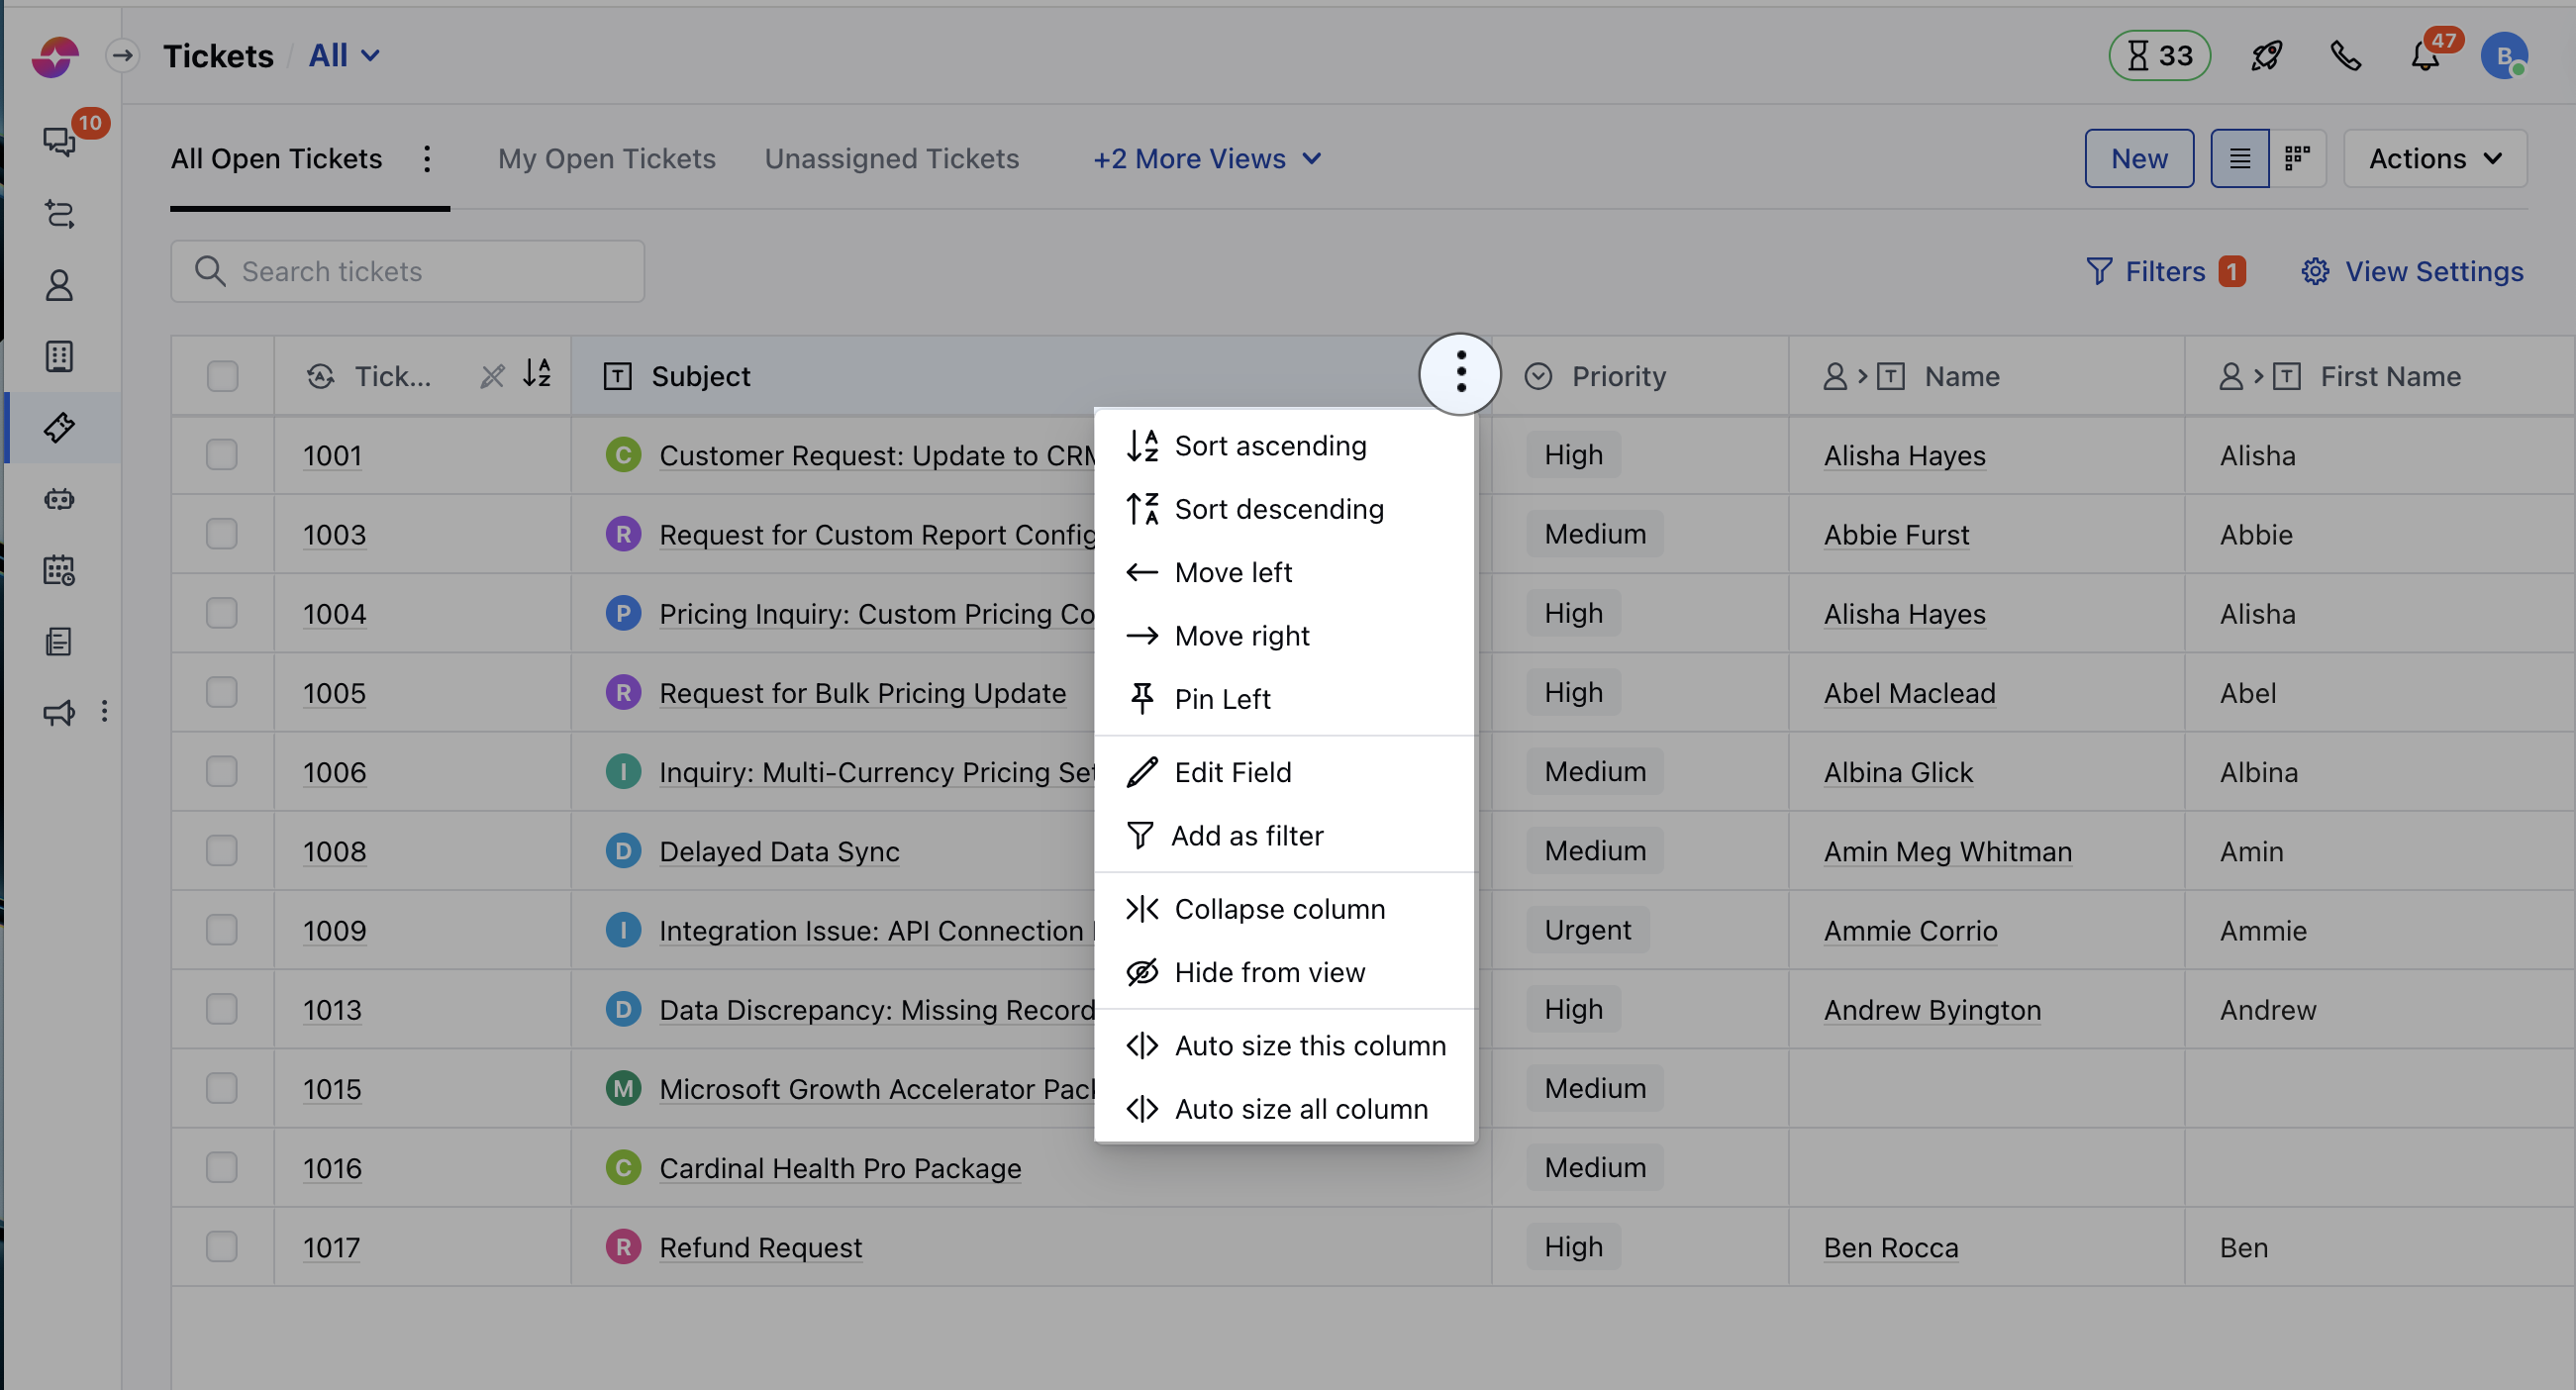
- Hover on the Field Name, three dots will appear on the right, click on these three dots to perform any of the following actions,
- Sort Ascending: Click to sort your Records in ascending order.
- Sort Descending: Click to sort your Records in descending order
- Move Left: Click to move the column to the left. You can also drag and drop the column.
- Move Right: Click to move the column to the right. You can also drag and drop the column.
- Pin Column: Click to pin the column. You can pin the column to the **left side or the right side of the screen or unpin the column.
- Rename Field: Click to rename the field.
- Add As Filter: Click to apply filters on this column, with the default condition “Field contains”.
- Collapse Column: Click to collapse the column.
- Hide From View: Click to hide this column from your current view.
- Auto Size This Column: Click to adjust the size of this column automatically, according to its values.
- Auto Size All Column: Click to adjust the size of all columns automatically, according to their values.
Add a Column
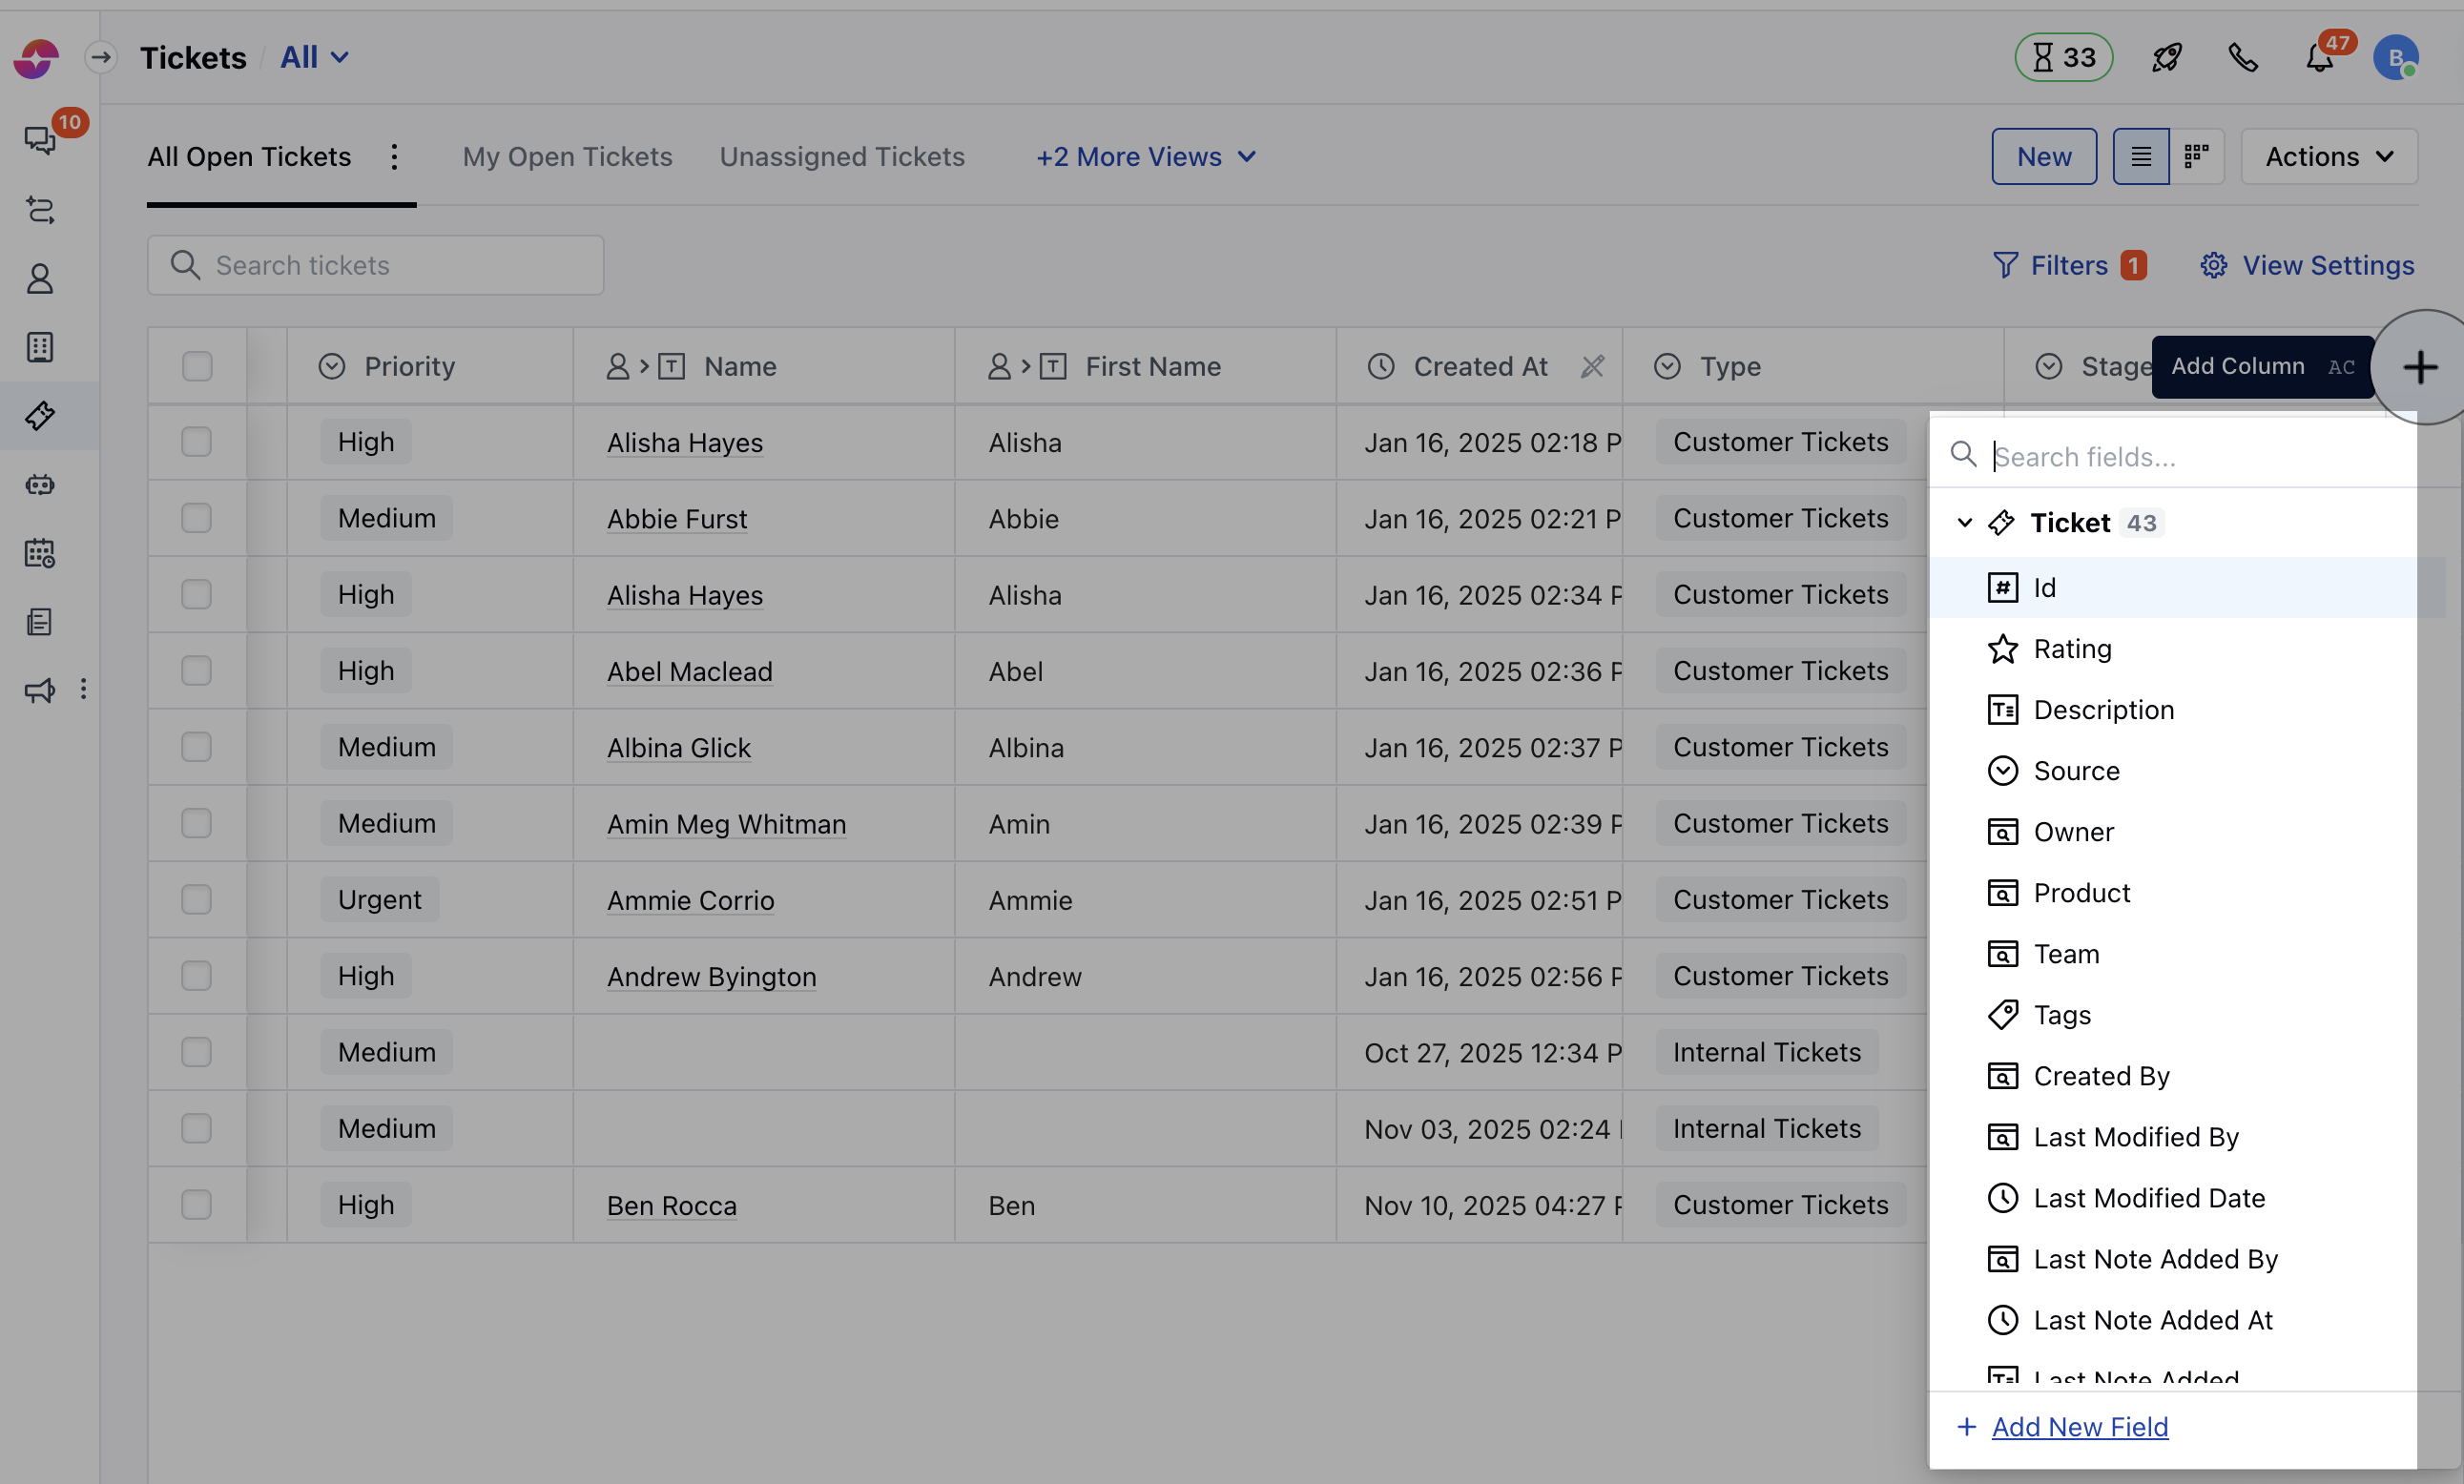
- + icon on the right corner will allow you to Add a Column or Create a New Field.
- You can also use the shortcut key (ac) to quickly add the Column
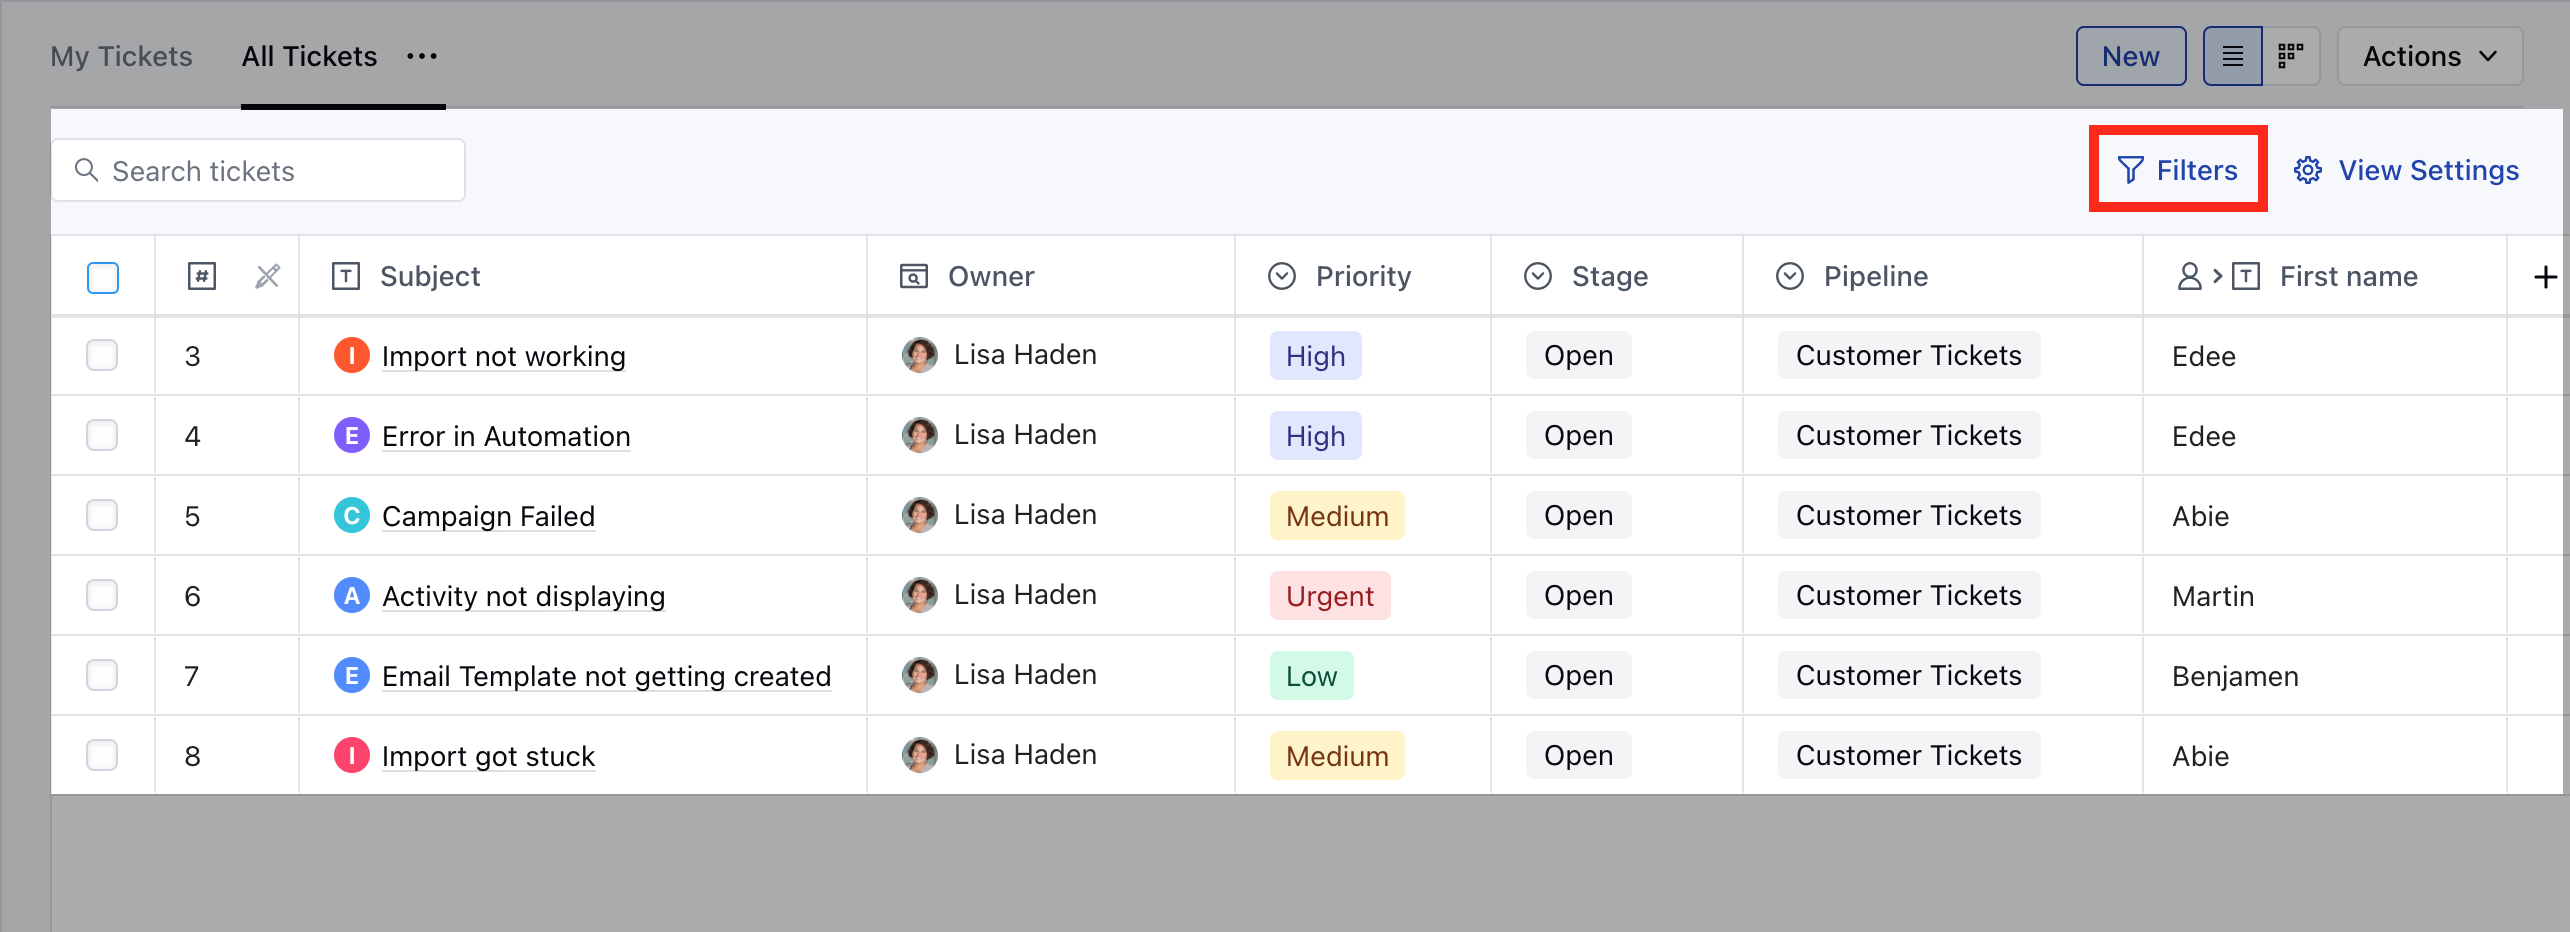
Add Filters
- Click on the Filter option
- Select the filter logic Match all filters (AND) – filter records that match “all” defined filter conditions. Match any filters (OR) – filter records that match ”anyone” of the defined filter conditions.
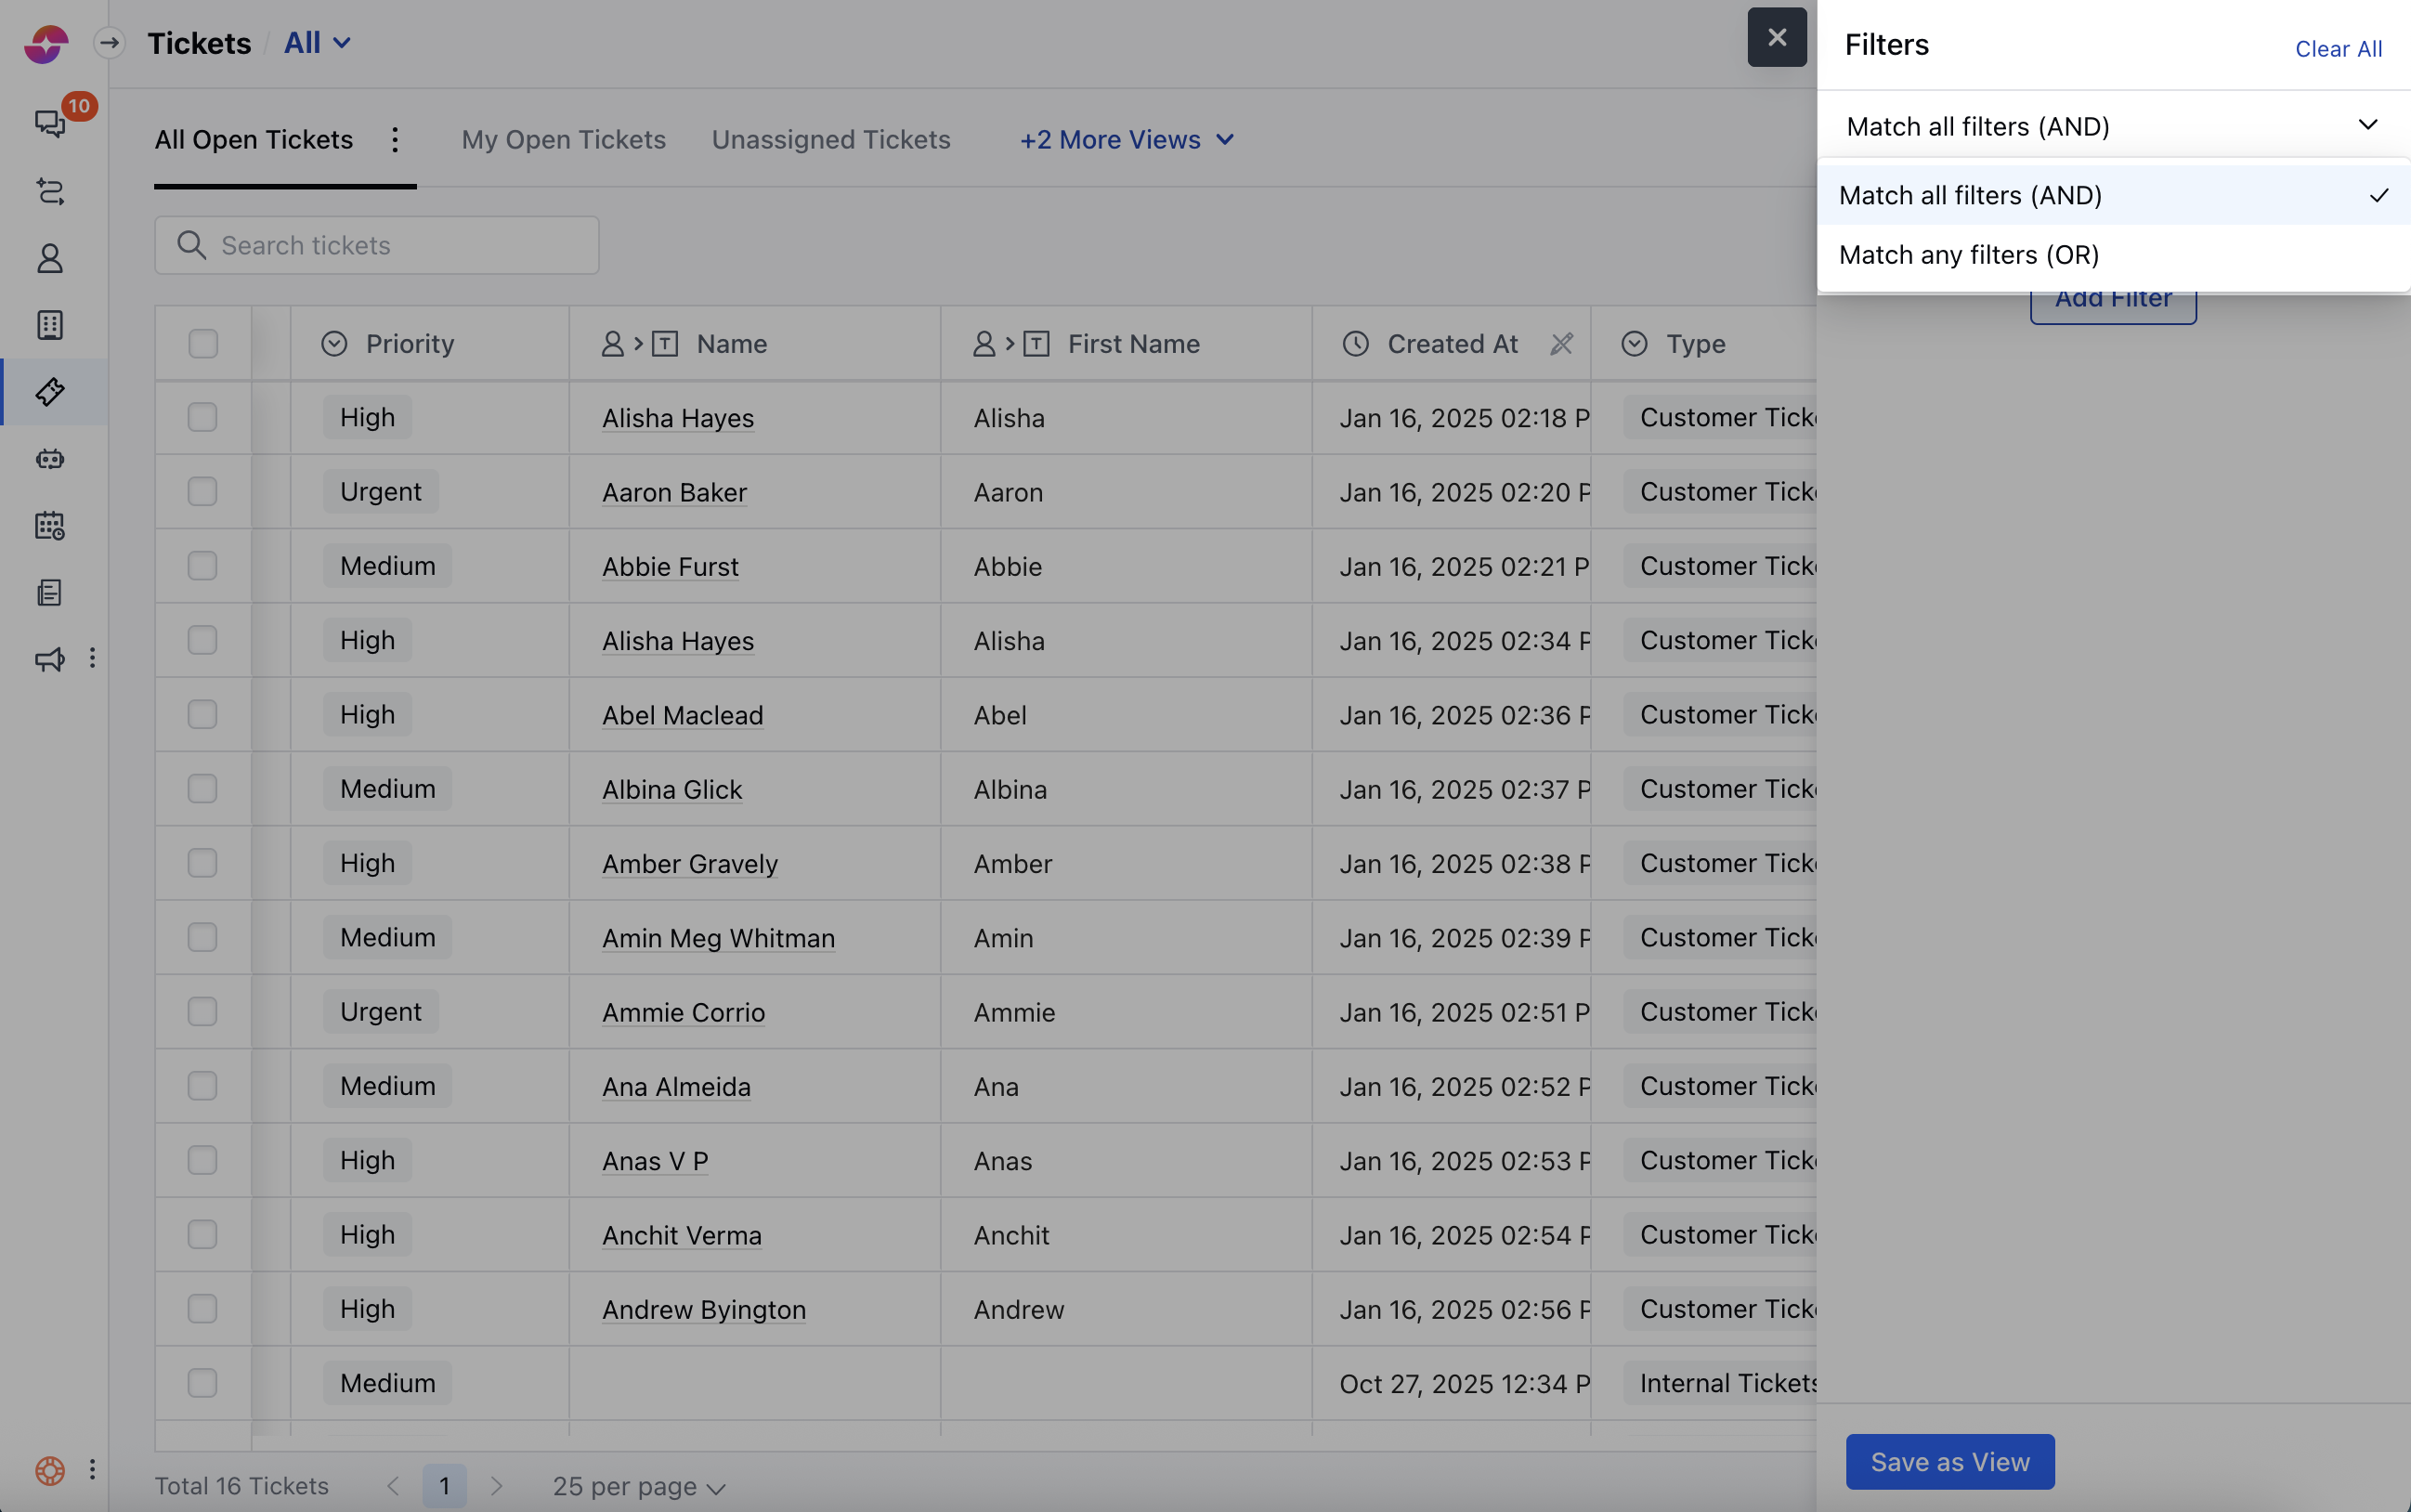
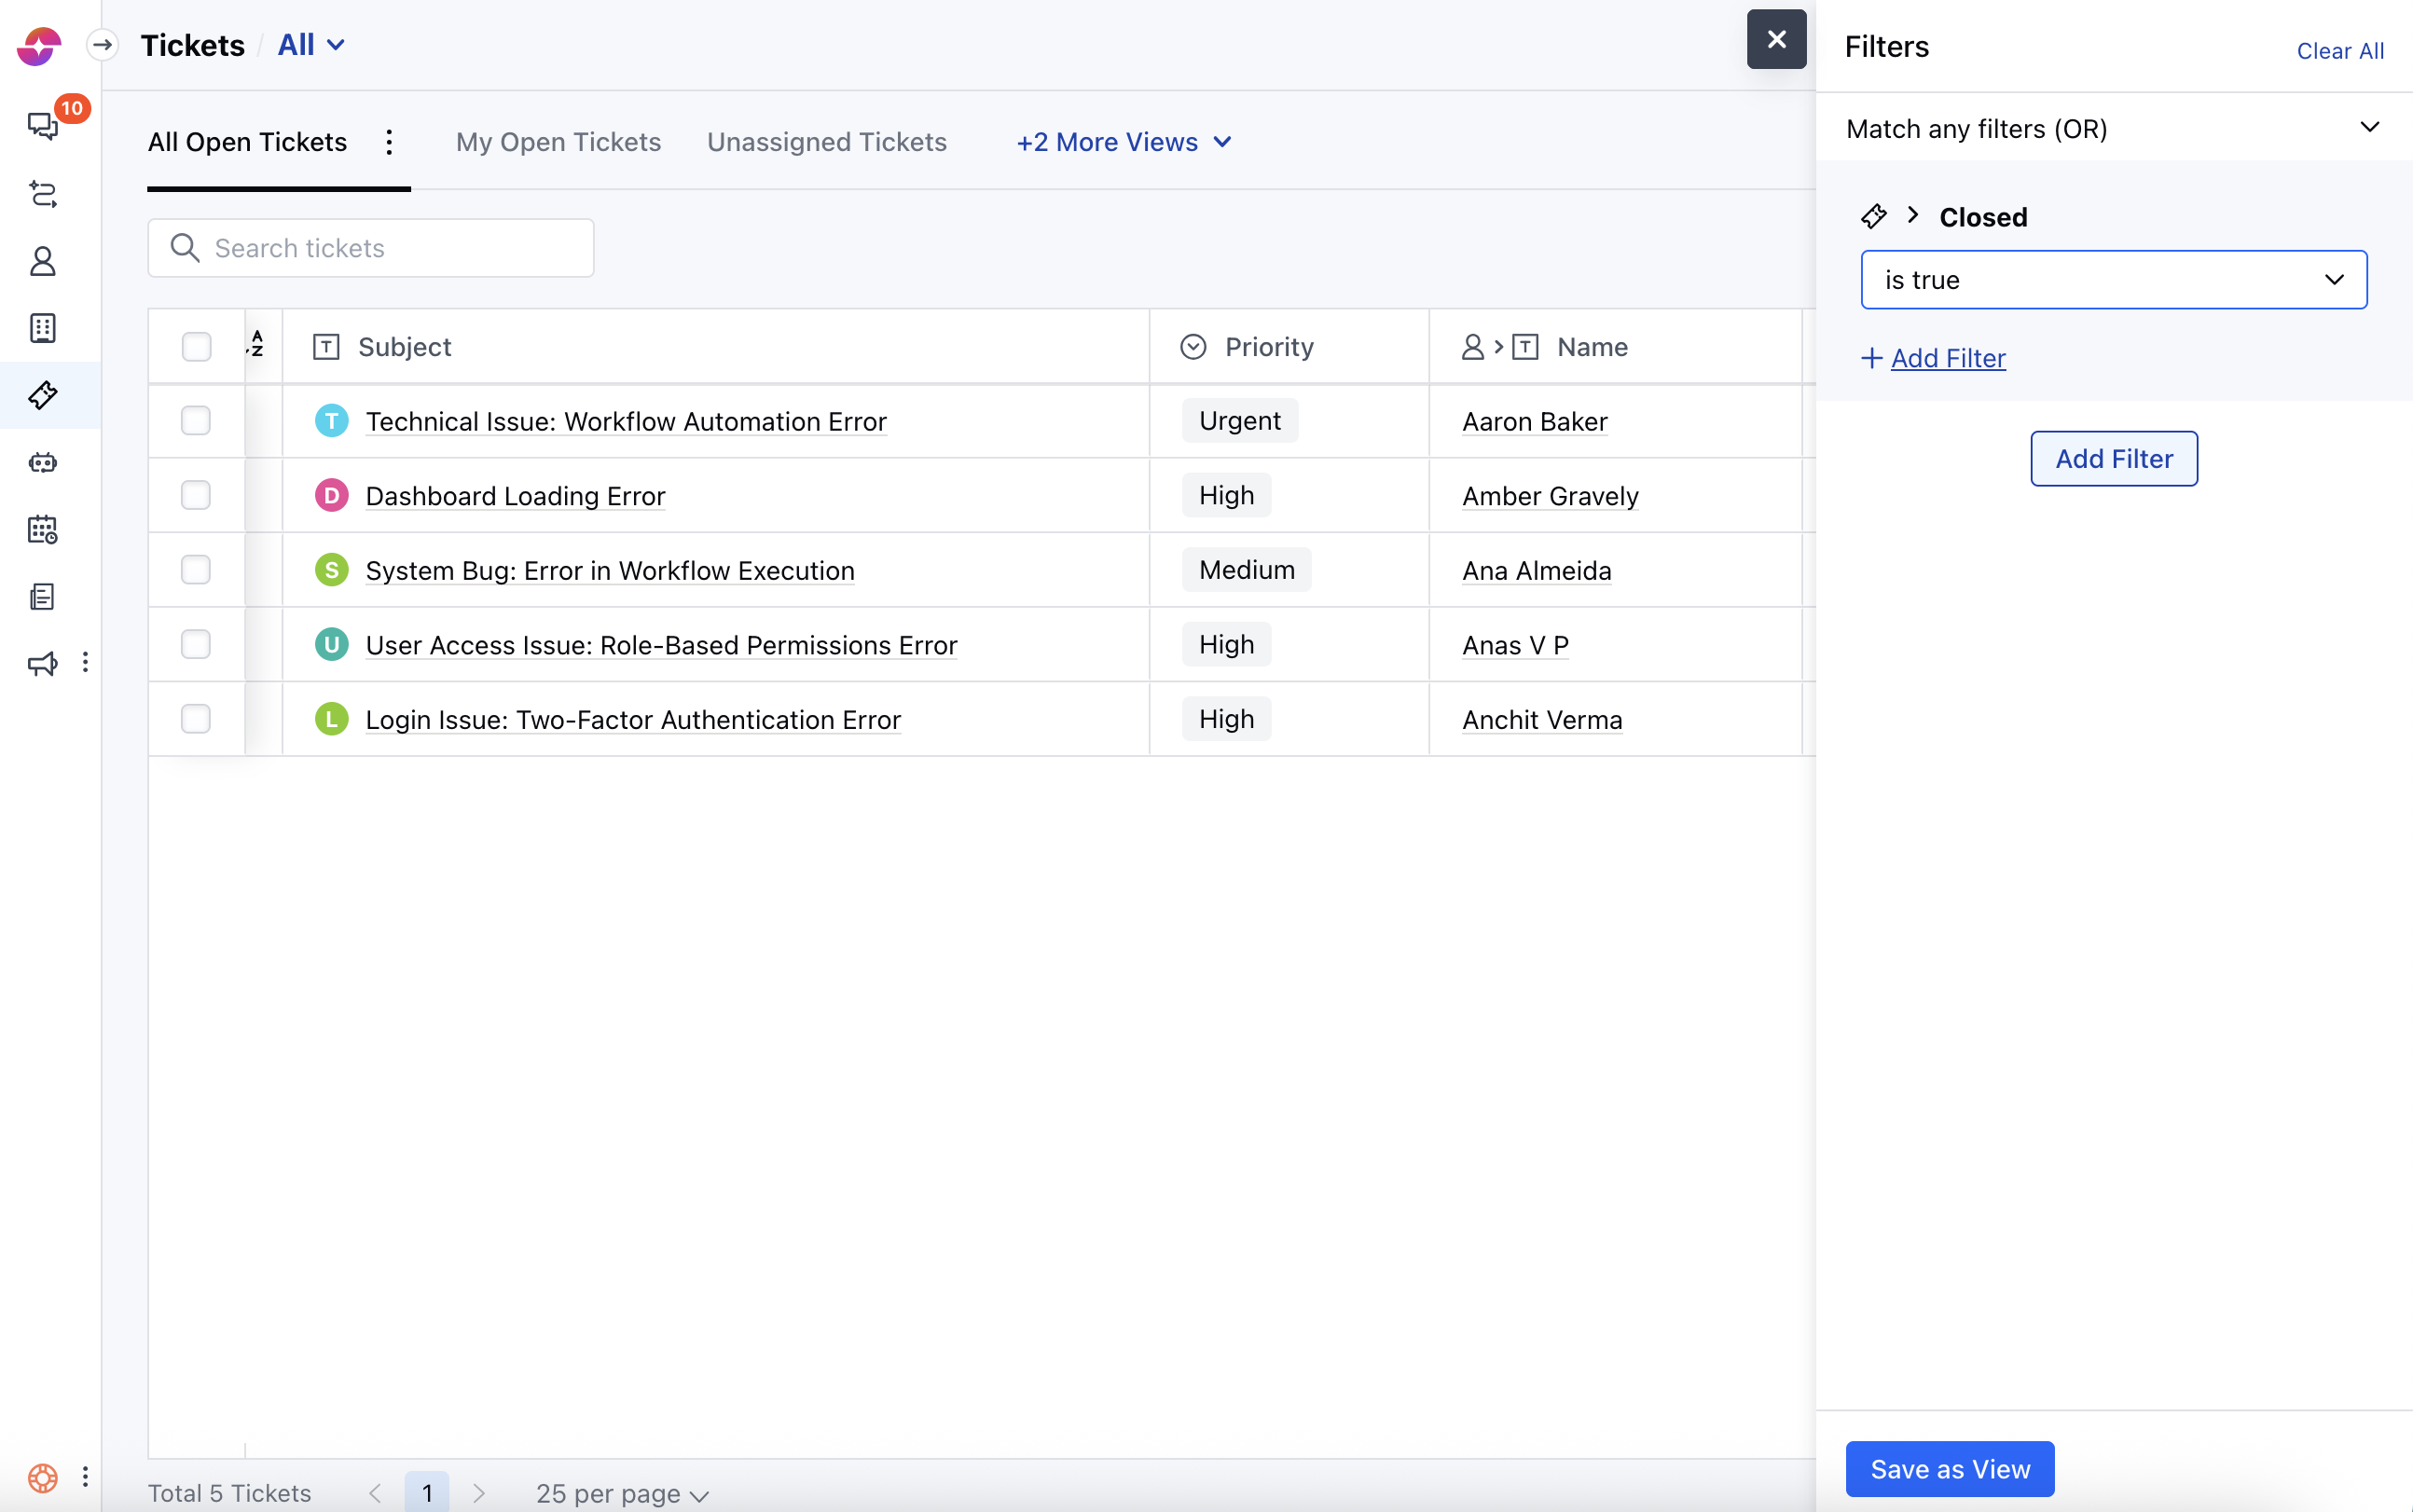
- Click on Add Filter

- Select the Field which you want to use for segmenting the records.
- Click on Save as View
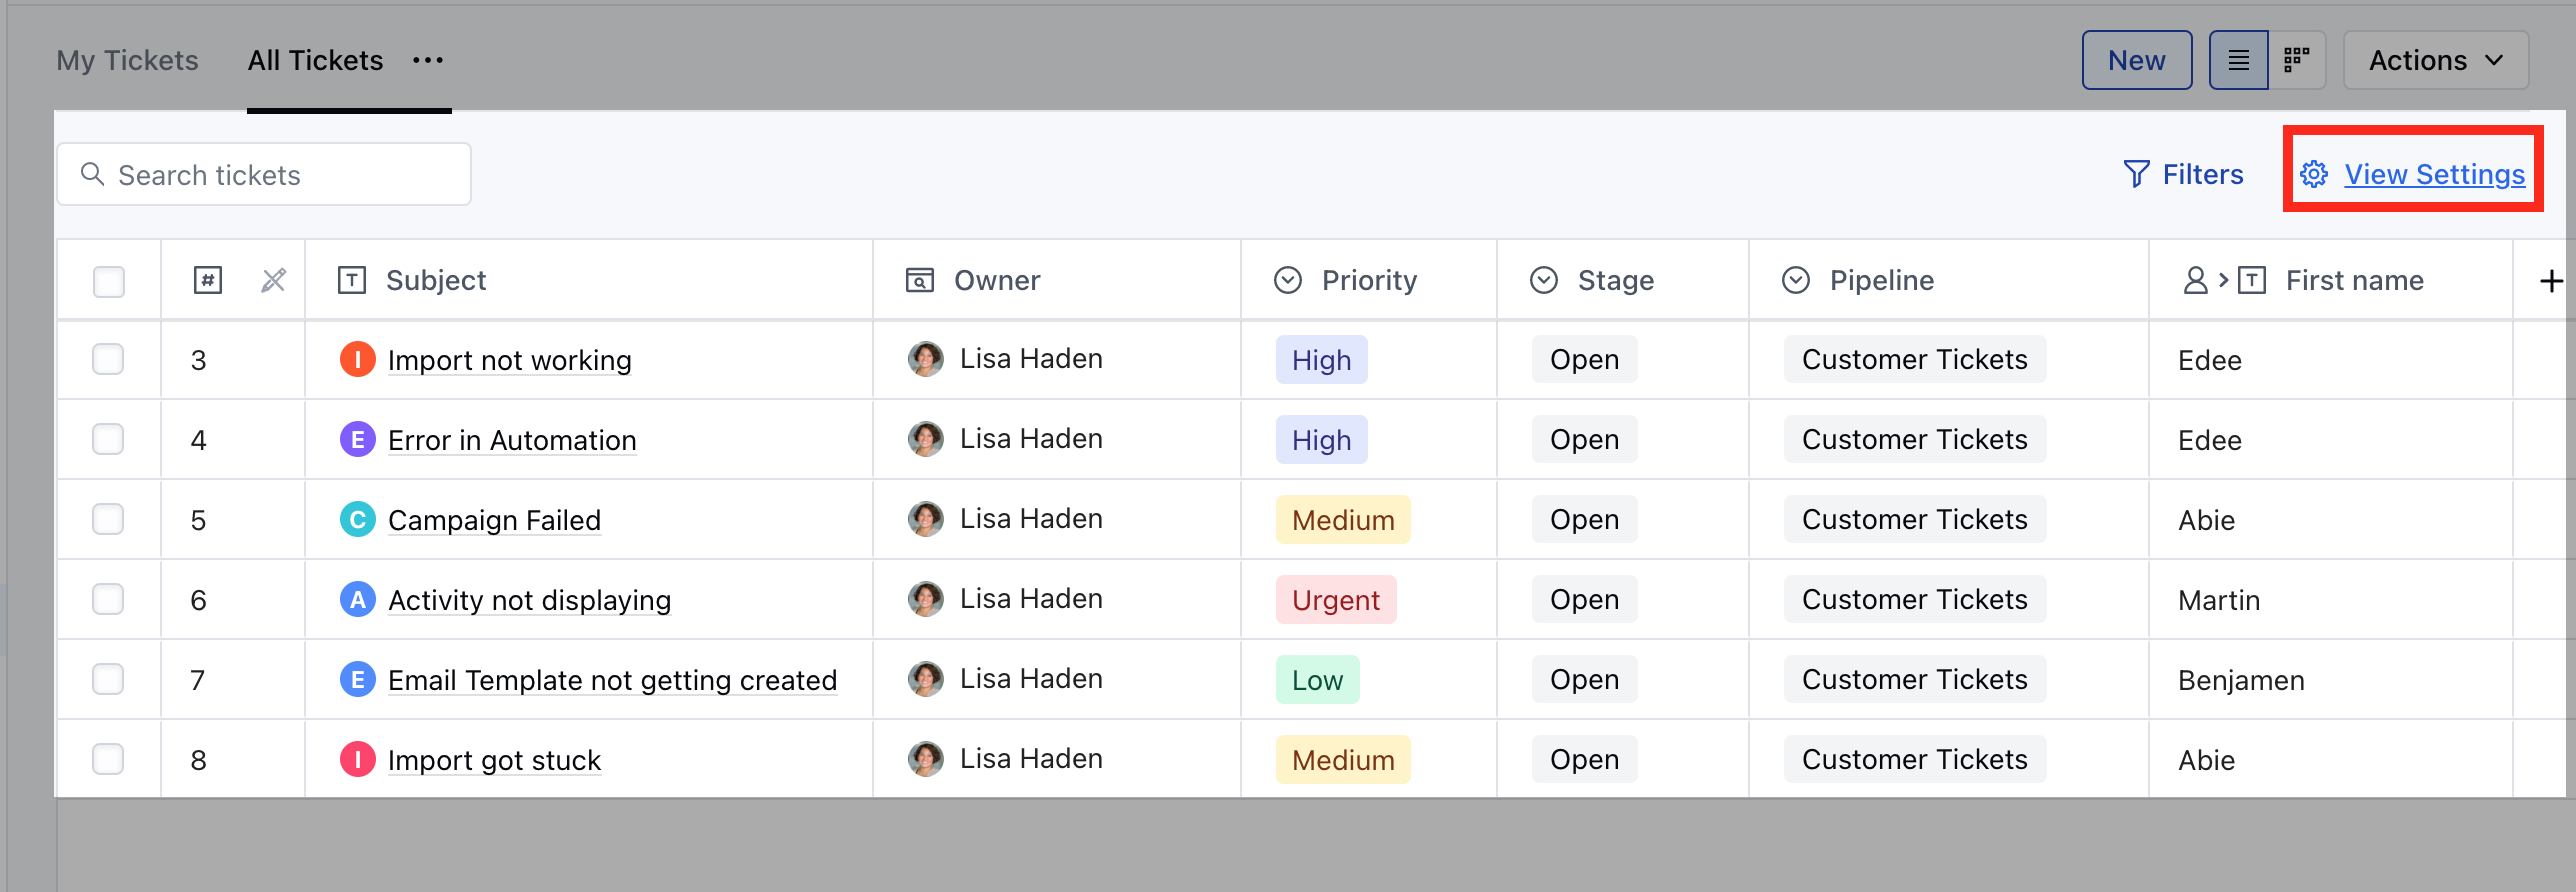
Manage View Settings
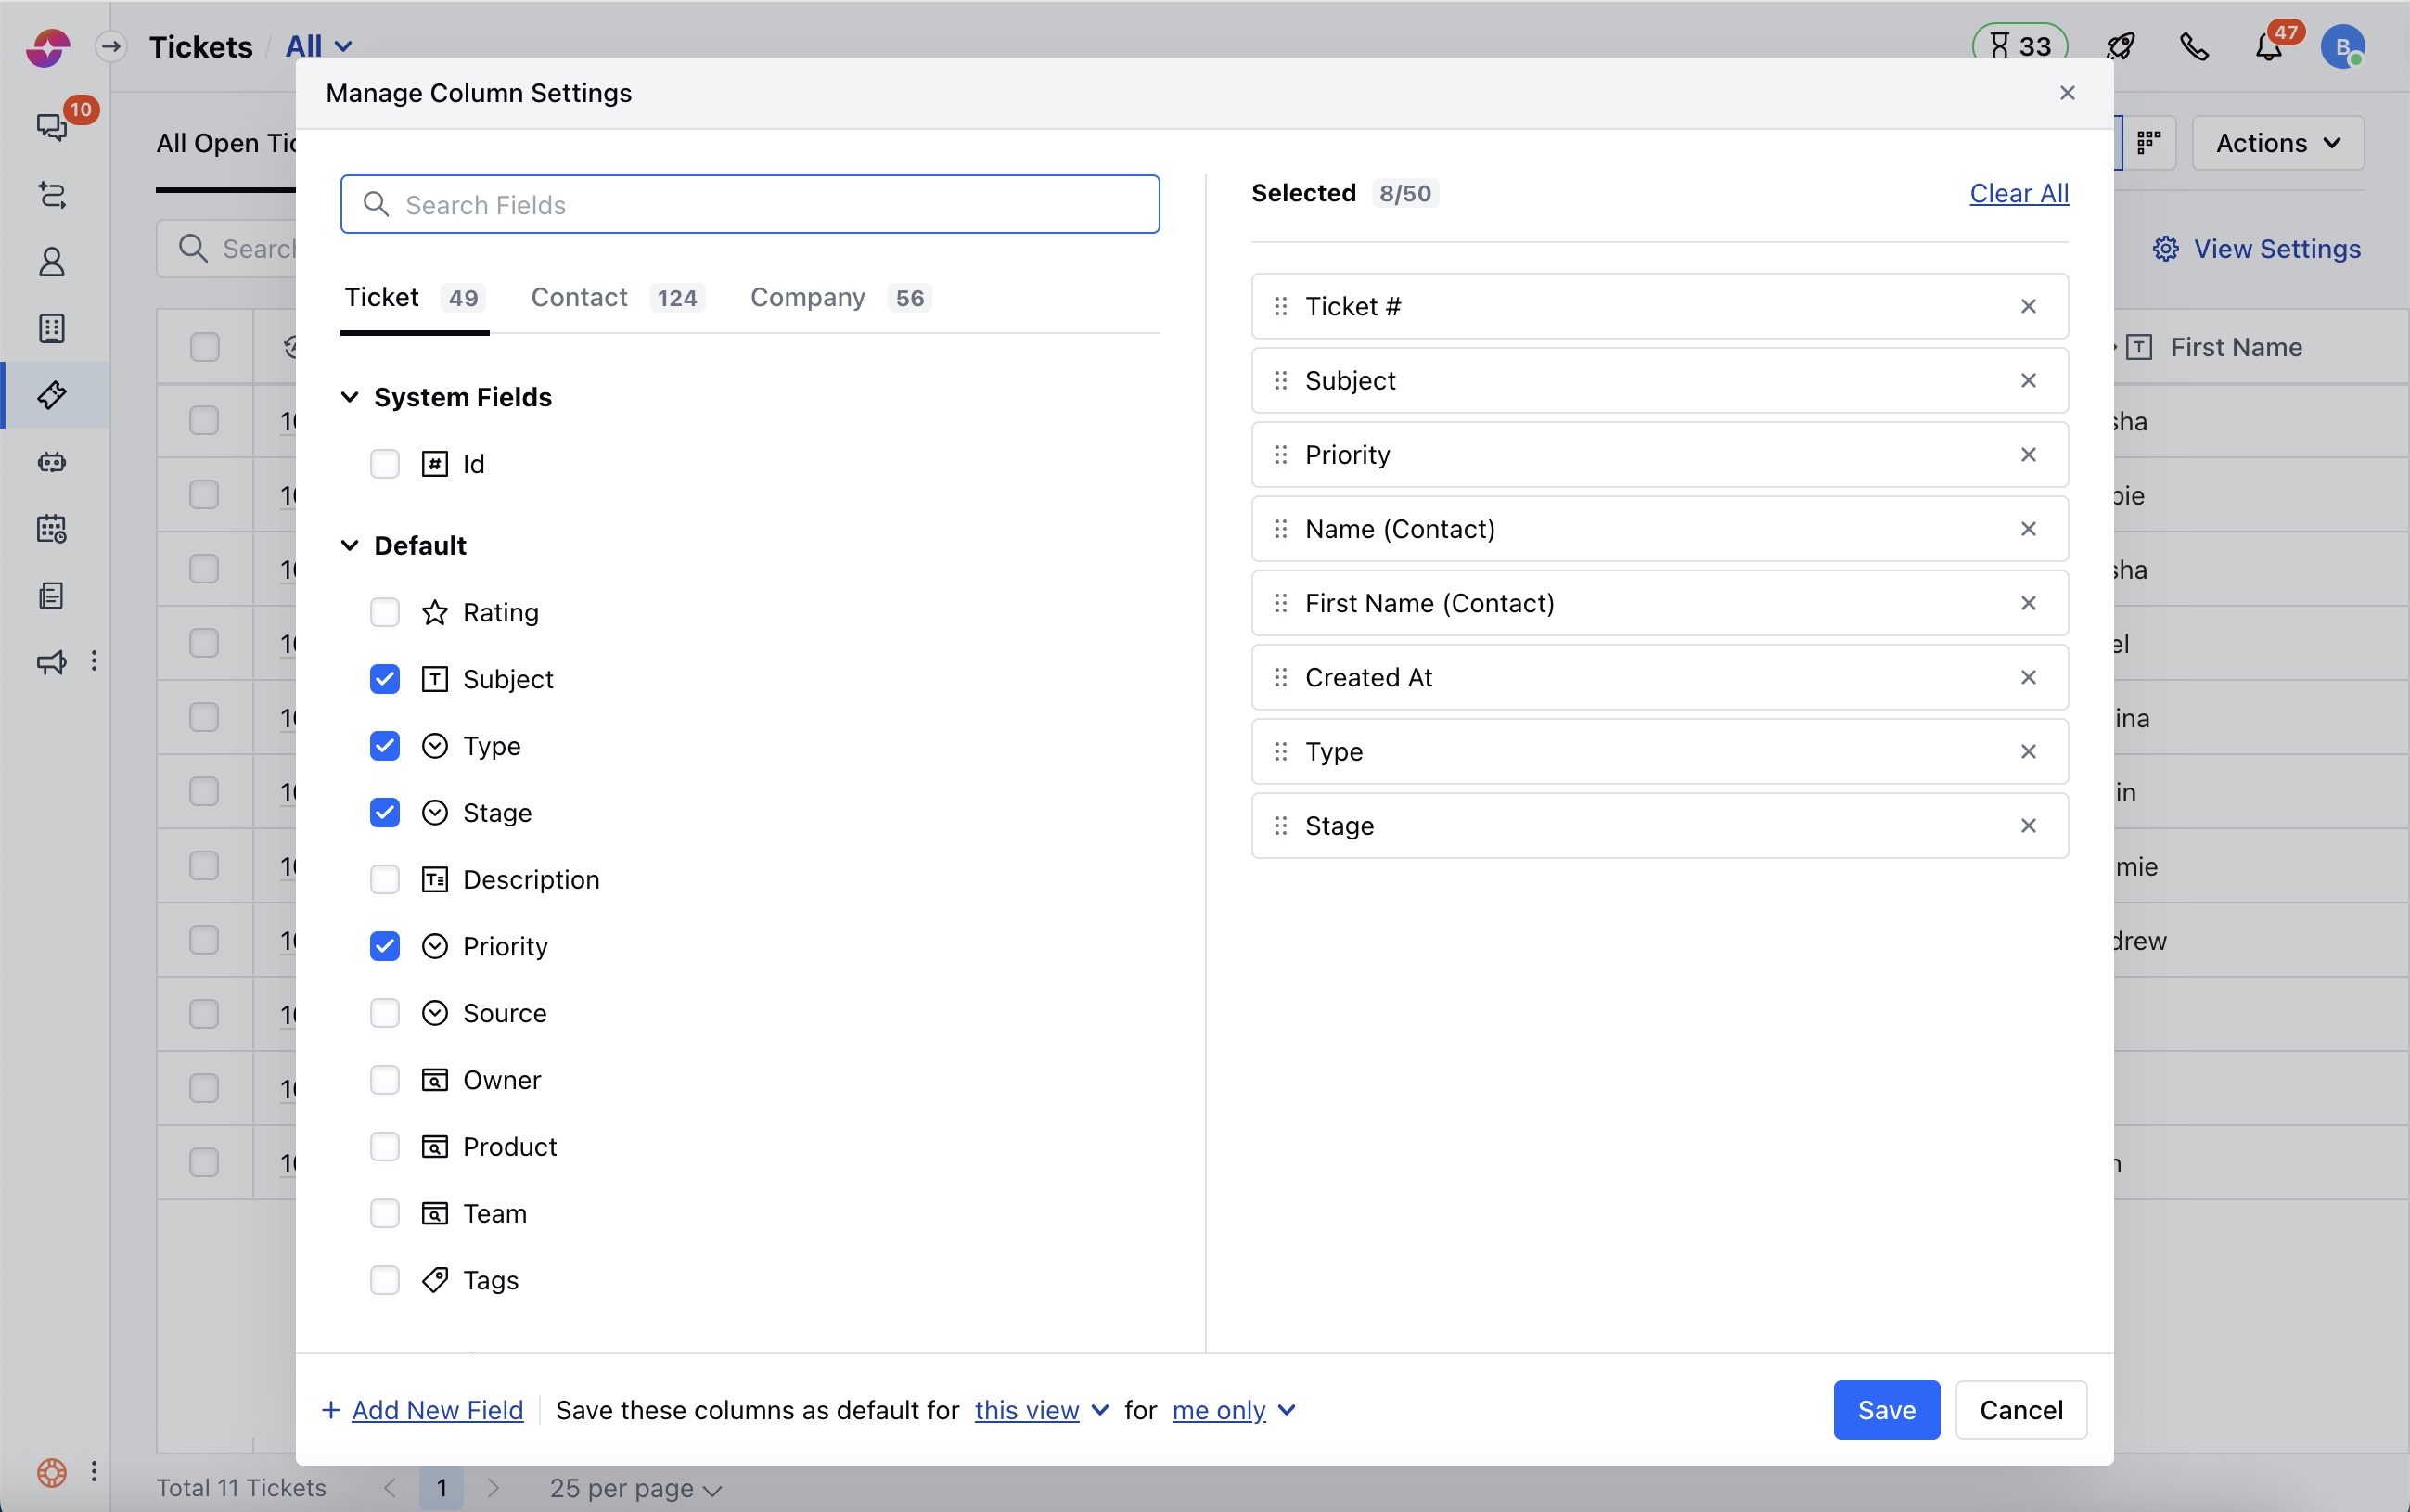
- Click on the View Settings button
- A popup of “Manage Column Settings” would appear that has two sections: *
- The section on the left will display:*
- A search bar to search for a field that you want to add to your columns.
- All fields will be displayed in their respective sections; the system fields, internal fields, smart fields, analytics fields, etc. along with the available sections.
- The section on the right will display:
- The list of selected fields that are added to your view.
- You can rearrange these fields in the order they should be displayed. i.e. the field on top will always be displayed as the first column.
- You can remove all fields by clicking on the “Clear All” option.
- You can provide the preference for saving these columns with a view
- “This view” - “For Me”: It only saves the field column for the selected view only
- “All views” - “For Me”: This will save the selected field columns as default for the owner of the view across all the views.
- “This view” - “For Everyone”: The User can perform this option and save the selected columns for everyone for this view.
- “All views” - “Everyone”: The user can save the selected columns for everyone.
Operations Under Actions
- Import from Excel or CSV file: This lets you Import your Records from CSV or Excel files
- Recent Deleted Records: Here you can view the records deleted recently
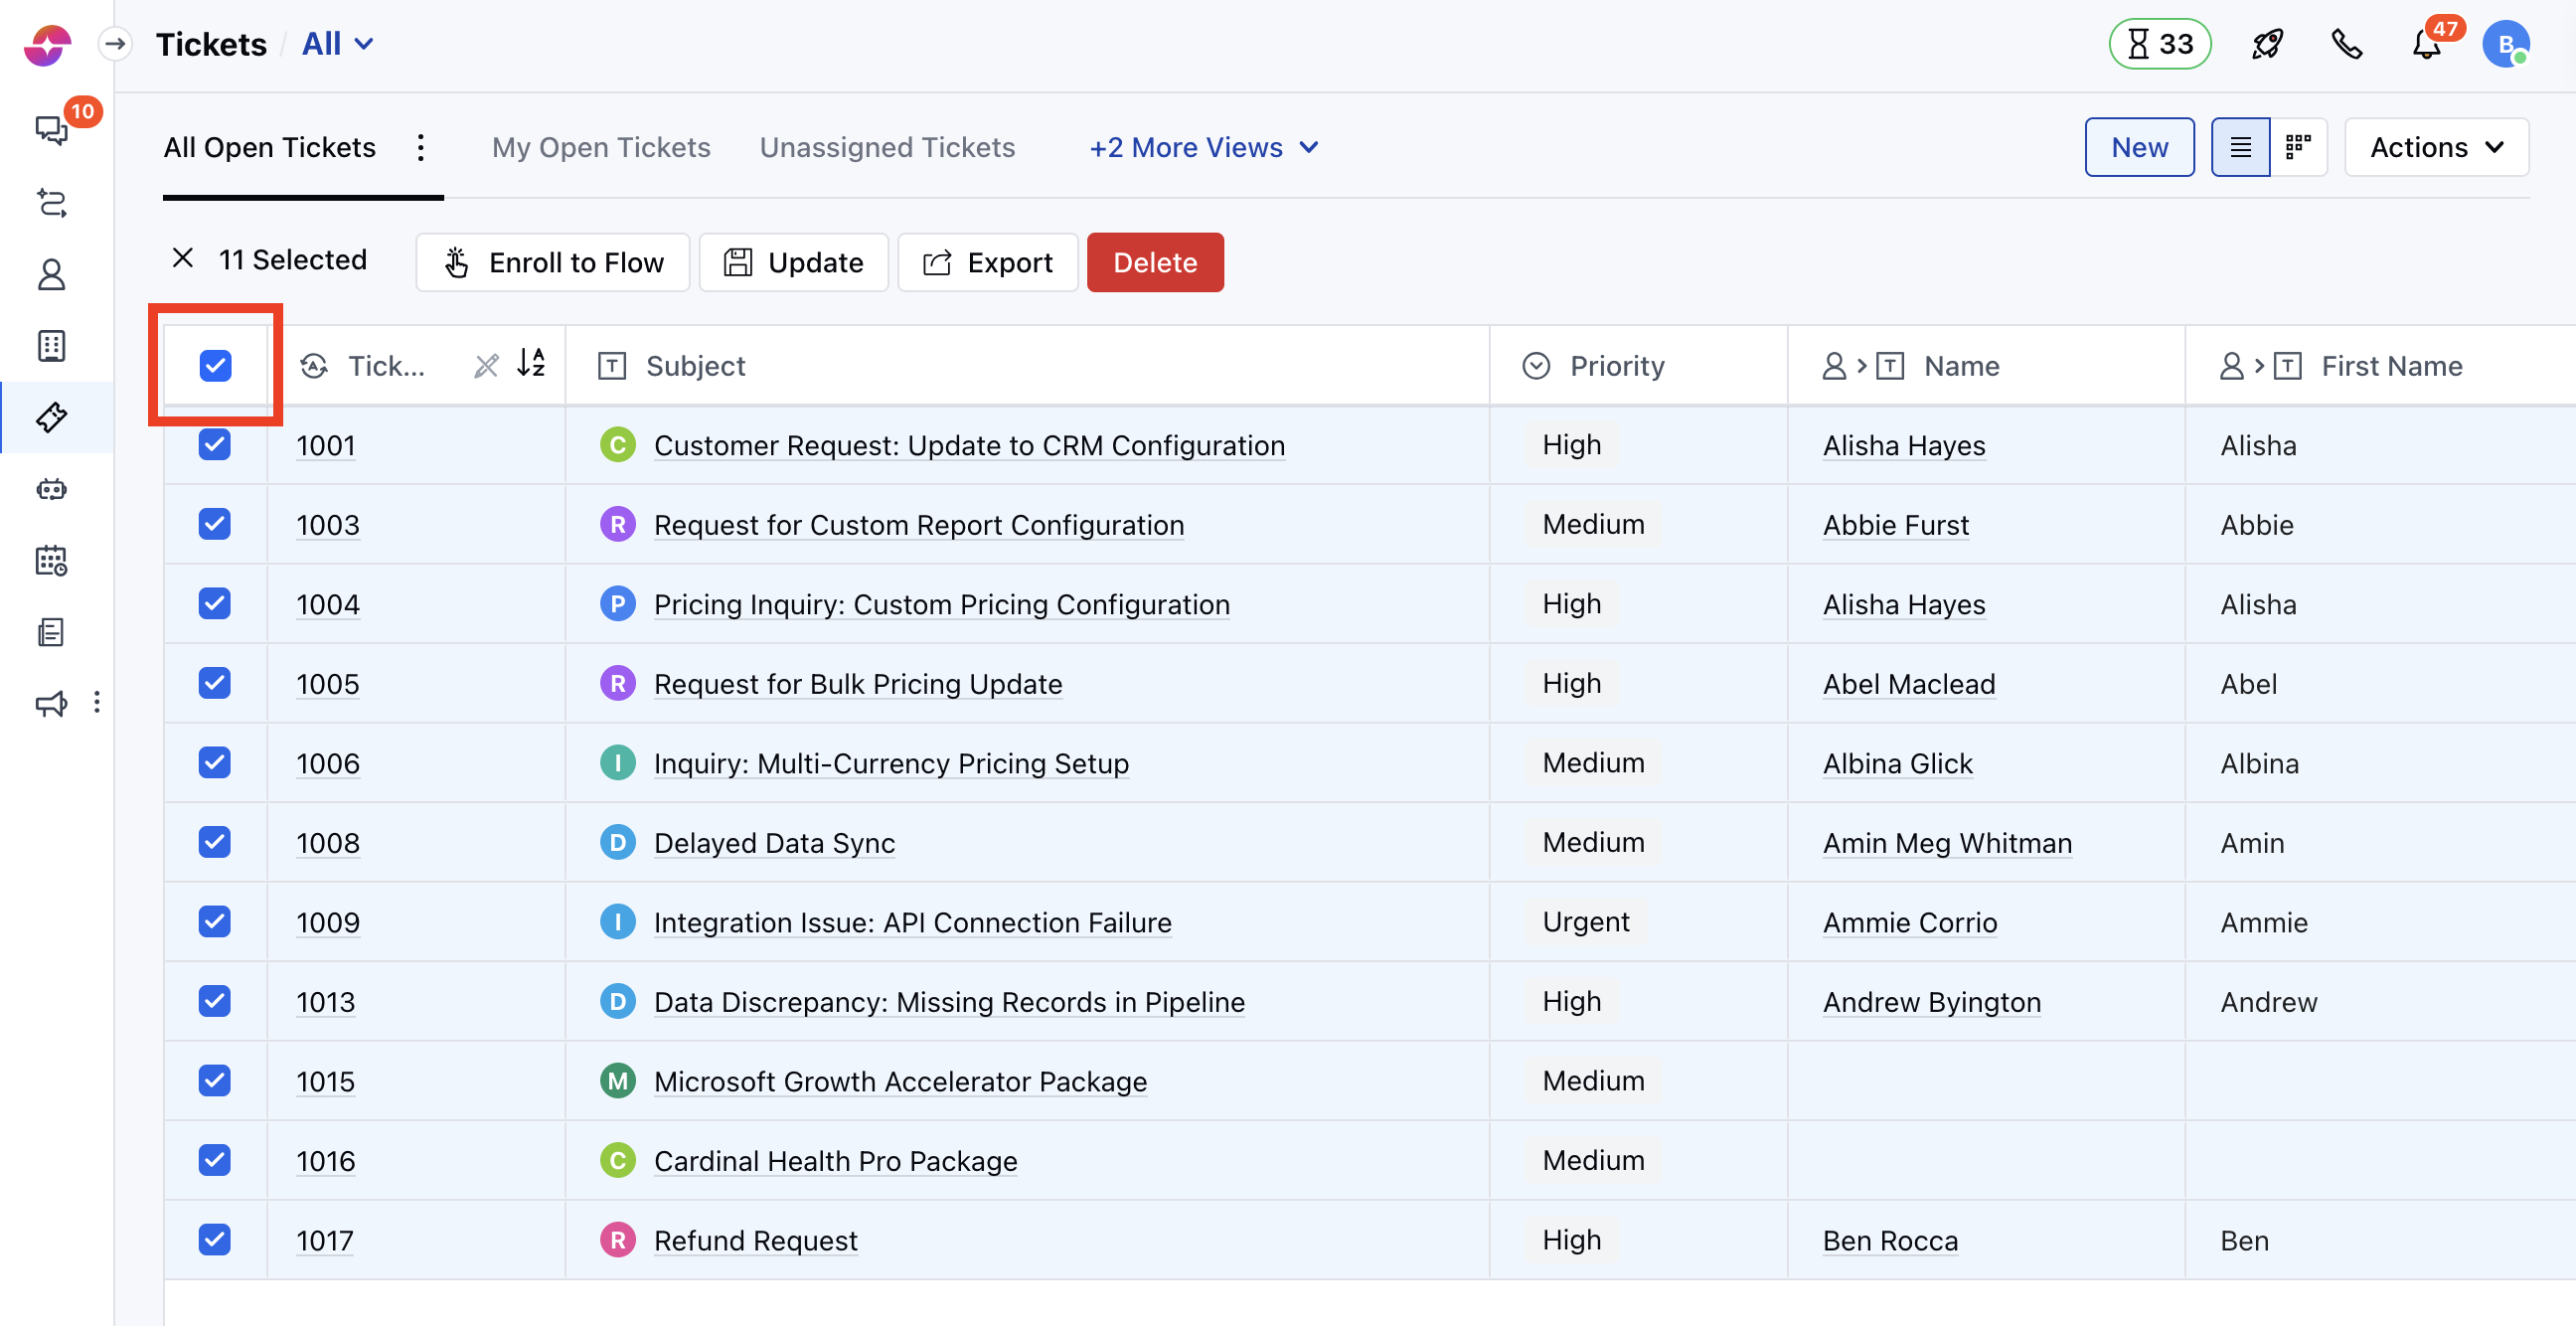
Bulk Operations
- You can perform the following bulk operations by selecting the Bulk Tickets from the Listing Page.
- **Enroll To Flow **the Tickets
- Update the Tickets
- Export the Tickets
- Delete the Tickets